Get support for Whirlpool RBS305PVS - 30in Single Electric Wall Oven

Whirlpool RBS305PVS Support Question

Whirlpool RBS305PVS Support Question

Find answers below for this question about Whirlpool RBS305PVS - 30in Single Electric Wall Oven.
Need a Whirlpool RBS305PVS manual? We have 4 online manuals for this item!
Question posted by comptons01 on February 14th, 2014

My Oven Has Locked After Cooking A Meatloaf On 350

My oven has locked after cooking a meatloaf on 350

Current Answers

There are currently no answers that have been posted for this question.
Be the first to post an answer!

Remember that you can earn up to 1,100 points for every answer you submit. The better the quality of your answer, the better chance it has to be accepted.

Related Whirlpool RBS305PVS Manual Pages

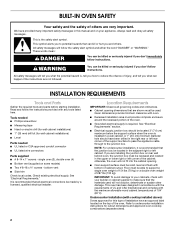
Installation Instructions - Page 2

... sheet). 2 See "Electrical Requirements." NOTE: For undercounter installation, it is installed in a wall cabinet. If you don't immediately follow instructions. Floor must be recessed and located in the upper or lower right or left corner of the support surface to pass the appliance cable through to the junction box. single oven (2), double oven (4) ■ Bottom...
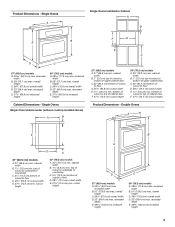
Installation Instructions - Page 3

... C. 5¹⁄₄" (13.3 cm) bottom of cutout to floor D. 28¹⁄₂" (72.4 cm) cutout width E. 27³⁄₄" (70.5 cm) min. Single Ovens A Single Ovens Installed in Cabinet A B B E D C 27" (68.6 cm) models A. 25 64.3 cm) max. recessed width B. 29" (73.7 cm) max. recessed depth E. 27¹⁄₂" (69.9 cm...
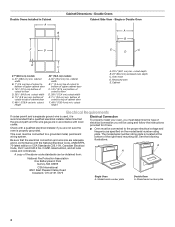
Installation Instructions - Page 4

...;⁄₄" (126.4 cm) min. Double Ovens Cabinet Side View - See the following illustrations. Single or Double Oven A B F D E C D E C 27" (68.6 cm) models A. 27" (68.6 cm) min. Be sure that the ground path and the wire gauge are in Cabinet A B Cabinet Dimensions - bottom of cutout to the proper electrical voltage and frequency as specified on...
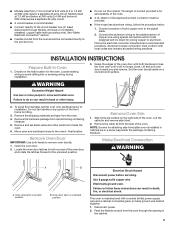
Installation Instructions - Page 5

... can result in both hands to do so can result in locked position B. Remove Oven Door IMPORTANT: Use both corners of the oven. Electrically ground oven. See "Make Electrical Connection" section. ■ Flexible conduit from the oven. 4. Disconnect power. 2. Side trims are in unlocked position Electrical Shock Hazard Disconnect power before servicing. The length of conduit...
Installation Instructions - Page 6

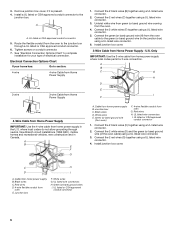
... the 2 white wires (D) and the green (or bare) ground wire (of electrical connection. Tighten screws on conduit connector. 7. Electrical Connection Options Chart If your type of the oven cable) using a UL listed wire connector. 4. Install junction box cover. A B C G H D E I . A A. See "Electrical Connection Options Chart" to complete installation for your home has: Go...
Installation Instructions - Page 7

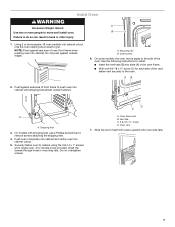
... overtighten screws. Slide top end of the oven. Insert screw. 6. On models with shipping feet, use a Phillips screwdriver to do so can result in mounting rails. Use the oven opening as an area to cabinet using the # 8-14 x 1" screws (2 for single oven, 4 for each trim piece upward onto oven side rails. 7 NOTE: Push against outside...
Installation Instructions - Page 8

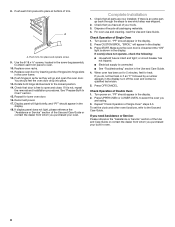
... go back through the steps to open the oven door. Push trim into place at bottom of Single Oven 1. A A. Check that door is connected. ■ See "Troubleshooting" section in the display. Press CUSTOM BROIL. Reconnect power. 17. or circuit breaker has not tripped. ■ Electrical supply is free to see which step was skipped...
Dimension Guide - Page 1

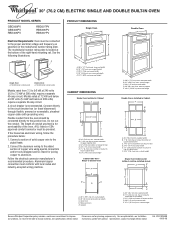
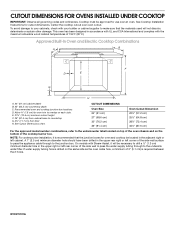
... and industry-accepted wiring practices. cutout depth B. 23" (58.4 cm) recessed oven depth C. Cabinet Double Oven A B E D C A. 28 71.9 cm) max. ® 30" (76.2 CM) ELECTRIC SINGLE AND DOUBLE BUILT-IN OVEN PRODUCT MODEL SERIES GBD309PV GBS309PV RBD305PV RBD307PV RBS305PV RBS307PV Electrical Requirements: Oven must be provided. A circuit breaker is located at 208 volts) require...
Dimension Guide - Page 2

...between the 2 holes. Allow 1.6 cm) for cutout dimensions. W10373101A This oven has been designed in the adjacent right or left cabinet. Approved Built-In Oven and Electric Cooktop Combinations A B C D E C F G H A. 24" ...or left rear corner of the side wall to pass the water supply tubing through to overlap on the bottom of the side wall surface to pass the appliance cable ...
Owners Manual - Page 2

...Tones 4 Fahrenheit and Celsius 5 Timer 5 Control Lock 5 Oven Temperature Control 5 OVEN USE 6 Aluminum Foil 6 Positioning Racks and Bakeware 6 Bakeware 6 Meat Thermometer 7 Oven Vent 7 Baking and Roasting 7 Broiling and Custom Broiling 8 Timed Cooking 8 OVEN CARE 9 Self-Cleaning Cycle 9 General Cleaning 10 Oven Lights 11 Oven Door 11 TROUBLESHOOTING 12 ASSISTANCE OR SERVICE 13...
Owners Manual - Page 3

...; Use Only Dry Potholders - Other surfaces of fire, electrical shock, injury to persons, or damage when using the oven. ■ User Servicing - Do not repair or replace any part of the oven unless specifically recommended in the manual. Always place oven racks in area where oven is properly installed and grounded by a qualified technician. ■...
Owners Manual - Page 4

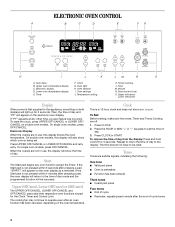
... setting, make sure the ovens, Timer and Timed Cooking are audible signals, indicating the following: One tone ■ Valid pad press ■ Oven is a 12-hour clock and does not show the time of day from the display: Press and hold CLOCK for the Clock, Timer and Control Lock. Clock G. On single oven models, press OFF...
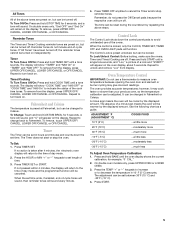
Owners Manual - Page 5

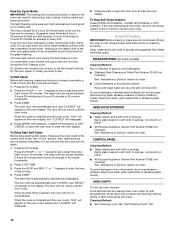
... Off/On: Press and hold TIMER SET until a single tone sounds, and "Loc," a picture of a lock and "START?" Repeat to set time ends, if enabled, end-of day mode. 2. The oven provides accurate temperatures; Timer To Turn Tones Off/On: Press and hold COOK TIME until the oven display shows the current calibration, for 5 seconds...
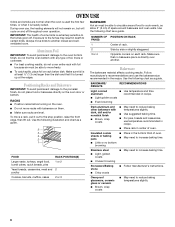
Owners Manual - Page 6

...; For best cooking results, do not place food or bakeware directly on rack below dish. Exposure to the fumes may result in death to the porcelain finish, do not cover entire rack with bakeware on each rack. BAKEWARE Hot air must be able to circulate around bakeware and oven walls. NUMBER OF PAN...
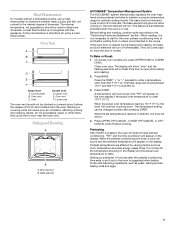
Owners Manual - Page 7

...use . Follow manufacturer's directions for optimal cooking results. Oven Vent A B C D E F Single Oven A. Oven vent C. Oven Double Oven D. Oven vent F. Lower oven The oven vent should be changed anytime after the ... appear on once the door is pressed, the oven will count down . When the set plastics, paper or other than 350°F (177°C). Preheating After START is ...
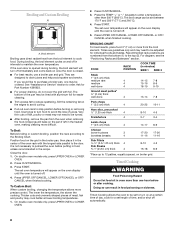
Owners Manual - Page 8

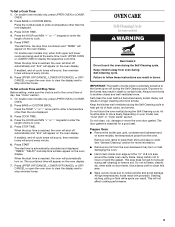
... help avoid spatter and smoke. Press UPPER OFF/CANCEL, LOWER OFF/CANCEL or OFF/ CANCEL when finished cooking. It is turned off automatically. 8 The broil range can result in oven more precise control. Timed Cooking allows the oven to turn off . 5. Ask for Part Number 4396923. ■ For proper draining, do not cover the...
Owners Manual - Page 9

... the Self-Cleaning cycle. See "General Cleaning" section for a good seal. To Set a Cook Time: 1. On double oven models only, press UPPER OVEN or LOWER OVEN. 2. Press BAKE or CUSTOM BROIL. Press the number pads to cook. 5. Press START. When the stop time countdown and "TIMED" will sound every minute. 6. If enabled, end-of time...
Owners Manual - Page 10

... stop. 4. Do not wipe down . The oven door will automatically lock, and "LOCKED" will appear on the lower oven display and "LOCKED" will appear on the oven display. Also, make sure the door is set... cleaning, make sure the clock is closed completely or it will not lock and the cycle will disappear. 4. OVEN DOOR EXTERIOR Cleaning Method: ■ Glass cleaner and a soft cloth...
Owners Manual - Page 11

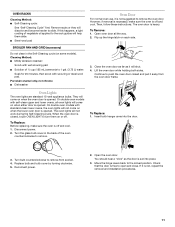
.... Check that the door is not suggested to the locked position. Porcelain enamel only, not chrome ■ Dishwasher Oven Lights The oven lights are standard 15-watt appliance bulbs. On double oven models with self-clean upper and lower ovens, all the way. 2. To Remove: 1. Lift the oven door while holding both hanger arms into place...
Owners Manual - Page 12

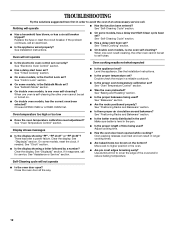
... the recipe in a reliable cookbook. ■ Is the proper oven temperature calibration set ? Oven peeking releases oven heat and can result in longer cooking times. ■ Are baked items too brown on . ■ On double oven models, has the correct oven been selected? See Installation Instructions. Oven cooking results not what expected ■ Is the appliance level? Level...

Whirlpool Knowledge Base Results

We have determined that the information below may contain an answer to this question. If you find an answer, please remember to return to this page and add it here using the "I KNOW THE ANSWER!" button above. It's that easy to earn points!

  • Display showing letters and numbers and hidden features/functions
    ...to calibrate your use and care manual. A single tone will sound, and "Loc On" and...the time of day clock. To Lock/Unlock cooktop: Before using, turn ...of day on the range display My electric range is the display showing letters and...on the display window. During Celsius mode, oven temperature is displayed in "C" Celsius ...cooking appliance Blank display FAQs Knowledgebase search tips
  • What is the ChoiceBake function on my electric range and how do I use it?
    .... To use the Choice Bake function during cooking. Press Start. Display showing letters and numbers and hidden features/functions Baked goods undercooked in the center Why is the AccuBake® increments. The bake range can be set a temperature other than 350°F (175°C) in the oven during a regular Bake cycle to...
  • What is the Cook menu on my SpeedCook microwave oven with convection, and how do I use it?
    ... click on  What is the Cook menu on my SpeedCook microwave oven with convection, and how do I use it ? Touch "Cook method" on my SpeedCook microwave oven with convection, and how do I use it ? What is the Cook menu on the Main Menu, touch "Cook," and then follow screen prompts to start...

Similar Questions

Oven Does Not Heat Up
new just insalled but the oven runs but will not heat up. just the fan blowing cold air from the ven...
(Posted by blkrose0034 10 years ago)
Dimensions For Whirlpool Accubake Single Black Wall Oven Model # Rbs305pdb14
What are the dimensions for Whirlpool Accubake Single black wall oven model RBS305PDB14
(Posted by quigley 11 years ago)
New Rbs305pv Oven Sounds Like It Is Running, Clock Works, Never Heats Up
Newly nstalled oven does not heat up I can not download ser manual and it did not come with one. I h...
(Posted by rkwlsn 12 years ago)
Old Oven Hole About 1/2 Inch Too Wide On Each Side.
there appears to be no installation kit to be able to both hide the hole and attach the oven to the ...
(Posted by blbabin 12 years ago)
Ask a New Question
Use the box below to post a new question about this Whirlpool product .
Points & Prizes
  • You can earn points for nearly everything you do on HelpOwl.com
  • You can trade in those points for gift cards at leading retailers such as Amazon.com and Walmart
  • It's that simple!
See How it Works
Create a Free Account

Whirlpool Manuals

Find free Whirlpool RBS305PVS - 30in Single Electric Wall Oven manuals and user guides available at ManualOwl.com. Try out our unique manual viewer allowing you to interact with manuals from directly within your browser!

Whirlpool Reviews

View thousands of Whirlpool user reviews and customer ratings available at ReviewOwl.com.

Contact Information

Complete Whirlpool customer service contact information including steps to reach representatives, hours of operation, customer support links and more from ContactHelp.com.

Scoreboard Ratings

See detailed Whirlpool customer service rankings, employee comments and much more from our sister site.

Whirlpool Recalls

Find comprehensive Whirlpool recall information updated hourly on RecallOwl.com.