Get support for Vivitar DVR 426HD

Vivitar DVR 426HD Support Question

Vivitar DVR 426HD Support Question

Find answers below for this question about Vivitar DVR 426HD.
Need a Vivitar DVR 426HD manual? We have 2 online manuals for this item!
Question posted by sdsykeg on March 13th, 2014

How To Set Up Vivitar Dvr 426hd Camcorder

The person who posted this question about this Vivitar product did not include a detailed explanation. Please use the "Request More Information" button to the right if more details would help you to answer this question.

Current Answers

There are currently no answers that have been posted for this question.
Be the first to post an answer!

Remember that you can earn up to 1,100 points for every answer you submit. The better the quality of your answer, the better chance it has to be accepted.

Related Vivitar DVR 426HD Manual Pages

v2 Camera Manual - Page 1

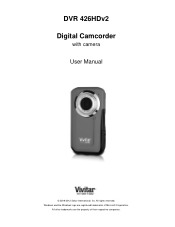
All other trademarks are registered trademarks of their respective companies. All rights reserved. DVR 426HDv2 Digital Camcorder with camera User Manual © 2009-2012 Sakar International, Inc. Windows and the Windows logo are the property of Microsoft Corporation.
v2 Camera Manual - Page 2

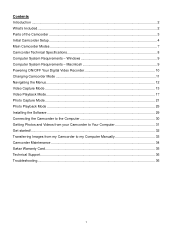
Contents Introduction ...2 What's Included...2 Parts of the Camcorder ...3 Initial Camcorder Setup ...4 Main Camcorder Modes ...7 Camcorder Technical Specifications 8 Computer System Requirements - Macintosh 9 Powering ON/OFF Your Digital Video Recorder 10 Changing Camcorder Mode ...11 Navigating the Menus...12 Video Capture Mode ...13 Video Playback Mode...17 Photo Capture Mode ...21 Photo...
v2 Camera Manual - Page 3

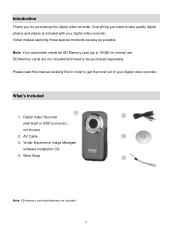
... included with Built-in order to get the most out of your digital video recorder. Wrist Strap Note: SD memory card and batteries not included. 2 Digital Video Recorder (with your digital video recorder. Vivitar Experience Image Manager software Installation CD 4. Note: Your camcorder needs an SD Memory card (up to 16GB) for purchasing this manual...
v2 Camera Manual - Page 6

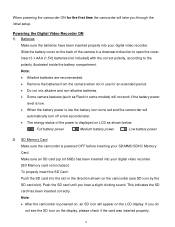
... inserted into your digital video recorder. (SD Memory card not included.) To properly insert the SD Card: Push the SD card into your SD/MMC/SDHC Memory Card. When powering the camcorder ON for an extended period.  Do not mix alkaline and non-alkaline batteries.  Some camera features (such as shown...
v2 Camera Manual - Page 7

Setting the Camcorder Language You will appear. If the SD card is locked this will prevent the camcorder from saving captured photos to the SD card. 3) Power On Press and hold the POWER button to select a language for the camcorder.... The Language selection menu will first be prompted to turn on the side of your choice and press the Shutter/OK button to begin capturing videos ...
v2 Camera Manual - Page 9

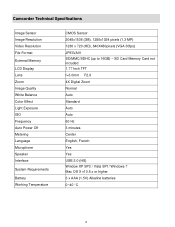
..., French Yes Yes USB 2.0 (HS) Window XP SP3 / Vista SP1/ Windows 7 Mac OS X v10.5.x or higher 3 x AAA (1.5V) Alkaline batteries 0~40 C 8 Camcorder Technical Specifications Image Sensor Image Resolution Video Resolution File Format External Memory LCD Display Lens Zoom Image Quality White Balance Color Effect Light Exposure ISO Frequency Auto Power Off...
v2 Camera Manual - Page 11

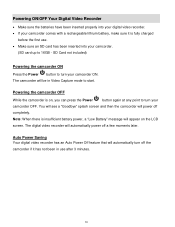
... will be in use .  Make sure an SD card has been inserted into your digital video recorder.  If your camcorder OFF. The camcorder will appear on , you can press the Power button again at any point to turn your camcorder comes with a rechargeable lithium battery, make sure it has not been in...
v2 Camera Manual - Page 12

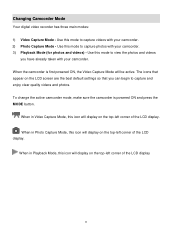
... on the top-left corner of the LCD display. When in Photo Capture Mode, this mode to capture videos with your camcorder. 3) Playback Mode (for photos and videos) - Use this icon will display on the LCD screen are the best default settings so that appear on the top-left corner of the LCD display.
v2 Camera Manual - Page 13

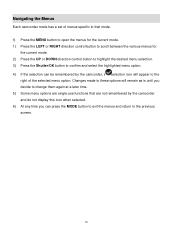
.../OK button to confirm and select the highlighted menu option. 4) If the selection can be remembered by the camcorder, a selection icon will remain as is until you decide to change them again at a later time. 5)... Some menu options are single-use functions that are not remembered by the camcorder and do not display this icon when selected. 6) At any time you can press the MODE ...
v2 Camera Manual - Page 14

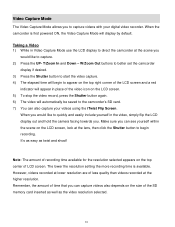
... display out and hold the camera facing towards you to capture. 2) Press the UP- Remember, the amount of time that you would like to capture videos with your videos using the iTwist Flip Screen. When the camcorder is available. Video Capture Mode The Video Capture Mode allows you . Taking a Video 1) While in Video Capture Mode use the LCD...
v2 Camera Manual - Page 16

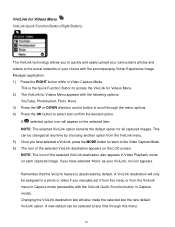
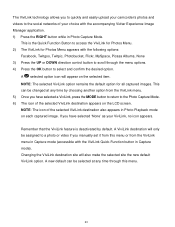
... in Capture mode (accessible with the accompanying Vivitar Experience Image Manager application. 1) Press the RIGHT button while in Video Capture Mode. Changing the ViviLink destination site ...Videos Menu ViviLink Quick Function Button (Right Button): The ViviLink technology allows you to quickly and easily upload your camcorder's photos and videos to a photo or video if you manually set...
v2 Camera Manual - Page 17

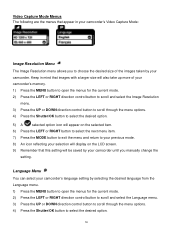
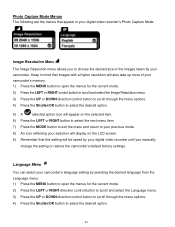
... will display on the LCD screen. 9) Remember that appear in your camcorder's Video Capture Mode: Image Resolution Menu The Image Resolution menu allows you manually change the setting. Language Menu You can select your camcorder until you to choose the desired size of your camcorder's memory. 1) Press the MENU button to open the menus for...
v2 Camera Manual - Page 18

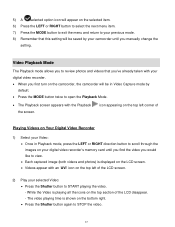
... again to STOP the video. 17 The video playing time is shown on your digital video recorder's memory card until you manually change the setting. icon appearing on the top left corner of Playing Videos on Your Digital Video Recorder 1) Select your Video:  Once in Video Capture mode by your camcorder until you find the video you would like...
v2 Camera Manual - Page 22

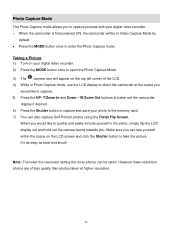
...Capture mode, use the LCD display to direct the camcorder at higher resolution. 21 However lower resolution photos are of the LCD. 4) While in Video Capture Mode by default.  Press the ...1) Turn on your digital video recorder. 2) Press the MODE button once to open the Photo Capture Mode. 3) The camera icon will be taken. Note: The lower the resolution setting the more photos can also...
v2 Camera Manual - Page 24

...set it from this menu. 23 A new default can be assigned to a photo or video...upload your camcorder's photos and videos to the ...social networks of your ViviLink, no icon appears. A selected option icon will also make the selected site the new default ViviLink option. NOTE: The selected ViviLink option remains the default option for Photos Menu appears with the accompanying Vivitar...
v2 Camera Manual - Page 25

... to select the desired option. 24 Photo Capture Mode Menus The following are the menus that appear in mind that this setting will be saved by your camcorder. Keep in your digital video recorder's Photo Capture Mode: Image Resolution Menu The Image Resolution menu allows you to choose the desired size of your...
v2 Camera Manual - Page 30

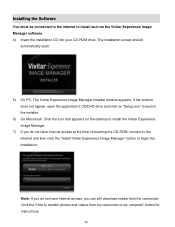
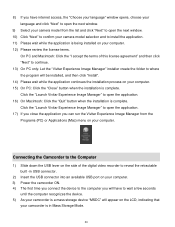
Click the "How to transfer photos and videos from the camcorder. If the window does not appear, open . 5) On PC: The Vivitar Experience Image Manager Installer window appears. The installation screen should automatically open the application's CD/DVD drive and click on "Setup.exe" to launch the ...
v2 Camera Manual - Page 31

...on the LCD, indicating that your camcorder is in USB connector. 2) Insert the USB connector into an available USB port on your computer. 3) Power the camcorder ON. 4) The first time you... when the installation is complete. Click the "Launch Vivitar Experience Image Manager" to open the next window. 10) Click "Next" to confirm your camera model selection and to install the application. 11) ...
v2 Camera Manual - Page 32

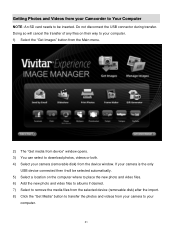
...) after the import. 8) Click the "Get Media" button to transfer the photos and videos from your camera to be selected automatically. 5) Select a location on their way to your computer. 1) ...to download photos, videos or both. 4) Select your camera (removable disk) from your Camcorder to Your Computer NOTE: An SD card needs to your computer. 31 Getting Photos and Videos from the device window...
v2 Camera Manual - Page 35

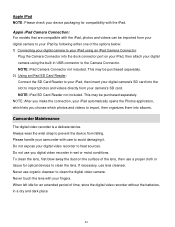
... left idle for optical devices to clean the digital video camera. This may be imported from your digital camera to your iPad by following either one of the options below: 1) Connecting your digital camera to your camcorder with care to prevent the device from your digital camera using the built-in USB connector to heat sources...

Similar Questions

I Lost The Installation Disk For My Vivitar Dvr 884hd Camcorder. Is There A
I lost the installation disk for my Vivitar DVR 884HD camcorder. Is there any way I can download it ...
(Posted by ANITRIAA44 8 years ago)
Vivitar Dvr787-pnk-kit-wm Action Digital Video Recorder, Pink Video Camera With
Vivitar's DVR 787 HD comes on when plugged in and says it has full power but cuts off when you unplu...
(Posted by jjknott82 8 years ago)
Ask a New Question
Use the box below to post a new question about this Vivitar product .
Points & Prizes
  • You can earn points for nearly everything you do on HelpOwl.com
  • You can trade in those points for gift cards at leading retailers such as Amazon.com and Walmart
  • It's that simple!
See How it Works
Create a Free Account

Vivitar Manuals

Find free Vivitar DVR 426HD manuals and user guides available at ManualOwl.com. Try out our unique manual viewer allowing you to interact with manuals from directly within your browser!

Vivitar Reviews

View thousands of Vivitar user reviews and customer ratings available at ReviewOwl.com.

Contact Information

Complete Vivitar customer service contact information including steps to reach representatives, hours of operation, customer support links and more from ContactHelp.com.

Scoreboard Ratings

See detailed Vivitar customer service rankings, employee comments and much more from our sister site.