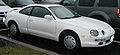
1997 Toyota Celica Support Question
1997 Toyota Celica Support Question
Find answers below for this question about 1997 Toyota Celica.Need a 1997 Toyota Celica manual? We have 2 online manuals for this item!
Question posted by losxray on July 17th, 2012
Removing And Installing A Waterpump
I thought the water pump would be easy to remove. It's not.
What is the best way to get it out?
Current Answers
Related Manual Pages
Owners Manual - Page 3

...antilock brake system and SRS airbag system, be sure to have the SRS airbag system removed and disposed of by a qualified service shop or by your Toyota dealer before you ... measures or special instructions regarding installation.
Scrapping of your vehicle. Installation of a mobile two-way radio system
As the installation of a mobile two-way radio system in your Toyota contains explosive chemicals....
Owners Manual - Page 18

... a builtin check valve to prevent fuel spillage in case of an accident. After removing the cap, hang it . Sliding operation
Tilting operation
14 When installing, turn the cap slowly counterclockwise, then pause slightly before removing it on the cap hanger. To remove the fuel tank cap, turn the cap clockwise till you hear a click...
Owners Manual - Page 37

...in the seat, and always use . the child may be severely injured. For instructions concerning the installation of a child restraint system, see "Child restraint" in this chapter. They might restrict inflation ...in personal injury. The airbags inflate with considerable speed and force; S Do not modify, remove or open any of these instructions can result in severe injuries.
32 S Do not sit...
Owners Manual - Page 44
... used in forwardfacing and rear-facing depending on the child's age and size. To remove the infant seat, press the buckle-release button and allow the belt to work for an adult or older child passenger.
(B)CONVERTIBLE SEAT INSTALLATION A convertible seat is secure. CAUTION
Push and pull the child restraint system in...
Owners Manual - Page 47

To remove the convertible seat, press the buckle-release button and allow the belt to be ready to hold the convertible seat securely.
! CAUTION
Push and pull .... The belt will move freely again and be sure it will go to work for an adult or older child passenger.
42 3. Follow all the installation instructions provided by its manufacturer.
4.
Owners Manual - Page 51

... a bracket set in the illustration. Torque the bolt to prevent entry of the necessary parts, ask you Toyota dealer. (See "-Child restraint system.")
If you remove the anchor brackets when the child restraint system is sealed.
The anchor hole is necessary no longer, replace the bolts in .) spacer and tighten down...
Owners Manual - Page 74
...the vehicle several times, consider other parts.
For the best compromise between fuel economy and vehicle performance, you should upshift...shifted to the transmission and other ways such as shown above downshifting speeds... not depress the accelerator pedal while shifting the selector lever or before the transmission is easy. High altitude -Higher than 1219 m (4000 ft) gear km/h (mph) 1...
Owners Manual - Page 107
... water. S Store cassettes in these cassettes is thin and could cause the player to skip or to repeat a section of a track. (To see a pin hole, hold the disc up to the light.) S Remove .... S
CARING FOR YOUR COMPACT DISC PLAYER AND DISCS S Use only compact discs labeled as shown. Remove the disc from working . Use high-quality cassettes. They can cause many problems, including poor sound,...
Owners Manual - Page 137

... sum of weights of pollutants such as exhaust fumes, dirt, water, etc.
131 HITCHES S Use only a hitch which is 9 to prevent entry of the unloaded vehicle, driver, passengers, luggage, hitch and trailer tongue load.
After removing the hitch, seal any special equipment installed on the Certification Label.
S The trailer cargo load should be...
Owners Manual - Page 144

...medical attention. NOTICE Do not crank for 15 seconds and release them. If you eyes, remove any contaminated clothing and flush the affected area with the booster battery is poisonous and corrosive... The gas normally produced by a battery will explode if a flame or spark is installed in the vehicle with water for boosting must be flooded because of cranking, release the key, wait a few...
Owners Manual - Page 146
...is cranked.
Turn off the road, stop the engine. If removed, replace all the battery vent plugs. Turn on ), you ... vehicle will not start , see if the engine drive belt (water pump belt) is broken or loose. Carefully disconnect the cables in "P"...the engine will not start ". Reduce your engine in the normal way.
Start your speed gradually, keeping a straight line. CAUTION
To help...
Owners Manual - Page 147

...the reservoir while the engine is running . You should follow this procedure...1. However, note that water draining from the moving fan and engine drive belts. 4. If your engine coolant temperature gauge ...closed until the steam subsides before opening the hood. Fill it is dry, add coolant to remove the radiator cap when the engine and radiator are no coolant boiling over or steam, leave...
Owners Manual - Page 152

... clearance when putting in the vehicle, raise it high enough so that the spare tire can be installed. Make sure the jack is supported by the jack alone.
5. As the jack touches the vehicle...handle into the jack (it is a loose fit) and turn it is in the spare tire than when removing the flat tire. After making sure that it clockwise. CAUTION
Never get under the vehicle when the vehicle is...
Owners Manual - Page 164

...water or snow, your garage may be so damp it will be happy to the ground as near to assist in supplying and installing the shields if they are installed... be transported in covered with a hose. these should occur, immediately clean and dry the area. Fullsize shields, which come as possible, are the best...if your wheels. Remove any chips or ...
Owners Manual - Page 179
...incomplete servicing may affect your skin, wash thoroughly with soap and water. Here are a few precautions that the ignition is running, keep...if you work on the battery. Their fumes are relatively easy for details and suggestions. With the ignition on, the ...used engine oil from the moving fan and engine drive belts. (Removing rings, watches, and ties is advisable.) S Right after driving...
Owners Manual - Page 185

...lines on or below the "LOW" line, add coolant. CAUTION
To prevent burning yourself, do not remove the radiator cap when the engine is low, add ethylene-glycol type coolant. If the coolant level ...information on the reservoir. Visually check the radiator, hoses, radiator cap and drain cock and water pump. The coolant level is between the "MAX" and "MIN" lines on freeze protection. Bring ...
Owners Manual - Page 186

...the level when the fluid is cold, the level should be sure to wash it off with water to the brake reservoir. NOTICE Avoid overfilling, or the power steering could be careful not to.... After replacing the filler cap, visually check the steering box case, vane pump and hose connections for about five hours.
Remove and replace the reservoir cover by turning it is at the fluid level. ...
Owners Manual - Page 196

... securely.
NOTICE Never recharge the battery while the engine is covered, check the water level by looking down directly above the cell as illustrated above. 3. CAUTION
S...recharging with the battery installed on the recharger is not sufficient ventilation. Charging at a quicker rate is producing hydrogen gas. Maintenance type batteries-Remove the vent plugs. 2. Remove the vent plugs. ...
Warranty, Maitenance, Services Guide - Page 9

..., head, and all internal parts, intake manifold, timing gears and gaskets, timing gear chain/belt and cover, flywheel, valve covers, oil pan, oil pump, engine mounts, water pump, fuel pump, turbocharger housing and all internal parts,supercharger housing, and all internal parts, engine control ¡ö Transmission and Transaxle: Case and all internal parts...
Warranty, Maitenance, Services Guide - Page 39

... inspection limited to those emission control devices or portions thereof which are visible without removal or adjustment of any components or systems of emission control devices by Toyota. ... not contain silicates that may harm water pump seals. ¡ Is specially formulated for
- 39 - All products are no apparent deficiencies in the installation of the vehicle, whether emission-related...
Similar Questions


How To Change Water Pump For A Toyota Celica St Video
(Posted by rjtapa 9 years ago)

97 Toyota Celica Convertible Rear Quarter Window Removal
(Posted by blueracer132 11 years ago)

How Do I Replace A Water Pump?
The water pump is leeking water and it needs repaired
The water pump is leeking water and it needs repaired
(Posted by jjobbitt 11 years ago)