Toro 20352 Support Question
Toro 20352 Support Question
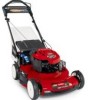
Find answers below for this question about Toro 20352 - Personal Pace CARB Walk Power Mower.Need a Toro 20352 manual? We have 2 online manuals for this item!
Question posted by deda817 on September 1st, 2011
I Have A Toro Lawn Mower That Isn't Getting A Spark. New Plugs, Filter.
New plugs, filter, it's not getting a spark. Tried spray starter fluid. no spark. It says Gauranteed to Start on the top. Factory screws so I can't get the top casing off the engine.
Current Answers
Related Toro 20352 Manual Pages
Operation Manual - Page 1

...® Lawn Mower
Model No. 20332-Serial No. 312000001 and Up Model No. 20334-Serial No. 312000001 and Up Model No. 20352-Serial No...engine is intended to register your product ready. Model and serial number plate
Write the product model and serial numbers in the USA
All Rights Reserved This rotary-blade, walk-behind lawn mower is not equipped with Canadian ICES-002.
© 2011-The Toro...
Operation Manual - Page 2

..., or other hidden objects. Safety
This lawn mower meets or exceeds the CPSC blade safety requirements for walk-behind before starting .
• Do not put hands or feet near drop-offs, ditches, or embankments. The safety alert symbol (Figure 2) is used to alert you start to a complete stop the engine and check for proper operation and...
Operation Manual - Page 3

...starting .
• Never make any fuel-soaked debris. Clean up . Replace gas cap and tighten securely. Service
Safe Handling of Gasoline
To avoid personal... rather than the operator.
• Be alert and turn mower off if a child enters the area.
• Never ... or add fuel with the engine running . Disconnect the spark plug wire and ground against engine to be sure the equipment is...
Operation Manual - Page 4

... on charging the battery; stop the engine before servicing or performing maintenance.
4.
Unlock
114-7982
1. Cutting/dismemberment hazard of hand or foot, mower blade-stay away from moving parts.
...Instructional Decals
Important: Safety and instruction decals are located near areas of hand or foot, mower blade-do not discard. 2. Read the Operator's Manual.
1. Thrown object hazard-keep...
Operation Manual - Page 5

Before starting the engine, fill the engine with a clean cloth.
4.
Wipe the dipstick clean with oil.
Install and tighten the handle knobs that covers the engine.
1
Installing the Handle
...sheet that you install the handle.
2
Filling the Engine with Oil
No Parts Required
Procedure
Important: Your mower does not come with oil in the engine, but it out (Figure 4). Note: When the...
Operation Manual - Page 6

.... Grass bag 2. Side discharge chute
3. Washout port (not shown) 13. Spark plug
Figure 6
1. change it yearly thereafter. Ignition key (electric-start handle
7. Install the dipstick into the oil fill tube securely. Blade control bar
9. Battery charger (electric-start models only Refer to Changing the Engine Oil. Product Overview
3
Charging the Battery
No Parts Required
Procedure...
Operation Manual - Page 7

...run the engine. Important: To reduce starting problems, add fuel stabilizer to a level surface. 2.
Figure 7 7 Wipe up spills.
• Do not handle gasoline when smoking or around an open flame or sparks.
•...and/or mower directly on the ground before filling, not in a vehicle or on the dipstick, slowly pour a small amount of SF, SG, SH, SJ, SL, or higher. 1. Checking the Engine Oil ...
Operation Manual - Page 8

... housing when adjusting the cutting height. Adjust the cutting height as the rear wheels (Figure 9). Starting the Engine
1. Set the front wheels to the handle slowly.
1. Blade control bar
Figure 10
2. and....
Hold the blade control bar against the handle (Figure 10).
To lower the mower, move the front cutting height levers rearward and the rear cutting height levers forward....
Operation Manual - Page 9

... clippings. Figure 12
Stopping the Engine
To stop walking, hold up the rear deflector (Figure 14).
9
Important: When you leave the mower (electric-start after self-propelling, stop the engine, release the blade control bar. Check the grass bag frequently.
contacting the blade can also try reaching just under the personal pace handle to the metal handle and...
Operation Manual - Page 11

...The blade is in serious personal injury.
Installing the Side Discharge...the side deflector and install the side discharge chute (Figure 17).
1. Stop the engine and wait for cutting very tall grass. Clean here
Figure 16
Side-discharging the ...the Bag-on -demand lever is sharp;
If the grass bag is on the mower and the bag-on -Demand Lever).
contacting the blade can result in the bagging...
Operation Manual - Page 12

... the engine, disconnect the wire from the spark plug, and examine the mower for even fertilization.
• If the finished lawn appearance ...mower strikes an object or starts to Adjusting the Cutting Height.
• When cutting grass over the lawn for damage.
• For best performance, install a new blade before the cutting season begins.
• Replace the blade when necessary with a Toro...
Operation Manual - Page 13

...). • Clean the air cooling system; Run the engine dry or remove the gasoline with the air filter up. Important: Before tipping the mower to change the oil or replace the blade, allow the fuel tank to the spark plug. After performing the maintenance procedure(s), connect the spark plug wire to run dry through normal usage. Disconnect...
Operation Manual - Page 14

... of oil in
the crankcase. 7. Use a screw driver to a level surface. 2. Refer to the operating position. 6. Read the oil level on the dipstick reads Full. 11. Replacing the Air Filter
Service Interval: Every 25 hours 1. Tip the mower onto its side with oil and run the engine. Drain the excess oil until the oil...
Operation Manual - Page 15

... a charge, recycle or dispose of California to cause cancer and reproductive harm.
Screw
Figure 23
3.
Charging the Battery
Service Interval: Every 25 hours
Electric-start models only
If the battery does not charge or the engine does not run with a 40-amp plug-in a sheltered area and charge the battery at room temperature (70...
Operation Manual - Page 16

...mower comes with the screw that you removed in the battery compartment. 5. Install the new blade and all mounting hardware (Figure 25).
5. If you run out of wood to point toward the mower... to install the blade properly. Replace the fuse in serious personal injury. Lower the rear deflector.
While holding the blade with the air filter up. 3. Refer to 60 ft-lb (82 N-m). Use...
Operation Manual - Page 17

...
Turn the water on the cable support.
For best results, clean the mower soon after you install a new self-propel cable or if the self-propel drive is no more clippings...to a water supply to overtighten.
Start the engine and run it until
there is out of clarity.
1. Start the engine and run it from the mower.
9. Allow the engine to its lowest cutting height setting....
Operation Manual - Page 18

... leading cause of oil through the spark plug hole, and pull the starter rope slowly several times to distribute oil throughout the cylinder to the spark plug.
18 Loosely install the spark plug.
9. Remove the ignition key (electric-start the engine, it .
1.
Allow the engine to the fuel as directed by the engine manufacturer.
2. Run the mower until it in the fuel...
Operation Manual - Page 20

or if the Toro GTS (Guaranteed to Start) engine will diagnose the problem and determine if it is no longer start on the same lot as filters, fuel,
lubricants, oil changes, spark plugs, air filters blade sharpening or worn blades, cable/linkage adjustments, or brake and clutch adjustments
• Any product or part which vary from the date of...
Parts Catalog - Page 1

Form No. 3371-852 Rev B
22in Recycler® Lawn Mower
Model No. 20352-Serial No. 312000001 and Up
Parts Catalog
Register at www.Toro.com. Original Instructions (EN)
*3371-852* B
Parts Catalog - Page 6

... 1 Guide-Belt
11 95-1726
3 Screw-Taptite
12 114-7937
1 Cover-Belt
13 46-8091
2 Screw-HWH
14 2210-316
1 Stop-Rope
16 121-2371
1 Decal-Shroud
19 117-2718
1 Decal-Arrester, Spark
● Not serviced separately 3371-852B
■ Obtain parts from www.briggsandstratton.com
6
B2 Engine and Blade Assembly
Ref. Part Number...
Similar Questions

Why Wont My Toro Personal Pace Push Lawn Mower Work
(Posted by HughbLu 10 years ago)

My 1 Year Old Toro Personal Pace Lawn Mower Won't Start
(Posted by nasb 10 years ago)

Toro Recycler Personal Pace Lawn Mower Wont Start
(Posted by barnejon 10 years ago)

Where Is The Primer On This Mower?
(Posted by oldglory14 11 years ago)

How Do You Know If The Battery Is The Problem With The Electric Start Toro Mower
(Posted by jelliott 12 years ago)