Sanyo LCD32R45F Support Question
Sanyo LCD32R45F Support Question
Find answers below for this question about Sanyo LCD32R45F.Need a Sanyo LCD32R45F manual? We have 1 online manual for this item!
Question posted by camilleriordan on July 27th, 2014
How Do I Turn Off Screen Saver On Sanyo Tv Lcd-40xr10f ?
How do I turn off screen saver on Sanyo TV LCD-40xr10f ? I've tried resetting factory settings, restarting TV, retuning, plugs & aerial. I can play a DVD and alter sound & audio functions. I've wasted hours and can't work it out.
Current Answers
Related Sanyo LCD32R45F Manual Pages
Instruction Manual - Page 1

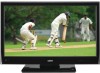
INSTRUCTION MANUAL
High Definition LCD TV
LCD-32R45F
Help line: 1-800-263-2244 Monday to Friday 9 am to 5 pm (Eastern) http://ca.sanyo.com
Instruction Manual - Page 2

... ...5 Preparations ...6 Identification of Controls...9 Connections ...11 Turning on your TV for the first time 15 Basic Operations ...16 Adjusting PICTURE Menu Options 20 Adjusting AUDIO Menu Options 22 Adjusting SETUP Menu Options 23
Parental Controls...24 Closed Caption ...27 Time & Menu Settings...28 Input Label/Restore Default/Audio Only 29 Adjusting CHANNEL Menu Options 30...
Instruction Manual - Page 3

...way, such as when a power-supply cord or plug is grounded so as UL).
18. If an outside antenna is connected to the television equipment, be sure the antenna system is damaged,.... 8. If not, it can reduce the service life of the LCD TV cabinet for choosing SANYO. Install in a proper position. A grounding type plug
GROUNDING CONDUCTORS (NEC SECTION 810-21)
has two blades and a ...
Instruction Manual - Page 4
.... "As an Energy Star® Partner, Sanyo Electric co., Ltd. PROTECTING THE LCD SCREEN
The screen can cause permanent discoloration or dark spots.
"Dolby" and the double-D symbol are trademarks or registered trademarks of HDMI Licensing LLC in the United States and other countries.
has determined that this television meet rigid U.L.
safety standards against risk...
Instruction Manual - Page 6

Before attempting assembly or removal of the TV.
2.
Lay your TV flat (screen down) on the TV back with the holes in the stand column, then secure the stand to the TV with provided screws . And align the screw holes on the edge of a table or bench.
You must install your TV's finish. Remove the stand from your...
Instruction Manual - Page 9

.... ANT/CABLE IN: Connect an antenna or cable TV to this jack, then connect an audio cable to this jack.
13. Do not use.
2. Second touch will illuminate it again to STANDBY.
4. Touch it . Headphone: Connect headphones to this icon to turn the set back to turn the unit ON from the remote control. Touch...
Instruction Manual - Page 10

...
inputs.
4 PICTURE: Selects picture mode. 5 AUDIO: Selects sound mode. 6 MENU: Displays the main menu screen. 7 5 /6 /3 /4 /ENTER: Menu navigation buttons.
5 /6 : Press to move up and down in the menu.
3 /4 : Press to move left or right in the menu or to adjust a menu setting. Identification of Controls (Continued)
Remote Control Unit
TV INPUT
14
1
15
2
VIDEO HDMI...
Instruction Manual - Page 11

... press INPUT button. Turn on your VCR , insert a videotape and press the Play button. Connecting a VCR
TV REAR
VCR
S-VIDEO
Cables are securely inserted into their terminals. Press 5 or6 to select AV1or S-Video1, then press ENTER to connect:
Connect the Audio/Video cables between the Audio (L/R)/Video jacks on your source supports it. Note: ·...
Instruction Manual - Page 12

... connect:
Connect the Audio/Video cables between the Audio (L/R) jacks on your TV, select a program. 2.
Audio System
AV cable
To improve sound quality, you just press VIDEO button twice to go to white. To play audio system
1. Note: The operations of your camcorder and set it to output mode. (For details, refer to white, etc. Turn on your camcorder...
Instruction Manual - Page 13

... the device using HDMI Connection:
Connect the HDMI cable between the AUDIO output on the computer and AUDIO input jack on the unit. Turn on your TV, then press INPUT button. If HDMI2 interface is used , please select HDMI2 mode.
To play from a computer
1. Turn on your device and set it to select directly.) 3. Note:
! Connect an...
Instruction Manual - Page 14

..., white to Component1 mode directly. Turn on your TV, then press INPUT button. Turn on your external device and set it to the correct mode. See the device's user guide for more information.
HDMI3
L AUDIO R
AV2 IN
S-VIDEO2 VIDEO
Headphones
Connecting Digital Optical Audio
TV Side
TV REAR
For a full Home Theater sound experience, you can press COMP button...
Instruction Manual - Page 15

... you don't need to run the auto scan again to set the date/time manually), or Auto
- Move
Français Español
Select
ENTER Next
Next
MENU Previous
3 Press 6 or 5 to "Press MENU or EXIT if you turn on your TV source screen opens. select your viewing area observes daylight savings time...
Instruction Manual - Page 16

... -
Basic Operations
Turning On/Off the Power 1 Plug the power cord into the TV. To completely disconnect power, unplug the power cord. Watch the signal from the AV 1 input terminals. !
Watch the signal from the AV 2 input terminals. ! S-Video2 - Parental Controls
Time
Closed Caption
Menu Settings
VGA Settings
Input Label
Restore Default
Audio Only
Off
3 Press...
Instruction Manual - Page 17

..., Overscan, Adaptive Contrast, DCR,
Auto Zoom items)
Audio menu
Sound Mode Bass Treble Balance
Surround
(Refer to section for details.)
AVC
Digital Output
Audio Language
Setup menu
Parental Controls Time Closed Caption
(Refer to section for details.) VGA Settings Input Label Restore Default Audio Only
Picture Audio Setup Channel
TV Source Auto Scan Favorites Show/Hide Channel...
Instruction Manual - Page 21

...screen burn) which affects the overall brilliance of the image gets lost. Select Off to see less intense colors with more blue. In TV mode, if Auto Zoom is set...the picture display. DCR Auto Zoom
Turn this function. Cinema: Stretches the picture at the...Press EXIT to activate the Dynamic Backlight Control function. Picture Audio
Color Temperature Zoom Mode Noise Reduction Overscan Adaptive...
Instruction Manual - Page 23

... more instructions. Running this function to reset most settings of current source to its default settings by making use of Setup menu.
1 Press MENU, use of Time sub-menu to select. Audio Only
Lets you control which automatically sets the time based on -screen instructions.
See [Playing TV Audio Only] section for more instructions.
See [Menu Settings] section for details...
Instruction Manual - Page 27

...Turns off Closed Caption, to set Mode to customize the digital closed caption options. (Only for the edges. Advanced Selection Allows you want to Default. To restore to default settings, just set Closed Caption type, to open the Closed Caption setting screen. Picture Audio... digital closed caption options. On: Turns on the Closed Captions when the TV is muted.
Note: You can ...
Instruction Manual - Page 28

..., Atlantic, Eastern,
Time Zone DST Mode
Central, or Mountain.
This setting is cleared when the TV is turned off.
1 Press MENU, use 3 or4 to select Setup menu, press 6 to open the Time setting screen. Picture Audio Setup Channel
Parental Controls
Time
Closed Caption
Menu Settings
VGA Settings
Input Label
Restore Default
Audio Only
Off
Select
Move
MENU Exit
Picture...
Instruction Manual - Page 29

When you can select DVD as that source's label.
Perform this function to reset current source label to the factory default.
Picture Audio Setup Channel
Parental Controls
Time
Closed Caption
Menu Settings
VGA Settings
Input Label
Restore Default
Audio Only
Off
Select
Move
MENU Exit
Playing TV audio only
You can select one of them as your current source label. (For ...
Instruction Manual - Page 33

... POWER on the TV or on again. Check the antenna/cable connections.
! Try another channel; Using a highly directional outdoor antenna or a cable may solve the problem.
! You may set hidden. Disconnect the power cord and wait for a few seconds. Video and Audio
Problem
No picture (screen not lit), No sound Dark, poor or no sound
Audio noise
Possible...
Similar Questions


Can I Connect My Care Sara Hydrophone To My Sanyo Dp46840 Flat Panel Tv
(Posted by freespirittonya 9 years ago)
Can I Connect My Care Sara Hydrophone To My Sanyo Dp46840 Flat Panel Tv And How
(Posted by freespirittonya 9 years ago)

How Do I Get Rid Of Screen Saver On Model Lcd-32xr11(b) On Sanyo Lcd Tv
(Posted by sharky75 11 years ago)

Tv/dvd Combo Unplugged Tv And Plugged Back In And Noe Get No Channels.
I unplugged my tv and plugged it back in and i get no channels now. I use an antenna and had a l...
I unplugged my tv and plugged it back in and i get no channels now. I use an antenna and had a l...
(Posted by homesbytara 11 years ago)