2004 Pontiac Bonneville Support Question
2004 Pontiac Bonneville Support Question
Find answers below for this question about 2004 Pontiac Bonneville.Need a 2004 Pontiac Bonneville manual? We have 1 online manual for this item!
Question posted by walt8osborne on April 26th, 2014
How To Remove The Rear Integration Module?
The person who posted this question about this Pontiac automobile did not include a detailed explanation. Please use the "Request More Information" button to the right if more details would help you to answer this question.
Current Answers
Answer #1: Posted by waelsaidani1 on April 26th, 2014 8:28 AM
waelsaidani1

Member since:
May 12th, 2013 Points: 19,501,777

Member since:
May 12th, 2013 Points: 19,501,777
Hello please go through here for help: http://www.gmforum.com/2000-2005-90/rear-integration-module-repair-preventative-maintenance-304368/
Related Manual Pages
Owner's Manual - Page 34

Buckle, position and release the safety belt as described in Rear Seat Passengers on top.
4. Slide the guide into its storage pocket on the side of the guides. Be sure...the guide on page 1-23. Make sure that the belt is not twisted and it lies flat. 3. To remove and store the comfort guides, squeeze the belt edges together so that you can take them out of the seatback.
1-28
Owner's Manual - Page 50

...see Lower Anchorages and Top Tethers for Children (LATCH System) on page 1-40. 5. To remove the child restraint, simply unhook the top tether from the top tether anchorage and then disconnect ....
1-44 The child restraint instructions will show you want to secure the child restraint in a Rear Seat Position
If your child restraint does not have the LATCH system, you will show you how...
Owner's Manual - Page 63

... system triggers a release of collisions, including frontal or near frontal collisions, rollovers, and rear impacts, primarily because an occupant's motion is in the seatback closest to severe frontal or...belted occupants can contact the inside the steering wheel and instrument panel. Frontal air bag modules are all part of the impact more evenly over the occupant's upper body, stopping ...
Owner's Manual - Page 145

... the equipment. Check with the accessory power outlet and could result in use the outlet, remove the protective cap which covers it or keep other components from the plug because the power ... a problem, see your vehicle has a floor console, the outlet is located at the rear of the floor console. The accessory power outlet will drain the battery. Always turn off ...
Owner's Manual - Page 149

...;ve minutes before turning off. The rear window defogger will not turn the rear window
defogger on again, the defogger will heat to help keep the rear glass clear. Do not drive the vehicle until all windows are clear. Be sure to remove fog or frost from the rear window. If you select this button...
Owner's Manual - Page 153

... Notice: Using a razor blade or sharp object to the floor outlets. Rear Window Defogger
The rear window defogger uses a warming grid to remove fog or frost from the rear window.
= REAR: Press this button directs most of the mirror when the rear window defogger button is at or below freezing.
If you select this function...
Owner's Manual - Page 182

...) 83 102 140 141 142 143 144 147
Warning Message SERVICE AIR BAG CHECK CHARGE SYSTEM DRIVER DOOR AJAR FRONT PASSENGER DOOR AJAR LEFT REAR DOOR AJAR RIGHT REAR DOOR AJAR CHECK TIRE PRESSURE PARK BRAKE SET*
The EXP codes are used to make translation from the DIC display, unless noted by...
Owner's Manual - Page 263

... your vehicle handles. Your vehicle can change the way your vehicle any heavier than the GVWR, or either the maximum front or rear GAWR. Set the parking brake and then remove the key. 4. Clamp the steering wheel in PARK (P). 3. Two labels on your vehicle show how much weight your vehicle can shorten...
Owner's Manual - Page 272

...
It is important to have to follow the instructions for
hitches. Here are a few reasons why you remove the hitch. If you do , both brake systems will need the right hitch. Do not attach rental...then be able to seal the holes later when you will not work well, or at the driver's side rear lamp connector. If you do not attach them , deadly carbon monoxide (CO) from the hitch. See ...
Owner's Manual - Page 278
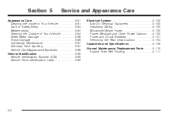
... Add-On Electrical Equipment ...5-100 Headlamp Wiring ...5-100 Windshield Wiper Fuses ...5-100 Power Windows and Other Power Options ...5-100 Fuses and Circuit Breakers ...5-101 Removing the Rear Seat Cushion ...5-104 Capacities and Specifications ...5-109 Normal Maintenance Replacement Parts ...5-110 Engine Drive Belt Routing ...5-111
Appearance Care ...5-91 Cleaning the Inside...
Owner's Manual - Page 321

...and work properly. When it must be sure you replace parts of California to see Removing the Rear Seat Cushion on page 5-104.
Battery
Your new vehicle comes with top-quality GM ... new approved GM replacement parts. These fumes can let sulfuric acid fumes into the area under the rear seat cushion.
Its many other ways if someone puts in a crash. When you get one that...
Owner's Manual - Page 324

4. Open the hood on your vehicle under the rear passenger's seat. Keep hands, clothing and tools away from any underhood electric fan.
{CAUTION:
Using a match near a battery ...CAUTION: You will not need more light. It is located under the hood. Access the remote positive (+) terminal by removing the cover.
{CAUTION:
An electric fan can start up even when the engine is for jump starting.
Owner's Manual - Page 332

Tail/Brake Lamp
1. Open the trunk. Remove the plastic trim piece from the rear corner of the trunk.
5-56 Pull the bulb straight out of the trunk counterclockwise and remove them. 2. Replace the bulb and reverse Steps 1 through 6 to remove it from the lamp assembly. 6. Back-Up Lamp B. Remove the three nuts holding the lamp in...
Owner's Manual - Page 347

... use the correct rotation pattern shown here. After the tires have been rotated, adjust the front and rear in the Index. Reset the check tire pressure system, if equipped. In an emergency, you can ...use a scraper or wire brush later, if you change a wheel, remove any rust or dirt from places where the wheel attaches to get all wheel nuts are properly tightened. ...
Owner's Manual - Page 355

... tips about what to expect and what to a stop well out of a tire, it is used for a tire to use in a skid. In any rear blowout, remove your tires properly. Gently brake to do maintenance or repairs is designed only for changing a flat tire will create a drag that pulls the vehicle...
Owner's Manual - Page 369

... mild soap or saddle soap and wipe dry with a clean, damp cloth to the rear window defogger and the integrated radio antenna. Cleaning Interior Plastic Components
Use only a mild soap and water solution on page...dealer for this more than once.
• Things like tar, asphalt and shoe polish will remove normal tobacco smoke and dust films on leather. Cleaning Vinyl
Use warm water and a ...
Owner's Manual - Page 377
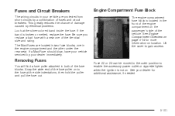
... your dealer for more information on . Be sure you replace a bad fuse with a new one in the engine compartment and the other under the rear seat. Removing Fuses
You will find a fuse puller attached in both of the vehicle.
The MaxiFuses are protected from short circuits by your dealer immediately. If...
Owner's Manual - Page 380

...battery and or wires. Pull the cushion up on the seat cushion, you remove or reinstall the rear seat.
To reinstall the rear seat cushion, do the following : 1. If the safety belt hasn't ...CAUTION:
A safety belt that the safety belts are properly routed and are not twisted.
5-104 Removing the Rear Seat Cushion
Notice: If you touch the exposed wires with the metal on the front of ...
Owner's Manual - Page 382

...Ventilation, Air Conditioning Blower Memory Seat Assembly Line Diagnostic Link Not Used Compact Disc (CD) Driver Door Module Supplemental Inflatable Restraint Not Used Usage 17 18 19 20 21 22 23 24 25 26
...Ignition 1 Lamps Park Left Interior Lamp Dimmer Module Satellite Digital Radio Heated Seat Left Front Not Used Rear Door Modules Stoplamps PARK (P) / REVERSE (R) Audio Retained Accessory ...
Owner's Manual - Page 383

... 55 Fuel Pump Parking Lamps Ignition 1
Usage
Instrument Panel Heated Seat Right Front Not Used Heating, Ventilation, Air Conditioning Ignition 3 Rear Antilock Brake System Turn Signal/Hazard HVAC Battery Dash Integration Module
Rear Fog Lamps Not Used Park Brake Reverse Lamps Retained Accessory Power Not Used Ignition 3 Interior Lamps Trunk Release Front Courtesy Lamps...
Similar Questions

How To Remove The Backseat To The Trunk On A Pontiac Bonneville 2004
(Posted by jajodu 9 years ago)

2001 Bonneville Where Is Dash Integration Module
(Posted by fujpakj1 10 years ago)

Where Is The Rear Integrated Module On 2004 Bonneville Located
(Posted by kiss1l20G9 10 years ago)

Rear Turn Signal Socket Removal/replacement
How do I remove the rear left turn signal socket and replace it? Looks like lots of corrosion too. M...
How do I remove the rear left turn signal socket and replace it? Looks like lots of corrosion too. M...
(Posted by schneiderse 10 years ago)
How To Remove Oil Pan From 2004 Bonneville
(Posted by hielankaren 11 years ago)