Get support for Pfaff hobbylock 784

Pfaff hobbylock 784 Support Question

Pfaff hobbylock 784 Support Question

Find answers below for this question about Pfaff hobbylock 784.
Need a Pfaff hobbylock 784 manual? We have 1 online manual for this item!
Question posted by sj2hodge on March 29th, 2019

Repair Part

do you have part 340348

Current Answers

Answer #1: Posted by Odin on March 30th, 2019 6:24 AM
This answer was accepted by the poster of the original question.
Odin

Member since:
April 10th, 2010

Points: 41,236,680
1,100
points


Hope this is useful. Please don't forget to click the Accept This Answer button if you do accept it. My aim is to provide reliable helpful answers, not just a lot of them. See https://www.helpowl.com/profile/Odin.

Related Pfaff hobbylock 784 Manual Pages

Owner's Manual - Page 2

... but an authorized agent. adjusted Pfaff C) The maximum approved the light bulb is 15 watts. Notes on safety A) aatoOhvrfeweotaihidunecsgioenntrnjoeutmeirntydhuuleaseotnsuudtspaalnykoadebnwsdstehhuridelfvefoeiuwcspietnehpwneemitrnscgoeka.vwnreieifmnegt,eont B) When leaving the machine, changing parts or machine must never be accessories, disconnected the from the power source.
Owner's Manual - Page 4

... reel change on hobbylock 784 and 786 Adjusting the differential feed (hobbyfock 786) . . Disengaging the upper knife Adjusting the seam width Changing the sewing foot Changing the light bulb Cleaning the thread tensions Rolled hems Changing the needles Changing the knives Changing the upper knife Changing the lower knife Oiling the machine Sewing problems and...
Owner's Manual - Page 5

... the sewing machine 1 Thread spool stand 2 Carrying handle 3 Left needle thread tension dial 4 Right needle thread tension dial 5 Right looper thread tension dial 6 Left looper thread tension dial 7 Thread tension cover 8 Lint box 9 Handwheel 10 Looper cover with recess 11 Upper knife 12 Work support (swivel-type) 13 Needle plate 14 Sewing foot...
Owner's Manual - Page 6

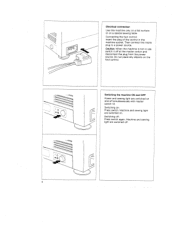
... place any objects on : Press switch. Caution: When the machine is not in the machine socket. Switching on the foot control. Machine and sewing light are switched on and off . 4 Then connect the mains plug to a power source. Machine and sewing light are switched on a special sewing table. Connecting the foot control: Insert the plug of the...
Owner's Manual - Page 7

... wattage of the needles and the upper knife, the user must take sufficient care to the up and down , the faster the machine will sew. Foot control The speed of the Hobbylock is regulated as follows: The more you press the foot control down movement of the light bulb is 15 watts. D) The...
Owner's Manual - Page 9

... guides (Figs. A threacing diagram is fixed to the right until it up (Fig. B and C). To close the work support, push it to the machine behind the carrying handle The machine must be pulled up until it down again. 7 After threading, carrying handle 2 must be threaded correctly. right needle (green) 4. hold it, and...
Owner's Manual - Page 10

... seam is sewn with two needle threads and two looper threads. If' 5, /2 / 8 1 5 H 6 8 Threading the right looper: Thread the right looper in sequence 1 to obtain perfect sewing results, the thread must be pulled between the tension discs when threading the tensions. 21 - 3 4 - 75 - 4-thread overedge seam This seam is described on page...
Owner's Manual - Page 12

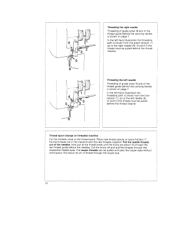
...must be pulled behind the thread retainer. Place new thread spools on page 7. Tie the threads still in the machine and the new threads together. Now pull at the thread ends until past the last thread guide before the ...Threading the right needle Threading of guide wires 18 and of the thread guide behind the carrying handle is shown on threaded machine Cut the threads close to the thread spool.
Owner's Manual - Page 13

looper cover 10. I Seam allowance If the cutting is guided along below 1 Then push the bottom of the box against the machine. the lint box, use the I -J / / Inserting the lint box: downwards the cover. I After threading the machine, push handle 2 down, and close work support 12 and -
Owner's Manual - Page 14

..., as shown in the direction indicated by the arrow on the wheel. Sewing test After threading, a sewing test test should be made. Lay the threads back under the sewing foot. Insert test fabric up to the upper knife and lower the sewing foot. - - 'I \\ Hold thread ends with your left hand while turning hand wheel...
Owner's Manual - Page 15

Use your hand for guiding only. Sew approximately 5 cm beyond the end a scissors to sew. (Also after the machine has been rethreaded.) Sew the first stitches slowly. Points to observe during sewing Place the fabric completely under the sewing foot when starting to cut Since the fabric is fed automatically, do 4 not pull or push the fabric.
Owner's Manual - Page 16

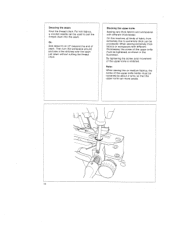
... 2 turns, so that the upper knife can be tightened, as shown in the illustration. When sewing extremely thick fabrics or workpieces with different thicknesses: On this machine, all kinds of the upper knife holder must be loosened by about 5 cm (2") beyond the end of the upper knife must be processed. Blocking the...
Owner's Manual - Page 20

... the stitch length desired between 1 and 5 mm. Standard setting N is3mm. / / - / c\L-_ t/>7 A . .i,___c( Setting the stitch length on the hobbylock 784 without differential feed Open work support 12. Standard setting N Setting the stitch length on the hobbylock 786 with differential feed Open work support 12. Material Light materials: Organdy, light-knit fabric, Taffeta, silk...
Owner's Manual - Page 21

.... The following variants can be set infinitely from 0.5 to process (see table on the hobbylock 786 The differential feed prevents inter-ply shift. Note: The following settings at button 23 are... processed. 19 Set the diffe rential feed according to the material you wish to 2, also during sewing. N = Same stroke of both pick up and move the workpiece at a diffe rential feed ...
Owner's Manual - Page 22

In order to make sure about the setting required for the fabric you wish to process, a sewing test has to - N 1 Correct seam a Fabric Nylon, tricot, lining fabrics, satin, poplin, and silk N - 2 Light cotton, jeans (normal fabrics) 1.5 3 d ... differential feed can also be made. This table indicates possible settings of differential feed Illustration 0.5 to be set during sewing.
Owner's Manual - Page 27

... tensions Threading path: 1. approx. "N" to -3 approx. + 5 approx. left looper, yellow path needle thread, green path For threading of the sewing machine: Needle: Sewing foot: Seam width: Stitch length: Thread: reffperrnooomgmmlyaoegv31see..t00elrreottooflttlhe42rnd..e00eahedm(edsmlmh1eo2f0r(ot-does1ttp4i"et0cRnhf"doirlneggnrgeotehnn),mraetderiaanld) yellow thread tensions Threading...
Owner's Manual - Page 28

...needle change tool from the accessories (see page 21. 26 PKunlilvoesut the mains plug. Lower the sewing foot. Turn the hand wheel in hole M of the needle change tool from the needle. ... ___;_ . \c;;-rI - An incorrectly inserted needle will go. Changing the knives are used on these machines: System 130/705 H (75-90) Although the correct needle size depends on the material and the...
Owner's Manual - Page 32

... to be corrected by following the instructions below may occur due to incorrect threading. Sewing problems and solutions These machines have been developed for light materials) (pages 15, 16). Do not pull material during sewing. Needle not fully inserted. Sewing problems of the kind described below . Thread has caught. Insert needle correctly (page 26...
Owner's Manual - Page 33

B. 31 I 5o 6Q •11 II#ICIIIII*IIIiIlI, Bfl E '1 Accessories 1 Screwdriver (big) t 2 Screwdriver (small) 3 Lint brush 4 Tweezers 5 Upper knife 6 Thread unreeling disc 7 Needles 8 Sewing machine oil I 9 Rolled hem sewing foot 10 Thread spool net 11 Needle change tool I item 6 of the accessories is used for synthetic threads which 1 tend to become loose, unravel and...
Owner's Manual - Page 34

... width Stitch length Sewing foot Lubrication Sewing foot height Needle system Number of threads Dimensions Weight Contents of cardboard box 1 machine with motor 1 foot control 1 instruction manual/guarantee certificate 1 lint box 1 thread spool stand 4 thread spool stand bars 1 thread guide 1 machine cover 1.300 stitches/mm. 3-7.2mm 1 -4 mm (HL-786) 1 -5 mm (HL-784) Hinged Manual 5mm...

Similar Questions

How To Oil 784 Hobbylock
(Posted by lindakastle 20 days ago)
Edge Guide - Pfaff Select 1540 Sewing Machine
How does the Edge Guide work for the Pfaff Select 1540 sewing machine?
(Posted by jesjames 2 years ago)
Hobbylock 784
I lost the pedal of my hobbylock 784, How can I rich a new one?
(Posted by shelly2004 2 years ago)
Machine Doesn't Turn Freely
The sewing mechanism doesn't turn freely, is there a service manual that could help me open the mach...
(Posted by semalmquist 6 years ago)
Pfaff 259 Sewing Machine Won't Run With Foot Petal
I have a pfaff 259. When I push on the foot petal the motor runs but the machine itself doesn't run....
(Posted by Aemazing 8 years ago)
Ask a New Question
Use the box below to post a new question about this Pfaff product .
Points & Prizes
  • You can earn points for nearly everything you do on HelpOwl.com
  • You can trade in those points for gift cards at leading retailers such as Amazon.com and Walmart
  • It's that simple!
See How it Works
Create a Free Account

Pfaff Manuals

Find free Pfaff hobbylock 784 manuals and user guides available at ManualOwl.com. Try out our unique manual viewer allowing you to interact with manuals from directly within your browser!

Pfaff Reviews

View thousands of Pfaff user reviews and customer ratings available at ReviewOwl.com.

Contact Information

Complete Pfaff customer service contact information including steps to reach representatives, hours of operation, customer support links and more from ContactHelp.com.

Scoreboard Ratings

See detailed Pfaff customer service rankings, employee comments and much more from our sister site.