
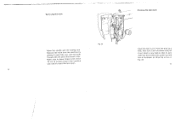
Pfaff 213 Support Question
Pfaff 213 Support Question
Find answers below for this question about Pfaff 213.Need a Pfaff 213 manual? We have 1 online manual for this item!
Question posted by Dee2727 on February 1st, 2013
Resale Value Of Pfaff 213
The person who posted this question about this Pfaff product did not include a detailed explanation. Please use the "Request More Information" button to the right if more details would help you to answer this question.
Current Answers
Related Pfaff 213 Manual Pages
Owner's Manual - Page 1

PFAFF
212 213
Instruction book - ;--
-
-
Owner's Manual - Page 2

imniij lIne machine iced Basic rules Safely rules Sir Omillit sliP Ii aiol iigiaq Smwtriq un buttons Sewing buttonholes Blnndst itching hems loser log zippers ...Is
Page
POllS of inodOl 212
2
Paris of model 213
4
I lEO trii:il ( OnnE(cfiuo
(5
Work support of model 213
7
tternovirrg tile bobbin case
B
Diserigiiginq the sewing rnecharicri B
.iioifig he tiobhirr
10
breading the bobbin...
Owner's Manual - Page 3

4
5
67
_JL
23
iPFAFFI 217
22
I
10
21
11
12 20
19 18
13
Parts of the PFAFF 212
I luke up lever 2 1 bread guide 3 Bobbin winder tension with
thread guide 4 Utility stitch Selector... 15 Needle plate 16 Shuttle (not visible) 17 Beitplate cover 18 Sewing toot 19 Sewing tool holder wit ti s( rev 20 Needle bar 21 Thread guides 22 Sewing light switch 23 Face cover 24 bread I eusion 25 Presser bar...
Owner's Manual - Page 4

...9
iiL
24
23 10
11
21
12
20 19
18
4
17
16
15 11
13
Parts of the PFAFF 213
1 Take up lever
2 Thread guide
3
Bobbin winder thread guide
tension
with
4 Utility stitch selector
5 Utility...16 Flap 11 Needle plate 18 Shuttle (not visible) 19 Sewing foot 20 Sewing toot holder with scre 21 Needle bar 22 Thread guides 23 Sewing light switch 24 Face cover 25 Thread tension 26 Presser bar ...
Owner's Manual - Page 5

Electrical connections
Push plug 1 into the machine socket and plug 2 into the wall outlet. Place foot control 3 within easy reach of model 213
fo enlarge the sewing area for ordinary
sewing operations, push the work sup
port onto the free arm as tar as it will...purpose pull it oft
To the
FIg. 2
6
/ The more the pedal is depressed, the faster the machine runs
Work support of your foot.
Owner's Manual - Page 6

Removing the bobbin case Fig 3.Model2l2 Fig. 4: Model 213
Turn the balance wheel toward you ( arrow in Fig. 5) The sewing rnechani is at its highest point. Open the bedplate cover or ..., and putt the bobbin case out Then release the latch so that the bobbin can drop out 8
Disengaging the sewing mechanisri
FIg. 5
Hold the balance wheel steady wdh y left hand and, with your right hand, I the ...
Owner's Manual - Page 7

Winding the bobbin Select the thread from the chart on the inside front cover
Disengage the sewing mechanism and place a spool of thread on pin 1 (Fig 0) Push a bobbin onto spindle 4 (... (see arrow) Wind a few turns of thread on bobbin 3 in the direction indicated by an arrow Run the machine, iIhen the bubbin is lull, the bobbin winder will stop automatically Remove the bobbin If you do not need a ...
Owner's Manual - Page 9

...indicating the desired stitch length between 0 and 4 is npposilo mark C.
Regulating the stitch length and sewing backwards
Fig. 13
Hold the end of the needle thread in your left hand Turn the balance ...you until the needle moves down reverse teed Control 8 When you release the control, the machine will sew forwards again
ii tiless down and up again and the take-up lever has reached Is...
Owner's Manual - Page 11

... pieces ob tabruc and sumuuifarieousiy turrustung i t'un C nige
tun "•"
w5
S-.a
-
-U
--
-
-
bantack
red
2V 4 6 8
1o
12 iii
Buttoruhoie -
d9 ance
cud
sewing
stretch
iabrucs
as
well
as
-
-
-
applique work arid sewing on the opposite page
18
.*__.
S..-
tell seam
Buttonhoie - right seam
Putioxer stitch their applications are shown in the chart on...
Owner's Manual - Page 12

...foot
Raise the needle and Press the red hutton sewing foot shoe
the sewing foot 1 to release the
prpiuTneirnnopedpos2aelssatrieetctarniteochtenbhewrasirsttthhheslweeilfoyitsstneoeergu3wwr.afiironnlieoggdftttathoothoooaltttndhdseeshrhosoaLeaero,midwspeoehlarotctilhtmdehaeetiitt
Hole 4 and edge guide dealer
screw 5 serve br which you can buy
tilting an from your
'sir
()
(
2
(
L
-,
-
Fig...
Owner's Manual - Page 13

... sure to avoid finger injuries b the needle when sewing. 2.
darning and button sewing Machine teed raised for sewing
Basic rules Always turn the balance wheel towards you want to change th needle, sewing foot, bobbin or needl plate, when you never allow a threaded machine to interrupt sew,n and leave the machine for a while. 3. Safety rules 1. Make sure you...
Owner's Manual - Page 14

... the colour range selector so that you turn the halance wheeL Slowly sew about 10 stitches, thou turn the utility stitch selec tor to 7. Sewing
Make sure the disengaging knob on the balance wheel is tight
Straight-stitch sewing
The machine sews straight stitches when the utitity stitch selector is set at the desired stitch...
Owner's Manual - Page 15

...the balance wheel toward you do not damage the buttonhole seams and the bartacks
27 Fig 25
Sewing buttonholes
Attach the clear-view foot Mark the position arid length of the buttonhole on the material...point 3
Turn the utility stitch selector to the right buttonhole seam and sew the right seam the same length as the letl Stop sewing at the top and turn the utility stitch selector to the left ...
Owner's Manual - Page 16

...-3 and 29).
- ..
-.. as shown at the left of the fabiic (Fig
28
ing 3.
28 -4)
Fig. 29
Place the fabric with its folded edge under the sewing foot and lower the
presser bar lifter
On heavy woolen fabrics the hero is fold ed once only and its edge back by
The hem...
Owner's Manual - Page 17

... that the tront stud enters slot 2. Inserting zippers
Raise the needte and attach the adjust able zipper toot as it will go Fhen sew in the right halt ot the zipper (Fig 31) Raise the needle and the zipper toot.
Embroidering and darning
bhamaftlynaaybte3goahttspSohtnohoao2cwterpeuseitdeodee)dtdthetee,hctaegaiwrf0maphgdearotts1rahihnrihhtirtlranannneateeteeeaitihhngsgsdrnaesnndntet,sc...
Owner's Manual - Page 18
...1 up a little, then turn it out. Removing the work
Raise the needle and the sewing (oot Remove the work trorn the machine by pulling it toward the rear, and trim both threads with the aid of the thread ...cutter Make sure to leave thread ends about 10 cm (4 inches) long in the machine with which to start the next seam 32
/
Chaning the light bulb
Open the face cover Push the ...
Owner's Manual - Page 19

Machine care
Cleaning the shuttle race
Oiling
All bearings behind the face cover...To do this, remove the bobbin case
Always use high-grade (resin -free) sewing
machine oil After oiling, run for a short time on a piece
the machine of excess oil
34
Raise the needle and take out bobbin
coCauastrewetauFrldtyws iatphnudllbrosebhmbuiotntvleeEsAhSuwotutilntegoraflcaiettcsrhineragscBe0.. but ...
Owner's Manual - Page 20

needle 5.
Rem e (t y
Adjust both tensions as indi Needle and Thread Chart. Needle inserted improperly.
Sewing foot, shuttle or shuttle race may be damaged.
Needle may be blunt or bent Insert a new system 130/705 H needle.
4 Thread used is too heavy ...
Owner's Manual - Page 21

... the material and the
thread size are of inferior qualify
38
Remedy Use a thicker needle as indicated in the Needle and Thread Chart
Raise the sewing foot and draw the needle thread between the tension discs
39
) Needle breaks Cause 1 Fabric is too thick.
2 The material is not properly ad
lusted...
Owner's Manual - Page 22
Machine runs heavily and is noisy
Cause• 1 Dust and pieces of thread have accu
mulated in the shuttle race 2 Machine has not been serviced for a
longer time 3 The machine is clogged by interior oil
40
Remedy Clean the shuttle, as instructed cii pages 34 and 35 Read the instructions on page 34
Have a mechanic clean the machine thoroughly.
Similar Questions

Pfaff 213 Original Work Tray
I am looking for the work tray that originally came with this Pfaff 213; any ideas ?
I am looking for the work tray that originally came with this Pfaff 213; any ideas ?
(Posted by shewolff2 3 years ago)

Pfaff 259 Sewing Machine Won't Run With Foot Petal
I have a pfaff 259. When I push on the foot petal the motor runs but the machine itself doesn't run....
I have a pfaff 259. When I push on the foot petal the motor runs but the machine itself doesn't run....
(Posted by Aemazing 8 years ago)
I Am Looking For An Extra Bobbin Case For My Pfaff 213.
One sewing machine parts company told me it is part number JO1313ZW, the picture of which looks iden...
One sewing machine parts company told me it is part number JO1313ZW, the picture of which looks iden...
(Posted by rfgslc 9 years ago)
How To Open The Face Cover Of Pfaff 213?
I've looked for a secret lever to open the face cover for oiling, but cannot find it. Please help.
I've looked for a secret lever to open the face cover for oiling, but cannot find it. Please help.
(Posted by rfgslc 9 years ago)

Pfaff 362-261 Automatic Sewing Machine
i hope you can help me. I have a Vintage PFAFF 362-261 sewing machine that is in a mint condition in...
i hope you can help me. I have a Vintage PFAFF 362-261 sewing machine that is in a mint condition in...
(Posted by boancomputers 10 years ago)