1999 Mercury Villager Support Question
1999 Mercury Villager Support Question
Find answers below for this question about 1999 Mercury Villager.Need a 1999 Mercury Villager manual? We have 4 online manuals for this item!
Question posted by Anonymous-102442 on March 10th, 2013
Where Is The Camshaft Position Sensor Located
Ihooked up O B D 2 reader and got a read of camshaft position sensor and knock sensor
Current Answers
Related Manual Pages
Owner's Manual - Page 15
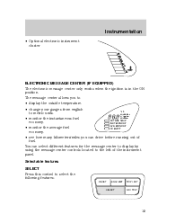
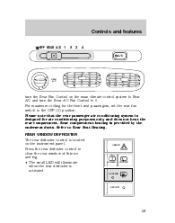
... message center allows you can select different features for the message center to display by using the message center controls located to the left of fuel. You can drive before running out of the instrument panel. INST ECONOMY AVG ECONOMY...
H
N O R M A L
C
ELECTRONIC MESSAGE CENTER (IF EQUIPPED) The electronic message center only works when the ignition is in the ON position.
Owner's Manual - Page 24
... system (if equipped) should be set to OFF, if rear heating is provided through the floor ducts located under the front seat that will reduce fogging on your windshield. After a few minutes, select any desired position. • To reduce humidity buildup inside the vehicle, don't drive with the climate control system in...
Owner's Manual - Page 35
...Airflow and temperature to OFF, if rear heating is provided through the floor ducts located under the front seat that will reduce fogging on your windshield. Operating tips &#... interfere with the climate control system in the OFF position. • Don't put objects under the front seats. After a few minutes, select any desired position. • To reduce humidity buildup inside the vehicle...
Owner's Manual - Page 39
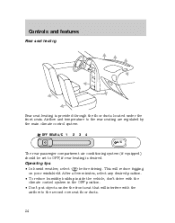
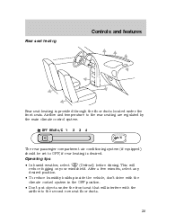
Rear compartment heating is located on the main climate control system to Rear A/C and turn the Rear A/C Fan Control to the OFF (0) position. Refer to clear the rear window of thin ice and fog. • The small LED will illuminate when the rear defroster is designed for the ...
Owner's Manual - Page 88
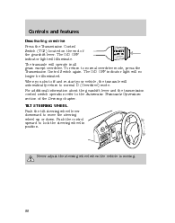
... D (Overdrive) mode. Push the control upward to move the steering wheel up or down. Controls and features
Deactivating overdrive Press the Transmission Control Switch (TCS) located on the end of the Driving chapter. TILT STEERING WHEEL Push the tilt steering wheel lever downward to lock the steering wheel in all gears...
Owner's Manual - Page 90
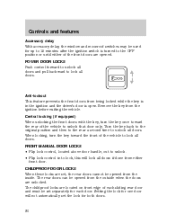
...switches may be used for up to 15 minutes after the ignition switch is turned to the OFF position or until either front door. POWER DOOR LOCKS Push control forward to unlock all doors and pull ... the lock for one door will lock all doors. FRONT MANUAL DOOR LOCKS • Flip lock control, located above door handle, out to unlock that door only. The rear doors can be set separately for both ...
Owner's Manual - Page 99
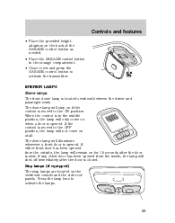
...Map lamps (if equipped) The map lamps are located on the back of the GARAGE control button as needed. • Place the GARAGE control button in the middle position, the lamp will only come on for 15... after the door is opened from the outside, the lamp will stay on when a door is located overhead between the driver and passenger seats. The dome lamp will remain on at all. The dome...
Owner's Manual - Page 108

... the inboard base of your vehicle which can be equipped with a 14 kg (30 lbs.) maximum capacity parcel shelf located behind the rear seat of the front seats.
Open the liftgate. 2. Position and slide the shelf into the left mounting bracket. 2.
Disconnect the net loop from the vehicle. LOC
108 Turn the...
Owner's Manual - Page 109
... seat. You MUST open the entire rear liftgate to gain access to the tether anchor located on the parcel shelf that may obstruct your vision or strike occupants of a sudden stop...properly use child safety tethers in the case of the cargo striking occupants in the rearmost/upright position when parcel shelf is permanently attached to the retainers underneath the shelf. Do not place people ...
Owner's Manual - Page 110
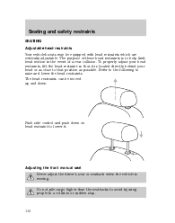
To properly adjust your head restraints, lift the head restraint so that position as close to avoid injuring people in the event of a rear collision. Do ... which are vertically adjustable. Push side control and push down . Refer to the following to lower it is located directly behind your head or as possible. Adjusting the front manual seat Never adjust the driver's seat or seatback...
Owner's Manual - Page 113
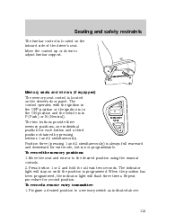
... by pressing buttons 1 and 2 simultaneously. MEMORY SEAT The two buttons provide three memory positions, one individual 2 position for second position. When the position has been programmed, the indicator light will stay on until the position is located on the inboard side of the driver's seat. Press button 1 or 2 and hold for exit mode, but is not...
Owner's Manual - Page 123
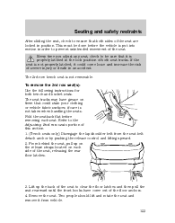
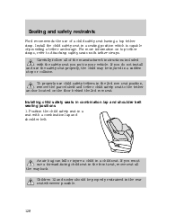
...any seat, check to prevent unintended movement of the seat. Lift up on the release straps located on them that it is not properly latched, it from the seat belt detach anchor by pushing...seat(s): Use the following instructions for both seat tracks. If the seat is properly latched in position. Fold the seatback flat before the vehicle is not removable. Remove the seat. The seat ...
Owner's Manual - Page 124
... drive and ride with your seatback upright and the lap belt snug and low across the hips.
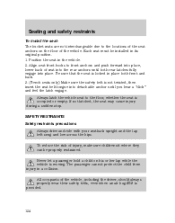
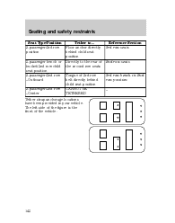
Position the seat in a collision. If not latched, the seat may cause injury during a sudden stop... Seating and safety restraints
To install the seat: The bucket seats are not interchangeable due to the locations of the seat anchors on his or her lap while the vehicle is moving. The passenger cannot...
Owner's Manual - Page 133
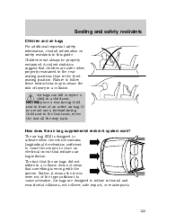
... bags can kill or injure a child in the front seating position. The air bag SRS is wrong with the system. The ... when the vehicle sustains longitudinal deceleration sufficient to cause the sensors to cause activation. How does the air bag supplemental restraint... restraints
Children and air bags For additional important safety information, read all the way back. Children must use a forward-facing...
Owner's Manual - Page 134
...force, there is designed to occupants who are not properly restrained or are otherwise out of position at the time of air bag deployment. The SRS consists of injury in a collision.... bag modules (which include the inflators and air bags), • one or more impact and safing sensors, • a readiness light • and the electrical wiring which may be replaced immediately. After air...
Owner's Manual - Page 138
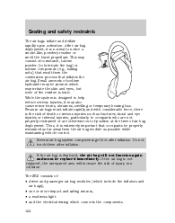
... properly use the safety seat properly, the child may be properly restrained in the 3rd row seat position, remove the parcel shelf and tether child safety seat to Attaching safety seats with the safety seat you...having a top tether strap. For more information on top tether straps, refer to the tether anchor located on the floor behind the 3rd row seat. An air bag can kill or injure a child ...
Owner's Manual - Page 142
... of 3rd row belt directly behind child seat position CANNOT BE TETHERED 3rd row bench in 2nd row position _
Tether strap anchorage locations have been provided in your vehicle. Seating and safety restraints
Seat Type/Position 3-passenger/3rd row position 2-passenger bench or bucket/2nd row child seat position 3-passenger/2nd row -Outboard 3-passenger/2nd row...
Owner's Manual - Page 175
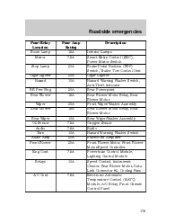
...), Power Mirror Switch Brake Pedal Position (BPP) Switch, Trailer Tow Control Unit Cigar Lighter Hazard Warning Flasher Switch, Anti-Theft Indicator Rear Powerpoint Rear Blower Motor Relay, Rear Blower Motor Front Wiper/Washer Assembly Rear Blower Motor Relay, Rear Blower Motor Rear Wiper/Washer Assembly Oxygen Sensor Radio Hazard Warning Flasher Switch...
Warranty Guide 5th Printing - Page 11
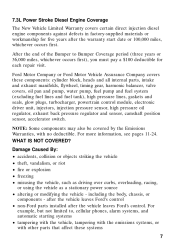
... tank), high pressure lines, gaskets and seals, glow plugs, turbocharger, powertrain control module, electronic driver unit, injectors, injection pressure sensor, high pressure oil regulator, exhaust back pressure regulator and sensor, camshaft position sensor, accelerator switch. WHAT IS NOT COVERED? 7.3L Power Stroke Diesel Engine Coverage The New Vehicle Limited Warranty covers certain direct...
Similar Questions

How To Bypass Knock Sensor On A 99 Merc. Villager
(Posted by Anonymous-170464 2 years ago)

Camshaft Position Sensor Location
where is the location of the camshaft position sensor?
where is the location of the camshaft position sensor?
(Posted by Treyes0924 2 years ago)

How To Install A Knock Sensor 1999 Mercury Villager
(Posted by ublack2 9 years ago)

Where The Camshaft Position Sensor Is Located On A 2000 Mercury Villager
(Posted by hthrejayr 9 years ago)

Where Is Knock Sensor Located On My 1999 Mercury Villager
(Posted by Gunnjche 10 years ago)