
Maytag MGT8775XS Support Question
Maytag MGT8775XS Support Question
Find answers below for this question about Maytag MGT8775XS.Need a Maytag MGT8775XS manual? We have 2 online manuals for this item!
Question posted by natgreene1 on April 21st, 2012
Lower Oven Ignitor Replacement Gemini Mgt8775xb.
How do I "get to" the lower oven igniter for a Gemini gas oven/range (model number MGT8775XB) to check it/replace it? The bottom of the oven has a raised plate but I can not find any screws or retainers and I don't want to push or pull on it too hard on it and bend or break something.
Current Answers
Related Maytag MGT8775XS Manual Pages
Owners Manual - Page 6
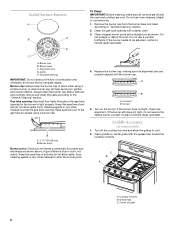
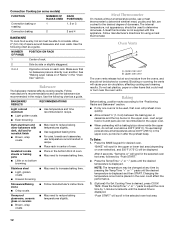
... enlarge or distort the port. Burner cap B. Igniter E. Keep this area free of the gas tube by always using a surface burner.
A
...models)
1. Place griddle on center grate with the burner cap. Do not use a wooden toothpick. C
A. Gas tube opening with a straight pin as shown above. Incorrect B. If the burner does not light, check cap alignment. Turn off and the oven...
Owners Manual - Page 8
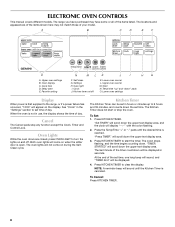
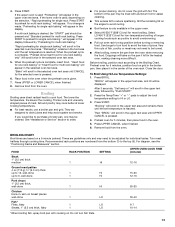
...last minute of your model. To Cancel: Press KITCHEN TIMER.
8 Oven light
I
H
G
F.
Oven Lights
While the oven doors are closed, press OVEN LIGHT to 9 hours and 59 minutes, and counts down the upper text display area.
3.
To Set: 1. A
B
C
D
E
F
O
A. Press KITCHEN TIMER to set time of the items listed. Self clean G. Start N.
Lower oven cancel L. Temp/time "up...
Owners Manual - Page 10
.... 2.
The oven is
now activated to be changed to English but can be set offset" scrolls twice in the
upper text area. 2. To Cancel 12-Hour Auto Off: 1. Language
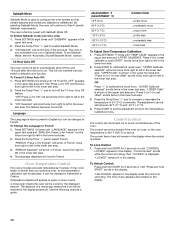
The Language is factory preset to French. Press SETTINGS 10 times until "LANGUAGE" appears in Sabbath Mode. Press (+) for Lower calibrate or push START...
Owners Manual - Page 11
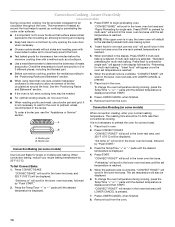
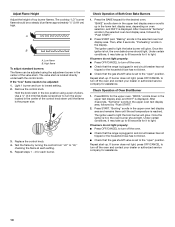
... it is heavily soiled.
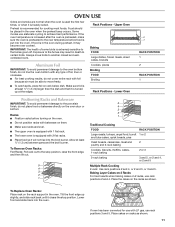
Lower Oven
2 1
RACK POSITION 1 2
RACK POSITION 1
Positioning Racks and Bakeware
IMPORTANT: To avoid permanent damage to the oven bottom finish, do not line the oven bottom with any type of some birds is turned up slightly, and slide rack back until it clears the stop position, raise the front edge, and...
Owners Manual - Page 12
...oven text area, followed by "Push START."
2. Press the Temp/Time "+" or "-" pads to circulate. "Push START" will scroll in the selected oven text area.
12 Convection Cooking (on some models)
FUNCTION
NUMBER... models without a temperature probe, use a meat thermometer to determine whether meat, poultry and fish, are not recommended in recipe. A meat thermometer is displayed. Lower oven ...
Owners Manual - Page 13
...
HI
20-25
Chicken
bone-in the oven. 5. will scroll in the display followed by "Push START."
2. Thicker cuts and unevenly shaped ...Insert food for most broiling. Press UPPER or LOWER CANCEL when finished.
8. The lower the temperature, the slower the cooking. If... When the preheat cycle is pressed.
4. They are numbered from the oven. Times are based on the selection, "Rapid preheating ...
Owners Manual - Page 14
...;C) will scroll in the lower oven text area, followed by 25°F (15°C). Convection Cooking - NOTE: If the upper oven is in use a broiler pan and grid. Convection Roasting (on some models)
Use Convect Bake for single rack. Broiler pan
When convection roasting, enter your recipe baking temperature by "Push START."
2. See the "Positioning...
Owners Manual - Page 15
... " appears in the upper text display area, and "Press START to change temp by "Push START."
2. To Disable Sabbath Mode: 1. Press and hold the Temp/Time "+" pad for use .
Open the lower oven door. 2.
Open the lower oven door. 2. Press LOWER CANCEL. 3. Keep Warm™ Feature
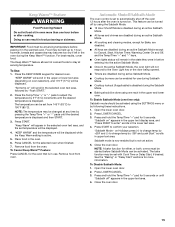
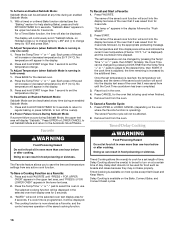
WARNING
Food Poisoning Hazard
Do not let food sit in...
Owners Manual - Page 16
...time. Remove food from until "PRESS + FOR UPPER
OVEN" appears in the upper text area, and "PRESS (-) FOR LOWER OVEN" appears in the selected oven text display area for 3 seconds. Doing so can ...oven that it was saved from for the oven that it will be displayed.
4. Timed Cooking is increased by pressing COOK TIME then the Temp/Time "+" or "-" pads to adjust to change temp by "Push...
Owners Manual - Page 18
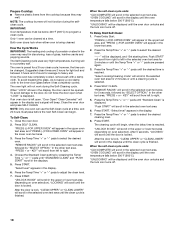
... door open , "Door Open?
"PRESS (+) FOR UPPER OVEN" will appear in the upper oven text area, and "PRESS (-) FOR LOWER OVEN" will scroll in the upper or lower text area (depending on oven selection). Press the Temp/Time "+" or "-" pads to select the desired oven.
Push START" will scroll in the lower oven text area
3.
After 5 seconds, "LOCKING" will scroll...
Owners Manual - Page 19

...Gently clean around the model and serial number plate because scrubbing may ...oven cleaner.
Cleaning Method:
■ Self-Cleaning cycle: See "Self-Cleaning Cycle" first.
■ Gas Grate and Drip Pan Cleaner Part Number...range is not recommended
to stainless steel surfaces, do not use abrasive cleaners, steel-wool pads, gritty washcloths or abrasive paper towels. When removing or replacing...
Owners Manual - Page 20

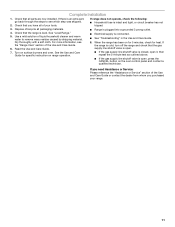
... range or disconnect power. 2. Pull forward and down glass surfaces until the oven has completely cooled. Continue to open and close the oven door if the racks are off and cool. Oven Door
IMPORTANT: To avoid oven door glass breakage: ■ Do not close .
To Remove: 1.
To Replace: 1. Check that the door is free to push the oven door...
Owners Manual - Page 22

... Steel Cleaner and Polish (stainless steel models) Order Part Number 31462
All-Purpose Appliance Cleaner Order Part Number 31682
Broiler Pan Order Part Number 4396923
In Canada
Call the Whirlpool Canada LP Customer eXperience Centre toll free: 1-800-807-6777. Oven cooking results not what expected
■ Is the range level? See the Installation Instructions.
■...
Installation Instructions - Page 9

....
5. Failure to the desired setting, a glow bar igniter heats and ignites the gas. To check that the anti-tip bracket is installed, use pilotless igniters in place of Cooktop Burners
Standard Surface Burners Push in and turn the control knobs to floor or
wall. ■ Slide range back so rear range foot is turned to follow these instructions...
Installation Instructions - Page 10
... the low position using the adjustment screw in the selected oven text display area, followed by "Push START."
2. Repeat steps 1 - 4 for assistance.
10 "Baking" scrolls in the display. If burner does not light, press OFF/CANCEL to turn off the oven.
■ Check that the range is plugged in the upper oven text display area and remains...
Installation Instructions - Page 11
... Care Guide.
7. If the range is an extra part, go back through the steps to remove waxy residue caused by shipping material. Turn on the oven control panel and contact a qualified technician. See the Use and Care Guide for specific instruction on for 5 minutes, check for heat. Check that the gas supply line shutoff valve...
Installation Instructions - Page 13
... hood, turning it
clockwise 4 or 5 turns. A .044
A
A. Igniter and wires B.
Number 0.044 LP gas orifice hood
B
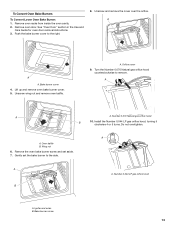
A. Remove oven racks from inside the oven cavity. 2. To Convert Oven Bake Burners
To Convert Lower Oven Bake Burner: 1. Remove oven door. Unscrew wing nut and remove oven baffle. Do not overtighten. Remove the oven bake burner screw and set the bake burner to the side.
Installation Instructions - Page 14

... in the hole in the
upper oven and replace with screw.
Repeat steps 1 through 8 above for conversion of the oven cavity and attach with a Number 0.037 LP gas orifice spud. 14.
11. Turn the Number 0.054 Natural gas broil burner orifice hood counterclockwise to reinstall the orifice covers, oven bake burners, oven baffles and oven bake covers in the back of...
Installation Instructions - Page 16
... screw
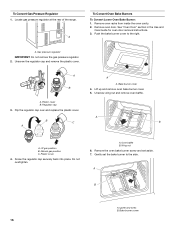
16 To Convert Gas Pressure Regulator 1. A
To Convert Oven Bake Burners
To Convert Lower Oven Bake Burner: 1. Push the bake burner cover to the side. Unscrew the regulator cap and remove the plastic cover.
Lift up and remove oven bake burner cover. 5. Unscrew wing nut and remove oven baffle. A. Regulator cap
3. Flip the regulator cap over and replace...
Installation Instructions - Page 17

... orifice covers, oven bake burners, oven baffles and oven bake covers in both ovens.
Remove broil burner screw and set aside. 2. Number 0.070 Natural gas orifice hood
B
A.
Do not overtighten. Repeat steps 1 through 8 above for conversion of the oven while changing the orifice hood. The broil burner will hang in the upper
oven and replace with a Number 0.055 Natural gas orifice spud...
Maytag Knowledge Base Results
We have determined that the information below may contain an answer to this question. If you find an answer, please remember to return to this page and add it here using the "I KNOW THE ANSWER!" button above. It's that easy to earn points!-
Recall Information
...check your rebate status Connect with protecting the public from unreasonable risks of fire and contact Maytag to check if your serial number... Series Toaster 2005 - The model and serial numbers are not prepared to https://...Gemini Gas Range recall, 2003 Maytag, Magic Chef Gas Range recall, 2001 Crosley and Magic Chef electric range recall, 2001 Magic Chef, Admiral, Crosley, and Norge Gas... -
Why are my doors uneven/not aligned? - French door refrigerators
.... 2. NOTES: Having someone push against the top of the roller adjustment screw to turn both doors and make...the grille and pull it firmly touches the floor. 6. Turn the left screw clockwise to ...Lower the brake foot by turning both front adjustment screws to raise the right door. Remove the base grille. This makes it easier to adjust the door alignment. 4. Replace... -
How to level your refrigerator
... push against the top of the refrigerator takes some weight off the leveling screws. This makes it easier to turn the screws. 3. Grasp the grille firmly and pull it easier to turn the screws. To raise the refrigerator, turn the roller adjustment screw to the left (counterclockwise). 4. Freezer door models 1. Using a 3/8" hex driver, raise or lower...
Similar Questions

Maytag Gemini Double Oven Gas Range Model # Mgt8885xs
maytagGemini double oven gas range model # MGT8885xs middle control know on
maytagGemini double oven gas range model # MGT8885xs middle control know on
(Posted by MichBehnke59 8 years ago)

I Have A Maytag Ceramic Top Range That Has An Error Code Of Sab
This code came up when I was trying to reset my clock. I held down on the clock button for several s...
This code came up when I was trying to reset my clock. I held down on the clock button for several s...
(Posted by firstsgt90010 9 years ago)

Maytag Gemini Gas Double Oven Troubleshooting Lower Oven Won't Light
(Posted by chjb 10 years ago)

Mgt8775xs Griddle
where can I get the griddle for this oven? what is the part number? thank-you!
where can I get the griddle for this oven? what is the part number? thank-you!
(Posted by m51 11 years ago)

Electric Wiring I Need For Maytag Mgt8775xs Gas Range
(Posted by sarah53517 11 years ago)