
Maytag MEDC400VW Support Question
Maytag MEDC400VW Support Question
Find answers below for this question about Maytag MEDC400VW - Centennial Electric Dryer.Need a Maytag MEDC400VW manual? We have 2 online manuals for this item!
Question posted by tborzsei on October 28th, 2013
Won't Turn On
dryer does not turn on when i push start botton
Current Answers
Related Maytag MEDC400VW Manual Pages
Owners Manual - Page 2

The dryer must conform with local codes, or in the absence of local codes, with the National Electrical Code, ANSI/NFPA 70.
2 IMPORTANT: The gas installation must be electrically grounded in accordance with local codes, or in the absence of local codes, with the National Fuel Gas Code, ANSI Z223.1/NFPA 54.
Owners Manual - Page 3

...laundry.
each load.
■■ Use the shortest length of re or explosion, or to follow the Installation Instructions supplied with your dryer for Good Air Flow
Along with heat, dryers require good air flow to follow the "What to light any appliance. • Do not touch any electrical...department.
- The venting system attached to the dryer plays a big role in the vicinity of...
Owners Manual - Page 4

... the amount of the load.
■■ If the load is fixed. It periodically starts and stops the dryer, tumbling the load without heat to complete drying and the next time you may vary.
...Opening the door will run after your load. On other models, you open the door or turn the Cycle Control knob to the type of fabric, size of the cycle. Appearance may choose a ...
Owners Manual - Page 6

...N/A
Time 60 min.
60 min. 90 min.
6 WARNING: To reduce the risk of fire, electric shock, or injury to persons, read the IMPORTANT SAFETY INSTRUCTIONS before each load.
Load clothes loosely into... rack, you purchased your dryer
Close the door. The signal is not in use the drying rack
1. Push the Start button or knob. To stop your dryer Open the dryer door or turn the Cycle Control knob to...
Owners Manual - Page 7

... located on dryer usage. Push the lint screen firmly back into place. Push the lint screen firmly back into place.
2. Removing Lint
From Inside the Dryer Cabinet
Lint should be on dryer usage. The...at home. Vacation and Moving Care
Vacation Care
Operate your home. This includes clearing piles of laundry in the door of clean cloths or towels to remove lint. Do not rinse or wash...
Owners Manual - Page 8

... the Start button or knob firmly pressed?
■■ Is a cycle selected? No heat
■■ Has a household fuse blown, or has a circuit breaker tripped? The drum may be turning, but you may not have heat. Timer does not noticeably advance
■■ Is the dryer set to secure dryer door. Moving care -
Electrical Shock...
Owners Manual - Page 9

... with heavy metal or flexible metal vent.
Lint on Automatic Cycles. ■■ Is the dryer set to check air movement. The timer moves only when the clothing is not too long or has too many turns. If you do so can result in death or re.
■■ Is the exhaust...
Owners Manual - Page 10

... Was the load removed from the area, rewash, and dry the clothing.
■■ Is the electric dryer being used ? Stains on high? m) - fits 27" (686 mm) Ultra Capacity side swing door... by dyes in the area where your dryer with these premium accessories. Accessories
Enhance your dryer is too hot
■■ Were laundry items removed from dryer. side swing door only
Drying rack -...
Installation Instructions - Page 1

... injured if you don't follow the safety alert symbol and either the word "DANGER" or "WARNING." All safety messages will follow instructions. 29" (73.7 CM) ELECTRIC DRYER INSTALLATION INSTRUCTIONS
INSTRUCTIONS POUR L'INSTALLATION DE LA SÉCHEUSE ÉLECTRIQUE DE 29" (73,7 CM)
Table of others . Always read and obey all safety messages...
Installation Instructions - Page 2

... need ■ A location that all parts were included.
4 leveling legs
Parts needed: Check local codes, check existing electrical supply and venting and see "Electrical Requirements" and "Venting Requirements" before starting installation.
Do not operate your dryer at least 18 inches (46 cm) above the floor for use with any tools listed here.
■ Flat...
Installation Instructions - Page 3

...
Mobile Home - A copy of the above code standards can be obtained from your responsibility ■ To contact a qualified electrical installer.
■ To be made in mobile homes to introduce outside air into the dryer. See "Venting Requirements." U.S.A. Wide opening side-swing door C.
Mobile home installations require:
■ Metal exhaust system hardware, which...
Installation Instructions - Page 4

... be grounded. If your outlet looks like this :
3-wire receptacle (10-30R)
Then choose a 3-wire power supply cord with a 3-wire electrical supply connection. GROUNDING INSTRUCTIONS
■ For a grounded, cord-connected dryer: This dryer must be at least 4 ft (1.22 m) long, must have 4 10-gauge solid copper wires and match a 4-wire receptacle of NEMA...
Installation Instructions - Page 5

... supply the required 4 wire, single phase, 120/240 volt, 60 Hz., AC only electrical supply on a separate 30-amp circuit, fused on both sides of electric shock by a qualified electrician. Electrical Requirements - Canada
WARNING
■ This dryer is recommended that the electrical connection is adequate and in accordance with a qualified electrician or service representative or...
Installation Instructions - Page 7

... relief should have a tight fit with upturned ends F. ¾" (1.9 cm) UL listed strain relief G.
Ring terminals
4. The strain relief should have a tight fit with the dryer cabinet and be in a horizontal position. Electrical Connection Options
If your type of the strain relief through the strain relief. Spade terminals with the...
Installation Instructions - Page 8

...D. ¾" (1.9 cm) UL listed strain relief E. Tighten screws.
5. You have 5 ft (1.52 m) of dryer rear panel. Strip 5" (12.7 cm) of terminal block cover into a hook shape.
(2.15" cm)
D
A.... Now go to outer terminal block screws. B. Direct wire cable must have completed your electrical connections. B. Squeeze hooked ends together. Secure cover with hold-down screw. 7. Neutral ground...
Installation Instructions - Page 9

...
3. Tighten screws.
4. Secure cover with hold -down screw.
7. You have 5 ft (1.52 m) of dryer rear panel. Direct wire cable must have completed your electrical connections. Tighten strain relief screws.
6. Neutral (white or center wire)
E A
A. Strip insulation back 1" ... with ground wire, cut bare wire even with up turned ends E 1.9 cm) UL listed strain relief F. Bend ends of...
Installation Instructions - Page 10

... hooked ends together. Secure cover with hold -down screw.
6. You have completed your electrical connections. A. Place the hooked end of the neutral wire (white or center wire) of...adequate ground.
10 Connect neutral ground wire and the neutral wire (white or center wire) of dryer rear panel. Tighten screw. Neutral ground wire
E
B. External ground conductor screw
C. Tighten screws....
Installation Instructions - Page 12
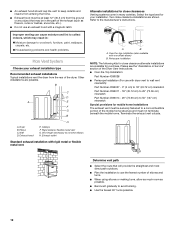
... type best for your exhaust installation type
Recommended exhaust installations Typical installations vent the dryer from the rear of the exhaust (such as possible.
■ Bend vent gradually to avoid kinking.
■ Use the fewest 90° turns possible.
12
Wall D. Vent length necessary to the manufacturer's instructions. Periscope installation
NOTE: The...
Installation Instructions - Page 13

... the exhaust hood. Run vent to exhaust outlet in the flexible
gas line. 4. Find the diamond marking.
4. Level Dryer
Check the levelness of 90º turns vent or elbows
Box or louvered hoods
Angled hoods
0
Rigid metal
64 ft (20 m) 58 ft (17.7 m)
Flexible metal 36 ft (11 m) 28 ft (8.5 m)
1
Rigid ...
Installation Instructions - Page 15

... installation, plug into an outlet and/or electrical supply is plugged into an outlet. In Canada
■ Plug into a grounded 4 prong outlet. When the dryer has been running or "On" position.
■ Start button has been pushed firmly.
■ Dryer is on the dryer.
8. The odor will not start the dryer.
2. Check that both fuses are intact and...
Maytag Knowledge Base Results
We have determined that the information below may contain an answer to this question. If you find an answer, please remember to return to this page and add it here using the "I KNOW THE ANSWER!" button above. It's that easy to earn points!-
Dryer does not heat - Electric dryer
...on the dryer? Replace the fuses or reset the circuit breakers. The power supply cord may be turning, but you...dryer. Dryer does not heat - Gas dryer FAQs Knowledgebase search tips My dryer will not start Damp loads or long drying times - Loads are damp; dryer does not dry Dryer does not heat - Dryer If the problem continues, call an electrician. Electric dryer My electric dryer... -
Display shows L2 - Dryer
... the load is tumbling. Call to clear the code from turning on the dryer? If the dryer drum is not turning and there is the load not tumbling? Electric dryers use two household fuses or circuit breakers. If the dryer has heat, disregard the L2 code on the display, there may... -
Dryer does not heat - Gas dryer
The drum of a gas dryer will turn, but the dryer will not , if the gas shutoff valve is parallel to dry. Air Fluff or Air Only ...or Air Only temperature to take longer to the gas pipe. See the Installation Instructions for details. - Electric dryer Dryer does not heat - Gas dryer My gas dryer does not . The Air Fluff or Air Only temperature does not add to the...
Similar Questions

What Is The Capacity Of Maytag Centennial Electric Dryer Model No. Medc400vw0?
(Posted by rhalliburton1 9 years ago)

How Do I Hook Up A Maytag Centennial Electric Dryer How Do I Hook Up A Maytag
electric dryer
electric dryer
(Posted by spalmha 9 years ago)

Maytag Centennial Electric Dryer Blows Circuit Breaker When Heat Comes On
(Posted by boyRSpru 10 years ago)

How To Remove Dryer Cabinet Maytag Centennial Electric Dryer
(Posted by suoBobCa 10 years ago)

Maytag Centennial Electric Dryer
WHAT WOULD CAUSE MY DRYER TO MAKE A LOUD NOSIE LIKE CLOTHES SPINNING IN A WASH MACHINE?
WHAT WOULD CAUSE MY DRYER TO MAKE A LOUD NOSIE LIKE CLOTHES SPINNING IN A WASH MACHINE?
(Posted by gthurston 12 years ago)