Get support for Maytag MEDC400VW - Centennial Electric Dryer

Maytag MEDC400VW Support Question

Maytag MEDC400VW Support Question

Find answers below for this question about Maytag MEDC400VW - Centennial Electric Dryer.
Need a Maytag MEDC400VW manual? We have 2 online manuals for this item!
Question posted by swpalmer1 on May 27th, 2011

Dryer Door Reversal

Trying to reverse door on Maytag MEDC400VW0. How do I swap over door opener pull handle?

Current Answers

Answer #1: Posted by Anonymous-39256 on October 1st, 2011 7:30 AM
Anonymous-39256

Member since:
October 1st, 2011

Points: 20
110
points
The door has two pieces.  Remove the four screws around the edge of the door and rotate the outer piece 180 degrees and reatach the screws.

Related Maytag MEDC400VW Manual Pages

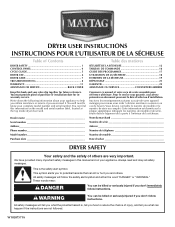
Owners Manual - Page 1

...Adresse Numéro de téléphone Numéro de modèle Date d'achat DRYER SAFETY Your safety and the safety of injury, and tell you what can happen if the instructions ... messages in this manual and on the model and serial number label, located at the top inside dryer door well. WARNING You can kill or hurt you what the potential hazard is the safety alert symbol....
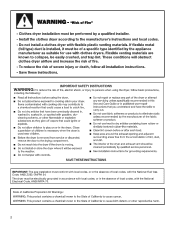
Owners Manual - Page 2

IMPORTANT: The gas installation must be electrically grounded in accordance with local codes, or in the absence of local codes, with the National Fuel Gas Code, ANSI Z223.1/NFPA 54. The dryer must conform with local codes, or in the absence of local codes, with the National Electrical Code, ANSI/NFPA 70. 2
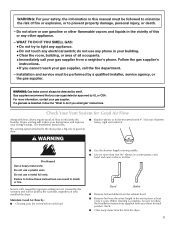
Owners Manual - Page 3

...SMELL GAS: • Do not try to prevent property damage, personal injury, or death....approved by the customer, regardless of who installed the dryer. WARNING: Gas leaks cannot always be detected by .... The venting system attached to efficiently dry laundry. Do not use a metal foil vent....any appliance. • Do not touch any electrical switch; Proper venting will be paid by UL ...
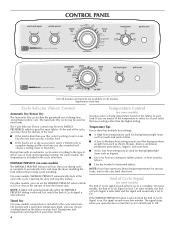
Owners Manual - Page 4

...the fabrics in the cycle selections. It periodically starts and stops the dryer, tumbling the load without heat to More Dry. Opening the door will depend on some models, WRINKLE PREVENT automatically starts at the end... rather than you like, select a setting closer to Less Dry the next time you open the door or turn the Cycle Control knob to complete drying and the next time you may vary...
Owners Manual - Page 6

... hang over the edge of fire, electric shock, or injury to medium-weight fabrics. 4. Load clothes loosely into the dimples on the dryer opening. 2. For best results, allow items.... 8. To stop your dryer Open the dryer door or turn the Cycle Control knob to follow these instructions can stop your dryer anytime during a cycle. To find out whether your dryer. Select a Timed Dry...
Owners Manual - Page 7

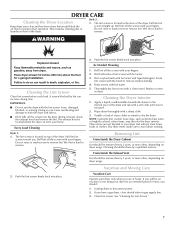
...brightly colored cotton items, may discolor the dryer interior. This includes clearing piles of laundry in the door of the drum and rub with a ...dryer usage. If you . Every Load Cleaning Style 1: 1. Cleaning the Dryer Interior 1. Wipe drum thoroughly with your fingers. Clean lint screen. Pull the lint screen toward you have a gas dryer, close shutoff valve in dryer. Unplug dryer...
Owners Manual - Page 8

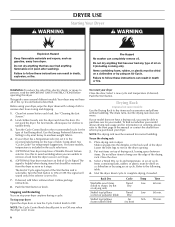
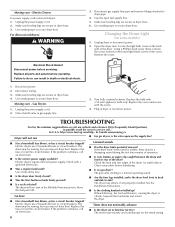
...Make sure leveling legs are secure in dryer base. 6. Open the dryer door. Locate the light bulb cover on some models) 1. Close shutoff valve in death or electrical shock. 1. In U.S.A. Move the dial... corner of the dryer? In Canada www.maytag.ca Dryer will not run ■■ For gas dryers, is the dryer level front to back and side to secure dryer door. The drum may...
Owners Manual - Page 9

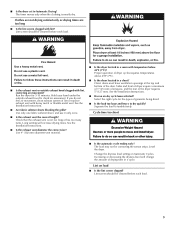
... exhaust vent or outside exhaust hood to dry quickly? Check that the exhaust vent is mostly dry. Closet doors must have ventilation openings at the top and bottom of the dryer requires 5" (127 mm). Level the dryer. Lint screen should be cleaned before each load. 9 Failure to follow these instructions can result in a room...
Owners Manual - Page 10

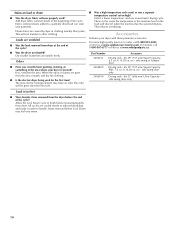
...electric dryer being used ? If so, ventilate the area. ft. (0.18 cu. side swing or hamper door Drying rack - side swing door only Drying rack - fits 27" (686 mm) Ultra Capacity side swing door...; Was the dryer overloaded? The odor will not transfer to handle. Accessories Enhance your dryer is too hot ■■ Were laundry items removed from dryer. Stains on high? m) -...
Installation Instructions - Page 1

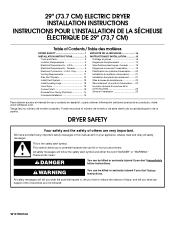
... Vent System 12 Install Vent System 13 Install Leveling Legs 13 Level Dryer 13 Connect Vent 13 Reverse Door Swing (Optional 14 Complete Installation 15 SÉCURITÉ DE LA... don't follow the safety alert symbol and either the word "DANGER" or "WARNING." U.S.A 3 Electrical Requirements - All safety messages will tell you what can kill or hurt you don't immediately follow ...
Installation Instructions - Page 2

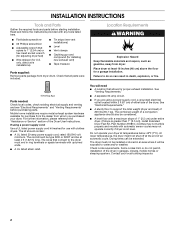
... installing new exhaust vent) ■ Tape measure Parts supplied: Remove parts package from dryer. If using a power supply cord, a grounded electrical outlet located within 2 ft (61 cm) of either side of the dryer in an area where it will need ■ A location that opens to 1" (2.54 cm) or hex-head socket wrench (for adjusting...
Installation Instructions - Page 3

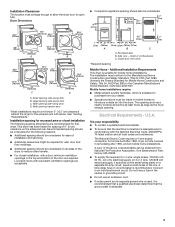
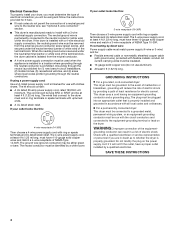
...in remodeling after 1996, and all mobile home installations. Louvered doors with equivalent ventilation openings are required. Electrical Requirements - The National Electric Code requires a 4-wire supply connection for the exhaust vent with the National Electrical Code, ANSI/NFPA 70-latest edition and all sides of the dryer to reduce noise transfer. ■ For closet installation, with...
Installation Instructions - Page 4

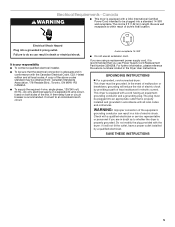
.... The plug must be plugged into an appropriate outlet that connect to the neutral conductor (white wire) within the dryer. If the dryer is prohibited. If using and follow the instructions provided for electric current. If your outlet looks like this : 3-wire receptacle (10-30R) Then choose a 3-wire power supply cord with ring...
Installation Instructions - Page 5

... Part Number 3394208. Be sure wall receptacle is recommended. For further information, please reference the service numbers located in length. Electrical Requirements - GROUNDING INSTRUCTIONS ■ For a grounded, cord-connected dryer: This dryer must be plugged into a standard 14-30R wall receptacle. A time-delay fuse or circuit breaker is within reach of least...
Installation Instructions - Page 7

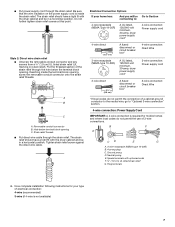
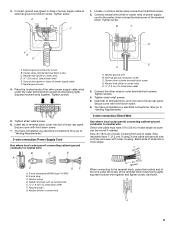
... opening. Tighten strain relief screw against the direct wire cable. Ring terminals 4. Do not further tighten strain relief screws at this point. Electrical Connection Options If your type of electrical ... disconnect or circuit breaker box* A UL listed, 120/240-volt minimum, 30-amp, dryer power supply cord* 4-wire connection: Direct Wire 3-wire connection: Power supply cord 3-wire...
Installation Instructions - Page 8

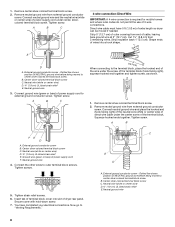
... the hooked end (hook facing right) of the neutral wire (white or center wire) of extra length so dryer can be moved if needed. You have 5 ft (1.52 m) of direct wire cable under center, silvercolored terminal block screw... go to outer terminal block screws. Direct wire cable must have completed your electrical connections. Remove neutral ground wire from external ground conductor screw.
Installation Instructions - Page 9

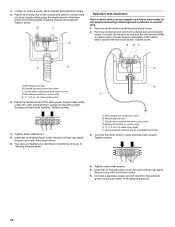
...cover into slot of dryer rear panel. Direct wire cable must have completed your electrical connections. Tighten screw. Insert tab of terminal block cover into slot of dryer rear panel. Spade terminals.... Tighten screw. Squeeze hooked ends together. Tighten screws. 5. You have completed your electrical connections. If using 3-wire cable with ground wire, cut bare wire even with hold...
Installation Instructions - Page 10

... silver-colored terminal block screw D. Insert tab of terminal block cover into slot of dryer rear panel. Now go to outer terminal block screws. Neutral ground wire C. Tighten screws. 4. ... adequate ground. 10 Secure cover with hold -down screw. 6. You have completed your electrical connections. Remove center silver-colored terminal block screw. 2. Tighten screws. 4. Place the ...
Installation Instructions - Page 14

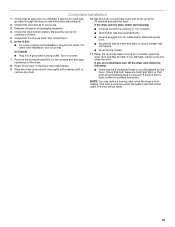
... door panel so handle is on dryer, grasp sides of outer door A and gently lift to separate it is at top, bottom and side of slots. Position door so large end of dryer. Tighten screws. Insert and tighten top screws in hinges. 7. Remove door strike plug (B). Reverse Door Swing (Optional) You can change your door swing from a right-side opening to door...
Installation Instructions - Page 15

...the dryer is level. Read "Dryer Use" in a running for 5 minutes, open the dryer door and feel heat, turn on a full heat cycle (not an air cycle) for the dryer. ...Dryer is plugged into an outlet and/or electrical supply is on. ■ Household fuse is intact and tight, or circuit breaker has not tripped. ■ Dryer door is closed. 11. The odor will not start the dryer. 2. If the dryer...

Maytag Knowledge Base Results

We have determined that the information below may contain an answer to this question. If you find an answer, please remember to return to this page and add it here using the "I KNOW THE ANSWER!" button above. It's that easy to earn points!

  • Recall Information
    ...and Magic Chef electric range recall, 2001 Magic Chef, Admiral, Crosley, and Norge Gas Dryer recall, 1997 Maytag brand Dishwasher recall, 1995 Other Whirlpool Corporation Product Recalls Single Door, Frost-Free... sell or re-sell this press release and recall information at top of the door opening. contributed significantly to protecting consumers and families from over the past 30 years. ...
  • Door opens in the wrong direction - Top freezer
    ...Open refrigerator door and remove base grille from the bottom front of refrigerator door. Bottom hinge         Door changes Remove the door hinge-hole plug from the cabinet. Door reversals...dryer does not dry Product Literature (Use & Care, Parts Lists, etc) Door opens in place. Open the refrigerator door... door changes Remove freezer door handle assembly as ...
  • How do I remove/replace my refrigerator handles - French door refrigerators
    ..., reverse the directions. Firmly grasp the handle and slide it to tighten loose handles. Top freezer Different types of the handle, slide the handle upward, and pull the handle straight out from the door. NOTE: There are two screws at each Phillips-head screw is required for reattaching the handles. See Plastic Handle graphics 1 and 2. Purchasing accessories or parts Door opens in...

Similar Questions

Ask a New Question
Use the box below to post a new question about this Maytag product .
Points & Prizes
  • You can earn points for nearly everything you do on HelpOwl.com
  • You can trade in those points for gift cards at leading retailers such as Amazon.com and Walmart
  • It's that simple!
See How it Works
Create a Free Account

Maytag Manuals

Find free Maytag MEDC400VW - Centennial Electric Dryer manuals and user guides available at ManualOwl.com. Try out our unique manual viewer allowing you to interact with manuals from directly within your browser!

Maytag Reviews

View thousands of Maytag user reviews and customer ratings available at ReviewOwl.com.

Contact Information

Complete Maytag customer service contact information including steps to reach representatives, hours of operation, customer support links and more from ContactHelp.com.

Scoreboard Ratings

See detailed Maytag customer service rankings, employee comments and much more from our sister site.

Maytag Recalls

Find comprehensive Maytag recall information updated hourly on RecallOwl.com.