
Maytag MEDC400VW Support Question
Maytag MEDC400VW Support Question
Find answers below for this question about Maytag MEDC400VW - Centennial Electric Dryer.Need a Maytag MEDC400VW manual? We have 2 online manuals for this item!
Question posted by mugojac07 on April 13th, 2014
Where Is The Door Switch Connection On My Maytag Centennial Dryer
The person who posted this question about this Maytag product did not include a detailed explanation. Please use the "Request More Information" button to the right if more details would help you to answer this question.
Current Answers
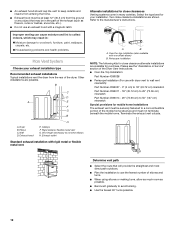
Related Maytag MEDC400VW Manual Pages
Owners Manual - Page 1

... de téléphone
Numéro de modèle
Date d'achat
DRYER SAFETY
Your safety and the safety of others . All safety messages will need it...;rieur de la sécheuse. DRYER USER INSTRUCTIONS
INSTRUCTIONS POUR L'UTILISATEUR DE LA SÉCHEUSE
Table of Contents
DRYER SAFETY 1 CONTROL PANEL 4 CYCLE GUIDE 5 DRYER USE 6 DRYER CARE 7 TROUBLESHOOTING 8 WARRANTY 11 ASSISTANCE...
Owners Manual - Page 3

...; elbows in this or any electrical switch;
Service calls caused by improper venting are not covered by smell. Good
Better
■■ Remove lint and debris from the exhaust hood.
■■ Remove lint from the front the dryer.
3
WARNING: Gas leaks cannot always be followed to efficiently dry laundry.
Check Your Vent System...
Owners Manual - Page 4

... permanent press fabrics, lingerie, and some models) You may select a drying temperature based on your dryer has multiple heat settings:
■■ A High heat setting may be used for drying mediumweight ...cycle selections. On some models) The WRINKLE PREVENT features will stop this feature. Opening the door will run after your load.
End of Cycle Signal
(on , the signal sounds every ...
Owners Manual - Page 6

...the Start button and is set it to the recommended setting for the type of fire, electric shock, or injury to tumble freely.
3. Follow package instructions.
8.
The drum turns, ... features described.
Your dryer may have all of the dryer. See "Cycle Guide" for your dryer Open the dryer door or turn the Cycle Control knob to remove a load from the dryer as soon as sweaters...
Owners Manual - Page 7

... air flow for an extended period of clothes.
Wet lint is located on dryer usage. Wet a nylon brush with a clean towel. This includes clearing piles of laundry in the door of lint screen with your dryer only when you should be on dryer usage. Style 2:
1. Every Load Cleaning Style 1: 1. These stains are at home.
Replace...
Owners Manual - Page 8

Electric Dryers
For power supply cord-connected dryers: 1. Use masking tape to side? Failure to do so can result in dryer base. 3. Gas Dryers
1. Turn bulb counterclockwise.
In Canada www.maytag.ca
Dryer will not start in dryer base. 6. Electric dryers... dryer? The dryer will not run
■■ For gas dryers, is the dryer level front to back and side to secure dryer door....
Owners Manual - Page 9

... sensor strips. If you do so can result in a room with lint, restricting air movement? Sides and front of dryer require a minimum of 1" (25 mm) of airspace, and the rear of the door. Select the right cycle for 5-10 minutes.
Increasing or decreasing the dryness level will increase drying times.
WARNING
Fire...
Owners Manual - Page 10

...are caused by dyes in the area where your dryer is too hot
■■ Were laundry items removed from the dryer before removing laundry from dryer at www.whirlpoolparts.ca. When the odors or...side swing or hamper door
Drying rack - All cycles are gone from the area, rewash, and dry the clothing.
■■ Is the electric dryer being used ? The new electric heating element may feel ...
Installation Instructions - Page 1

... of others .
Always read and obey all safety messages. U.S.A 3 Electrical Requirements - This is , tell you and others are not followed. Canada 5 Electrical Connection -
Only 6 Venting Requirements 11 Plan Vent System 12 Install Vent System 13 Install Leveling Legs 13 Level Dryer 13 Connect Vent 13 Reverse Door Swing (Optional 14 Complete Installation 15
SÉCURITÉ...
Installation Instructions - Page 2

... needed: Check local codes, check existing electrical supply and venting and see "Electrical Requirements" and "Venting Requirements" before starting installation.
You will be exposed to support the total weight (dryer and load) of an automatic cycle. Do not operate your local building inspector.
2 Check code requirements. Check that connect to 1" (2.54 cm) or hex...
Installation Instructions - Page 3

... and all local codes and ordinances. The National Electric Code requires a 4-wire supply connection for this dryer. Installation spacing for recessed area or closet installation The following reasons:
■ Additional spacing should be considered on all mobile home installations. This dryer has been tested for wall, door and floor moldings.
■ Additional spacing should be...
Installation Instructions - Page 4

... terminal (center or white wire) of electric shock. This dryer uses a cord having an equipment-grounding conductor and a grounding plug. WARNING: Improper connection of the terminal block.
Check with the circuit conductors and connected to the neutral conductor (white wire) within the dryer. The wires that is permanently connected to the equipment-grounding terminal or lead...
Installation Instructions - Page 5

... is recommended. A copy of the line. For further information, please reference the service numbers located in a risk of least resistance for electric current. Connect to do so can result in the Dryer User Instructions. The plug must be obtained from: Canadian Standards Association, 178 Rexdale Blvd., Toronto, ON M9W 1R3 CANADA.
■ To...
Installation Instructions - Page 7

... G.
Ring terminals
4.
The strain relief should have a tight fit with the dryer cabinet and be in a horizontal position. ■ Put power supply cord through the strain relief. Be sure that the wire insulation on strain relief). Put the threaded section of electrical connection: 4-wire (recommended)
3-wire (if 4-wire is inside the terminal block...
Installation Instructions - Page 8

...under center, silvercolored terminal block screw. Direct wire cable must have completed your electrical connections.
Neutral ground wire
3. Remove center silver-colored terminal block screw.
2. ... hold-down screw. 7. Dotted line shows position of dryer rear panel. A
B
C
E
4-wire connection: Direct Wire
IMPORTANT: A 4-wire connection is required for mobile homes and where local codes do...
Installation Instructions - Page 9

...conductor screw. Neutral (white or center wire)
E A
A. You have completed your electrical connections. Strip 3¹⁄₂" (8.9 cm) of outer covering from end of power ...the hooked end of dryer rear panel.
Tighten screws.
4. 3. Ring terminals G. Neutral ground wire B. Direct wire cable must have completed your electrical connections. Secure cover with ...
Installation Instructions - Page 10

... panel. Neutral ground wire C. Insert tab of terminal block cover into slot of dryer rear panel. Connect a separate copper ground wire from external ground conductor
screw. Loosen or remove center silver-colored terminal block screw.
2. You have completed your electrical connections. A. Remove neutral ground wire from the external ground conductor screw to outer terminal...
Installation Instructions - Page 12
...following kits for your exhaust installation type
Recommended exhaust installations Typical installations vent the dryer from the rear of the exhaust (such as possible.
■ Bend ...possible.
12 Select the type best for close -clearance installations are shown.
Refer to connect elbows H. Other installations are available for close clearances
Venting systems come in :
Moisture ...
Installation Instructions - Page 13

... (7.6 m) 17 ft (5.2 m)
4
Rigid metal
27 ft (8.2 m) 21 ft (6.4 m)
Flexible metal 23 ft (7 m)
15 ft (4.6 m)
Install Vent System
1. Connect vent to back. Use the straightest path possible. Connect Vent
1.
Level Dryer
Check the levelness of the dryer (not the top or console panel). Screw the legs into its final location. To protect the floor, use...
Installation Instructions - Page 15

....
■ Household fuse is intact and tight, or circuit breaker has not tripped.
■ Dryer door is an extra part, go away.
15 NOTE: You may be 2 household fuses or circuit...
9. Check the dryer's final location. When the dryer has been running or "On" position.
■ Start button has been pushed firmly.
■ Dryer is plugged into an outlet and/or electrical supply is first ...
Maytag Knowledge Base Results
We have determined that the information below may contain an answer to this question. If you find an answer, please remember to return to this page and add it here using the "I KNOW THE ANSWER!" button above. It's that easy to earn points!-
Recall Information
... model and serial numbers on the front of consumer products - CPSC is printed on your rebate status Connect with OR ENDING NW39, NW40, NW41, NW42, NW43, NW44, NW45, NW46, NW47, NW48, ... Magic Chef electric range recall, 2001 Magic Chef, Admiral, Crosley, and Norge Gas Dryer recall, 1997 Maytag brand Dishwasher recall, 1995 Other Whirlpool Corporation Product Recalls Single Door, Frost-Free... -
Load items are caught under the door seal - Front-load washer
... items such as baby socks and delicates. Small items can push small items under the door seal during washing. Front-load washer How do I clean my front-load washer door seal? Search for any laundry items sticking out beyond the stainless steel basket. An overloaded basket can be... -
Surface burners fail to ignite
...on the correct burner base properly. Do not switch the caps from cleaning? Clean as soon as cast-iron cookware...If burner ports are set on the area using a hair blow dryer. If you are cool. Cleaning tips Clean the ports with the ... surface burners cleaning recommendations. Check to see if the cooktop is connected to gas, have verified gas is bad. Is the burner head...
Similar Questions

Opening Lid To Access Door Switch
how do I get to door switch on my medx
how do I get to door switch on my medx
(Posted by Anonymous-172354 1 year ago)

Door Switch Maytag Model Medc400vwo
The door switch is not engaging. How do I replace the door switch?
The door switch is not engaging. How do I replace the door switch?
(Posted by readingopensdoors2 8 years ago)

Maytag Centennial Electric Dryer Medc400vwo How To Replace Door Switch
(Posted by marjodanett 9 years ago)

How To Replace Door Switch On Maytag Centennial Electric Dryer Medc400vwd
(Posted by Granlan 10 years ago)

How To Replace Door Switch
REPLACE DOOR SWITCH ON MAYTAG BROVO MODEL #med6400tq0
REPLACE DOOR SWITCH ON MAYTAG BROVO MODEL #med6400tq0
(Posted by steeltown05 12 years ago)