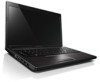
Lenovo G580 Support Question
Lenovo G580 Support Question
Find answers below for this question about Lenovo G580.Need a Lenovo G580 manual? We have 1 online manual for this item!
Current Answers
Answer #1: Posted by tintinb on April 1st, 2013 12:58 AM
tintinb

Member since:
October 26th, 2012 Points: 7,056,550

Member since:
October 26th, 2012 Points: 7,056,550
Based on my research, your Lenovo G580 has a Windows 8 Operating System. To remove a user account from Windows 8 OS, please follow the detailed instructions provided in the video tutorials below.
- Windows 8 - Add/Delete/Modify User Accounts [Tutorial]
- Windows 8 - How to Remove a User Account
- How to: Delete User Account in Windows 8
If you have more questions, please don't hesitate to ask here at HelpOwl. Experts here are always willing to answer your questions to the best of our knowledge and expertise.
Regards,
Tintin
Related Lenovo G580 Manual Pages
User Guide - Page 1
Lenovo G480/G485/ G580/G585/G780
User Guide V1.0
Read the safety notices and important tips in the included manuals before using your computer.
User Guide - Page 2
... guide. • The illustrations used in Contract No. If you are using other operating systems, some operations may include features that you are for Lenovo G580 unless otherwise stated. • The illustrations in this guide are using other Windows operating system, some operations may not apply to you are common to...
User Guide - Page 3
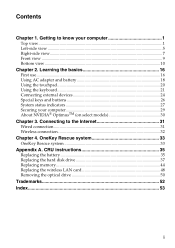
CRU instructions 35
Replacing the battery 35 Replacing the hard disk drive 37 Replacing memory ...44 Replacing the wireless LAN card 48 Removing the optical drive 50
Trademarks 52 Index...53
i Connecting to know your computer 29 About NVIDIA® OptimusTM (on select models 30
Chapter 3. OneKey Rescue ...
User Guide - Page 6
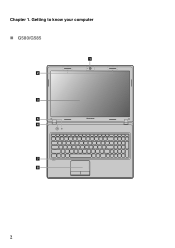
Chapter 1. Getting to know your computer
„ G580/G585
1 2 3 5 4
7 8
2
User Guide - Page 9
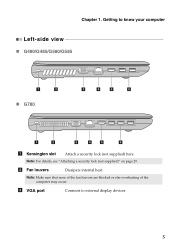
... fan louvers are blocked or else overheating of the computer may occur. c VGA port
Connects to know your computer
Left-side view
„ G480/G485/G580/G585
1
2
„ G780
3
4
5
6
1
2
3
4
5
6
a Kensington slot
Attach a security lock (not supplied) here. b Fan louvers
Dissipate internal heat.
Getting to external display devices.
5 Note: For details, see...
User Guide - Page 11
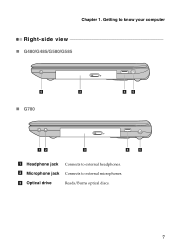
b Microphone jack Connects to external headphones. c Optical drive
Reads/Burns optical discs.
7 Getting to know your computer
Right-side view
„ G480/G485/G580/G585
6
3
„ G780
45
12
3
4
5
a Headphone jack Connects to external microphones.
Chapter 1.
User Guide - Page 13
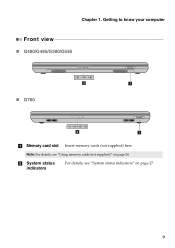
b System status indicators
For details, see "Using memory cards (not supplied)" on page 27.
9 Note: For details, see "System status indicators" on page 24.
Getting to know your computer
Front view
„ G480/G485/G580/G585
„ G780
2
1
2
1
a Memory card slot Insert memory cards (not supplied) here. Chapter 1.
User Guide - Page 16

Getting to know your computer
„ G580/G585
1
2
3
5
4
5
12 Chapter 1.
User Guide - Page 20
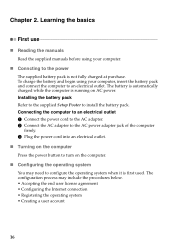
... may include the procedures below. • Accepting the end user license agreement • Configuring the Internet connection • Registering the operating system • Creating a user account
16 To charge the battery and begin using your computer, insert the battery pack and connect the computer to install the battery pack. The configuration...
User Guide - Page 23
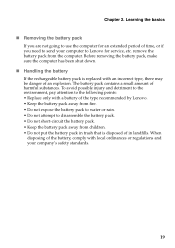
... your computer to disassemble the battery pack. • Do not short-circuit the battery pack. • Keep the battery pack away from the computer. Before removing the battery pack, make sure the computer has been shut down.
„ Handling the battery
If the rechargeable battery pack is disposed of time, or...
User Guide - Page 25

... function keys incorporated in its standard keyboard.
„ Numeric keypad G480/G485
The keyboard has keys that, when enabled, work as a 10-key numeric keypad. G580/G585/G780 The keyboard has a separate numeric keypad. To enable or disable the numeric keypad, press Fn+F8 .
User Guide - Page 26
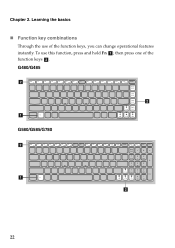
G480/G485 b
b a G580/G585/G780 b
a b
22 To use of the function keys b . then press one of the function keys, you can change operational features instantly. Learning the basics
„ Function key combinations
Through the use this function, press and hold Fn a ; Chapter 2.
User Guide - Page 27
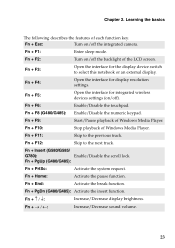
... + End:
Activate the break function.
Fn + F5:
Open the interface for integrated wireless devices settings (on/off the backlight of Windows Media Player. Fn + Insert (G580/G585/
G780):
Enable/Disable the scroll lock.
Learning the basics
The following describes the features of Windows Media Player.
Fn + PgDn (G480/G485): Activate the...
User Guide - Page 28
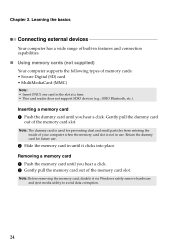
Note: Before removing the memory card, disable it clicks into place. Learning the basics
Connecting external devices
Your computer ...Digital (SD) card • MultiMediaCard (MMC)
Note: • Insert ONLY one card in until it via Windows safely remove hardware and eject media utility to avoid data corruption.
24
Chapter 2. Inserting a memory card 1 Push the dummy card until you hear a...
User Guide - Page 31
Chapter 2. G480/G485/G580/G585
G780
3
4
1
1
2
3
4
5
6
27 Learning the basics
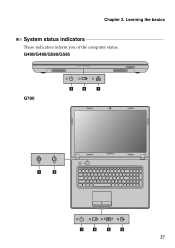
System status indicators
These indicators inform you of the computer status.
User Guide - Page 39
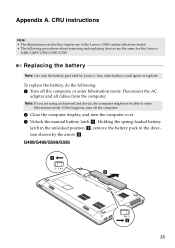
.../G780. If this chapter are of the Lenovo G580, unless otherwise stated. • The following : 1 Turn off the computer.
2 Close the computer display, and turn off the computer, or enter hibernation mode. To replace the battery, do the following procedures about removing and replacing devices are using an ExpressCard device, the computer...
User Guide - Page 44
G480/G485/G580/G585
3 3
G780
3 3
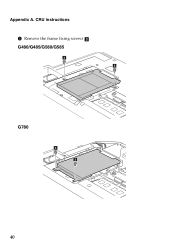
40 Appendix A. CRU instructions
5 Remove the frame fixing screws c .
User Guide - Page 45
G480/G485/G580/G585
4
G780
4
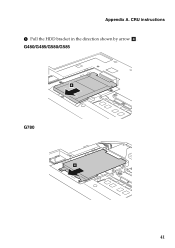
41 Appendix A. CRU instructions 6 Pull the HDD bracket in the direction shown by arrow d.
User Guide - Page 46
then push it firmly into the hard disk drive bay with the tab
facing upwards and the connectors facing each other; G480/G485/G580/G585
5
G780
5
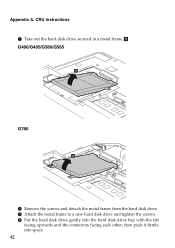
8 Remove the screws and detach the metal frame from the hard disk drive. 9 Attach the metal frame to a new hard disk drive and tighten the screws. 0 ...
User Guide - Page 54

Appendix A. CRU instructions
Removing the optical drive
To remove the optical drive, do the following: G480/G485/G580/G585 1 Remove the Hard disk drive/Memory/Central processing unit/Mini PCI
Express Card slot compartment cover. 2 Remove the screw shown in the illustration a . 3 Gently pull the optical drive out b .
1 2
50
Similar Questions


Where Can I Find The Product Key For My Lenova Laptop G580 For Microsoft Office?
(Posted by roshnie1022 11 years ago)

I Can Not Set The Brightness Of My Laptop G580 Using Fn And Arrow Key.
I can not set my laptop brightness using fn+arrow key. I am using windows7. Please give me solution.
I can not set my laptop brightness using fn+arrow key. I am using windows7. Please give me solution.
(Posted by pratikkantharia 11 years ago)
Laptop - G580 Leneva - Touch Pad - So Sensitive - Selcts Whole Web Pg W/o Comnd
laptop - G580 Leneva - touch pad - so sensitive - selcts whole web pg w/o comnd - tried all setting ...
laptop - G580 Leneva - touch pad - so sensitive - selcts whole web pg w/o comnd - tried all setting ...
(Posted by jaypardeshi2010 11 years ago)