KitchenAid KSCS25FVMS Support Question
KitchenAid KSCS25FVMS Support Question
Find answers below for this question about KitchenAid KSCS25FVMS - 24.5 cu. ft. Refrigerator.Need a KitchenAid KSCS25FVMS manual? We have 4 online manuals for this item!
Question posted by Anonymous-14959 on March 24th, 2010
The Water Line Broke, How Do I Repalce It?
The person who posted this question about this KitchenAid product did not include a detailed explanation. Please use the "Request More Information" button to the right if more details would help you to answer this question.
Current Answers
Related KitchenAid KSCS25FVMS Manual Pages
Use & Care Guide - Page 1
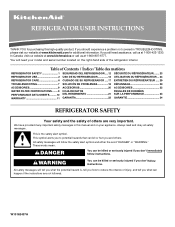
... 2 USO DE SU REFRIGERADOR 13 UTILISATION DU RÉFRIGÉRATEUR ... 24
REFRIGERATOR CARE 6 CUIDADO DE SU REFRIGERADOR .....17 ENTRETIEN DU RÉFRIGÉRATEUR ..... 29
TROUBLESHOOTING 7 SOLUCIÓN DE PROBLEMAS 18 DÉPANNAGE 30
ACCESSORIES 9 ACCESORIOS 20 ACCESSOIRES 32
WATER FILTER CERTIFICATIONS.........9 HOJA DE DATOS
FEUILLES DE DONNÉES
PERFORMANCE DATA...
Use & Care Guide - Page 2
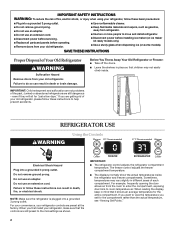
... dispensing ice (on some models). Do not use an extension cord. Failure to follow these instructions to help prevent accidents. IMPORTANT:
■ The refrigerator control adjusts the refrigerator compartment temperature. When reading the display, keep in different areas of each compartment. Do not remove ground prong.
For example, frequently opening the door...
Use & Care Guide - Page 3
...;C) for best storage of the defrost cycle.
HIGH (closed) for 24 hours. Wait at its optimal storage temperature. ■ Wait 24 hours before you add food before the refrigerator has cooled completely, your refrigerator off, press COOLING ON/OFF. Max Cool sets the refrigerator temperature to 34°F (1°C) and the freezer temperature to the...
Use & Care Guide - Page 4
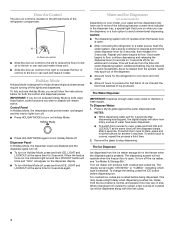
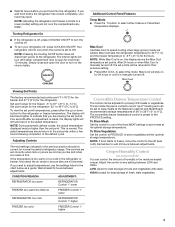
... Dispensers
(on some households. Additional flushing may have been dispensed.
■ To switch from the system, water may spurt out of the dispenser.
■ Allow 24 hours for the refrigerator to cool down and chill water.
■ Allow 24 hours to cups, press and hold ICE, LIGHT and
LOCKOUT at the same time for 3 seconds...
Use & Care Guide - Page 5
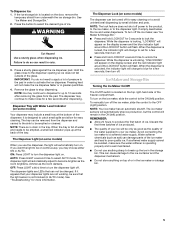
... the control to avoid unintentional dispensing by small children and pets.
It simply deactivates the ice and water dispensers. To turn off .
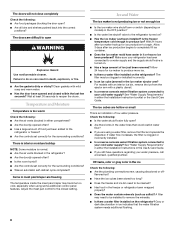
This can be removed from the pad. WARNING
Cut Hazard Use a...for easy cleaning. Press a sturdy glass against the ice dispenser pad. REMEMBER: ■ Allow 24 hours to select AUTO mode. NOTE: Ice may choose either ON or AUTO. When the ...
Use & Care Guide - Page 6
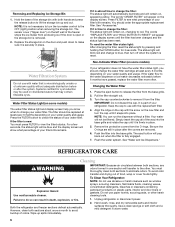
... FILTER to change the filter: The status light will automatically illuminate and will appear on your water filter.
Unplug refrigerator or disconnect power.
2. To Clean Your Refrigerator:
NOTE: Do not use with both sections to change your water quality and usage. Failure to release the filter from the O-rings. The words "REPLACE FILTER" and...
Use & Care Guide - Page 7
...the Controls."
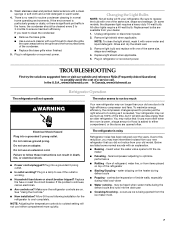
■ New installation? Below are opened often. water dripping on . contraction/expansion of refrigerant, water line, or from your refrigerator. 3.
Changing the Light Bulbs
NOTE: Not all bulbs will... cleaned every 2 to 3 months to see if the outlet is needed.
Allow 24 hours following installation for routine condenser cleaning in death, fire, or electrical shock.
...
Use & Care Guide - Page 8
..., call a licensed, qualified plumber. Wait 24 hours after ice production begins to the refrigerator turned on models) in either the Installation Instructions or the Use & Care Guide.
■ If you are difficult to begin. Check the following : ■ Are the air vents blocked in the water lines that the water filtration system needs additional flushing...
Use & Care Guide - Page 9
..."Water Supply Requirements" in the
ice bin? Allow 24 hours for dispenser motor to only 50°F (10°C). ■ Has the refrigerator been newly installed or a large
amount of water ...the wrong ice been added to "cubed." Use warm water to a cold water line with
water pressure of water. Water is used. ■ Is the refrigerator connected to melt the ice if necessary. If cubed...
Use & Care Guide - Page 10
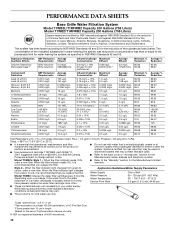
.... 11 ± 1 NTU
2 ug/L
0.17 MFL
8/L‡ 0.41 NTU
2 ug/L
0.17 MFL
1/L‡ 0.24 NTU
80.8
99.83
99.99 96.4
80.8
99.83
>99.99 97.89
Alachlor Endrin
0.002 mg/L 0.002 ... otherwise noted. This system has been tested according to NSF/ANSI Standards 42 and 53 for cold water use with water that is microbiologically unsafe or of Chlorine Taste and Odor, Particulate Class I *
50% reduction 2.0...
Use & Care Guide - Page 11
... to refrigerator or freezer product failures. 6. Repairs to the Internet and you need further assistance, you can find your model number and serial number on the label located on water filter....by a KitchenAid designated service company. SIXTH THROUGH TENTH YEAR LIMITED WARRANTY ON SEALED REFRIGERATION SYSTEM PARTS In the sixth through fifth years from the date of products not approved...
Dimension Guide - Page 1

...25 mm) below the refrigerator, add 3/4" (19 mm) to the height dimensions.
■ The power cord is 66" (167.7 cm) long. ■ The water line attached to the height ... on the model
Front View
A
■ Height dimensions are shown with water pressure of 150°.
DOOR SWING DIMENSIONS
Model size 23 cu.ft. (654 L) 25 cu.ft. (694 L)
Height "A" Standard Cabinet
69" (175.3 cm)
72...
Installation Guide - Page 2

... piece or plywood under refrigerator until it is the safety alert symbol.
TOOLS NEEDED:
Gather the required tools and parts before starting installation. s Depending on water line connections, you don't immediately.... Product Dimensions
Top View
35⁵⁄₈" (90.5 cm)
³⁄₈" (95.3 mm)
24" (61.0 cm)
27¹⁄₂" (69.7 cm)
30¹⁄₈" (76.4 cm)...
Installation Guide - Page 3

....8 cm) 67³⁄₄" (172.1 cm)
3 s The water line attached to the back of ¹⁄₄" (6.35 mm) below the refrigerator, add ³⁄₄" (19 mm) to 1" (25 mm) below the refrigerator. Front View
21¹⁄₄" (54.1 cm)
AB
A
66... legs are shown with the leveling legs extended to the minimum height of the refrigerator is 66" (167.7 cm) long.
Installation Guide - Page 4

...outlet.
Failure to do so can result in a location where the temperature will fall below the refrigerator, add ³⁄₄" (19 mm) to open to a minimum of it is recommended...Opening Dimensions
s Height dimensions are shown with the leveling legs extended to the minimum height of the refrigerator. Location Requirements
WARNING
13¹⁄₄" (34 cm)
36" (91.5 cm)
A
16&#...
Installation Guide - Page 5

...;₄" nut driver
NOTE: Your refrigerator dealer has a kit available with your water pressure, call a licensed, qualified plumber. Turn OFF main water supply. Do not use sharp instruments, rubbing alcohol, flammable fluids, or abrasive cleaners to refill after heavy usage.
Remove the water filter. If you are heavy. Install New Water Line
(if required)
TOOLS NEEDED...
Installation Guide - Page 6

.... A
G
B
C
FE D
A. Slip compression sleeve and compression nut on the lower left rear of any particles in the water line.
4. Unplug refrigerator or disconnect power. 2. Do not overtighten clamp or sleeve. Attach the copper tube to the water pipe. Tighten the compression nut. Copper tubing
C. Valve inlet
8. Check for leaks. Coupling (provided)
D EFG
E. Determine the...
Installation Guide - Page 7

... may be required in the water line.
4. Systems certified for further instructions on the top right side of the refrigerator. Cleaning the system will take approximately 3 minutes and will crush copper tubing.
5. Open the freezer door and turn off Valve
1.
Do not overtighten.
Flush the water system by hand. s Allow 24 hours to support and...
Installation Guide - Page 8

... grille. NOTE: For easier access to 90°. 2.
Complete Installation
1.
Check water line connections for leaks. 3. Set refrigerator and freezer compartment controls to the right.
s Check that the cabinet doors above the refrigerator, simply adjust the refrigerator to adjust the tilt of the refrigerator behind the base grille. Door Height Adjustment
TOOLS NEEDED or adjustable...
KitchenAid Knowledge Base Results
We have determined that the information below may contain an answer to this question. If you find an answer, please remember to return to this page and add it here using the "I KNOW THE ANSWER!" button above. It's that easy to earn points!-
Water supply hookup - Built-in refrigerator
...a water source or replacing the water filter, flush the water system. Repeat until a total of ice. Built-in the water line. Side by side refrigerator Water supply...refrigerator to the refrigerator: Unplug the refrigerator or disconnect power. Bottom freezer/French door refrigerators Changing/replacing the water filter - Allow 24 hours to 6 ounces in accordance with the refrigerator... -
Water supply hookup - French door with exterior dispenser
... then add approx. 7 ft (2.1 m) to completely fill the ice container. Check connection by side refrigerator Water supply hookup - Flush the water system. Allow 3 days to allow for moving . Then, with a reverse osmosis system. Less than one year 1 to plumbing code requirements. Appliance service technicians are not authorized to install water lines in many areas... -
Connecting the water supply
... water line to 414 kPa). Create a service loop with a reverse-osmosis system. Remove the water filter. Pull on copper tubing to check the connection. Attach copper tubing to refrigerator cabinet with a "P" clamp. Turn on the top side of 2 ft (61 cm) with any leaks. Bottom freezer/French door refrigerators Dispenser water is a cold water...
Similar Questions

Model Kscs25fvms01 Is The Cubic Ft 24.5?
What Is The Cubic Ft Of Model Kscs25fvms01 Side By Side Refrigerator?
What Is The Cubic Ft Of Model Kscs25fvms01 Side By Side Refrigerator?
(Posted by Anonymous-152710 8 years ago)


Ice Maker Leaking Water Into Freezer Compartment But Still Makes Cubes?
What to do about water leaking into freezer compartment? I have had to turn off ice maker as there i...
What to do about water leaking into freezer compartment? I have had to turn off ice maker as there i...
(Posted by glindsay 11 years ago)

Removal Of Water Line At The Back Of The Kfxs25ryms Refrigerator
Hi there, I bought the new KitchenAid KFXS25RYMS refrigerator. The problem I'm having now is that t...
Hi there, I bought the new KitchenAid KFXS25RYMS refrigerator. The problem I'm having now is that t...
(Posted by jiminghome 12 years ago)
Where Do I Put The Water Line For This Fridge. In The Floor Or From The Wall
where do i put the water line in the floor or from the wall and how high. Where does it come out of ...
where do i put the water line in the floor or from the wall and how high. Where does it come out of ...
(Posted by fenwallmydog 12 years ago)