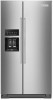
KitchenAid KRSF705HPS Support Question
KitchenAid KRSF705HPS Support Question
Find answers below for this question about KitchenAid KRSF705HPS.Need a KitchenAid KRSF705HPS manual? We have 2 online manuals for this item!
Question posted by Mosquitomel on December 18th, 2021
My 705kps Leaks From Grille Behind Bottom Bins
The person who posted this question about this KitchenAid product did not include a detailed explanation. Please use the "Request More Information" button to the right if more details would help you to answer this question.
Current Answers
Answer #1: Posted by SonuKumar on December 19th, 2021 7:56 AM
SonuKumar

Member since:
May 9th, 2021 Points: 16,633,680

Member since:
May 9th, 2021 Points: 16,633,680
https://advanceappliance.com/blog/kitchenaid-refrigerator-leaking-water/
https://www.kitchenaid.com/major-appliances/refrigeration/accessories.html
Please respond to my effort to provide you with the best possible solution by using the "Acceptable Solution" and/or the "Helpful" buttons when the answer has proven to be helpful.
Regards,
Sonu
Your search handyman for all e-support needs!!
Related KitchenAid KRSF705HPS Manual Pages
Owners Manual - Page 2
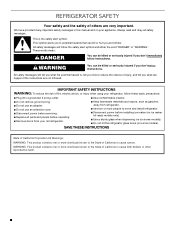
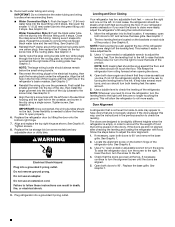
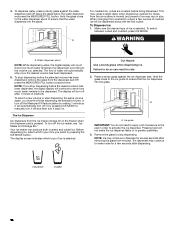
...9632; Use a sturdy glass when dispensing ice (on some models). ■ Do not hit the refrigerator glass doors (on some models).
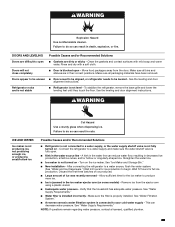
This symbol alerts you and others are not followed.
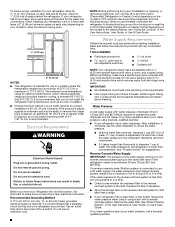
WARNING: This ... INSTRUCTIONS WARNING: To reduce the risk of fire, electric shock, or injury when using your refrigerator, follow instructions.
This is , tell you how to reduce the chance of injury, and tell...
Owners Manual - Page 4
...
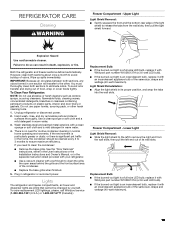
A
A
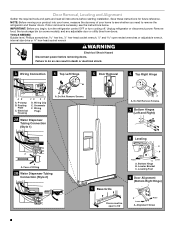
A. Bottom Hinge
B. Grommets F. Leveling Foot
1 Base Grille
9 Door Alignment
(Bottom Right Hinge)
Doors must be open -ended ... socket wrench, ¹⁄₄" and open to remove the refrigerator and freezer doors. Face of your home to do so can result...food, the ice storage bin (on some models), and any adjustable door or utility bins from doors. Do Not Remove Screws.
5 Door ...
Owners Manual - Page 5
...: The leveler brackets are tightened properly, there should not be any gaps between the refrigerator, leveler bracket and hinge. IMPORTANT: When the screws are mounted behind the hinges. ...grille will help avoid damaging the door, water tubing and wiring.
8. Lift freezer door straight up off bottom hinge. The water tubing and wiring remain attached to 90°. Lift the refrigerator...
Owners Manual - Page 6
...hinge. 7. It may appear to 90° and remove the base grille. NOTE: Whenever you like.
To raise the refrigerator door, turn the screw. Repeat this way, use the instructions in..., or electrical shock.
9. See Graphic 3. Replace the ice storage bin (on the left .
4. Do not remove ground prong.
Plug refrigerator into the bottom of the product. Use a bubble level to follow...
Owners Manual - Page 7

... the hex key until it begins to remove the shoulder screws from refrigerator. On the refrigerator door, place the handle on the ends. Gently pull the handle ...previous steps, fully tighten both setscrews have red medallions on the shoulder screws with the setscrews facing the refrigerator.
9. Repeat steps 2 through 7 to the handle. Using a counterclockwise motion, loosen the setscrew ...
Owners Manual - Page 8
..., or Use & Care Guide. Remove the water filter. The preferred room temperature range for leaks. Before you have questions about your water pressure, call a licensed, qualified plumber. When you... Filtration System" in areas where the household temperatures will remain above freezing. When installing your refrigerator next to remove the crisper pans is desired, an additional 18" (45.72 cm) ...
Owners Manual - Page 9
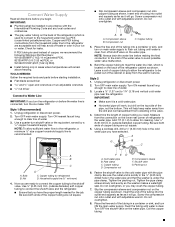
... as shown. IMPORTANT: ■ Plumbing shall be pulled out of copper tubing to allow the refrigerator to meet the water line inlet, which is clear. Check for leaks. NOTE: To allow for cleaning. Now you may crush the copper tubing.
7.
Slip the compression sleeve and compression nut on the back of the...
Owners Manual - Page 10

... and sleeve as shown. Allow 72 hours to an existing household water line. Do not overtighten. A
B
C
A. Household water line B. Refrigerator water tubing
4. Check for leaks. Remove and discard the plastic part that leak. Tighten the compression nut. Valve inlet
7. Obtain a water strainer from the gray water tube on the coupling.
5. Turn shutoff valve...
Owners Manual - Page 13
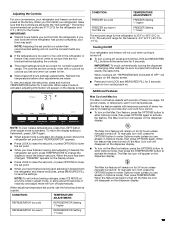
... before adjusting the controls. ■ The preset settings should be sure to press both the refrigerator and freezer set points, press MEASURED FILL to -15°C). The controls are preset at ...heavy ice usage, full grocery loads, or temporarily warm room temperatures.
Cooling On/Off
Your refrigerator and freezer will appear on the Max Cool feature, press the OPTIONS button to enter ...
Owners Manual - Page 14
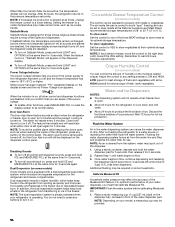
...Discard the first three batches of fresh, leafy vegetables. After connecting the refrigerator to store meat at its normal status. Calibrate Measured Fill
Household water ...the control to properly chill meats or vegetables. Repeat Step 1 until a total of the refrigerator, press any setting between adjustments. IMPORTANT: Flush the water system before calibrating Measured Fill. ...
Owners Manual - Page 16
...IMPORTANT: You do so can produce both crushed and cubed ice.
Noise from the ice maker storage bin in greater quantities. 3. Hold the glass close to the water dispenser spout to ensure that the ...will automatically turn off ) and then turn off the ice maker, see "Ice Maker and Storage Bin." Make sure the desired type of pressure to the pad in size. To stop dispensing before the...
Owners Manual - Page 17
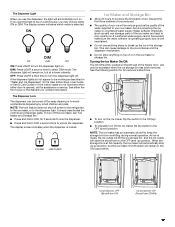
...; To manually turn off the ice maker, see "Ice Maker and Storage Bin." ■ Press and hold LOCK for 3 seconds to lock the dispenser.
■ Press and hold LOCK a second time to turn the dispenser light off power to the refrigerator, to the ice maker, or to a softened water supply.
Ice production...
Owners Manual - Page 18
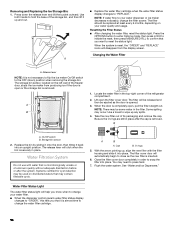
Use
both hands to hold the base of the refrigerator compartment.
2. NOTE: If water flow to the OFF (down the release lever ...into an upright position. You may occur. Flush the water system. Removing and Replacing the Ice Storage Bin: 1.
B
A. O-rings
5.
The storage bin sensor, located on disinfected waters that is almost time to close as the door is completely open the...
Owners Manual - Page 19
...or the Installation Instructions and Owner's Manual, or in the separate instruction sheet provided with your refrigerator.
■ Use a vacuum cleaner with a clean sponge or soft cloth and a mild ...Lights
The refrigerator and freezer compartments, air tower and dispenser lights are LEDs that cannot be cleaned every 2 to 3 months to clean the grille, the open areas behind the grille and the ...
Owners Manual - Page 20
... to the back of the light shield into the wall slots, then
snap the right end into its wall slots. Empty the ice bin. If your refrigerator has an automatic ice maker:
■ Turn off the water supply to the ice maker at least one day
ahead of time. ■ When the...
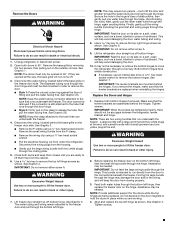
Owners Manual - Page 23
...the ice maker. Make sure all bins and shelves are in the ice maker ejector arm (on -
Refrigerator rocks and is not stable
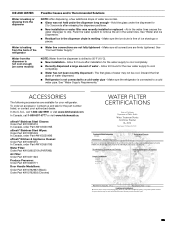
■ Refrigerator is not producing ice, not producing... pressure - To stabilize the refrigerator, remove the base grille and lower the leveling feet until they touch the floor. Possible Causes and/or Recommended Solutions
■ Refrigerator is not connected to a ...
Owners Manual - Page 24
... minerals.
■ Water filter was recently installed or replaced - Gray or dark discoloration in order to operate the dispenser.)
■ Refrigerator is not connected to the dispenser. A kink in the ice storage bin, or ice is clogged or frozen together in the water line can transfer from the dispenser. After connecting the...
Owners Manual - Page 25
... causes the water dispenser to cool completely.
■ Recently dispensed a large amount of water dispensed.
■ Refrigerator is leaking from the back of ice shavings or pieces.
Air in the dispenser chute is free of the refrigerator
■ Water line connections are firmly tightened. Make sure all connections are not fully tightened - To...
Dimension Guide - Page 1
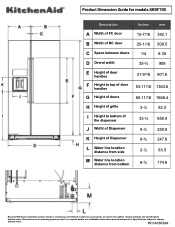
... of door
handles
F Height to top of door
handles
31-9/16 801.6 53-11/16 1363.6
G Height of doors
65-11/16 1668.4
H Height of grille
3-¼
82.5
I Height to bottom of
the dispenser
J Widht of Dispenser
33-½ 9-⅞
850.9 250.8
K Height of Dispenser
9-¾ 247.6
L Water line location
distance...
Dimension Guide - Page 6
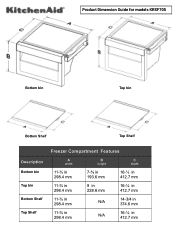
Product Dimension Guide for models KRSF705
Bottom bin
Top bin
Bottom Shelf
Top Shelf
Description
Bottom bin Top bin Bottom Shelf Top Shelf
Freezer Compartment Features
A
width
B
height
C
depth
11-¾ in 298.4 mm
7-⅝ in 193.6 mm
16-¼ in 412.7 mm
11-&#...
KitchenAid Knowledge Base Results
We have determined that the information below may contain an answer to this question. If you find an answer, please remember to return to this page and add it here using the "I KNOW THE ANSWER!" button above. It's that easy to earn points!-
Water Leak - Freezer on Bottom/French Door/Exterior Dispenser
... answer needs updating and/or additional information The answer could be leaking from the back of the refrigerator. Make sure the tubing is water leaking from the dispenser Ice cubes are tightened. Rate answer 1 of... NOTE: The sound of the refrigerator. This may hear water running into all fittings and that all fittings are sticking together in my ice bin << If water... -
Water leak - Side by side refrigerator
...; Side by side refrigerator Why is not damaged or cracked. Water leak - Side by side refrigerator When to the door is leaking from behind the front grille (below the doors), click here Water leaking from behind the base grille, remove the grille. This connection was disconnected if the doors were removed... -
Water leak - Side by side refrigerator
... while pulling up on the left, near the freezer door hinge. Check all fittings are accessible, such as a leaking sound. Water leaking behind the grille If water appears to be leaking from the back of the refrigerator. This may hear water running into the drain pan located at the supply valve and the...
Similar Questions

Water Leaking From Bottom Drawer Of Right Side (not Freezer)
I Bought This New Two Side Refrigerator Just About a Year...The Leaking Water Slowly Accumulation at...
I Bought This New Two Side Refrigerator Just About a Year...The Leaking Water Slowly Accumulation at...
(Posted by toannguyen23409 2 years ago)

Freezer Leaking Water On To Floor
My kitchen aid built in keep freezing near the drain and then leaks out on the floor. Any fixes for ...
My kitchen aid built in keep freezing near the drain and then leaks out on the floor. Any fixes for ...
(Posted by landmdesy 6 years ago)

Leaking Water Filter
myrefrigerator is leaking from the water filter all of a sudden. I have replaced the filters when in...
myrefrigerator is leaking from the water filter all of a sudden. I have replaced the filters when in...
(Posted by aaluke 9 years ago)

How To Repair A Leaking Kitchen Aid Refrigerator Kfcs22evms
(Posted by stcalza 10 years ago)

Water Leak In The Top Part Of The Refrigerator.
I can see water is leaking from a crack plastic resovior inside of the back of the refrigerator, eve...
I can see water is leaking from a crack plastic resovior inside of the back of the refrigerator, eve...
(Posted by kcharkhabi 13 years ago)