Get support for KitchenAid KHMC1857WSS - Microwave Hood Combination Oven

KitchenAid KHMC1857WSS Support Question

KitchenAid KHMC1857WSS Support Question

Find answers below for this question about KitchenAid KHMC1857WSS - Microwave Hood Combination Oven.
Need a KitchenAid KHMC1857WSS manual? We have 3 online manuals for this item!
Question posted by jegly on December 30th, 2011

Halogen Bulbs

what size halogen bulbs for khmc 1857wss

Current Answers

There are currently no answers that have been posted for this question.
Be the first to post an answer!

Remember that you can earn up to 1,100 points for every answer you submit. The better the quality of your answer, the better chance it has to be accepted.

Related KitchenAid KHMC1857WSS Manual Pages

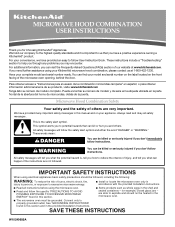
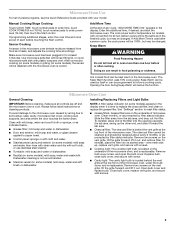
Use & Care Guide - Page 1

... instructions. For your KitchenAid microwave hood combination, please contact us that can be killed or seriously injured if you may encounter. If you and others are able to follow the specific "PRECAUTIONS TO AVOID POSSIBLE EXPOSURE TO EXCESSIVE MICROWAVE ENERGY" found in this section and in the microwave oven. ■ The microwave oven must be followed, including the...
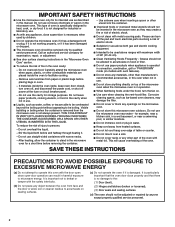
Use & Care Guide - Page 2

...combination, grill or "PAN BROWN" mode (on models with maximum width of fire in a wet basement, or near water - It is not designed for a short time before placing bags in the microwave oven...■ See door surface cleaning instructions in operation. ■ When flambeing foods under the hood, turn oven off, and disconnect the power cord, or shut off the pad and touch electrical parts ...
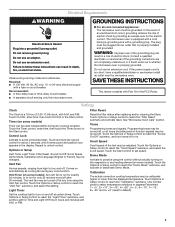
Use & Care Guide - Page 3

...time-delay fuse or time-delay circuit breaker. ■ A separate circuit serving only this microwave oven. The vent fan may be adjusted. In the event of an electrical short circuit, grounding ... be used independently during any cooking program. Observe all cord connected appliances: The microwave oven must be turned off after replacing and/or cleaning the filters. Touch CLOCK, enter...
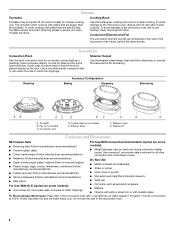
Use & Care Guide - Page 4

...on rack for bake and for simmering. Steamer base F. Use ovenproof, microwave-safe cookware for all other convection and combination cycles. ■ Melamine (Follow manufacturer recommendations.) ■ Paper towels...steamer vessel base, insert and lid for steaming, or use the dish in the microwave oven with plates that are side by side. Turntable B. Cookie sheet (not provided) ...
Use & Care Guide - Page 5

... programs, see the Quick Reference Guide provided with screws. ■ Cooktop light: The cooktop light bulb is located on the underside of the microwave oven, under the bulb cover, and is cooled. Add More Time At the end of the microwave oven, and is replaceable. Keep Warm can be used after cooking. Always follow a cooking cycle...
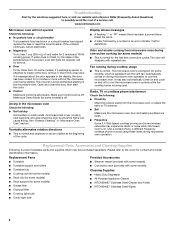
Use & Care Guide - Page 6

... light bulb ■ Cavity light bulb ■ Steamer vessel (provided with some models) ■ Convection rack (provided with repeated use. Make sure Demo Mode (on cavity walls, microwave inlet ...for the first few convection cycles. Odor and smoke coming from microwave oven during convection cooking (on during microwave oven operation to the cover for assistance. The odor will not ...
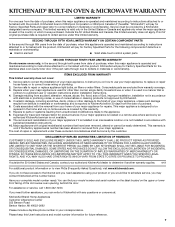
Use & Care Guide - Page 7

... major appliance for future reference. 7 Service calls to repair or replace appliance light bulbs, air filters or water filters. Damage resulting from accident, alteration, misuse, abuse... ■ Solid state touch control system parts SECOND THROUGH TENTH YEAR LIMITED WARRANTY On microwave ovens only, in an inaccessible location or is contrary to published user or operator instructions and...
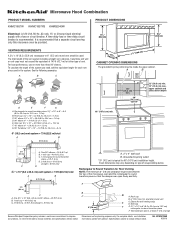
Dimension Guide - Page 1

... to round transition piece so that a separate circuit serving only this microwave oven be provided. 17 " (43.8 cm) 16 " (41.3 cm) VENTING REQUIREMENTS A 3¹⁄₄" x 10" (8.3 x 25.4 cm) rectangular or 6" (15.2 cm) round vent should be inside the upper cabinet. Microwave Hood Combination PRODUCT MODEL NUMBERS KHMC1857W KHMC1857XS KHMS2040W PRODUCT DIMENSIONS Electrical: A 120...
Installation Guide - Page 1

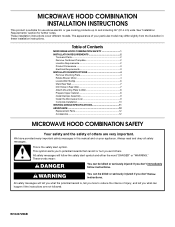
... chance of others . This is , tell you how to Wall 8 Prepare Upper Cabinet 8 Install Damper Assembly 9 Install the Microwave Oven 9 Complete Installation 10 VENTING DESIGN SPECIFICATIONS 11 ASSISTANCE 12 Replacement Parts 12 Accessories 12 MICROWAVE HOOD COMBINATION SAFETY Your safety and the safety of injury, and tell you and others are not followed. W10247296B The...
Installation Guide - Page 2

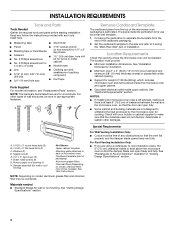
... Masking tape or thumbtacks (or box wrench) for use appropriate fasteners. Cut along the perforation to exist above the microwave oven so that the materials used will be included. See "Installation Dimensions" illustration. ■ Minimum one 2" x 4"... (for weight of wall structures, be combined. Power supply cord bushing (1) H. See "Venting Design Specifications" section.
Installation Guide - Page 3

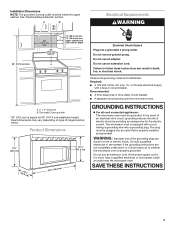
... properly grounded. Recommended: ■ A time-delay fuse or time-delay circuit breaker. ■ A separate circuit serving only this microwave oven. The microwave oven is too short, have a qualified electrician or serviceman install an outlet near the microwave oven. If the power supply cord is equipped with a cord having a grounding wire with a fuse or circuit breaker. Do...
Installation Guide - Page 4

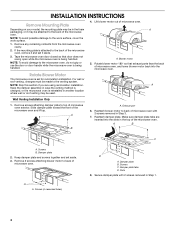
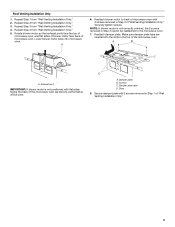
... avoid possible damage to the venting system. Rotate Blower Motor The microwave oven is set aside. 3. Remove any remaining contents from the microwave oven cavity. 2. Rotate blower motor 180° so that door does not swing open while the microwave oven is attached to back of microwave oven exterior. Make sure damper plate tabs are using recirculation installation...
Installation Guide - Page 5

... Step 2 from "Wall Venting Installation Only." 4. Reattach damper plate. A 6. Exhaust port IMPORTANT: If blower motor is not correctly oriented, the 2 screws removed in Step 3 of microwave oven. Slots 8. Repeat Step 3 from "Wall Venting Installation Only." 3. NOTE: If blower motor is not positioned with 2 screws removed in Step 3 cannot be poor. Damper plate...
Installation Guide - Page 6

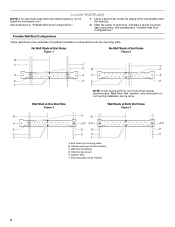
...Studs at End Holes Figure 2 B C C C D B D A A A A E E E E F F NOTE: If wall stud is within the opening. End holes (on mounting plate) B. Cabinet opening , do not install the microwave oven. 1. Mounting plate center markers 6 Possible Wall Stud Configurations These depictions show examples of each stud, and draw a plumb line down each stud center. Using a stud...
Installation Guide - Page 7

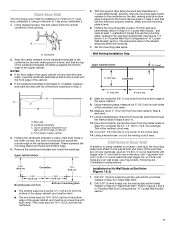
... cardboard template must be installed on the wall, making sure it is level, and that the end holes are properly marked. Mark Rear Wall The microwave oven must be on a level line with the dimensions described in Step 2 of "Locate Wall Stud(s)," and mark at End Holes (Figures 1 & 2) 1. Centerline 2. This is level...
Installation Guide - Page 8

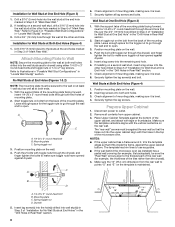
... the wall stud at One End Hole" in the "Drill Holes in Step 2 of the microwave oven. Prepare Upper Cabinet 1. Make sure the template centerline aligns with toggle nuts through the drywall, ... toggle nut to go through the wall and to use as guides. ■ If the wall behind the microwave oven (as at both end holes. 3. Position mounting plate on the wall. 2. Start a toggle nut on...
Installation Guide - Page 9

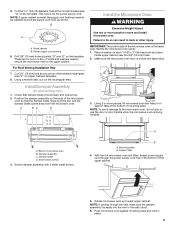
... B. Using a keyhole saw, cut out the rectangular area. IMPORTANT: The control side of the microwave oven is closed and taped shut. 3. Back of mounting plate. Damper assembly C. Mounting plate B. NOTE...These are for wall venting only) 1. Power supply cord bushing 6. Make sure the microwave oven door is the heavy side. Position the damper assembly on each 1/4-20 x 3" flat...
Installation Guide - Page 10

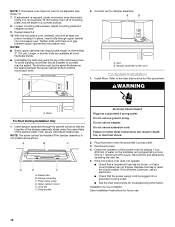
... on a covered surface. 8. Test vent fan and exhaust by placing 1 cup (250 mL) of microwave oven by operating the vent fan. 5. If the problem continues, call an electrician. ■ Check that ... so that the power supply cord is no gap between the upper cabinet bottom and the microwave oven. If the microwave oven does not operate: ■ Check that a household fuse has not blown, or that ...
Installation Guide - Page 11

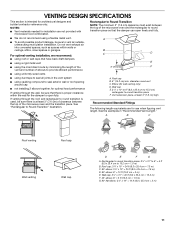
... efficient performance ■ using uniformly sized vents ■ using duct tape ... are for installation are not provided with microwave hood combination. ■ We do not recommend using...to Round Transition NOTE: The minimum 3" (7.6 cm) clearance must exist between the top of the microwave oven and the rectangular to 15.2 cm = 1.5 m) B. See "Rectangular to round transition piece F. ...
Installation Guide - Page 12

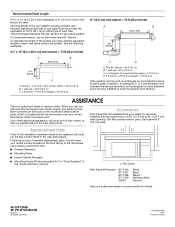
... a list of vent. All rights reserved. 461965617428 9/10 Printed in pairs. Accessories Filler Panel Kits are available from sticking. Replacement Parts If any of the microwave oven. One 3¹⁄₄" x 10" (8.3 x 25.4 cm) 90° elbow = 25 ft (7.6 m) B. 1 wall cap = 40 ft (12.2 m) C. 2 ft (0.6 m) + 6 ft (1.8 m) straight = 8 ft (2.4 m) 6" (15.2 cm) vent system...

KitchenAid Knowledge Base Results

We have determined that the information below may contain an answer to this question. If you find an answer, please remember to return to this page and add it here using the "I KNOW THE ANSWER!" button above. It's that easy to earn points!

  • My microwave oven will not run
    ...Is the magnetron working properly? Child Lock (on the display. Superba built-in and microwave combination ovens Can I use of the microwave oven. Is the door completely closed? Is the electronic oven control set ? Try to heat one cup (250 mL) of cold water...free: 1-800-334-6889.  Care Guides, Installation Instructions and Warranty Information. Changing the oven light bulb -
  • Changing the oven light bulb - Superba built-in and microwave combination ovens
    ... door is opened . Remove the bulb from the oven. Replacing oven light bulbs - The oven lights will not run Do not touch the bulb with bare fingers. Remove the glass light cover by snapping it back into the wall. Built-in and microwave combination ovens How do I change the oven light bulb? On double oven models, both upper and lower lights...
  • Replacing oven light bulbs - Built-in ovens
    ... not touch the bulb with bare fingers. Superba built-in ovens When should come on when the oven door is closed, touch Oven Light to operate the lights. They should the lights in my built-in oven come on ?  Architect Series II - Built-in and microwave combination ovens Changing the oven light bulb - Replace the bulb, using tissue or...

Similar Questions

Halogen Bulb
Should the halogen bulb be on when baking with convection oven? Our halogen light does not come on a...
(Posted by steveandcathyharmon 9 years ago)
How Do You Repair Cook Top Bulbs On Kitchen Aid Microwave Model Khmc1857wss
How do I repair/replace oven top bulbs on my Kitchen Aid Microwave Model KHMC1857WSS?
(Posted by schirm43 9 years ago)
What Bulbs Do I Buy For Under The Hood?
i know its 25w 120v but is it a G9 or G6 halogen bulb ?
(Posted by allhairbyjen 12 years ago)
Change Light Bulb In Microwave Oven.
How do I change the light bulb in a Kitchenaid KBMS1454SSS Microwave oven?
(Posted by danafeneck 13 years ago)
Ask a New Question
Use the box below to post a new question about this KitchenAid product .
Points & Prizes
  • You can earn points for nearly everything you do on HelpOwl.com
  • You can trade in those points for gift cards at leading retailers such as Amazon.com and Walmart
  • It's that simple!
See How it Works
Create a Free Account

KitchenAid Manuals

Find free KitchenAid KHMC1857WSS - Microwave Hood Combination Oven manuals and user guides available at ManualOwl.com. Try out our unique manual viewer allowing you to interact with manuals from directly within your browser!

KitchenAid Reviews

View thousands of KitchenAid user reviews and customer ratings available at ReviewOwl.com.

Contact Information

Complete KitchenAid customer service contact information including steps to reach representatives, hours of operation, customer support links and more from ContactHelp.com.

Scoreboard Ratings

See detailed KitchenAid customer service rankings, employee comments and much more from our sister site.

KitchenAid Recalls

Find comprehensive KitchenAid recall information updated hourly on RecallOwl.com.