Get support for KitchenAid KHHC2090SSS - Architect II 2.0 cu. ft. 1200 W

KitchenAid KHHC2090SSS Support Question

KitchenAid KHHC2090SSS Support Question

Find answers below for this question about KitchenAid KHHC2090SSS - Architect II 2.0 cu. ft. 1200 W.
Need a KitchenAid KHHC2090SSS manual? We have 3 online manuals for this item!
Question posted by dave5762 on September 4th, 2014

F2.h2 Error Codes

What does F2.H2 error codes mean and how do you fix it?

Current Answers

Answer #1: Posted by Odin on September 4th, 2014 4:22 PM
This answer was accepted by the poster of the original question.
Odin

Member since:
April 10th, 2010

Points: 41,236,700
1,100
points


Hope this is useful. Please don't forget to click the Accept This Answer button if you do accept it. My aim is to provide reliable helpful answers, not just a lot of them. See https://www.helpowl.com/profile/Odin.

Related KitchenAid KHHC2090SSS Manual Pages

Use & Care Guide - Page 1

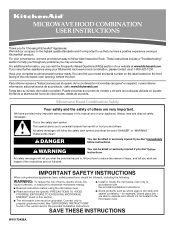
...website at 1-800-422-1230. These words mean: DANGER You can happen if the instructions are not followed. Connect only to excessive microwave energy: ■ Read all safety messages... "DANGER" or "WARNING." We have provided many important safety messages in the microwave oven. MICROWAVE HOOD COMBINATION USER INSTRUCTIONS Thank you have a positive experience owning a KitchenAid®...
Use & Care Guide - Page 2

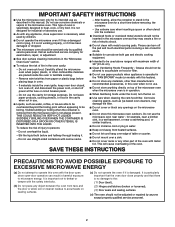
...■ Do not cover or block any openings on top of the microwave oven when the microwave oven is specifically designed to heat, cook, or dry food. Pieces can result in... scouring pads. To reduce the risk of injury to facilitate cooking. - Carefully attend the microwave oven when paper, plastic, or other than manufacturer's recommended accessories, in this manual. for example...
Use & Care Guide - Page 3

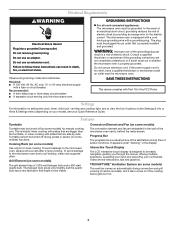
...codes and ordinances. Do not use of the grounding plug can result in death, fire, or electrical shock. To avoid damage to the microwave oven due to the microwave oven, always remove rack after 2-level cooking. Failure to whether the microwave oven... breaker. ■ A separate circuit serving only this microwave oven. It also shows instructions, tips and graphics. Electrical Requirements...
Use & Care Guide - Page 4

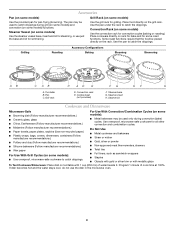
...and lid for steaming, or use the dish in the microwave oven. 4 Steamer Vessel (on some models): ■ Use ovenproof, microwave-safe cookware to catch drippings during convection (bake) cycles. ... do not use just the base and lid for grilling. Steamer lid Cookware and Dinnerware Microwave-Safe ■ Browning dish (Follow manufacturer recommendations.) ■ Ceramic glass, glass ■...
Use & Care Guide - Page 5

... pads, gritty washcloths or some models) before or after convection cooking or grilling (on cleaning products. Activate child lock to lessen doneness. Microwave Oven Use Sensor Cooking A sensor in the microwave oven detects moisture released from most automatic cook functions by touching "Doneness" on the touch screen during programing, and following the prompts. Doneness...
Use & Care Guide - Page 6

...phone or avoid using manual grill - It may experience static or noise while microwave oven is normal. Fan running during convection cooking ■ This is normal and depends...2 minutes at the beginning of the microwave oven. Program the microwave oven using these items during microwave oven operation to be purchased separately. The microwave oven's cooling fan (on the turntable and...
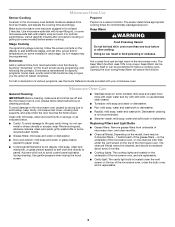
Use & Care Guide - Page 8

... ■ Solid state touch control system parts SECOND THROUGH TENTH YEAR LIMITED WARRANTY On microwave ovens only, in the second through tenth years from date of purchase, when this major ...labor to correct defects in your major appliance is located in accordance with electrical or plumbing codes, or use of consumables or cleaning products not approved by an authorized KitchenAid servicer is...
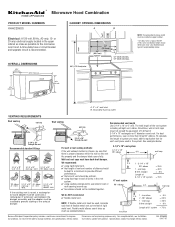
Dimension Guide - Page 1

... should not be installed to the microwave oven hood. Specifications subject to change without notice. Because Whirlpool Corporation policy includes a continuous commitment to 6" = 5 ft. 3-1/4" x 10" 3-1/4" x 10" roof cap = 24 ft. 90° elbow = 25 ft. 90° elbow 6" = 10 ft. 3-1/4" x 10" 45° elbow wall cap = 6" = 5 ft. 40 ft. 3-1/4" x 10" 90° flat elbow= 10...
Installation Guide - Page 1

... 8 Install the Microwave Oven 9 Install Filters 10 Complete Installation 10 VENTING DESIGN SPECIFICATIONS 11 ASSISTANCE 12 Replacement Parts 12 MICROWAVE HOOD COMBINATION SAFETY ...Your safety and the safety of injury, and tell you what can be killed or seriously injured if you what the potential hazard is the safety alert symbol. These words mean...
Installation Guide - Page 2

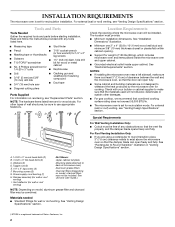
... "Venting Design Specifications" section. See "Venting Design Specifications" section. †®TORX is a registered trademark of 150 lbs (68 kg), which includes microwave oven and items placed inside the microwave oven and upper cabinet. ■ Grounded electrical outlet inside upper cabinet. See "Rectangular to make sure there is at least 3" (7.6 cm) of wall structures...
Installation Guide - Page 3

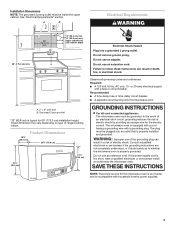
... A 120 Volt, 60 Hz, AC only, 15- GROUNDING INSTRUCTIONS ■ For all governing codes and ordinances. SAVE THESE INSTRUCTIONS NOTE: The power source for 69" (175.3 cm) installation ...39.4 cm) Electrical Shock Hazard Plug into an outlet that is typical for this microwave oven. Consult a qualified electrician or serviceman if the grounding instructions are not completely understood,...
Installation Guide - Page 4

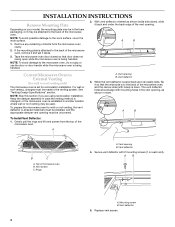
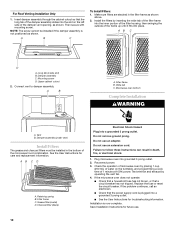
..." section. Keep the damper assembly in case the venting method is changed, or the microwave oven is set it aside. 3. Vent screen C. A B Convert Microwave Oven to the back of the microwave oven. To prepare the microwave oven for wall or roof venting only) The microwave oven is reinstalled in another location where wall or roof venting may be attached to...
Installation Guide - Page 5

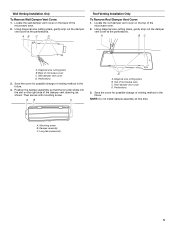
...damper assembly so that the long tab slides into the slot on the top of the microwave oven. 2. Mounting screw B. Using diagonal wire cutting pliers, gently snip out the damper vent... 3. Diagonal wire cutting pliers B. Locate the roof damper vent cover on the right side of microwave oven C. Wall Venting Installation Only To Remove Wall Damper Vent Cover: 1. Locate the wall damper vent...
Installation Guide - Page 6

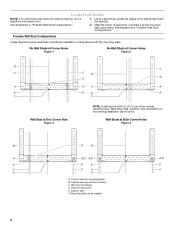
... at Both Corner Holes Figure 4 MOUNTING PLATE MOUNTING PLATE MOUNTING PLATE MOUNTING PLATE B D B A A,D A,D A,D E E E E C C C C F F A. Support tabs F. Cabinet opening , do not install the microwave oven. 1. Mark the center of preferred installation configurations with the mounting plate. Mounting plate center markers 6 See illustrations in "Possible Wall Stud...
Installation Guide - Page 7

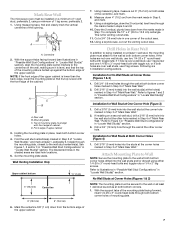
... the wall stud at Both Corner Holes (Figure 4) 1. Installation for No Wall Studs at both sides of the centerline, and mark. 8. Mark Rear Wall The microwave oven must be secured to the centerline on the wall, making sure it is level, and that its top is level with front edge of cabinet...
Installation Guide - Page 8

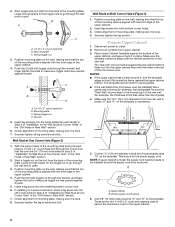
...). 4. Leave enough space for two 1/4-20 x 3" bolts and washers used to secure the microwave oven to outlet. 2. Remove all lag screws and bolts. NOTES: ■ If the upper cabinet... edges so that the top of the mounting plate is aligned with the front edge of the microwave oven. Place Upper Cabinet Template against drywall. Upper-cabinet template D E 10¹⁄₂" 10...
Installation Guide - Page 9

... A. 1/4-20 x 3" bolts 9 NOTE: To avoid damage to do not grip or use the door or door handle while the microwave oven is required, rotate microwave oven downward. NOTE: If microwave oven does not need to move and install microwave oven. If adjustment is being handled. 4. Longer or shorter bolts are available at the bottom of the upper cabinet...
Installation Guide - Page 10

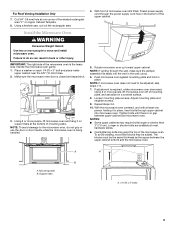
... tab (inside slot) B. Grease filter (metal) D. Do not remove ground prong. Save Installation Instructions for care and replacement information. For Roof Venting Installation Only 1. AB C D A. Microwave oven bottom Complete Installation WARNING A. Reconnect power. 3. NOTE: The screw cannot be installed in death, fire, or electrical shock. 1. If the...
Installation Guide - Page 11

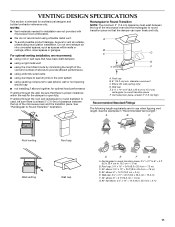
... B. 6" (15.2 cm) min. Roof cap: 3¹⁄₄" x 10" = 24 ft (8.3 x 25.4 cm = 7.3 m) C. 90° elbow: 3¹ ₄" x 10" = 25 ft (8.3 x 25.4 cm = 7.6 m) D. 90° elbow: 6" = 10 ft (15.2 cm = 3 m) E. Vent extension piece, at least 3" (7.6 cm) of clearance between the top of the microwave oven and the rectangular to round transition piece so that the...
Installation Guide - Page 12

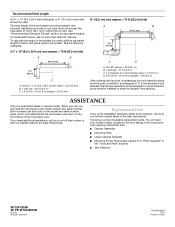
...3¹⁄₄" x 10" (8.3 x 25.4 cm) 90° elbow = 25 ft (7.6 m) B. 1 wall cap = 40 ft (12.2 m) C. 2 ft (0.6 m) + 6 ft (1.8 m) straight = 8 ft (2.4 m) 6" (15.2 cm) vent system = 73 ft (22.2 m) total A B 6 ft (1.8 m) 2 ft (0.6 m) C D A. If you need additional assistance, call , you need the microwave oven model number and serial number. All rights reserved. 461965618634 9/10...

KitchenAid Knowledge Base Results

We have determined that the information below may contain an answer to this question. If you find an answer, please remember to return to this page and add it here using the "I KNOW THE ANSWER!" button above. It's that easy to earn points!

  • Changing the oven light bulb - Superba built-in and microwave combination ovens
    ... power. Do not touch the bulb with bare fingers. Architect Series II - When the oven door is closed, touch Oven Light to turn them on when either door is opened . Remove the bulb from the oven. Built-in and microwave combination ovens How do I change the oven light bulb? Remove the glass light cover by snapping it...
  • The water temperature is not correct - Top-load washer
    ... that there are as effective as warm rinsing and reduce wrinkling and save energy. Front-load washer FAQs Knowledgebase search tips Display shows an error code - You may use less than your water heater can make a difference in each of time may notice lower hot or warm water temperatures. The water...
  • Display shows F22 or FdL - Front-load washer
    The door must be latched. Front-load washer The door will not open - This error code indicates that the door is not locking.  Reduce your load size if needed.  ... out beyond the door opening. Were you close it may not be completely closed , but it . To remove the error display, press Pause/Off twice. Open the door and firmly close the washer door, check for the washer to freely...

Similar Questions

Ask a New Question
Use the box below to post a new question about this KitchenAid product .
Points & Prizes
  • You can earn points for nearly everything you do on HelpOwl.com
  • You can trade in those points for gift cards at leading retailers such as Amazon.com and Walmart
  • It's that simple!
See How it Works
Create a Free Account

KitchenAid Manuals

Find free KitchenAid KHHC2090SSS - Architect II 2.0 cu. ft. 1200 W manuals and user guides available at ManualOwl.com. Try out our unique manual viewer allowing you to interact with manuals from directly within your browser!

KitchenAid Reviews

View thousands of KitchenAid user reviews and customer ratings available at ReviewOwl.com.

Contact Information

Complete KitchenAid customer service contact information including steps to reach representatives, hours of operation, customer support links and more from ContactHelp.com.

Scoreboard Ratings

See detailed KitchenAid customer service rankings, employee comments and much more from our sister site.

KitchenAid Recalls

Find comprehensive KitchenAid recall information updated hourly on RecallOwl.com.