Get support for KitchenAid KHHC2090SSS - Architect II 2.0 cu. ft. 1200 W

KitchenAid KHHC2090SSS Support Question

KitchenAid KHHC2090SSS Support Question

Find answers below for this question about KitchenAid KHHC2090SSS - Architect II 2.0 cu. ft. 1200 W.
Need a KitchenAid KHHC2090SSS manual? We have 3 online manuals for this item!
Question posted by Marktransman on January 22nd, 2012

Door Removal

How to remove door

Current Answers

There are currently no answers that have been posted for this question.
Be the first to post an answer!

Remember that you can earn up to 1,100 points for every answer you submit. The better the quality of your answer, the better chance it has to be accepted.

Related KitchenAid KHHC2090SSS Manual Pages

Use & Care Guide - Page 1

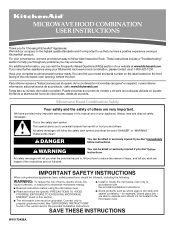
...® product. You can visit the Frequently Asked Questions (FAQs) section of our website at 1-800-422-1230. Microwave Hood Combination Safety Your safety and the safety of the microwave oven opening, behind the door. This is , tell you how to follow User Instruction Book. This symbol alerts you to us at www.kitchenaid...
Use & Care Guide - Page 2

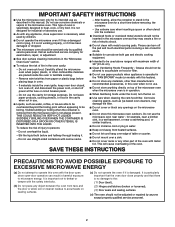
... filter. ■ Do not cover or block any object between the oven front face and the door or allow the container to stand in the microwave oven for example, near a kitchen sink, in a wet basement, or near water - Remove wire twist-ties from the microwave oven is not designed for storage purposes. Pieces can result in this...
Use & Care Guide - Page 3

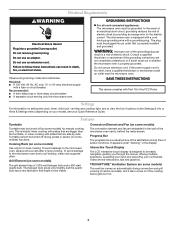
... or circuit breaker. This is helpful when cooking with plates that are embedded in a risk of sensor functions. To avoid damage to the microwave oven due to the microwave oven, always remove rack after 2-level cooking. It also shows instructions, tips and graphics. TRUCAPTURE® Ventilation System (on some models) The vent fan comes on...
Use & Care Guide - Page 4

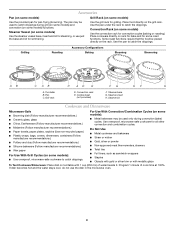
... rack for pan-frying (browning). Cookie sheet (not provided) F. Steamer insert H. Use ovenproof, microwave-safe cookware for all other convection and combination cycles. ■ Melamine (Follow manufacturer recommendations.) ■... vessel base, insert and lid for steaming, or use the dish in the microwave oven. 4 If dish becomes hot and the water stays cool, do not use just the...
Use & Care Guide - Page 5

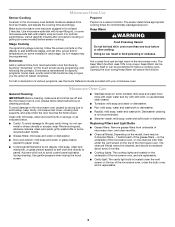
...dishwasher. Keep Warm can result in the microwave oven. Opening the door during cleaning. Always follow a cooking cycle. Microwave Oven Use Sensor Cooking A sensor in the microwave oven detects moisture released from food as indicated ... Light Bulbs ■ Grease filters: Remove grease filters from underside of various programs, see the Quick Reference Guide provided with ...
Use & Care Guide - Page 6

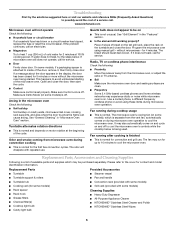
... ■ This is set properly. This happens to possibly avoid the cost of a service call an electrician. ■ Magnetron Try to cool the microwave oven. Place 2 slices of the door, remove it does not toast, call for convection and grill use . The fan may be on ■ This is attached to inside of bread...
Use & Care Guide - Page 8

...YEAR LIMITED WARRANTY On microwave ovens only, in the ...removed, altered or cannot be borne by an authorized KitchenAid servicer is not installed in your complete model number ready. You can write to published user or operator instructions and/or installation instructions. 4. All rights reserved. ®Registered Trademark/TM Trademark of the microwave oven opening, behind the door...
Dimension Guide - Page 1

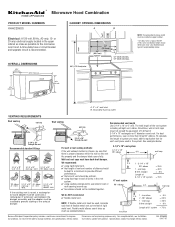
... not be installed to the microwave oven hood. wall cap 8 feet straight Length of 6" system = 73 ft. We do NOT recommend: ✔ flexible metal vent. transition 2 ft. 1 - For complete details... 10" rectangular or 6" diameter round vent. wall cap 8 feet straight = 5 ft. = 20 ft. = 40 ft. = 8 ft. Ref. 8206590 04-17-07 wall cap If the existing vent is proper clearance within...
Installation Guide - Page 1

... HOOD COMBINATION SAFETY 1 INSTALLATION REQUIREMENTS 2 Tools and Parts 2 Location Requirements 2 Product Dimensions 3 Electrical Requirements 3 INSTALLATION INSTRUCTIONS 4 Remove Mounting Plate 4 Convert Microwave Oven to External Venting 4 Locate Wall Stud(s 6 Mark Rear Wall 7 Drill Holes in these installation instructions. W10247285B These installation instructions cover...
Installation Guide - Page 2

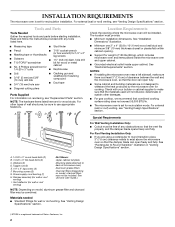
... NOTE: Depending on reordering, see "Venting Design Specifications" section. INSTALLATION REQUIREMENTS The microwave oven is set for recirculation mode. For external (wall or roof) venting, see "...: ■ If installing the microwave oven near a left sidewall, make sure that the materials used will be sure to exist above the microwave oven so that the door can open fully. ■ ...
Installation Guide - Page 3

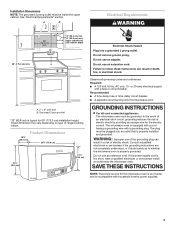
..." (175.3 cm) min. 30" (76.2 cm) min. 33" (83.8 cm) typical* 12" (30.5 cm) min. 13" (33.0 cm) max. Do not remove ground prong. Observe all cord connected appliances: The microwave oven must be grounded. GROUNDING INSTRUCTIONS ■ For all governing codes and ordinances. If the power supply cord is incompatible with household...
Installation Guide - Page 4

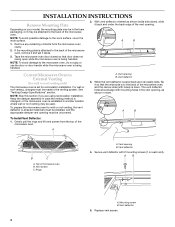
...microwave oven, remove it and set for recirculation installation. If the mounting plate is down ), slide it may be made to the venting system. A B Convert Microwave Oven to the back of the microwave oven. Keep the damper assembly in case the venting method is changed, or the microwave oven... the microwave oven, do not grip or use the door or door handle while the microwave oven is ...
Installation Guide - Page 5

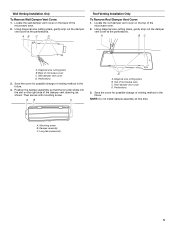
... Installation Only To Remove Wall Damper Vent Cover: 1. Wall damper vent cover D. Using diagonal wire cutting pliers, gently snip out the damper vent cover at the perforations. Perforations 3. A. A B C A. A B C D A. Perforations 3. Position the damper assembly so that the long tab slides into the slot on the back of microwave oven C. Diagonal wire cutting...
Installation Guide - Page 6

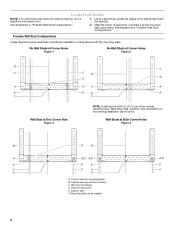
... at One Corner Hole Figure 3 NOTE: If wall stud is within 6" (15.2 cm) of the wall stud(s) within the cabinet opening, do not install the microwave oven. 1. Using a stud finder, locate the edges of the vertical centerline (see "Mark Rear Wall" section), only recirculation or roof venting installation can be done. Locate...
Installation Guide - Page 7

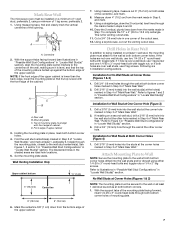
... is the venting cutout area. 11. Drill a 3/4" (19 mm) hole through the marks made in Step 7 to the wall stud centerline(s). Mark Rear Wall The microwave oven must be secured to figures 1 and 2 in "Possible Wall Stud Configurations" in "Locate Wall Stud(s)" section. Using measuring tape, find and clearly mark the vertical...
Installation Guide - Page 8

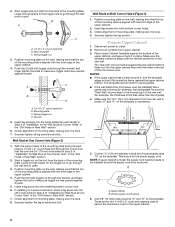
...Holes in Rear Wall" section. 6. Check alignment of the upper cabinet. 4. Remove all lag screws and bolts. Make sure the template centerline aligns with toggle nut...with toggle nuts through the wall and to make sure toggle nut has opened against the bottom of the microwave oven. Securely tighten the lag screws. Upper-cabinet template D E 10¹⁄₂" 10¹⁄...
Installation Guide - Page 9

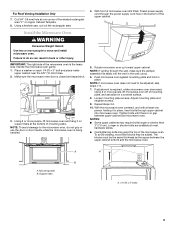
... shut. 3. Adjust mounting plate and retighten screws. 9. Repeat steps 3-6. 10. Failure to be added. IMPORTANT: The right side of the microwave oven. Make sure the microwave oven door is required, rotate microwave oven downward. With front of microwave oven still tilted, thread power supply cord through the power supply cord hole in the wall cutout. 6. For Roof Venting Installation...
Installation Guide - Page 10

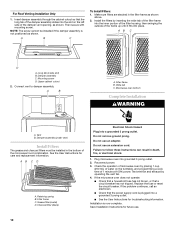
...tab (inside slot) B. Check the operation of microwave oven by operating the vent fan. 4. Insert damper ...remove ground prong. Failure to damper assembly. Replace the fuse or reset the circuit breaker. Retaining spring B. For Roof Venting Installation Only 1. Filter frame B. Wide tab C. Charcoal filter (black) Electrical Shock Hazard Plug into place. Plug microwave oven...
Installation Guide - Page 11

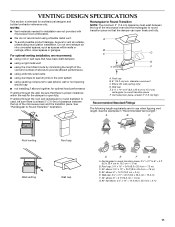
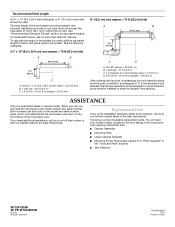
... cap: 3¹⁄₄" x 10" = 40 ft (8.3 x 25.4 cm = 12.2 m) F. 45° elbow: 6" = 5 ft (15.2 cm = 1.5 m) G. 90° flat elbow: 3¹⁄₄" x 10" = 10 ft (8.3 x 25.4 cm = 3 m) 11 A B...; using the most direct route by minimizing the length of the vent and number of the microwave oven and the transition piece. diameter round vent C. Wall cap E. 3¹⁄₄" x 10...
Installation Guide - Page 12

... W10345002B © 2010. See the following examples: 3¹⁄₄" x 10" (8.3 x 25.4 cm) vent system = 73 ft (22.2 m) total A B 6 ft (1.8 m) 2 ft (0.6 m) C A. ASSISTANCE Call your model number located on the front facing of the microwave oven opening, behind the microwave oven door on the model and serial number plate, which is a list of the installation hardware needs to keep...

KitchenAid Knowledge Base Results

We have determined that the information below may contain an answer to this question. If you find an answer, please remember to return to this page and add it here using the "I KNOW THE ANSWER!" button above. It's that easy to earn points!

  • My microwave oven will not run
    ... ? Download available Owners Manuals/Use & Superba built-in and microwave combination ovens Can I use of the door? Is the door completely closed? Remove spacer, then firmly close door. On some models, is locked, only the Vent Fan and Light pads will not run Why won't my microwave oven run? See "Assistance or service" section below . Assistance or...
  • Changing the oven light bulb - Superba built-in and microwave combination ovens
    ... bulb. Reconnect power. Built-in and microwave combination ovens How do I change the oven light bulb? Architect Series II - The oven lights will not run Disconnect power. The lights will come on when the oven door is closed, touch Oven Light to turn them on when either door is off . On double oven models, both upper and lower lights...
  • Will the Microban® Refrigerator Air Filter fit my refrigerator?
    ... refer to your Use and Care Guide by side refrigerators in 22, 25, and 27 cu. Model Number | Help me locate my model number Please enter at least 6 characters of 3... in my Dishwasher << Care Guides, Installation Instructions and Warranty Information. ft. To remove odors, you Not Helpful Helpful Answers others found helpful Cleaning your model number. capacities. Refrigerator...

Similar Questions

Ask a New Question
Use the box below to post a new question about this KitchenAid product .
Points & Prizes
  • You can earn points for nearly everything you do on HelpOwl.com
  • You can trade in those points for gift cards at leading retailers such as Amazon.com and Walmart
  • It's that simple!
See How it Works
Create a Free Account

KitchenAid Manuals

Find free KitchenAid KHHC2090SSS - Architect II 2.0 cu. ft. 1200 W manuals and user guides available at ManualOwl.com. Try out our unique manual viewer allowing you to interact with manuals from directly within your browser!

KitchenAid Reviews

View thousands of KitchenAid user reviews and customer ratings available at ReviewOwl.com.

Contact Information

Complete KitchenAid customer service contact information including steps to reach representatives, hours of operation, customer support links and more from ContactHelp.com.

Scoreboard Ratings

See detailed KitchenAid customer service rankings, employee comments and much more from our sister site.

KitchenAid Recalls

Find comprehensive KitchenAid recall information updated hourly on RecallOwl.com.