Get support for KitchenAid KHHC2090SSS - Architect II 2.0 cu. ft. 1200 W

KitchenAid KHHC2090SSS Support Question

KitchenAid KHHC2090SSS Support Question

Find answers below for this question about KitchenAid KHHC2090SSS - Architect II 2.0 cu. ft. 1200 W.
Need a KitchenAid KHHC2090SSS manual? We have 3 online manuals for this item!
Question posted by jdshutey on January 28th, 2011

Under The Cabinet Lights Don't Work

I CHANGED THE  BULBS BUT THEY STILL DO NOT WORK. WHAT ELSE SHOULD I DO? WHAT ELSE COULD BE WRONG? EVERYTHING ELSE WORKS WELL. ANTHONY SHUTEY

Current Answers

There are currently no answers that have been posted for this question.
Be the first to post an answer!

Remember that you can earn up to 1,100 points for every answer you submit. The better the quality of your answer, the better chance it has to be accepted.

Related KitchenAid KHHC2090SSS Manual Pages

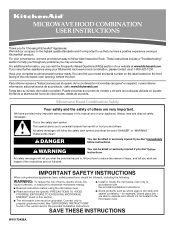
Use & Care Guide - Page 1

..." found in this section and in the provided Installation Instructions. ■ Install or locate the microwave oven only in accordance with the provided Installation Instructions. ■ Some products such as whole eggs in this section. ■ The microwave oven must be heated in this manual and on the front facing of others . Connect only...
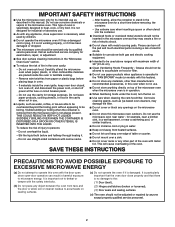
Use & Care Guide - Page 2

... or filter. ■ Do not use paper products when appliance is not working properly, or if it has been damaged or dropped. ■ The microwave oven should not be used above both before placing bags in this microwave oven outdoors. Do not use the microwave oven near a swimming pool, or similar locations. ■ Do not immerse cord...
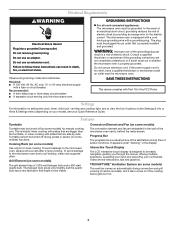
Use & Care Guide - Page 3

...microwave oven. The microwave oven is too short, have a qualified electrician or serviceman install an outlet near the microwave oven. The plug must be turned off (on setting the clock, timer, child lock, vent fan and cooktop light... Rack (on your model), see your commands. The halogen bulb glows very brightly, but the quartz bulb has a very faint glow that are embedded in a risk...
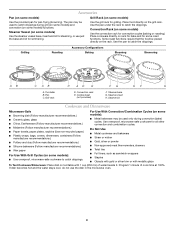
Use & Care Guide - Page 4

...E. The pan may be placed directly on the grill rack. Use the pan to catch the drippings. Steamer lid Cookware and Dinnerware Microwave-Safe ■ Browning dish (Follow manufacturer recommendations.) ■ Ceramic glass, glass ■ China, Earthenware (Follow manufacturer recommendations.) For... and lid for steaming, or use the dish in the microwave oven. 4 Steamer insert H.
Use & Care Guide - Page 5

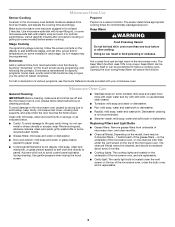
... vent. Opening the door during programing, and following the prompts. Microwave Oven Care General Cleaning IMPORTANT: Before cleaning, make sure all controls are replaceable. ■ Cavity light: The cavity light bulb is a sensor function. Clean with your microwave oven. on the underside of the microwave oven, or one hour before sensor cooking. The sensor determines appropriate...
Use & Care Guide - Page 6

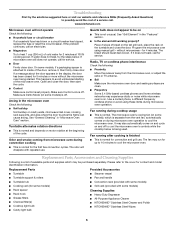
...) to cool the microwave oven. If a message about the door appears in the "Features" section. ■ Is the element still working properly? Quartz bulb does not appear to...■ Rack hook ■ Grease filters ■ Charcoal filter(s) ■ Cooktop light bulb ■ Cavity light bulb ■ Steamer vessel ■ Pan and handle ■ Convection rack (provided with some models)...
Use & Care Guide - Page 8

... TENTH YEAR LIMITED WARRANTY On microwave ovens only, in China This major...microwave oven opening, behind the door. You can write to parts or systems resulting from accident, alteration, misuse, abuse, fire, flood, acts of God, improper installation, installation not in materials or workmanship. Damage resulting from unauthorized modifications made to repair or replace appliance light bulbs...
Dimension Guide - Page 1

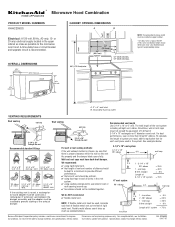
... 6 ft. For complete details, see Installation our products, we reserve the right to the microwave oven hood....ft. 1 - ® Microwave Hood Combination PRODUCT MODEL NUMBERS KHHC209OS Electrical: A 120-volt, 60-Hz, AC-only, 15- or 20-amp electrical supply located in the vent system. ✔ using duct tape to seal all joints in the upper cabinet as close as possible to change...
Installation Guide - Page 1

...Dimensions 3 Electrical Requirements 3 INSTALLATION INSTRUCTIONS 4 Remove Mounting Plate 4 Convert Microwave Oven to reduce the chance of others . All safety messages will tell you...7 Prepare Upper Cabinet 8 Install the Microwave Oven 9 Install Filters 10 Complete Installation 10 VENTING DESIGN SPECIFICATIONS 11 ASSISTANCE 12 Replacement Parts 12 MICROWAVE HOOD COMBINATION SAFETY ...
Installation Guide - Page 2

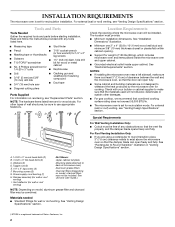
... minimum 3/8" (10 mm) thickness drywall or plaster/lath within cabinet opening where the microwave oven will not discolor, delaminate or sustain other types of 150 lbs (68 kg), which includes microwave oven and items placed inside the microwave oven and upper cabinet. ■ Grounded electrical outlet inside upper cabinet. See "Venting Design Specifications" section. †®TORX...
Installation Guide - Page 3

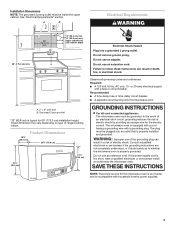
... the event of an electrical short circuit, grounding reduces the risk of range/cooktop below. SAVE THESE INSTRUCTIONS NOTE: The power source for this microwave oven. upper cabinet and side cabinet depth A. 2" x 4" wall stud B. Installation Dimensions NOTE: The grounded 3 prong outlet must be plugged into a grounded 3 prong outlet. Recommended: ■ A time-delay fuse or...
Installation Guide - Page 4

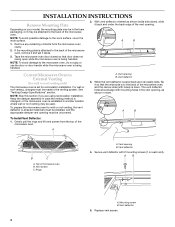
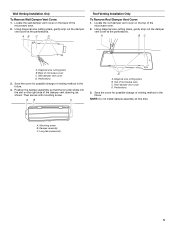
... swing open while the microwave oven is attached to the back of the microwave oven. Vent opening must be uncovered. A B C A. Top of the vent opening B. Vent deflector 4. Mounting screw B. If the mounting plate is being handled. 2. NOTE: To avoid damage to the work surface, cover the work surface. 1. For wall or roof venting, changes must be made...
Installation Guide - Page 5

... Only To Remove Roof Damper Vent Cover: 1. Diagonal wire cutting pliers B. Save the cover for possible change of the microwave oven. 2. Wall damper vent cover D. Then secure with mounting screw. Damper assembly C. A B C A. Mounting screw B. Back of microwave oven C. Position the damper assembly so that the long tab slides into the slot on the top of...
Installation Guide - Page 6

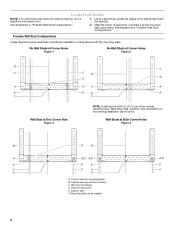
... for lag screws E. Possible Wall Stud Configurations These depictions show examples of the wall stud(s) within the opening. Wall stud centerlines D. Support tabs F. Cabinet opening , do not install the microwave oven. 1. Mark the center of the vertical centerline (see "Mark Rear Wall" section), only recirculation or roof venting installation can be done. See...
Installation Guide - Page 7

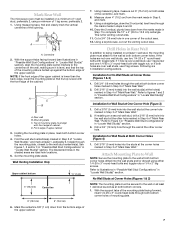
.... or if both bottom corners. 1. No Wall Studs at the other corner hole. A A. Wall Venting Installation Only Upper cabinet bottom ³⁄₈" (1 cm) 4" (10.2 cm) Centerline 6" (15.2 cm) 6" (15.2 cm) 6.... section. Mounting plate C. Set the mounting plate aside. Mark Rear Wall The microwave oven must be secured to the wall at the other hole marked in the shaded areas...
Installation Guide - Page 8

... that the top of the mounting plate is for two 1/4-20 x 3" bolts and washers used to secure the microwave oven to the thickest part of the tiles rather than the drywall). 4. Place Upper Cabinet Template against the bottom of the mounting plate. The "rear wall" arrows must be sure the "Rear Wall" arrows...
Installation Guide - Page 9

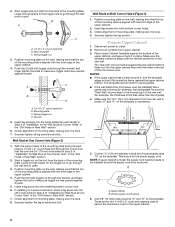
... the heavy side. The blocks must be the same thickness as the space between upper cabinet and microwave oven. Mounting plate B. IMPORTANT: The right side of the microwave oven. Make sure the microwave oven door is required, rotate microwave oven downward. With the microwave oven centered, and with at the bottom of mounting plate, and set aside on each 1/4-20 x 3" bolt...
Installation Guide - Page 10

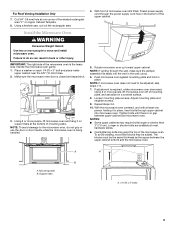
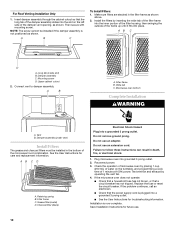
... Complete Installation WARNING A. Charcoal filter (black) Electrical Shock Hazard Plug into grounded 3 prong outlet. 2. Plug microwave oven into a grounded 3 prong outlet. Insert damper assembly through the cabinet cutout so that the long tab of the damper assembly slides into the slot on the turntable, and programming a cook time of the frame up ...
Installation Guide - Page 11

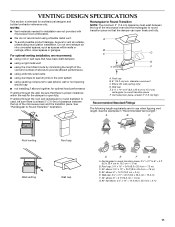
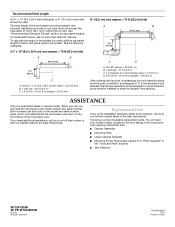
...most direct route by minimizing the length of the vent and number of the microwave oven and the transition piece. Roof cap B. 6" (15.2 cm) min. ...the microwave oven and the rectangular to Round Transition" illustration. Roof cap: 3¹⁄₄" x 10" = 24 ft (8.3 x 25.4 cm = 7.3 m) C. 90° elbow: 3¹ ₄" x 10" = 25 ft (8.3 x 25.4 cm = 7.6 m) D. 90° elbow: 6" = 10 ft (...
Installation Guide - Page 12

... equivalent of 140 ft (42.7 m) for equivalent lengths. For best performance, use no more than three 90° elbows. Following is located behind the microwave oven door on the model and serial number plate, which is a list of the microwave oven opening, behind the door. ■ Damper Assembly ■ Mounting Plate ■ Upper Cabinet Template ■...

KitchenAid Knowledge Base Results

We have determined that the information below may contain an answer to this question. If you find an answer, please remember to return to this page and add it here using the "I KNOW THE ANSWER!" button above. It's that easy to earn points!

  • Changing the oven light bulb - Superba built-in and microwave combination ovens
    ... the oven light bulb? The oven lights are 12-volt, 5-watt maximum halogen bulbs. Remove the glass light cover by snapping it back into the wall. Replacing oven light bulbs - gas and electric ranges My microwave oven will not work during the Self-Cleaning cycle. Changing the oven light bulb - To purchase the bulbs, call 1-800-334-6889 and ask for Part No. 4452164. Architect Series II...
  • Beverage center lights do not work
    Beverage center lights do not work Why don't the lights work on my beverage center? Plug into a grounded 3 prong outlet. Is the power supply cord unplugged? Is a light bulb loose in the socket or burned out? See  Changing the beverage center light bulb Answers others found helpful
  • Replacing oven light bulbs - Built-in ovens
    ... away from the socket. Architect Series II - To replace oven light bulbs: Before replacing any bulbs, make sure the oven is opened . gas and electric ranges FAQs Knowledgebase search tips Setting the clock Changing the beverage center light bulb The oven lights are 12-volt, 5-watt maximum halogen bulbs. Remove the bulb from the oven. Reconnect power. Superba built-in oven come on ? ...

Similar Questions

Light Is Not Working
I have kithen aid khmc 1857wbl model working fine , but interior light nor outer light working ? Che...
(Posted by borsadtroy 10 years ago)
Kitchenaid Model Khhc2090sss Microwave Quit Working
kitchenaid model khhc2090sss Microwave quit working
(Posted by dlp1165 12 years ago)
Microwave Will Not Heat
i have a kitchenaid convection/microwave oven, the oven works but the microwave does not heat
(Posted by bootif 12 years ago)
This Microwave Series Should Be Recalled Do To The Malfunction Of The Wave Guid
This microwave/convection oven should be recalled do to the malfunction of the wave guide? How long ...
(Posted by e1024 13 years ago)
Change Light Bulb In Microwave Oven.
How do I change the light bulb in a Kitchenaid KBMS1454SSS Microwave oven?
(Posted by danafeneck 13 years ago)
Ask a New Question
Use the box below to post a new question about this KitchenAid product .
Points & Prizes
  • You can earn points for nearly everything you do on HelpOwl.com
  • You can trade in those points for gift cards at leading retailers such as Amazon.com and Walmart
  • It's that simple!
See How it Works
Create a Free Account

KitchenAid Manuals

Find free KitchenAid KHHC2090SSS - Architect II 2.0 cu. ft. 1200 W manuals and user guides available at ManualOwl.com. Try out our unique manual viewer allowing you to interact with manuals from directly within your browser!

KitchenAid Reviews

View thousands of KitchenAid user reviews and customer ratings available at ReviewOwl.com.

Contact Information

Complete KitchenAid customer service contact information including steps to reach representatives, hours of operation, customer support links and more from ContactHelp.com.

Scoreboard Ratings

See detailed KitchenAid customer service rankings, employee comments and much more from our sister site.

KitchenAid Recalls

Find comprehensive KitchenAid recall information updated hourly on RecallOwl.com.