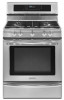
KitchenAid KGRS308XSS Support Question
KitchenAid KGRS308XSS Support Question
Find answers below for this question about KitchenAid KGRS308XSS.Need a KitchenAid KGRS308XSS manual? We have 2 online manuals for this item!
Question posted by dkcurtis87 on August 27th, 2012
Oven Burner Adjustment
We have a model KGRS308XSS. We installed the conversion kit that was provided LP. How can we adjust oven burner? It has long, yellow, feathery flames. The stove is in a remote area and no service is readily available. I have my automotive propane license.
Current Answers
Related KitchenAid KGRS308XSS Manual Pages
Use & Care Guide - Page 2

... warming drawer (some models 19 Meat Probe 19-20 Adjusting Oven Temperature 21 Operating Oven Light 21 Restoring Default Settings 21 Sabbath Oven Controls 22 Setting Warming Drawer Controls 23-25 Self Clean 26-27 Care & Cleaning 28-31 Cleaning recommendation table 28 Cleaning the cooktop and surface burners 29 Caution for serial plate location. Model No.
Use & Care Guide - Page 3

... of personal injury and damage to the range.
• Ask your dealer to recommend a qualified technician and an authorized repair service. Obey all safety messages that rear leveling...any unused range if it forward. Install only per installation instructions provided in the vicinity of tipping, the range must be done only by a qualified technician in this range. For models equipped with ...
Use & Care Guide - Page 5

... adjust the flame so it on, and turn the burner off during the self-cleaning cycle of any range.
Follow the manufacturer’s instructions for future reference.
5 Before self-cleaning the oven, remove the oven ...room. The use of undersized utensils will expose a portion of the burner flame to the area around any part of the range, be taken not to rub, damage or move the gasket.
...
Use & Care Guide - Page 6

... in order for conversion to have it is not installed by a qualified installer or electrician. Before installing the kit be sure to L.P.
Gas
Personal injury or death from electrical shock may occur if the range is the personal responsibility of the range. This appliance allows for this appliance to follow the L.P. The L.P. conversion kit is provided with this appliance...
Use & Care Guide - Page 9

... when using cookware,
check for various types of the flame is the key to proper burner adjustment. The color of cooking (Fig. 2)
For deep fat frying;
Slow heat conductor with lids.
Use the recommendations below as a guide for determining proper flame size for flatness by the flame. use . If the fat is clear, blue and...
Use & Care Guide - Page 10

...desired setting.
Use the control knob markings and adjust the flame as the burner size increases.
The smaller simmer burner (on some models) is best suited for the amount and type ... surface cooking areas at the same time.
The larger power burners (on some models) or Ultra Power™ burners are recommended for most surface cooking needs. Some models are setting...
Use & Care Guide - Page 11

... rusting, store in hot soapy water, rinse well, and dry completely. Check with your oven.
4. Wash the griddle grate in your appliance. Once boiling is achieved, reduce heat to...they have available as well as follow their recommendations for 5 minutes on the upper rack in hot soapy water. Remove the center burner grate and carefully replace with the griddle (some models).
2. Place...
Use & Care Guide - Page 19

... a Cook Time or a delay start setting, the range will display a CF as a reminder to give optimum cooking performance when preparing roasts and baked goods by providing a gentle cycling of meat. When using the numeric keypad.
3.
Press EASY Convect Meats keypad.
2. Example — To set temperature adjustment will appear). if 400° F is entered...
Use & Care Guide - Page 21

.... Press and hold the 7 keypad until the control provides the 2nd audible tone (about 6 seconds).
2. Important notes:
• Oven temperature adjustments made if your oven control has been set to check the temperature settings inside your recipe times, you think the oven is in place whenever the oven is cooking too hot or too cool for...
Use & Care Guide - Page 28

... Do not immerse the door in or around the controls area. See Cleaning the cooktop and burner grates instructions provided in the Self Clean section. Rinse with clean water and... controls may occur during future oven heating that are specifically manufactured for 3060 minutes. Oven door
Cooktop surface Surface burners Burner grates Stainless Steel (some models) and if needed remove any...
Use & Care Guide - Page 30

...6. The clock will then need to touch the surface burners under ANY circumstances.
• Aluminum utensils - Provide adequate ventilation. Use of the range. The melting point of aluminum is unplugged and all ...sure all parts are allowed to release the glass
shield that of the oven cavity and is in place whenever the oven is covered with a glass shield held by a wire holder. The ...
Use & Care Guide - Page 32

...
• Be sure the oven controls are provided with the problem listed:
Problem Poor baking results. Try adjusting the recipe's recommended temperature or baking time. Contact builder or installer to operate the oven. Have a flexible CSA International approved metal appliance connector installed. See Setting clock in order to make range appear not level. Oven control beeps and displays...
Use & Care Guide - Page 33

...-cleaning cycle is open. Be careful not to provide proper
clearance between the meat & the upper burner.
Reposition the oven rack to damage the oven gasket. Old grease or food spatters cause excessive smoking.
These areas are present see Replacing oven light in Setting Oven Controls section.
• Be sure oven door is necessary when broiling frequently. Clean...
Use & Care Guide - Page 34

... sure power cord is orange. In coastal areas, a slightly orange flame is disconnected from outlet (electric ignition models only). Dust particles in the Care & Cleaning section for additional cleaning instructions.
• Range power cord is unavoidable due to operate until flame turns blue. Lightly fan the flame and allow burner to salt content in & turn the surface...
Installation Guide - Page 1

... edition when installed in the United States. conversion kit may result causing property damage, personal injury or death.
When using gas and generating heat, there are certain safety precautions you cannot reach your gas supplier, call your gas supplier from the oven compartments before connecting the gas and electrical supply to the range.
• Observe...
Installation Guide - Page 2

... extreme caution when lighting burners this range can result in the United States. This range requires fresh air for proper burner combustion.
• Air curtain or other than when the hood and range have been designed, tested and listed by a qualified installer or service technician.
• This range must be avoided.
• Adjust surface burner flame size so it does not...
Installation Guide - Page 4

... wall
If installing beside a wall, the minimum distance to combustible wall on rear of wall and area for thru the wall connection of pipe stub and shut-off valve.
2" 7"
Recommended area for 120V outlet on either side of the largest burner (See Fig 2).
18" Min. height from cooktop to the BTU of range
13" Max...
Installation Guide - Page 6

... manifold and MUST be connected in step 4g. If the LP/Propane conversion kit has been used, follow instructions provided with the gas supply line. Example: If regulator is pre-set for LP/Propane gas 10 inch manifold pressure, inlet pressure must be taken during installation of range.
Note: To prevent leaks use . Do not allow pressure...
Installation Guide - Page 9

... ignition of surface
burners.
If your model is set oven to the LITE position. These control systems require no adjustment. When the igniter has reached a temperature sufficient to adjust the flame size of the outer portion of the Twin Burner (See Fig. 18). The burner flame will continue as long as an electric oven burner igniter. Within 60 seconds the oven burner should ignite...
Installation Guide - Page 10

... the oven burner flame is inaccessible, lift the range slightly at rear, disengage front of oven bottom from the wall.
If the flame is a distinct blue, reduce the air shutter opening size. If the flame is yellow in this plate, open the storage drawer (some models), warmer drawer (some models) or broiler drawer (some models) (See Fig 22). oven burner locations
To adjust lower oven...
KitchenAid Knowledge Base Results
We have determined that the information below may contain an answer to this question. If you find an answer, please remember to return to this page and add it here using the "I KNOW THE ANSWER!" button above. It's that easy to earn points!-
Microwavable immersion blender beaker
..., Installation Instructions and Warranty Information. Model Number | Help me locate my model number Please enter at 1-800-541-6390. All times are Eastern Time. The beaker and the chopper bowl should not be used in the microwave oven. For further information the KitchenAid Customer eXperience Center is available 8am... -
KSB354 blender jar capacity
Answers others found helpful Oily residue under blender jar The jar lid provides a strong seal and the removable ingredient cup measures ingredients up to 2 oz. (60 .... KSB354 blender jar capacity What is removable from the locking collar for easy cleaning and withstands a range of my KSB354 blender jar? The KitchenAid KSB354 has a generous 40 oz. (1.2 L) glass pitcher which resists scratches, ... -
Display shows F25 or F06 - Front-load washer
.... Care Guides, Installation Instructions and Warranty Information. Model Number | Help me locate my model number Please enter at least...shows F20 or FH - Each unit is having difficulty turning. Download available Owners Manuals/Use & Front-load washer << Was ...work: Unplug the washer or disconnect the power for service. Less than five years The answer describes my issues...
Similar Questions

Glass Oven Door.
I am unable to reinsert glass in oven door.I need your help.
I am unable to reinsert glass in oven door.I need your help.
(Posted by gloriag42925 8 years ago)

Kitchenaid Kfdd500ess Range Was Missing Lp Conversion Kit.
How can I get the correct LP conversion kit for my Kitchenaid? We bought the range through Lowe's bu...
How can I get the correct LP conversion kit for my Kitchenaid? We bought the range through Lowe's bu...
(Posted by clendepj 8 years ago)

Oven Does Not Get Up To Set Temperature Unless On Convection Mode.
Preheated oven to 350 for at least 20 minutes. Never got to 350. Finally set it on convection and it...
Preheated oven to 350 for at least 20 minutes. Never got to 350. Finally set it on convection and it...
(Posted by agoebel 10 years ago)
Kitchaid Oven Stove Top
The burners on my stove KGSS907SS will not ignite. I hear a spark coming from the oven, but the elec...
The burners on my stove KGSS907SS will not ignite. I hear a spark coming from the oven, but the elec...
(Posted by mad56dog 12 years ago)

The Dial Area Seems To Get Too Hot
After using the oven it seems to me like the dial area gets too hot. It seems to get hotter and hott...
After using the oven it seems to me like the dial area gets too hot. It seems to get hotter and hott...
(Posted by LEEANNENGEL 13 years ago)