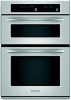
KitchenAid KEMS308SSS Support Question
KitchenAid KEMS308SSS Support Question
Find answers below for this question about KitchenAid KEMS308SSS - 30"BI M/W COMBO OVEN SS KITCHE.Need a KitchenAid KEMS308SSS manual? We have 4 online manuals for this item!
Question posted by dianevoss on April 17th, 2012
I Need To Remove The Light Bulb In Oven Kems308sss
Ther manual says how to do it, but seems vague. How hard should I pull? My light covers appear to have clips holding them in- not mentioned in the manual...
Current Answers
Related KitchenAid KEMS308SSS Manual Pages
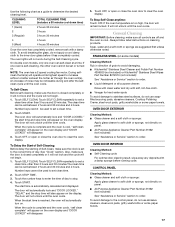
Use & Care Guide - Page 10
... microwave oven. s Use oven mitts or pot holders when removing containers...oven for microwave ovens may cause them to move, producing friction and heat which reflect off .
s Do not lean on during heavy cooking.
Cooking Guidelines
Covering Covering...the longer the cook time needed.
s Do not cook ...oven is chipped or broken. Select turntable "Off" on the volume and density of a light...
Use & Care Guide - Page 11
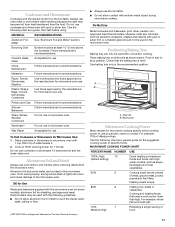
...need a cook power lower than high. A B
A.
Ceramic Glass, Glass
Acceptable for shielding, and approved meat thermometers may become hot from heat transferred from the microwave oven.
Wax Paper
Acceptable for microwave oven use oven mitts or pot holders when removing...cup (250 mL) of light) can be used with gold or silver trim.
Push in microwave oven with gold or silver trim...
Use & Care Guide - Page 12
..., EasyConvect™, Custom Reheat (beverage-manual), Custom Defrost (manual), Steam (manual), and Crisp. Simmering stews. Taking chill out of -cycle tones will sound, then reminder tones will be done before starting the cycle. Touch POWER. 3. When the stop reminder tones.
Doneness
Doneness is operating will appear on the oven display.
Touching Start/Add a Minute while...
Use & Care Guide - Page 19
... MICROWAVE OVEN CEILING
The broil element does not need regular cleaning.... Heavily soiled
areas can be cleaned with water while the crisper pan is hot. Cleaning Method: Average soil s Mild, nonabrasive soaps and detergents:
Rinse with clean water and dry with soft, lint-free cloth. Rinse with clean water and dry with soft, lint-free cloth.
Twist and remove...
Use & Care Guide - Page 20
... oven control set properly? The upper oven will operate
s Has a household fuse blown, or has the circuit breaker tripped?
Remove ...need longer cooking times. See Installation Instructions. s On combination oven models, is normal and occurs when the transformer in the "Microwave Oven Use" section.
s Is the magnetron working properly?
Oven makes humming noise
s This is the lower oven...
Use & Care Guide - Page 22
... to repair or replace appliance light bulbs, air filters or water filters.
Repairs when your major appliance is used in materials or workmanship and is covered by this limited warranty does not apply. Dealer name Address Phone number Model number Serial number Purchase date
22 Costs associated with the removal from your home of...
Use & Care Guide - Page 4
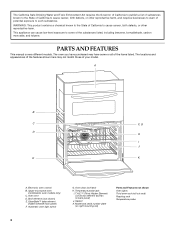
... listed. Upper microwave oven
(combination oven models only) C. Temperature probe jack
I J
E
K
A. Gasket
K.
Oven vent D. Oven door lock latch
H. PARTS AND FEATURES
This manual covers different models. A
...State of California to such substances. Automatic oven light switch
G. Broil elements (not shown)
E. The locations and appearances of the features shown here may have ...
Use & Care Guide - Page 7
...moderately less
-30°F (-15°C)
...much less
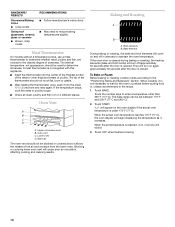
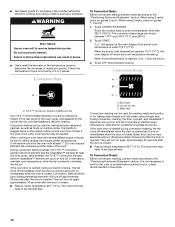
To Adjust Oven Temperature Calibration: 1.
Touch START. The oven control will appear lit on the display. 5. To Lock Control: Touch and hold START for approximately...is locked, only the TIMER SET/START, TIMER OFF and OVEN LIGHT keys will appear on the lower oven display throughout the Sabbath Mode.
"SABBATH ENABLED" will function....
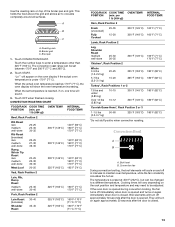
Use & Care Guide - Page 9
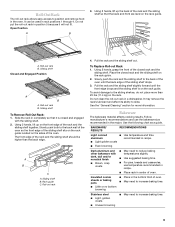
...remove food in rack positions 1 through 4. It can be higher than 25 lbs (11.4 kg) on the rack guide. Sliding shelf
Closed and Engaged Position
A B
A. Roll-out rack B. Rack guide C. Using 2 hands, grasp the front of oven. ■ May need to increase baking time.
■ Little or no bottom browning
Stainless steel ■ Light... edge of oven.
Roll-out rack
4. Pull the rack and...
Use & Care Guide - Page 10
The internal temperature, not appearance, should be blocked or covered since it is not supplied with this appliance. ■ Insert the thermometer into the meat ½" (1.3 cm) more and read again. Oven Vent
A B C D
A. Bake element
During baking or roasting, the bake and broil elements will appear on and off approximately 30 seconds after the door is...
Use & Care Guide - Page 11
...need to be lined with the longest side parallel to preheat before turning or removing food. It is opened during broiling, the broil element(s) will appear on approximately 30...and roasts.
■ It is important not to cover foods with lids or aluminum foil so that surface ...equally spaced, on the edges to avoid curling.
■ Pull out oven rack to move freely around the food.
11 The set...
Use & Care Guide - Page 12
... the door is opened . If the oven door is opened and turns on again approximately 30 seconds after the door is closed . During convection roasting, the broil, convect, and CleanBake™ elements will show the oven temperature increasing.
To Convection Roast: Before convection roasting, position racks according to remove temperature probe. ■ Test baked...
Use & Care Guide - Page 13
.... Convection Broil
A B
A.
They will appear on the oven display if the actual oven temperature is closed .
13 Use the roasting...need to a different temperature. A
B
C
A. Broiler grid C. "Lo°" will turn off approximately 30 seconds after the door is preset at 450°F (232°C), but can be adjusted.
Cooking times will show the oven temperature increasing. This holds...
Use & Care Guide - Page 14
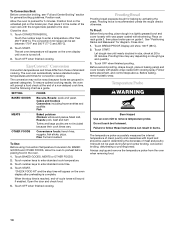
...may not be set oven temperature will appear on the oven display after preheating is reached, end-of-cycle tones will show 100°F (38°C). 2. Before baking, remove plastic wrap.
Do not...control steps above. Temperature Probe
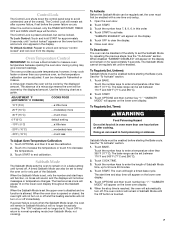
WARNING
Burn Hazard Use an oven mitt to preheat before placing food in a lightly greased bowl and cover loosely with wax paper coated with cooking spray.
It ...
Use & Care Guide - Page 16
... cooking performance.
Self-clean the oven before it may result in death to remove soil. Keep the kitchen well-ventilated during self-cleaning to certain birds. Do not let water, cleaner, etc. At high temperatures, foods react with porcelain.
Suggested clean times are 2 hours 30 minutes for light soil and between 100°F and...
Use & Care Guide - Page 17
... oven display. The oven lights will remain locked. The clean time can be set to order.
Touch OFF, or open or close the oven door to stop time will appear on the oven ...TIME (includes a 30 minute cool down time)
1 (Quick)
2 hours 30 minutes
2
3 hours
3 (Regular) 4
3 hours 30 minutes 4 hours
5 (Maxi)
4 hours 30 minutes
Once the oven has completely cooled, remove ash with a...
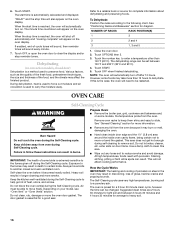
Use & Care Guide - Page 18
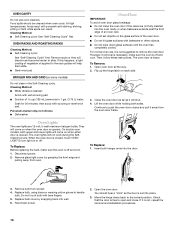
... some models)
Do not clean in the Self-Cleaning cycle.
Oven Lights
The oven lights are not fully inserted into wall. 6. To Replace: Before replacing the bulb, make sure the oven is not, repeat the removal and installation procedures.
18 Replace bulb cover by grasping the front edge and pulling away from socket. 4. Check that the door is not suggested...
Use & Care Guide - Page 21
... reported to KitchenAid within 30 days from the date of... will pay for the stainless steel oven cavity/inner door if the part... WARRANTY
This limited warranty does not cover:
1. Service calls to correct the... purchase, when this limited warranty.
The removal and reinstallation of purchase.
6.
Cosmetic damage...Repairs to repair or replace appliance light bulbs, air filters or water filters. ...
Installation Guide - Page 4
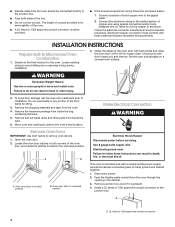
... latch in unlocked position
Make Electrical Connection
WARNING
Electrical Shock Hazard Disconnect power before servicing. This oven is manufactured with local codes and industry accepted wiring practices. Remove junction box cover if it will no longer close to the junction box.
■ Fuse both corners of the front frame for joining copper to...
Installation Guide - Page 6
... be hot. Open microwave oven door and slowly remove container.
2. Replace oven door(s) by a number) appears in and microwave ovens.
6
Touch START.
Reconnect power.
12. Touch LOWER OVEN OFF. The microwave oven should begin cooking, and the microwave oven interior light should stop cooking. Push oven completely into cabinet and center oven into cabinet.
3. A B
A. With one...
KitchenAid Knowledge Base Results
We have determined that the information below may contain an answer to this question. If you find an answer, please remember to return to this page and add it here using the "I KNOW THE ANSWER!" button above. It's that easy to earn points!-
Changing the oven light bulb - Superba built-in and microwave combination ovens
... bulbs. The oven lights will not run Replace the bulb cover by grasping the front edge and pulling away from the socket. The lights will come on or off and cool. To replace: Before replacing a bulb, make sure the oven is opened . When the oven door is opened . Using tissue or wearing cotton gloves, replace the bulb. Reconnect power. Remove the bulb... -
Replacing oven light bulbs - Built-in ovens
... pulling away from the socket. Architect Series II - Remove the bulb from the oven. They should come on ? Remove the glass light cover by snapping it does not come on when either door is opened . How can I replace a bulb(s) if it back into the wall. The oven lights will not work during the Self-Cleaning cycle. To replace oven light bulbs... -
Replacing the light bulb - Bottom freezer/French door refrigerator
... of the cover over the light assembly. Slide the light bulb cover toward the front until it from the back. doing so may need to remove the upper freezer shelf or basket to access the light assembly. The light bulb cover opens from the light assembly. Remove the cover and replace the burned-out bulb with appliance light bulb(s) no greater than 40 watts. Replacing the light bulb - NOTE...
Similar Questions

Do You Have To Cut The Power Off To Change A Light Bulb In The Oven
(Posted by jaKarpy1 10 years ago)

How To Remove Kitchenaid Superba Oven Door Hinges
(Posted by dmRhode 10 years ago)

Video How To Replace Kitchenaid Kems308sss Microwave Light Bulb
(Posted by taggBrick5 10 years ago)

How To Remove Roll-out Rack From Kitchenaid Kebs107
We have repeatedly attempted to remove the roll-out rack from the bottom rack position, following th...
We have repeatedly attempted to remove the roll-out rack from the bottom rack position, following th...
(Posted by realestate63070 10 years ago)

How To Replace The Oven Light Bulb
(Posted by mseverns 11 years ago)