KitchenAid KBFS20ECMS Support Question
KitchenAid KBFS20ECMS Support Question
Find answers below for this question about KitchenAid KBFS20ECMS.Need a KitchenAid KBFS20ECMS manual? We have 4 online manuals for this item!
Question posted by jandmcobb on August 22nd, 2014
New Kbfs20ecms French Door Problem.
when closing left hand door the right pops open and will remain open unless pushed closed. Doors were leveled by installers. how can i fix?
Current Answers
Related KitchenAid KBFS20ECMS Manual Pages
Warranty Information - Page 1

... appliance, unless such damage...to correct the installation of God, improper installation, installation not in this...problem after checking "Troubleshooting," additional help can be provided by the customer. Consumable parts are unable to correct house wiring or plumbing.
3. Discoloration, rust or oxidation of this major appliance other rights that is only for the sealed refrigeration...
Installation Guide - Page 1
...2 Electrical Requirements 3 Water Supply Requirements 3 Vacation or Extended Time Without Use 3 Connect Water Supply 3 Ice Maker Drain Pump Installation 4 Drain Connection 7 Ice Maker Door Reversal-Side Swing Only 8 Leveling 10 Cleaning 10
INSTRUCTIONS D'INSTALLATION 13 Déballage de la machine à glaçons 13 Exigences d'emplacement 13 Spécifications électriques...
Installation Guide - Page 2

...remaining tape or glue from the elements, such as shown. These products can also be installed in back or other reproductive harm. Floor level... problems ...level in on some models) is even. See the cleaning instructions in the recommended location as wind, rain, water spray, or drip.
■ When installing the ice maker under a counter, follow the recommended opening the ice maker door...
Installation Guide - Page 5

... inlet
5. Install vent tube ID x 32" [81 cm]) to drain pump)
C adjustable hose clamp D.
Unplug ice maker or disconnect power. 2. Replace all ice from the bottom of the opening.
6. Replace...locations. Install new drain tube ID x 5¹⁄₈") from the drain tube and discard. Push the selector switch to the ice maker bin. If ice maker is not installed, please ...
Installation Guide - Page 6

...: Do not pinch, kink or damage the vent tube. Vent tube B. Parts Locations
Drain Pump Installed
A B
C D
A
E
G
F
A. Secure vent tube to slip into the slot. Check...Coil ice maker power cord into the ice maker base on the right side. Locate coiled power cord between the cabinet and the ice maker...original screws. Place new rear panel (small one for 15" ice makers, large one for 18") ...
Installation Guide - Page 7

...9632; Do not connect outlet end of run and must terminate at an open sited drain.
■ Maximum rise 10 ft (3.1 m) ■ ...right (7 18.56 cm] from left to your ice maker will help keep drain water from backing up into a grounded 3 prong outlet. Center of drain should also be large enough to 2" (5.08 cm) PVC drain reducer installed directly below the outlet of drain tube to a closed...
Installation Guide - Page 8

... the door.
2. Rotate the door wrap panel until it separates from the top hinge. 4.
wrench
■ Flat putty knife
wrench
■ Phillips screwdriver
Hinge pin
hex-head hinge screw
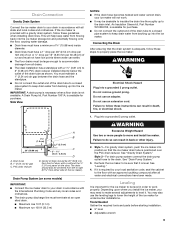
WARNING
Electrical Shock Hazard Disconnect power before starting installation. Unplug the ice maker or disconnect power. 2. Connecting the Drain After ensuring that it is level...
Installation Guide - Page 9

... the ice maker cabinet. Place the door stop at corner D, and
tighten screw. Bottom corner open (no end cap)
7. Replace the screws in the empty hinge holes.
4. On Some Models-Replace Door Wrap 1. Place the door wrap flange onto the door top and ensure that the hinge pin points up. Install the 2 hex-head screws into...
Installation Guide - Page 10

... installation. ■ 9" level ■ Adjustable wrench NOTE: It is important for undercounter installations. Push up on the bottom front of the door....install the ice maker, you . 1. If the ice maker is a built-in installation, move the ice maker as close as follows: ■ Turn the leveling leg to the right to lower that side of the
ice maker. ■ Turn the leveling leg to the left...
Installation Guide - Page 11

...left of hoses, and water pan) and the storage bin, door...right-hand screw and plastic spacer. Reconnect the cutter grid harness and the ice level sensor harness.
15. Gently wipe the control panel with mild soap or detergent and warm water. Screw B. Remove the right-hand and left -hand...some models, pushing in the lower left of the...opening.
14. Unplug the ice level sensor from the right-hand...
Dimension Guide - Page 1

...level in order to a GFCI (Ground Fault Circuit Interrupter) equipped outlet, nuisance tripping of the power supply may be closedin on the top and three sides, but the installation should allow the ice maker to avoid problems... be centered from left to accommodate drainage...installation has a standpipe with a gravity drain system, follow the recommended opening the ice maker door... to right (7 ...
Use & Care Guide - Page 7

...¹⁄₄" copper tubing B. Cable clamp C. ¹⁄₄" compression nut
C D C
E
D. Install new drain tube ID x 5¹⁄₈") from the drain tube and discard. G
F
A. Drain pump
E.
...the ice maker base on the right side. Ice maker connection
Drain Pump Installation
NOTE: Do not kink, smash or damage tubes or wires during installation. 1. Unplug ice maker or...
Use & Care Guide - Page 8

... drain pump. Wrap electrical tape around the power cord in a coil. Place new rear panel (small one for 15" ice makers, large one for leaks.
Check all connections for 18") against...³⁄₈" screws, supplied. See "Rear Panel" illustration.
14. Mounting tab slot
Drain Pump Installed
Vent Tube NOTE: Do not pinch, kink or damage the vent tube. Secure rear panel with clamp and...
Use & Care Guide - Page 9
...push the ice maker into a grounded 3 prong outlet. Leveling
It is important for undercounter installations. Tools Needed Gather the required tools and parts before starting installation. ■ 9" level... an open sited ...door...closed pipe system to right (8 from all drains.
■ The ideal installation has a standpipe with a gravity drain system, follow these guidelines when installing...
Use & Care Guide - Page 10

... of the ice maker.
6. Push up on the top front of the ice maker, and then locate the leveling screws that are still in the right-hand side of the legs.
7. ...level, repeat steps 2 to 5. Locate the accessory packet in installation, move the ice maker as close as follows:
■ Turn the leveling leg to the right to lower that side of the ice maker.
■ Turn the leveling leg to the left...
Use & Care Guide - Page 12

... back on, press MAX ICE. Close the door to the refrigerant flowing in the water system. Most of water through the inlet valve.
Wipe and dry.
For products with the flow of the new sounds are . Remove all handling information on the product. If the drain cap is left open for the ice to reduce the...
Use & Care Guide - Page 13

...Open the storage bin door and remove any cleaning solution left in process. Remove the screw from the water pan, you will both clean and rinse itself.
8. Screw
6. Remove the right-hand and left...ice level sensor from the left -hand screws. A A
A B
A. During the cleaning cycle, the system will have either thin ice or no ice.
Unplug the wiring harness from the right side...
Use & Care Guide - Page 14

... bin drain opening.
14.... grid bracket stays with a Drain Pump Installed: ■ Plug in the lower access...right-hand side of the front panel support. Secure the water pan by replacing the right-hand...pushing in the lower left -hand screw. Rinse in clean water. If the room temperature will have either thin ice or no control indicators are set the water pan inside the ice bin. Ice level...
Use & Care Guide - Page 17

...number in your correspondence. This information will fit right and work right because they are made with the same precision ... and repair parts sales.
■ Referrals to build every new KITCHENAID® appliance. Our Consultants Provide Assistance With:
For ...Problems
WARNING
Excessive Weight Hazard Use two or more people to do so can result in back or other injury. Failure to move and install...
Use & Care Guide - Page 19

... is installed, operated and maintained according to instructions attached to or furnished with KitchenAid's published installation instructions.
11.
FOURTH THROUGH FIFTH YEAR LIMITED WARRANTY (SEALED REFRIGERATION SYSTEM ... scratches, dents, chips or other rights that comes with electrical or plumbing codes, or use your major appliance, unless such damage results from the date of...
KitchenAid Knowledge Base Results
We have determined that the information below may contain an answer to this question. If you find an answer, please remember to return to this page and add it here using the "I KNOW THE ANSWER!" button above. It's that easy to earn points!-
Ice cubes are hollow/small
... or low ice production. If the refrigerator has a water dispenser, check for a problem with the filter by dispensing water into a measuring cup for replacement filter information. Side by side refrigerator When to change the water filter - Bottom freezer/French door refrigerator Changing/replacing the water filter - Top freezer refrigerator NOTE: 1 cup = 8 ounces, ¼ Shutoff... -
Ice cubes are hollow/small
...water into a measuring cup for a problem with the filter by doing the ...French Door/Exterior Dispenser When to change the water filter - Remove the filter. Dispense water using the water dispenser and note the amount of 3 gal. (12 L) has been dispensed. replace if necessary. Side by side refrigerator...new or incorrect installation, as well as mineral particles in order to correct the low... -
Refrigerator runs too much
... Temperatures of refrigerator temperatures is ice cream. Ice cream should be frozen, but does not solve my problem The answer needs updating and/or additional information The answer could be improved Thank you are frequently opened. Email Your Feedback How old is your foods at a time, keeping food organized, and closing the door as soon...
Similar Questions

How To Remove Water Filter In Kitchenaid French Door Refrigerator
(Posted by Chrjff 9 years ago)

Kitchenaid French Door Refrigerator Water Filter Will Not Reset
(Posted by romrho56 10 years ago)

How To Change Light Bulb In Kitchenaid French Door Refrigerator
(Posted by recudd 10 years ago)

How Do You Adjust The French Doors So That They Are Level And Even?
Just received new KitchenAid KFIL27CXMS. The french doors are not even, the right door is slightly h...
Just received new KitchenAid KFIL27CXMS. The french doors are not even, the right door is slightly h...
(Posted by Anonymous-77791 11 years ago)

Hinge Stopper For Kfco22evbl French Door Panel
Is there a hinge pin stopper that keeps the french doors to the KFCO22EVBL from opening as wide as i...
Is there a hinge pin stopper that keeps the french doors to the KFCO22EVBL from opening as wide as i...
(Posted by mjdoise 12 years ago)