HP LaserJet Pro CP1025 Support Question
HP LaserJet Pro CP1025 Support Question
Find answers below for this question about HP LaserJet Pro CP1025 - Color Printer.Need a HP LaserJet Pro CP1025 manual? We have 5 online manuals for this item!
Question posted by faithnkabinde on August 16th, 2012
Rear Door
Hi
Please help me how do I close the rea door that is open?
Regards
Current Answers
Answer #1: Posted by mukhan92 on August 16th, 2012 10:42 PM
mukhan92

Member since:
August 5th, 2012 Points: 11,210

Member since:
August 5th, 2012 Points: 11,210
Follow these steps to turn the printer off and on again.
Step one: Turn the All-in-One off and on again
- Press the Power button ( ) to turn off the product. If the product does not turn off, proceed to the next solution.
- Wait 60 seconds.
- Press the Power button ( ) to turn the product on. NOTE:The product might go through a warm-up period which might last up to two minutes. The product lights might flash and the carriage might move. Wait until the warm-up period completes before you continue.
- Load plain white paper in the input tray.
- Press the Power button ( ) button to turn on the product.
- Press Setup on the product control panel.
- Press the Right Arrow button ( ) until Print Report displays on the control panel display, and then press OK . The self-test report prints.
- If these steps resolved the issue , and the test page prints , there is no need to continue troubleshooting.
- If the issue persists , continue with the next solution.
- If the test page does not print , continue with the next solution.
- Remove the rear access door or duplexer (if installed) from the rear of the product. To remove, press in the tabs on the left and right side, and pull it away from the product.
- Gently pull any paper out of the rollers. CAUTION:If the paper tears while removing it from the rollers, check the rollers and wheels for torn pieces of paper that might remain inside the product. If any torn pieces of paper remain inside the product, more paper jams are likely to occur.
- Reattach the rear access door or duplexer. Gently push the door forward until it snaps into place.
- Make sure the product is on, and then disconnect the power cord and the USB or Ethernet cable from the rear of the product. Do not reconnect them until instructed to later. NOTE:Make sure the product is on before disconnecting the power cord. Failure to disconnect the power cord from the product can cause damage when removing jammed paper.
- Open the top access door by lifting from the front center of the product until the door locks into place. Figure 1: Opening the top access door
- Note where the carriage is stuck and look for jammed paper. NOTE:The carriage is the device that contains the printhead and moves left to right during printing. A paper jam can cause the error message and the carriage stall. Paper might be jammed in different locations and might cause the carriage to be stuck in the middle of the product or on the right or left side.
- Remove any jammed paper or objects that might be restricting the carriage. NOTE:Do not use any tools or other devices to remove jammed paper. Always use caution when removing jammed paper from inside the product.
- Carefully reach inside the product through the cartridge door, and then manually move the carriage.
- If the carriage is stuck on the right side of the product, move the carriage to the left side of the product.
- If the carriage is stuck on the left side of the product, move the carriage to the right side of the product.
- If the carriage is stuck in the middle of the product, move the carriage to the right side of the product.
- Make sure the carriage moves freely across the width of the product. Firmly push the carriage to the left side of the product, and then to the right side.
- Close the top access door, locking it into place.
- Reconnect only the power cord to the rear of the product. Do not connect the USB or Ethernet cables at this time . If the product does not turn on automatically, press the Power button ( ). NOTE:The product might go through a warm-up period of up to two minutes. Lights might flash and the carriage might move. Wait until the warm-up period is complete before going to the next step.
- Check the power light.
- Load plain white paper in the input tray.
- Press the Power button ( ) button to turn on the product.
- Press Setup on the product control panel.
- Press the Right Arrow button ( ) until Print Report displays on the control panel display, and then press OK . The self-test report prints.
- If these steps resolved the issue , and the test page prints , there is no need to continue troubleshooting.
- If the issue persists , continue with the next solution.
- If the test page does not print , continue with the next solution.
- Make sure the computer and the product have a three-prong power plug.
- Remove the product power cord from any power strips or surge suppressors, and then plug it directly into a grounded wall outlet.
- Try the print job again to see if this step resolved the issue. NOTE:If the product prints when plugged directly into a wall outlet while disconnected from any power strips or surge suppressors, the power strip or surge suppressor might not be allowing sufficient voltage to reach the product. If this did not resolve the issue, continue to the next step.
- Load plain white paper in the input tray.
- Press the Power button ( ) button to turn on the product.
- Press Setup on the product control panel.
- Press the Right Arrow button ( ) until Print Report displays on the control panel display, and then press OK . The self-test report prints.
- If these steps resolved the issue , and the test page prints , there is no need to continue troubleshooting.
- If the issue persists , continue with the next solution.
- If the test page does not print , continue with the next solution.
- Press the Power button ( ) to turn off the product. NOTE:The product might not turn off after pressing the Power button. Continue to the next step regardless.
- Disconnect the power cord from the rear of the product.
- Unplug the power cord from the electrical outlet.
- Wait 30 seconds.
- Replug the power cord into the electrical outlet.
- Reconnect the power cord to the rear of the product.
- Press the Power button ( ) to turn on the product.
- Load plain white paper in the input tray.
- Press the Power button ( ) button to turn on the product.
- Press Setup on the product control panel.
- Press the Right Arrow button ( ) until Print Report displays on the control panel display, and then press OK . The self-test report prints.
- If these steps resolved the issue , and the test page prints , there is no need to continue troubleshooting. Reconnect the USB cable, and then try to print again.
-
If the test page prints successfully , but you continue to experience an issue with your printer , then the issue is not related to the hardware.
Experiencing another issue?
If your printer prints a test page and there is still an issue with your printer, go to the support page for your printer , and then browse for the appropriate support document to troubleshoot the issue.
If you see a prompt to Enter a product name/number in the search box, follow these steps to go to your printer's home page:
- Type your printer name and number in the search box, and then click Search .
- If necessary, click your model in a list of similar printers.
- Search your printer's home page for topics to help resolve the issue.
- If the printer does not print a test page , there is an issue with the printer hardware. Continue to the next solution.
- If your product is in warranty , contact HP.
- If your product is out of warranty , click here to view additional printer support options starting as low as $20.
Muhammad Usman Khan
Related HP LaserJet Pro CP1025 Manual Pages
HP LaserJet Pro CP1020 - Software Technical Reference - Page 1

LASERJET PRO CP1020
COLOR PRINTER SERIES
Software Technical Reference
HP LaserJet Pro CP1020 - Software Technical Reference - Page 3

HP LaserJet Pro CP1020 Color Printer Series
Software Technical Reference
HP LaserJet Pro CP1020 - Software Technical Reference - Page 5

...
1 Document and product basics ...1 Purpose and scope ...2 Product description ...3 Documentation availability and localization 4 User documentation ...5 HP LaserJet Pro CP1020 Color Printer Series User Guide 5 HP LaserJet Pro CP1020 Color Printer Series Install Notes 6 Help and Learn Center 6 Administrator documentation 6 HP Driver Configuration Utility User Guide 7 HP Jetdirect Guide...
HP LaserJet Pro CP1020 - Software Technical Reference - Page 6

... network-connected products 42 Print driver only installation instructions (Microsoft Add printer Wizard 43 Printer sharing disclaimer 43 Point-and-Print installation 44 Modify a pre-existing installation 45
4 HP LaserJet Pro CP1020 Color Printer Series printer driver (Host-based raster driver 47 Change the printer driver settings for Windows 48 Properties tab set ...48 Printing Preferences...
HP LaserJet Pro CP1020 - Software Technical Reference - Page 8

... Change print-driver settings for Mac 78 Mac printing-system software ...79 HP LaserJet Pro CP1020 Color Printer Series PPD 79 HP LaserJet Pro CP1020 Color Printer Series PDE 79 HP Utility ...79 Supported printer drivers for Mac 79 Software for Mac ...80 HP Utility ...80 Open the HP Utility 80 Embedded Web Server 80 Availability ...80 Printing-system software...
HP LaserJet Pro CP1020 - Software Technical Reference - Page 9

... ...93 Special paper and print media guidelines table 95 Sizes (min & max) and supported paper by tray 96 Windows Install Notes/Readme ...98 HP LaserJet Pro CP1020 Color Printer Series install notes 98 I. INTRODUCTION ...99 PURPOSE OF THIS DOCUMENT 99 SUPPORTED OPERATING SYSTEMS 99 OVERVIEW OF THE PRINTING-SYSTEM COMPONENTS 100 II. LATE-BREAKING...
HP LaserJet Pro CP1020 - Software Technical Reference - Page 18

... computer screen. When you click a documentation link to an .HTM document, a Web
browser opens the file on the computer screen. ● Hypertext Markup (.HTM). Table 1-1 Documentation availability
Document
HP LaserJet Pro CP1020 Color Printer Series User Guide (.PDF file) HP LaserJet Pro CP1020 Color Printer Series Install Notes
Windows XP/Server Mac 2003/Server 2008/ Vista/7
x
x
x
Access...
HP LaserJet Pro CP1020 - Software Technical Reference - Page 19

... then click the Documentation button.
2.
ENWW
Documentation availability and localization
5 The user guide opens. Figure 1-1 Installation software CD - User Documentation screen (CDDocumentation_CP1020.eps)
HP LaserJet Pro CP1020 Color Printer Series User Guide
The HP LaserJet Pro CP1020 Color Printer Series User Guide describes the basic product features. Click the User Guide (CD...
HP LaserJet Pro CP1020 - Software Technical Reference - Page 20

... Pro CP1020 Color Printer Series Install Notes
The HP LaserJet Pro CP1020 Color Printer Series Install Notes (in .HTM format) contain important information about product features, instructions for performing specific tasks, including clearing jams and loading trays. In the main screen of the CD browser, and then click the Admin Documentation button. The guide opens. Administrator Documentation...
HP LaserJet Pro CP1020 - Software Technical Reference - Page 22

... CD is available with the product..
3.
To view the Product Support Web site from HP fulfillment centers.
In the main screen of the HP LaserJet Pro CP1020 Color Printer Series printing-system software and related software and firmware. The printing-system software CD is also available on the computer. The Web site offers an...
HP LaserJet Pro CP1020 - Software Technical Reference - Page 24
... driver languages
Component
Language list
HP LaserJet Pro CP1020 Color Printer Series host-based raster printer driver
● Arabic ● Bulgarian ● Catalan
● Czech
● Danish
● German
● Greek
● English
● Spanish
● Finnish
● French
● Hebrew
&#...
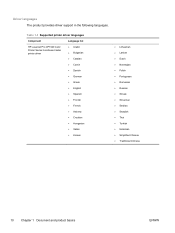
HP LaserJet Pro CP1020 - Software Technical Reference - Page 26

... the following languages. Table 1-5 Documentation languages
Component
Language list
● HP LaserJet Pro CP1020 Color Printer Series User Guide (.PDF file)
● Arabic ● Bulgarian
● HP LaserJet Pro CP1020 Color Printer Series User Guide (.CHM file)
● HP LaserJet Pro CP1020 Color Printer Series Driver Preconfiguration User Guide (Available in Arabic, Bulgarian, Czech...
HP LaserJet Pro CP1020 - Software Technical Reference - Page 29

... the type of the Windows operating system as well as toner cartridge life. Driver configuration for Windows 15 ENWW
Driver configuration for Windows
The HP LaserJet Pro CP1020 Color Printer Series host-based driver features bidirectional communication technology which, in environments that exists between the computer and the product.
HP LaserJet Pro CP1020 - Software Technical Reference - Page 30
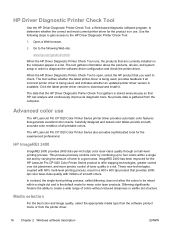
...
The HP LaserJet Pro CP1020 Color Printer Series printer driver provides automatic color features that HP can analyze and continuously improve its diagnostic tools. No private data is open, select the HP product that the HP Driver Diagnostic Printer Check Tool gathers is available. Carefully designed and tested color tables provide smooth, accurate color rendition of colors without reduced...
HP LaserJet Pro CP1020 - Software Technical Reference - Page 51

... This chapter provides procedures for installing and uninstalling the printingsystem software for Microsoft Windows and Apple Mac systems. Linux and UNIX systems support the HP LaserJet Pro CP1020 Color Printer Series, and software is available on the Web.
HP LaserJet Pro CP1020 - Software Technical Reference - Page 52
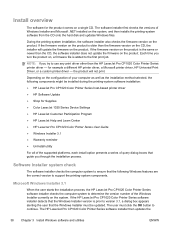
... ● Shop for example a different HP printer driver, a Microsoft printer driver, HP Universal Print Driver, or a custom printer driver - for Supplies ● Color LaserJet 1020 Series Device Settings ● HP LaserJet Customer Participation Program ● HP LaserJet Help and Learn Center ● HP LaserJet Pro CP1020 Color Printer Series User Guide ● Windows Installer 3.1 ●...
Service Manual - Page 13

... ...103 Table 3-6 Covers, panels, and doors 105 Table 3-7 Internal assembly) ...107 Table 3-8 PCAs ...109 Table 3-9 Alphabetical parts list ...110 Table 3-10 Numerical parts list ...112 Table B-1 Physical specifications1 ...128 Table B-2 HP LaserJet Pro CP1020 Color Printer Series (average in watts)123 128 Table B-3 HP LaserJet Pro CP1020 Color Printer Series1,2 129 Table B-4 Environmental...
Service Manual - Page 76

... (SR7)
Carousel motor (M1)
J140
Fuser motor (M2)
Pickup motor (M3) J152
T2 roller and ITB cleaner solenoid (SL1)
Description Fuser pressure release sensor (SR4)
Rear door open detection switch (SW1) ITB
Low-voltage power supply
Not used
60 Chapter 2 Solve problems
ENWW
Service Manual - Page 144

...Letter size and 16 PPM A4 size.
128 Appendix B Specifications
ENWW Power consumption
Table B-2 HP LaserJet Pro CP1020 Color Printer Series (average in watts)123
Product
Printing (16 PPM)
Ready
Sleep 1
Sleep 2
Off
HP LaserJet Professional
290
7.2
2.8
0.5
0.3
CP1025 Color Printer
series45
1 Values are based on preliminary data.
See www.hp.com/support/cp1020series. Physical...
Service Manual - Page 145

.... See www.hp.com/go/cp1020_regulatory or www.hp.com/go/cp1025_regulatory for current information.
2 Configuration tested: HP Color LaserJet CP1025 printing in color at 4 PPM Letter size and 4 PPM A4 size.
Acoustic specifications
Table B-3 HP LaserJet Pro CP1020 Color Printer Series1,2
Sound power level
Declared per ISO 9296
Printing
Ready
1 Values are based on preliminary data. ENWW...
Similar Questions

My Hp Cp1025 Color Printer Always Shows Mispic After Every Page It Prints
What should I do to stop this error
What should I do to stop this error
(Posted by marinaagiamoh 8 years ago)

Can I Make Copies From My Hp Laserjet Pro Cp1025 Color Printer
(Posted by leeahua 9 years ago)

Any Error For Example Rear Door Open
please help me i can,t remove the rear door open
please help me i can,t remove the rear door open
(Posted by hasanbirgawa 10 years ago)

Pcl Driver Wanted.
Can I find a PCL driver for this printer? I do not need the UPD that most use.
Can I find a PCL driver for this printer? I do not need the UPD that most use.
(Posted by barrym28092 11 years ago)