Haier HTQ21JAAWW Support Question
Haier HTQ21JAAWW Support Question
Find answers below for this question about Haier HTQ21JAAWW.Need a Haier HTQ21JAAWW manual? We have 1 online manual for this item!
Question posted by Ppalfajkm on August 7th, 2012
Where Is The Defrost Timer Located On Model #htq21jaaww
Can't locate the defrost timer
Current Answers
Related Haier HTQ21JAAWW Manual Pages
Product Manual - Page 3
... abrasion damage along its length, the plug or the connector end.
5) Unplug your refrigerator before cleaning or before making any sharp instrument in accordance with the installation instructions before... and should be eaten. The food may be properly installed in defrosting your refrigerator.
7) If your old refrigerator is used , we strongly recommend that of its intended purpose as...
Product Manual - Page 4
....
It is designed for using our Haier product. Thank you for freestanding installation only.
11) Do not operate your refrigerator in getting the best use manual will need it to record the model and serial number. You will guide you throw away your receipt to -use of your manual. Before you in...
Product Manual - Page 5
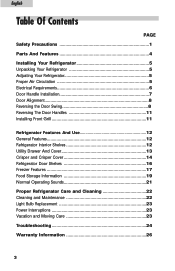
... 7 Door Alignment 8 Reversing the Door Swing 8 Reversing The Door Handles 11 Installing Front Grill 11
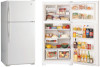
Refrigerator Features And Use 12 General Features 12 Refrigerator Interior Shelves 12 Utility Drawer And Cover 13 Crisper and Crisper Cover 14 Refrigerator Door Shelves 16 Freezer Features 17 Food Storage Information 19 Normal Operating Sounds 21
Proper...
Product Manual - Page 6
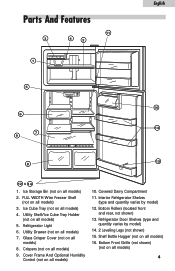
Crispers (not on all models) 9. Glass Crisper Cover (not on all
models) 8. Refrigerator Door Shelves (type and
quantity varies by model) 12. Shelf Bottle Hugger (not on all models) 16. Covered Dairy Compartment 11. Bottom Rollers (located front
and rear, not shown) 13. Bottom Front Grille (not shown)
(not on all models)
4 Ice Cube Tray (not on all...
Product Manual - Page 7
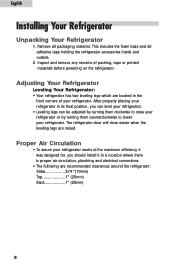
... at the maximum efficiency it in the
front corners of packing, tape or printed materials before powering on the refrigerator. Adjusting Your Refrigerator
Leveling Your Refrigerator: • Your refrigerator has two leveling legs which are located in a location where there is proper air circulation, plumbing and electrical connections.
• The following are raised.
Remove all...
Product Manual - Page 8
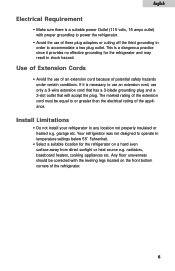
... rating of the extension cord must be corrected with proper grounding to power the refrigerator.
• Avoid the use of three plug adapters or cutting off the third grounding in any location not properly insulated or heated e.g. Your refrigerator was not designed to or greater than the electrical rating of the appliance. If...
Product Manual - Page 9
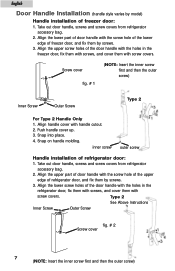
...screw first and then the outer screw) Take out door handle, screws and screw covers from refrigerator
accessory bag.
2.
Align handle cover with
screw covers. inner screw
outer screw
Handle installation of the door... handle with the screw hole of the lower
edge of freezer door, and fix them by model)
Handle installation of the door handle with the holes in the
freezer door, fix them with...
Product Manual - Page 10
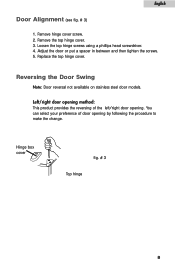
... the door or put a spacer in between and then tighten the screws. 5. Reversing the Door Swing
Note: Door reversal not available on stainless steel door models.
Remove the top hinge cover. 3. Loosen the top hinge screws using a phillips head screwdriver. 4. Left/right door opening method: This product provides the reversing of...
Product Manual - Page 11
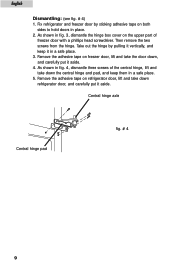
... fig. 3, dismantle the hinge box cover on both
sides to hold doors in a safe place. 5. Remove the adhesive tape on refrigerator door, lift and take the door down refrigerator door, and carefully put it vertically, and keep them in place. 2. Fix refrigerator and freezer door by pulling it aside. 4. English
Dismantling: (see fig. # 4) 1.
Product Manual - Page 13
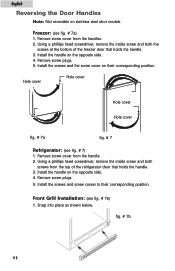
...Using a phillips head screwdriver, remove the inside screw and both the
screws at the bottom of the refrigerator door that holds the handle. 3.
Remove screw plugs.
5.
fig. # 7b
11 Remove screw plugs... screws and the screw cover on stainless steel door models. Hole cover
Hole cover
Hole cover Hole cover
fig. # 7a
fig. # 7
Refrigerator: (see fig. # 7a) 1. Front Grill Installation: (see fig. # ...
Product Manual - Page 14
... to 4 and allow 24 hours to pass
before
Adjustable temperature dial: plugging the unit in.)
Your refrigerator will automatically
Refrigerator Section
maintain the temperature level you to easily locate your food. Your model may have full-width or half-width shelves. English
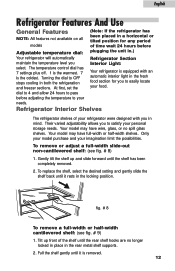
Refrigerator Features And Use
General Features
NOTE: All features not available on all...
Product Manual - Page 15
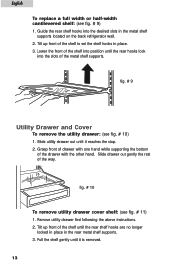
... metal shelf supports. 3. Guide the rear shelf hooks into the slots of the shelf to set the shelf hooks in the metal shelf
supports located on the back refrigerator wall. 2. Tilt up front of the shelf until it is removed.
13
Pull the shelf gently until the rear hooks lock
into the...
Product Manual - Page 16
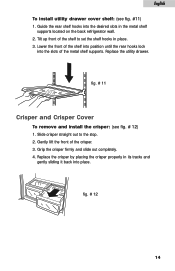
... shelf: (see fig. # 12) 1. Tilt up front of the crisper. 3. Replace the crisper by placing the crisper properly in the metal shelf
supports located on the back refrigerator wall. 2.
Slide crisper straight out to set the shelf hooks in place. 3. Replace the utility drawer.
fig. # 11
Crisper and Crisper Cover
To remove...
Product Manual - Page 17
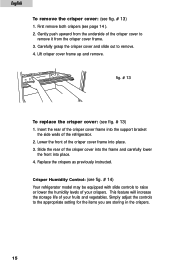
... crisper cover: (see fig. # 14) Your refrigerator model may be equipped with slide controls to
remove it from the crisper cover frame. 3. Insert the rear of your fruits and vegetables. Crisper Humidity Control: (see fig. # 13) 1.
This feature will increase the storage life of the refrigerator. 2. Lift crisper cover frame up and remove...
Product Manual - Page 18

To remove refrigerator door shelves: (see fig. # 15) 1. English
• LOW setting allows moist air to exit the crisper for optimum... leafy vegetables. Align the ends of the door shelf
brackets and then remove. Remove all items stored on the shelf. 2. To replace refrigerator door shelves: (see fig. # 15) 1. Gently push up each side until the shelf is clear of the shelves with gallon door...
Product Manual - Page 19
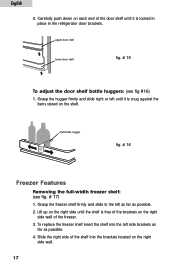
Grasp the hugger firmly and slide right or left until it is locked in place in the refrigerator door brackets. Lift up on the right side until it is free of the brackets on the... bottle huggers: (see fig. # 17) 1. To replace the freezer shelf insert the shelf into the brackets located on the shelf. Grasp the freezer shelf firmly and slide to the left side brackets as
far as possible. 2.
Product Manual - Page 21

... in crisper with one or two ice cube trays depending upon the model you do not have purchased.
This will ensure proper shelf life and prevent the transfer of storage are required, store immediately in the refrigeration. English
Ice Cube Trays: Your refrigerator is not prepackaged, be used the same day as necessary.
Product Manual - Page 22
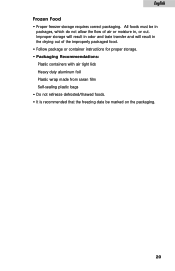
... Recommendations: Plastic containers with air tight lids Heavy duty aluminum foil Plastic wrap made from saran film Self-sealing plastic bags • Do not refreeze defrosted/thawed foods. • It is recommended that the freezing date be marked on the packaging.
20 Improper storage will result in odor and taste transfer...
Product Manual - Page 23
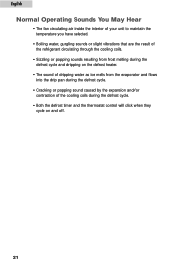
...are the result of the refrigerant circulating through the cooling coils.
• Sizzling or popping sounds resulting from frost melting during the defrost cycle and dripping on the defrost heater.
• The ... during the defrost cycle.
• Cracking or popping sound caused by the expansion and/or contraction of the cooling coils during the defrost cycle.
• Both the defrost timer and the ...
Product Manual - Page 26
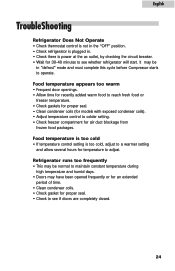
...temperature. • Check gaskets for proper seal. • Clean condenser coils (for models with exposed condenser coils). • Adjust temperature control to colder setting. •... closed.
24
English
TroubleShooting
Refrigerator Does Not Operate • Check thermostat control is not in the "OFF" position. • Check refrigerator is plugged in "defrost" mode and must complete ...
Similar Questions

Defrost Timer Location On Mod Rrtg18pabw
(Posted by louish 9 years ago)

Model #htq21jaaww Refrigerator Runs Continuously.
Is it normal for this refrigerator to run continuously? I've had it 3 days (used) and it hasn't turn...
Is it normal for this refrigerator to run continuously? I've had it 3 days (used) and it hasn't turn...
(Posted by stormcrusher 10 years ago)

Hair Hrf-281fr Defrost Timer
What is the part no of Haier HRF-281FR Defrost Timer and its Time Rating
What is the part no of Haier HRF-281FR Defrost Timer and its Time Rating
(Posted by hpdvimal 10 years ago)

Dimension For Haier Model# Htq21jaaww
What are the dimensions for haier model # htq21jaaww
What are the dimensions for haier model # htq21jaaww
(Posted by natacha29 10 years ago)

Defrost Timer.
hello.i want a photo for defrost timer haier hrf-588fr/a.or its model number
hello.i want a photo for defrost timer haier hrf-588fr/a.or its model number
(Posted by wahashali 12 years ago)