2004 Dodge Stratus Support Question
2004 Dodge Stratus Support Question
Find answers below for this question about 2004 Dodge Stratus.Need a 2004 Dodge Stratus manual? We have 2 online manuals for this item!
Question posted by stevesa on October 16th, 2013
How To Remove Srs Light 2004 Dodge Stratus R/t
The person who posted this question about this Dodge automobile did not include a detailed explanation. Please use the "Request More Information" button to the right if more details would help you to answer this question.
Current Answers
Related Manual Pages
Owner's Manual - Page 13
...phones, walkmans, etc., have been programmed to the vehicle electronics.
2 If the Theft Alarm Light remains On during vehicle operation, it indicates a fault in vehicle starting problems and loss of ...may result in the system electronics. If a problem occurs, remove the Sentry Key from the ignition key, the theft alarm light will illuminate for about 3 seconds when the ignition switch is...
Owner's Manual - Page 14
...key into the ignition and switch the ignition On within 15 seconds. Turn the ignition Off and remove the second key. 3.
Insert a blank Sentry Key into the ignition and turn the ignition On ... Customer Key Programming procedure. Turn the ignition Off and remove the first key. 2. After ten seconds a chime will sound and the Theft Alarm Light will sound. A blank key is required for dealer ...
Owner's Manual - Page 15
...The Sentry Key system complies with access to an unlocked vehicle. When leaving the vehicle always remove the key from the ignition lock, and lock your vehicle. Unsupervised use of an accident,...vehicle doors as you drive and when you park and leave the vehicle.
2
WARNING! The lights also will turn on when you open any interference that may be received, including interference that may...
Owner's Manual - Page 22
... present, the lights will continue to two years 2. Remove and replace the batteries. For the first three minutes the horn will sound and the headlights and interior lights will not start...KNOW BEFORE STARTING YOUR VEHICLE
If your fingers. Closeness to damage the rubber gasket material during removal.
2. Make sure not to a radio transmitter such as a radio station tower, airport ...
Owner's Manual - Page 32
.... Only use the seat belts throughout their pregnancy. Keeping the mother safe is not required, remove the extender and store it is the best way to illuminate while the driver's seat belt remains...Although the Enhanced Warning System (BeltAlert) has been deactivated, the Seat Belt Warning Light will take the force if there is in the recommended seating positions. That way the strong bones of...
Owner's Manual - Page 77

...
Electrical Outlet Use With Engine Off • Many accessories that draw higher power (i.e., coolers, vacuum cleaners, lights, etc.) will degrade the battery even more quickly. If the buffeting occurs with the windows down, or ...the vehicle's battery will discharge sufficiently to any outlet should be removed or turned off when the vehicle is a normal occurrence and can be minimized.
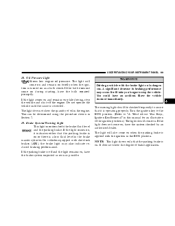
Owner's Manual - Page 87

... serviced as soon as a supplement to the radiator and aids in removing heat from odometer to the cooling system and turning off the A/C removes this occurs. 11. The gauge pointer may show the automatic transmission gear selection.
4 Engine Temperature Warning Light This light warns of your air conditioning is on the scale) shows that...
Owner's Manual - Page 89
... the parking brake is on or there is turned on is operating properly. The light will take you longer to "A Word About Your Keys, Ignition Key Removal" in this manual for an illustration of the ignition positions.) The light should be determined using the procedure shown in braking performance may also indicate reduced...
Owner's Manual - Page 163

...fuel nozzle "clicks" or shuts off, the fuel tank is refueled. If fuel is properly tightened.
The Malfunction Indicator Light will come on the ground while filling.
5
CAUTION! NOTE: The fuel tank filler tube may result if gasoline is... lit in or near the vehicle when the gas cap is removed or the tank filled. • Never add fuel to the vehicle when the engine is inside of a vehicle.
Owner's Manual - Page 217
...WARNING! The leather has already been pretreated. Small particles of dirt can be removed immediately with any leather conditioner may damage the factory applied top coat.
Cleaning ... Your vehicle has plastic headlights that could decrease visibility under bright light driving conditions. You should be removed easily with a damp soft cloth.
Higher gloss levels will increase...
Owner's Manual - Page 218

... Surfaces All glass surfaces should be followed. This will also weaken the fabric. Do not remove the belts from the vehicle to avoid scratching the plastic. • Clean with any commercial... Cleaning Plastic Instrument Cluster Lenses The lenses in front of scratching the lenses and reducing light output, avoid wiping with electric defrosters. A mild soap solution may be taken to ...
Owner's Manual - Page 225

... front fascia.
4. Pull the light assembly away from the housing.
7
2. MAINTAINING YOUR VEHICLE 225
Fog Light Bulb Replacement 1. Disconnect the wiring connector from the bulb and socket assembly. 5. Install the new bulb and socket assembly, reattach the wiring connector, and reinstall the fog light assembly. Remove the screw securing the light assembly to expose the...
Owner's Manual - Page 226
...connector. Turn the bulb socket counterclockwise to expose the wiring connector and light housing plastic retainers. 3. Remove the light housing from the housing.
2. Rear Light Bulb Replacement 1. Push the trunk liner back into place. Disconnect the wiring connector and remove the plastic retainers. Remove and replace the bulb then reinstall the bulb and socket assembly. 4. Open...
Owner Manual Coupe - Page 253

.... Plastic, vinyl leather, fabric, and flocked parts 1. If stained, vinyl and synthetic leather should be removed by lightly dabbing with either upholstery cleaner or a 3% solution of the surface. NOTE: Always read the instructions on the cleaner label. Lightly wipe with cleaner, wipe it dry in a 3% solution of neutral detergent and water.
7 After using...
Owner Manual Coupe - Page 297

Insert a screwdriver as shown in the illustration and remove the screws. N10F0820
8
Turn the light socket (A) counterclockwise and pull it out and remove the light bulb. EMERGENCIES
297
Adjustment of headlight aim The alignment of the headlights should be checked by an authorized dealer. Front turn signal and parking lights
Front fog lights (if so equipped)
N10X1630
1.
Owner Manual Coupe - Page 300

Turn the trim cover clip (A) counterclockwise and remove the trim cover clip. Partially remove the trim cover in the trunk. 300
EMERGENCIES
Front side marker lights
Rear combination lights
N10D0170
N20I0170
Turn the light socket counterclockwise and pull it out and remove the light bulb.
1.
Owner Manual Coupe - Page 301

... tail light B - Rear turn signal and tail light C - Remove the light case mounting nuts. Remove the bulb from the socket by turning it counterclockwise. Slide the light unit outward to remove it inward.
8 Remove each bulb socket assembly by turning it counterclockwise while pressing it . EMERGENCIES
301
A - Disconnect the connector.
3. Rear side marker light
N20I0160 N20I0290...
Owner Manual Coupe - Page 303

EMERGENCIES
303
Back up lights
N11H0150 N11H0140
1. Remove the light mounting screw and pull the entire light bracket out.
2. Push the connector (A) to disconnect and remove the light bulb.
8
Owner Manual Coupe - Page 305

... out.
8
N10M0380
NOTE: Wrap a cloth around the tip of the light assembly and pry gently downward to avoid scratching the light assembly. Insert a flat blade screwdriver into the notch of the screwdriver to remove it. Clips
Type 1
N10O0230
Pull both clips away from the center as shown and remove the light unit. EMERGENCIES
305
Trunk...
Owner Manual Coupe - Page 306

NOTE: Wrap a cloth around the tip of the light assembly and pry gently to avoid scratching the lens. Remove the light bulb from the light holder. N11I0040
Insert a straight blade screwdriver into the notch of the straight blade screwdriver in order to remove the lens. 306
EMERGENCIES
Reading lights
N10M0410
2. Remove the light bulb from the light holder.
Similar Questions


How To Locate And Change The Flasher For A Dodge 2004 Stratus Se
(Posted by nickRsoj 10 years ago)

2004 Stratus Unlock All Doors When Driver Door Is Opened
(Posted by keradannm 10 years ago)

I Just Replaced The Plugs And Wires On My 2004 Stratus R/t 3.0 Idle Is At 200rpm
The idle when i start it is around 600-650 and when i put it in drive it goes down to about 200rpm a...
The idle when i start it is around 600-650 and when i put it in drive it goes down to about 200rpm a...
(Posted by ajhanus 11 years ago)