Dell Vostro A860 Support Question
Dell Vostro A860 Support Question
Find answers below for this question about Dell Vostro A860.Need a Dell Vostro A860 manual? We have 3 online manuals for this item!
Question posted by regran on May 31st, 2014
Dell Vostro A860 Battery Warning: The Battery Cannot Be Identified.this System
will be unable to charge this battery.strike the f1 key to continue, f2 to run the setup utilitypress f5 to run onboard diagnostics.
Current Answers
Related Dell Vostro A860 Manual Pages
Dell™ Technology Guide - Page 277
... E S E M E S S A G E S . - Enter the system setup program and correct the date or time (see "Running the Dell Diagnostics" on page 308).
PLEASE RUN THE SYSTEM SETUP
Troubleshooting
277 MEMORY ODD/EVEN LOGIC FAILURE AT (ADDRESS) READ VALUE EXPECTING ( V A L U E) -
STRIKE F1 TO RETRY BOOT, F2 FOR SETUP UTILITY. Run the Dell Diagnostics (see "Entering the System Setup Program" on page 281...
Dell™ Technology Guide - Page 278
... AND TYPE CANNOT BE DETERMINED. STRIKE THE F3 KEY (BEFORE THE F1 OR F2 KEY) IF YOU DO NOT WANT TO SEE POWER WARNING MESSAGES AGAIN. PRESS F5 TO RUN ONBOARD DIAGNOSTICS. -
• Reseat the memory (for assistance (see "Entering the System Setup Program" on page 281). Ensure that require a 130-W or greater AC adapter. PLEASE CONNECT A DELL XXX-W AC ADAPTER OR...
Dell™ Technology Guide - Page 279

... BOOT WITH THIS BATTERY PLUGGED IN. WARNING! System board failure may be defective. STRIKE THE F1 KEY TO CONTINUE, F2 TO RUN THE SETUP UTILITY. -
THIS SYSTEM WILL BE UNABLE TO CHARGE THIS BATTERY. - IT IS ADVISABLE TO IMMEDIATELY BACK UP YOUR DATA
AND REPLACE YOUR HARD DRIVE BY CALLING YOUR SUPPORT DESK OR
D E L L. -
Contact Dell for assistance (see "Contacting Dell" on page 337...
Service Manual - Page 1

Dell™ Vostro™ A840/A860 Service Manual
Before You Begin Module Cover Memory Module Mini-Cards Center Control Cover Keyboard Display Palm Rest System Fan Processor Heat Sink Processor Hard Drive Coin-Cell Battery Optical Drive Speaker Internal Card With Bluetooth®Wireless Technology System Board Battery Latch Assembly Flashing the BIOS
Notes, Notices, and...
Service Manual - Page 2

... computer). Turn the computer over.
3. Replace the module cover. 2. Slide the battery into the battery bay, until it clicks into place.
Remove the two screws from the computer....module cover
4. Removing the Module Cover
1. Back to Contents Page
Module Cover
Dell™ Vostro™ A840/A860 Service Manual Removing the Module Cover Replacing the Module Cover
CAUTION: Before working ...
Service Manual - Page 3
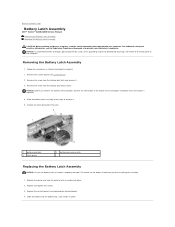
.... The indent for the button should face up when installing the assembly.
1. Slide the battery latch assembly to the right to Contents Page
Battery Latch Assembly
Dell™ Vostro™ A840/A860 Service Manual Removing the Battery Latch Assembly Replacing the Battery Latch Assembly
CAUTION: Before working inside your computer, read the safety information that shipped with...
Service Manual - Page 5

...on your computer. Ensure that shipped with your computer (see the Regulatory Compliance Homepage at www.dell.com/regulatory_compliance. NOTICE: To disconnect a network cable, first unplug the cable from your computer... assumes that is not authorized by Dell is flat and clean to Contents Page
Before You Begin
Dell™ Vostro™ A840/A860 Service Manual Recommended Tools Turning Off ...
Service Manual - Page 7
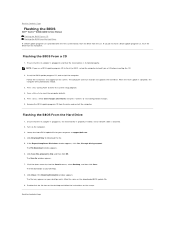
... flash the BIOS from the CD. The computer continues to save configuration changes. 6. When the flash update... and that the AC adapter is plugged in , the main battery is properly installed, and a network cable is complete, the computer ...enter the system setup program. 4. The File Download window appears. 6. Back to Contents Page
Flashing the BIOS
Dell™ Vostro™ A840/A860 Service Manual ...
Service Manual - Page 8

...computer. Back to Contents Page
Internal Card With Bluetooth®Wireless Technology
Dell™ Vostro™ A840/A860 Service Manual Removing the Bluetooth® Card Replacing the Bluetooth®... battery into the battery bay, until it clicks in Replacing the Palm Rest. 4.
Follow the instructions in place. Remove the palm rest (see the Regulatory Compliance Homepage at www.dell....
Service Manual - Page 9

... Contents Page
Coin-Cell Battery
Dell™ Vostro™ A840/A860 Service Manual Removing the Coin-Cell Battery Replacing the Coin-Cell Battery
CAUTION: Before working inside your computer, read the safety information that shipped with your computer.
Disconnect the coin-cell battery cable from the battery bay before you must remove the battery from the system board connector...
Service Manual - Page 10
...system board. The oils in your computer. Back to Contents Page
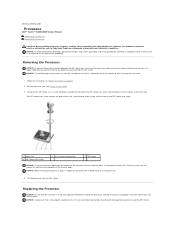
Processor
Dell™ Vostro™ A840/A860 Service Manual Removing the Processor Replacing the Processor
CAUTION: Before working inside ...the processor heat sink. Remove the heat sink (see the Regulatory Compliance Homepage at www.dell.com/regulatory_compliance. To loosen the ZIF socket, use a small, flat-blade screwdriver and ...
Service Manual - Page 12

.... 5. Back to ensure that you have already removed the processor heat sink and are reinstalled together. Back to Contents Page
Processor Heat Sink
Dell™ Vostro™ A840/A860 Service Manual Removing the Processor Heat Sink Replacing the Processor Heat Sink
CAUTION: Before working inside your computer. Remove the system board (see the...
Service Manual - Page 13

...Back to Contents Page
Display
Dell™ Vostro™ A840/A860 Service Manual Display Assembly ...Display Bezel Display Panel Display Panel Cable Display Inverter
CAUTION: Before working inside your computer.
NOTICE: To help prevent damage to disconnect the display cable from the battery bay before you must remove the battery...
Service Manual - Page 19

... Replacing the Palm Rest. Connect the fan cable to Contents Page
Back to the system board connector. 4. Back to Contents Page
System Fan
Dell™ Vostro™ A840/A860 Service Manual Removing the System Fan Replacing the System Fan
CAUTION: Before working inside your computer, read the safety information that shipped with your...
Service Manual - Page 20

...NOTE: Dell does ...Hard drives are installing a hard drive from a source other than Dell, you remove the hard drive from the computer when the drive is... drivers, and utilities on the hard drive at www.dell.com/regulatory_compliance. NOTICE: To prevent data loss, turn... drive. Back to Contents Page
Hard Drive
Dell™ Vostro™ A840/A860 Service Manual Removing the Hard Drive Replacing the...
Service Manual - Page 22

...begin working inside the computer. Pry out the center control cover from the battery bay before you must remove the battery from left to right. .
1
center control cover
5. Remove the center...a connector on page 9.
2. Back to Contents Page
Center Control Cover
Dell™ Vostro™ A840/A860 Service Manual Removing the Center Control Cover Replacing the Center Control Cover
CAUTION:...
Service Manual - Page 24

...the keyboard.
NOTICE: To help prevent damage to the system board, you must remove the battery from the computer. Remove the two screws at the top of the keyboard. NOTICE: To ... and slide them under the palm rest. 3. Back to Contents Page
Keyboard
Dell™ Vostro™ A840/A860 Service Manual Removing the Keyboard Replacing the Keyboard
CAUTION: Before working inside your computer...
Service Manual - Page 28

... connector. NOTICE: To help prevent damage to Contents Page
Mini-Cards
Dell™ Vostro™ A840/A860 Service Manual Removing the WLAN Card Replacing the WLAN Card
CAUTION: Before...connector (2)
4. Back to the system board, you must remove the battery from the card. 5. Remove the two securing screws from the battery bay before you ordered a WLAN card with your computer, the card...
Service Manual - Page 30

...Replace and tighten the screw securing the optical drive. 3. Slide the battery into the slot. 2. Follow the procedures in place. Remove the screw...panel) on the computer. Back to the computer base.
3. Back to Contents Page
Optical Drive
Dell™ Vostro™ A840/A860 Service Manual Removing the Optical Drive Replacing the Optical Drive
CAUTION: Before working inside your computer, read...
Service Manual - Page 33

... the computer base. 4. Slide the battery into the battery bay, until it clicks in Replacing the Palm Rest. 4. Removing the Speaker
1. Remove the speaker.
1 speaker 3 speaker cable connector
2 speaker screw (2)
Replacing the Speaker
1.
Remove the screws that secure the speakers to Contents Page
Speaker
Dell™ Vostro™ A840/A860 Service Manual Removing the Speaker...
Similar Questions


Dell Vostro A860 Laptop How To Restore To Factory Settings
(Posted by mwdddav 9 years ago)

New Laptop Vostro 1540 Purchased In Feb 12 And Key Bod Is Not Working. What To D
DEAR SIR KEDY BOARD OF ABOVE SAID LAPTOP IS NOT WORKING. MY ALL WORKS ARE HELD UP. PLEASE ADVICE WH...
DEAR SIR KEDY BOARD OF ABOVE SAID LAPTOP IS NOT WORKING. MY ALL WORKS ARE HELD UP. PLEASE ADVICE WH...
(Posted by sureshnairmb 11 years ago)
