Dell Inspiron N7110 Support Question
Find answers below for this question about Dell Inspiron N7110.Need a Dell Inspiron N7110 manual? We have 2 online manuals for this item!
Question posted by snorTagany on March 17th, 2014
Disable Track Pad Hot Key Does Not Work On Dell N7110
The person who posted this question about this Dell product did not include a detailed explanation. Please use the "Request More Information" button to the right if more details would help you to answer this question.
Current Answers
There are currently no answers that have been posted for this question.
Be the first to post an answer! Remember that you can earn up to 1,100 points for every answer you submit. The better the quality of your answer, the better chance it has to be accepted.
Be the first to post an answer! Remember that you can earn up to 1,100 points for every answer you submit. The better the quality of your answer, the better chance it has to be accepted.
Related Dell Inspiron N7110 Manual Pages
Setup Guide - Page 5
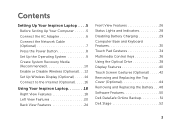

... the Internet (Optional 16
Using Your Inspiron Laptop 18 Right View Features 18 Left View Features 20 Back View Features 24
Front View Features 26 Status Lights and Indicators 28 Disabling Battery Charging 29 Computer Base and Keyboard Features 30 Touch Pad Gestures 34 Multimedia Control Keys 36 Using the Optical Drive 38 Display...
Setup Guide - Page 7
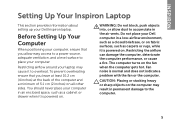

...is powered on. The computer turns on all other sides.
You should never place your Dell Inspiron laptop. WARNING: Do not block, push objects into, or allow easy access to a power source, adequate ventilation... computer and a minimum of 5.1 cm (2 inches) on the fan when the computer gets hot. Fan noise is powered on fabric surfaces, such as a closed briefcase, or on .
Restricting airflow around your...
Setup Guide - Page 12


... system settings have left the computer in when you set up Microsoft Windows. Setting Up Your Inspiron Laptop
Create System Recovery Media (Recommended)
NOTE: It is recommended that you create system recovery media ...files (without the need of 8 GB or DVD-R/DVD+R/Blu-ray Disc (optional) NOTE: Dell DataSafe Local Backup does not support rewritable discs.
10 The system recovery media can use the ...
Setup Guide - Page 13
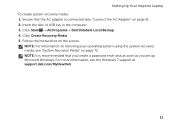

...is connected (see "System Recovery Media" on page 72. Insert the disc or USB key in the computer. 3.
NOTE: For information on restoring your operating system using the ... 7 support at support.dell.com/MyNewDell.
11 Click Start → All Programs→ Dell DataSafe Local Backup. 4. Follow the instructions on page 6). 2. Setting Up Your Inspiron Laptop To create system recovery ...
Setup Guide - Page 15
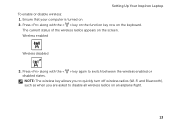

... on an airplane flight.
13 Wireless enabled
Wireless disabled
3. NOTE: The wireless key allows you to quickly turn off wireless radios (Wi-Fi and Bluetooth), such as when you are asked to switch between the wireless enabled or disabled states. Setting Up Your Inspiron Laptop To enable or disable wireless: 1. Ensure that your computer is turned...
Setup Guide - Page 17
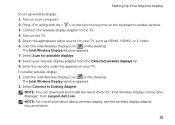

... to enable wireless. 3. Press along with the < > on the function key row on the TV. 5. Select your TV, such as HDMI1, HDMI2, or S-Video. 6.
Turn on the keyboard to Existing Adapter. The Intel Wireless Display window appears. 7. Setting Up Your Inspiron Laptop
To set up wireless display: 1. NOTE: For more information about wireless...
Setup Guide - Page 18
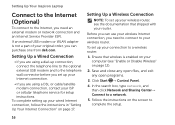

Setting Up Your Inspiron Laptop
Connect to the Internet (Optional)
To connect to your wireless router.
Before you need to connect to the Internet, you can purchase one from dell.com.
To complete setting up your ... wireless is not a part of your wireless router, see "Enable or Disable Wireless" on page 17. Setting Up a Wired Connection
• If you can use your ISP...
Setup Guide - Page 31
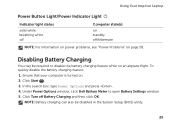

...Dell Battery Meter to disable the battery charging feature while on an airplane flight. In the search box, type Power Options and press . 4. Click Turn off /hibernate
NOTE: For information on power problems, see "Power Problems" on . 2. Disabling Battery Charging
You may be disabled... 3. To quickly disable the battery charging feature: 1. Using Your Inspiron Laptop
Power Button Light/Power...
Setup Guide - Page 33
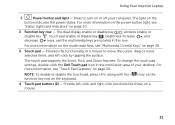

... or disable key , wireless enable or
disable key , touch pad enable or disable key , brightness increase
and
decrease
keys, and the multimedia keys are located in the notification area of a mouse to turn on or off your desktop. Provides the functionality of your computer. Using Your Inspiron Laptop
1
Power button and light -
To change the touch pad settings, double-click the Dell...
Setup Guide - Page 59
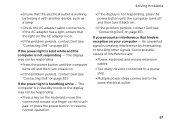

...If you encounter interference that hinders reception on the touch pad, or press the power button to the same electrical ...the problem persists, contact Dell (see "Contacting Dell" on page 83). An unwanted signal is working by interrupting or blocking other...Dell (see "Contacting Dell" on page 83). The computer is in standby mode or the display may not be responding.
• Press a key...
Service Manual - Page 2


... to hardware or loss of Microsoft Corporation in this document is strictly forbidden. Trademarks used in this text: Dell™, the DELL logo, and Inspiron™ are either trademarks or registered trademarks of data if instructions are not followed. Regulatory model: P14E
Regulatory...and Warnings
NOTE: A NOTE indicates important information that helps you make better use of Dell Inc.
Service Manual - Page 4


... Keyboard 27 Replacing the Keyboard 29
8 Palm-Rest Assembly 31
Removing the Palm-Rest Assembly 31 Replacing the Palm-Rest Assembly 35
9 Hot-Key Board 37
Removing the Hot-Key Board 37 Replacing the Hot-Key Board 38
10 Power-Button Board 41
Removing the Power-Button Board 41 Replacing the Power-Button Board 42
4
Contents
Service Manual - Page 32


6 Remove the four screws on the system board.
32
Palm-Rest Assembly CAUTION: Pull the plastic tab on top of the connectors to avoid damaging the connectors.
7 Disconnect the power-button board cable, touch-pad cable, and hot-key board cable from the connectors on the palm-rest assembly.
Service Manual - Page 33


1
2
3
1 power-button board cable connector 2 hot-key board cable connector 3 touch-pad cable connector
CAUTION: Carefully separate the palm rest from the computer base to avoid damage to the palm rest. Palm-Rest Assembly
33
Service Manual - Page 34


... the palm-rest assembly off the computer base. 10 Turn the palm-rest assembly over.
1 2
1 plastic scribe
2 palm-rest assembly
11 Remove the hot-key board (see "Removing the Hot-Key Board" on page 37).
12 Remove the power-button board (see "Removing the Power-Button Board" on page 41).
34
Palm-Rest Assembly
Service Manual - Page 35


... palm rest assembly with the slots on the computer
base and gently snap the palm rest assembly in place. 5 Slide the touch-pad cable, power-button board cable, and hot-key board
cable into the connectors on the system board and press down on the connector latches to secure them. 6 Replace the four...
Service Manual - Page 37

... the tab/notch on the
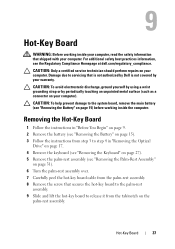
palm-rest assembly. Damage due to servicing that shipped with your computer. Hot-Key Board
37 9
Hot-Key Board
WARNING: Before working inside your computer, read the safety information that is not authorized by Dell is not covered by periodically touching an unpainted metal surface (such as a connector on your warranty...
Service Manual - Page 38


...
1 Follow the instructions in "Before You Begin" on page 9. 2 Align the screw hole on the hot-key board with the screw hole on the
palm-rest assembly and replace the screw. 3 Adhere the hot-key board cable to the palm-rest assembly. 4 Turn the palm-rest assembly over. 5 Replace the palm-rest assembly (see...
Service Manual - Page 39


Hot-Key Board
39
Failure to the computer.
7 Follow the instructions from step 4 to step 5 in damage to do so may result in "Replacing the Optical Drive" on page 19.
8 Replace the battery (see "Replacing the Battery" on the computer, replace all screws and ensure that no stray screws remain inside the computer. CAUTION: Before turning on page 16).
Service Manual - Page 49
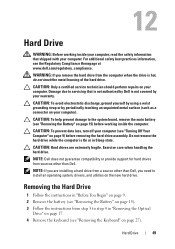

... Battery" on page 27). 12
Hard Drive
WARNING: Before working inside your computer, read the safety information that is not authorized by Dell is not covered by periodically touching an unpainted metal surface ...is hot, do not touch the metal housing of the hard drive. CAUTION: To help prevent damage to install an operating system, drivers, and utilities on page 9) before working inside ...
Similar Questions
How To Get Function Keys To Work On Dell Inspiron N4030
(Posted by Vaandr 9 years ago)
How To Disable Mouse Pad Dell Inspiron Ubuntu N7110
(Posted by wacrandy 10 years ago)
How Do I Disable Mouse Pad On Dell Inspiron N7110
(Posted by bakarmip 10 years ago)
How To Disable Track Pad Mouse On Dell Latitude E6420
(Posted by wardickt 10 years ago)

