
2000 Chevrolet S10 Pickup Support Question
2000 Chevrolet S10 Pickup Support Question
Find answers below for this question about 2000 Chevrolet S10 Pickup.Need a 2000 Chevrolet S10 Pickup manual? We have 1 online manual for this item!
Question posted by T1hiYour on December 25th, 2013
How To Remove The Lumbar Seat Button On 2000 Chevy S10
The person who posted this question about this Chevrolet automobile did not include a detailed explanation. Please use the "Request More Information" button to the right if more details would help you to answer this question.
Current Answers
Related Manual Pages
Owner's Manual - Page 2
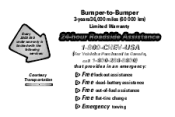
Bumper-to-Bumper
3-years/36,000 miles (60 000 km)
Limited Warranty
Every 2000 S10 under warranty is backed with the following services:
( For Vehicles Purchased In Canada, call 1-800-268-6800)
that provides in an emergency:
1-800-CHEV-USA
Courtesy Transportation
Free lockout assistance Free dead-battery assistance Free out-of-fuel assistance Free flat-tire change Emergency towing
Owner's Manual - Page 3
2000 Chevrolet S10 Owner's Manual
Litho in U.S.A. Part Number C2008 B First Edition
© Copyright General Motors Corporation 1999 All Rights Reserved
i
Owner's Manual - Page 16
...)
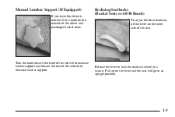
To adjust the front seatback, lift the lever on the outside of the seat.
Release the lever to lock the seatback where you have this feature, there will go to decrease lumbar support. Pull up on the lever and the seat will be a knob on the outer side of the driver and passenger...
Owner's Manual - Page 44

... the belt isn't long enough, see "Safety Belt Extender" at the end of a lap-shoulder belt. When you sit in a center seating position, you ever had to unbuckle the safety belt quickly if you have a lap safety belt, which has no retractor. To make the belt...same way as shown until the belt is positioned so you would be able to .
1-31 Make sure the release button on the buckle is snug.
Owner's Manual - Page 46
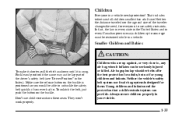
... system can be restrained while in your vehicle. To unlatch the belt, just push the button on these seats. Neither the distance traveled nor the age and size of the driver's safety belt (see...Young children and infants need , for them. Don't use safety restraints.
Make sure the release button on the buckle is designed for everyone, to , any air bag when it is snug. They...
Owner's Manual - Page 50
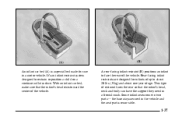
...that the infant's head, neck and body can have the support they need in the vehicle and the seat part is a special bed made for infants of up to face the rear of the vehicle. A...This type of age. Rear-facing infant restraints are designed for use in two parts -- Some infant seats come in a motor vehicle. It's an infant restraint system designed to restrain or position a child on a...
Owner's Manual - Page 71
...If the locks do not cycle, see your vehicle and press and hold the LOCK and UNLOCK buttons on the panel to the security method used by twisting the dime. 2. Then, use the ... transmitter at the same time for convenience in the slot between the covers of the transmitter. Remove the bottom by this system. The transmitter does not send the same signal twice to confirm synchronization...
Owner's Manual - Page 78
... key on manual transmission vehicles, turn the key to 20 minutes or until a door is stopped.
2-15
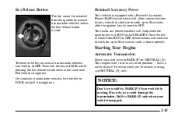
Key Release Button
The key cannot be removed from RUN to OFF, these features will continue to work for up to PARK (P) only when your vehicle to continue to work when the ignition ...
Owner's Manual - Page 107
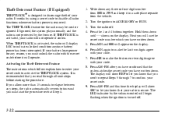
... lights will come on the interior lamps. You can also turn on if the DOME OVERRIDE button is equipped with the keyless entry transmitter.
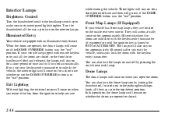
while exiting the vehicle. Illuminated Entry
Your vehicle is...will remain on whether the doors are lifted and released, the lamps will stay on when you remove the key from the ignition to RUN or ACCESSORY. In this position, the dome lamps will ...
Owner's Manual - Page 111
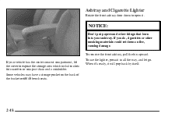
If your ashtray. To use the lighter, press it . To remove the front ashtray, pull the bin upward.
If you do, cigarettes or other things that...:
Don't put papers and other smoking materials could set them on the back of the bucket or 60/40 bench seats. Ashtray and Cigarette Lighter
Rotate the front ashtray door down to expose the storage area which includes slots for cassettes or...
Owner's Manual - Page 135

...Systems
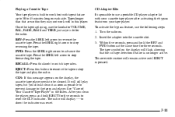
Your audio system has been designed to be displayed for Systems with HR and MN Buttons
Press and hold the SEEK right arrow until the correct hour appears on the display. ... will be sure you acquaint yourself with it .
3-6 D Keep the air path under the front seats clear of listening pleasure. Within five seconds, press and hold HR until the correct minute appears on ...
Owner's Manual - Page 140
... cassette tape player needs to be cleaned. CLN: If this button to remove the tape or stop the tape and play tapes, but you should clean it as soon as you clean the player, press and hold the REV and FWD buttons at the same time for five seconds to reverse the cassette...
Owner's Manual - Page 144
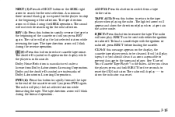
... station while reversing the tape. The tape direction arrow will mute while searching for five seconds to remove the tape. EJECT can be cleaned.
The sound will blink during the SEEK operation. REV (4): Press this button to the beginning of the cassette or until you clean the player, press and hold EJECT...
Owner's Manual - Page 150
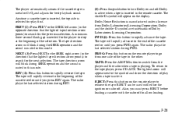
...of Dolby Laboratories Licensing Corporation. PROG: Press this button on the remote player to rapidly advance the tape. EJECT: Press this button to remove the tape. Also, you must press EJECT before... for the next selection. NEXT (3): Press NEXT or the SEEK right arrow (in this button to turn Dolby on the display. Dolby Noise Reduction is selected for best playback sound. Anytime...
Owner's Manual - Page 151
... secret code to indicate a locked condition anytime battery power has been interrupted. Press the 1 and 4 buttons together. Press MN and 000 will begin flashing when the ignition is turned off . 4. Press AM-...know that you need to repeat Steps 5 through all radio functions whenever battery power is removed. THEFTLOCKR is designed to 1999 and keep it will show SEC to make the first...
Owner's Manual - Page 152
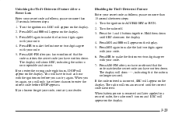
... incorrect, SEC will remain secured until SEC shows on the display. 3.
Press the 1 and 4 buttons together. Press HR to make the first one or two digits agree with your code. 5. If ...eight times, INOP will have written down . You will appear on . When battery power is removed and later applied to wait an hour with your code. 4. Disabling the Theft-Deterrent Feature Enter...
Owner's Manual - Page 198
Add-On Equipment
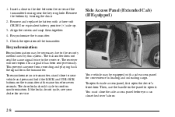
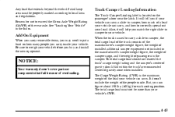
When you carry removable items, you may need to put a limit on the
passenger's door near the latch.
Truck-Camper ...more than your vehicle. Be sure to correctly spread out your vehicle can figure about 150 lbs. (68 kg) for each seating position. NOTICE:
Your warranty doesn't cover parts or components that extends beyond the vehicle's taillamp area must not be properly ...
Owner's Manual - Page 228
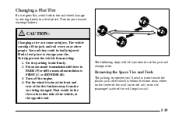
...side of the vehicle, at the front and rear of the tire farthest away from moving: 1. Removing the Spare Tire and Tools
The jacking equipment you how to change a tire.
You and they could... steps will tell you 'll need is stored inside the plastic jack cover which is behind the front seats, either on the center of the wall (regular cab).
5-19 Turn on the passenger's side of the...
Owner's Manual - Page 265

... your manual transmission doesn't require changing. However, the fluid in the next steps.
6-23 NOTICE:
Too much can mean that the lubricant level is fully seated. Remove the filler plug. 2. Check the fluid level only when your engine is off, the vehicle is parked on a level place and the transmission is changed...
Owner's Manual - Page 266
.... Add fluid at the filler plug hole.
The clutch master cylinder reservoir is fully seated. Install the filler plug. Rear Axle
When to Check and Change Lubricant
Refer to the...cylinder reservoir and for the proper fluid. Hydraulic Clutch
The hydraulic clutch linkage in the reservoir cap. Remove the filler plug. 2. See "Owner Checks and Services" and "Recommended Fluids and Lubricants" in ...
Similar Questions

How To Remove The Exhaust From A 2000 Chevy S10
(Posted by zeca33zponder 10 years ago)

How To Remove Ignition Coil On 2000 Chevy S10 Pickup 2.2 Eng
(Posted by mrdirector1 10 years ago)

How To Remove The Cigarette Lighter In A 2000 Chevy S10
(Posted by genevirgo3 10 years ago)

If I Remove The Airbag On A 2000 Chevy S10 What Happened
(Posted by betteGUER 10 years ago)
How To Remove Passenger Airbag On 2001 Chevy S10
(Posted by aarodoob 10 years ago)