
User Guide
Page 2
... FUTURE REFERENCE. Every effort has been made to ensure that the information in your computer operating system. PLA Series User's Guide 2 IMPORTANT! Therefore some features or options in your product firmware or your product. It contains information on making your product due to help you... get up and running right away. Related Documentation • Quick Start Guide The Quick Start Guide is designed to differences in this manual is a reference for a series of products. READ CAREFULLY BEFORE USE.
... FUTURE REFERENCE. Every effort has been made to ensure that the information in your computer operating system. PLA Series User's Guide 2 IMPORTANT! Therefore some features or options in your product firmware or your product. It contains information on making your product due to help you... get up and running right away. Related Documentation • Quick Start Guide The Quick Start Guide is designed to differences in this manual is a reference for a series of products. READ CAREFULLY BEFORE USE.

User Guide
Page 3
Table of Contents Table of Contents Table of Contents ...3 Part I: User's Guide 5 Chapter 1 Introducing the PLA ...6 1.1 Overview ...6 1.2 LEDs ...7 1.3 Standby Mode (Power Saving Mode 9 1.4 Ways to Manage the PLA ...9 1.5 Expand Your Network with the PLA ...9 1.6 Security ...10 1.6.1 Passwords ......: Technical Reference 18 Chapter 3 Installing the Utility...19 3.1 Windows ...19 3.1.1 System Requirements ...19 3.1.2 Installing the Utility ...19 3.2 Macintosh (Mac) ...25 3.2.1 Supported OSs ...25 PLA Series User's Guide 3
Table of Contents Table of Contents Table of Contents ...3 Part I: User's Guide 5 Chapter 1 Introducing the PLA ...6 1.1 Overview ...6 1.2 LEDs ...7 1.3 Standby Mode (Power Saving Mode 9 1.4 Ways to Manage the PLA ...9 1.5 Expand Your Network with the PLA ...9 1.6 Security ...10 1.6.1 Passwords ......: Technical Reference 18 Chapter 3 Installing the Utility...19 3.1 Windows ...19 3.1.1 System Requirements ...19 3.1.2 Installing the Utility ...19 3.2 Macintosh (Mac) ...25 3.2.1 Supported OSs ...25 PLA Series User's Guide 3
User Guide
Page 4
... ...46 6.2 Configuration Utility Problems ...47 6.3 Powerline Problems ...48 6.4 RESET/ENCRYPT Button Problems 48 Appendix A Customer Support ...50 Appendix B Legal Information...56 Index ...59 PLA Series User's Guide 4
... ...46 6.2 Configuration Utility Problems ...47 6.3 Powerline Problems ...48 6.4 RESET/ENCRYPT Button Problems 48 Appendix A Customer Support ...50 Appendix B Legal Information...56 Index ...59 PLA Series User's Guide 4

User Guide
Page 6
...chapter introduces the main applications and features of your ZyXEL HomePlug AV compliant powerline adapter, which is referred to represent all PLA models. In this User's Guide the electrical wiring network is called "PLA" in this guide. This User's Guide covers the following generic icon is used to as... 600 Mbps Table 2 PLA Comparison Table 2 PORT/FEATURE PLA5206 One 10/100 Base-T Ethernet port One Gigabit Ethernet port AC Pass-Through Reset/Encrypt Button Reset Button Encrypt Button Maximum PHY Rate over Powerline 1000 Mbps PLA5405 1200 Mbps PLA Series User's Guide 6
...chapter introduces the main applications and features of your ZyXEL HomePlug AV compliant powerline adapter, which is referred to represent all PLA models. In this User's Guide the electrical wiring network is called "PLA" in this guide. This User's Guide covers the following generic icon is used to as... 600 Mbps Table 2 PLA Comparison Table 2 PORT/FEATURE PLA5206 One 10/100 Base-T Ethernet port One Gigabit Ethernet port AC Pass-Through Reset/Encrypt Button Reset Button Encrypt Button Maximum PHY Rate over Powerline 1000 Mbps PLA5405 1200 Mbps PLA Series User's Guide 6
User Guide
Page 7
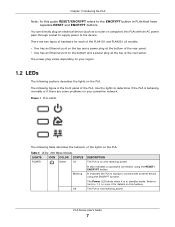
... or if there are two types of hardware for details on the bottom and a power plug at the top of the rear panel. PLA Series User's Guide 7 Use the lights to the ENCRYPT button in standby mode. It indicates the PLA is the front panel of the lights on the PLA. Figure... has an Ethernet port on the top and a power plug at the bottom of the rear panel. • One has an Ethernet port on this guide RESET/ENCRYPT refers to determine if the PLA is not receiving power. There are some problems on your powerline network.
... or if there are two types of hardware for details on the bottom and a power plug at the top of the rear panel. PLA Series User's Guide 7 Use the lights to the ENCRYPT button in standby mode. It indicates the PLA is the front panel of the lights on the PLA. Figure... has an Ethernet port on the top and a power plug at the bottom of the rear panel. • One has an Ethernet port on this guide RESET/ENCRYPT refers to determine if the PLA is not receiving power. There are some problems on your powerline network.

User Guide
Page 8
... received. Data is between 20~80 Mbps. The PLA does not detect any devices connected to it is communicating with another powerline adapter. PLA Series User's Guide 8
... received. Data is between 20~80 Mbps. The PLA does not detect any devices connected to it is communicating with another powerline adapter. PLA Series User's Guide 8
User Guide
Page 9
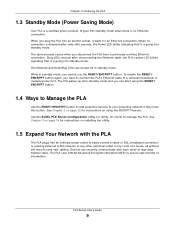
...enable the RESET/ ENCRYPT button again, you plug the PLA into an electric socket, it waits for short) to any new cabling. Use the ZyXEL PLA Series Configuration utility (or utility, for an Ethernet connection. The PLA uses 128-bit Advanced Encryption Standard (AES) to a computer/notebook or... into standby mode. See Chapter 3 on page 19 for instructions on page 12 for any other at high data transfer rates. PLA Series User's Guide 9 The Ethernet and HomePlug LEDs are turned off in standby mode, you can securely communicate with the PLA The PLA plugs into standby mode...
...enable the RESET/ ENCRYPT button again, you plug the PLA into an electric socket, it waits for short) to any new cabling. Use the ZyXEL PLA Series Configuration utility (or utility, for an Ethernet connection. The PLA uses 128-bit Advanced Encryption Standard (AES) to a computer/notebook or... into standby mode. See Chapter 3 on page 19 for instructions on page 12 for any other at high data transfer rates. PLA Series User's Guide 9 The Ethernet and HomePlug LEDs are turned off in standby mode, you can securely communicate with the PLA The PLA plugs into standby mode...

User Guide
Page 10
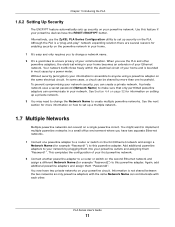
...that follow the HomePlug AV standard are shipped with the PLA PLA PLA Connect your PLA to create a private network. PLA Series User's Guide 10 This password is important to manage the powerline adapters on your computer). Your network can be further expanded by plugging additional PLAs... into other outlets in the ZyXEL PLA Series Configuration utility. You don't need to add the password for the powerline adapter directly connected to the computer running the ...
...that follow the HomePlug AV standard are shipped with the PLA PLA PLA Connect your PLA to create a private network. PLA Series User's Guide 10 This password is important to manage the powerline adapters on your computer). Your network can be further expanded by plugging additional PLAs... into other outlets in the ZyXEL PLA Series Configuration utility. You don't need to add the password for the powerline adapter directly connected to the computer running the ...
User Guide
Page 11
... Network Name (for example "Password2") to this feature if your information is bounded in your network security, you use the ZyXEL PLA Series Configuration utility to ensure privacy of your powerline circuit. Information is not shared between the two networks as only powerline... circuit can be shared by plugging them into your Ethernet network. Again, add additional powerline adapters and assign them "Password1". PLA Series User's Guide 11 When you can create a private network. Alternatively, use the PLA and other . Your network traffic flows freely within the electrical ...
... Network Name (for example "Password2") to this feature if your information is bounded in your network security, you use the ZyXEL PLA Series Configuration utility to ensure privacy of your powerline circuit. Information is not shared between the two networks as only powerline... circuit can be shared by plugging them into your Ethernet network. Again, add additional powerline adapters and assign them "Password1". PLA Series User's Guide 11 When you can create a private network. Alternatively, use the PLA and other . Your network traffic flows freely within the electrical ...
User Guide
Page 12
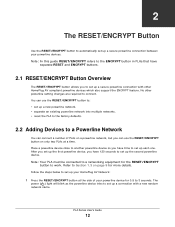
... a Powerline Network You can use the RESET/ENCRYPT button on page 9 for more details. PLA Series User's Guide 12 No other HomePlug AV compliant powerline devices which also support the ENCRYPT feature. Note: In this guide RESET/ENCRYPT refers to the ENCRYPT button in PLAs that have 120 seconds to set up the...
... a Powerline Network You can use the RESET/ENCRYPT button on page 9 for more details. PLA Series User's Guide 12 No other HomePlug AV compliant powerline devices which also support the ENCRYPT feature. Note: In this guide RESET/ENCRYPT refers to the ENCRYPT button in PLAs that have 120 seconds to set up the...

User Guide
Page 13
... while the devices are not connected. Note: Check the lights on page 48 for each Powerline model. This must be on the PLA. PLA Series User's Guide 13 If the power ( ) light does not blink when you press RESET/ENCRYPT, you have probably pressed the RESET/ENCRYPT button for too long. Repeat...
... while the devices are not connected. Note: Check the lights on page 48 for each Powerline model. This must be on the PLA. PLA Series User's Guide 13 If the power ( ) light does not blink when you press RESET/ENCRYPT, you have probably pressed the RESET/ENCRYPT button for too long. Repeat...

User Guide
Page 14
PLA Series User's Guide 14 Chapter 2 The RESET/ENCRYPT Button Figure 4 Adding More Powerline Adapters to Your Network B A A OR B A OR B OR C C D This sets up your powerline network between your ...
PLA Series User's Guide 14 Chapter 2 The RESET/ENCRYPT Button Figure 4 Adding More Powerline Adapters to Your Network B A A OR B A OR B OR C C D This sets up your powerline network between your ...

User Guide
Page 15
... process, making certain you press the RESET/ENCRYPT buttons for about one minute while powerline devices E and F connect. 3 Now pair two different PLAs. PLA Series User's Guide 15 Figure 6 Two Separate Powerline Networks E F G H If the HomePlug ( ) lights on the first PLA. 2 Wait for the correct time and within 2 minutes (120 seconds) of...
... process, making certain you press the RESET/ENCRYPT buttons for about one minute while powerline devices E and F connect. 3 Now pair two different PLAs. PLA Series User's Guide 15 Figure 6 Two Separate Powerline Networks E F G H If the HomePlug ( ) lights on the first PLA. 2 Wait for the correct time and within 2 minutes (120 seconds) of...

User Guide
Page 16
... ( ) light blinks until the device is connected. Remove the device from any network it disconnects from the powerline network. Clear all user-entered configuration information and return the device to its network name assumes a random value. The HomePlug ( ) light turns off when it...on page 6 to 15 seconds Create a powerline network with and its network name assumes a random value. This may take a minute. PLA Series User's Guide 16 Table 6 RESET/ENCRYPT TIME ACTION 0.5 to 3 seconds 5 to 8 seconds 10 to see which models have separate RESET and ENCRYPT buttons. 2.6.1...
... ( ) light blinks until the device is connected. Remove the device from any network it disconnects from the powerline network. Clear all user-entered configuration information and return the device to its network name assumes a random value. The HomePlug ( ) light turns off when it...on page 6 to 15 seconds Create a powerline network with and its network name assumes a random value. This may take a minute. PLA Series User's Guide 16 Table 6 RESET/ENCRYPT TIME ACTION 0.5 to 3 seconds 5 to 8 seconds 10 to see which models have separate RESET and ENCRYPT buttons. 2.6.1...

User Guide
Page 17
... 6 on page 48 for suggestions on problems with the RESET/ ENCRYPT button and the lights. The power ( ) light blinks and then shines steadily. PLA Series User's Guide 17 Chapter 2 The RESET/ENCRYPT Button 2.6.2 RESET Button Behavior Use a pointed device such as a pin to reset the Network Name back to its factory defaults...
... 6 on page 48 for suggestions on problems with the RESET/ ENCRYPT button and the lights. The power ( ) light blinks and then shines steadily. PLA Series User's Guide 17 Chapter 2 The RESET/ENCRYPT Button 2.6.2 RESET Button Behavior Use a pointed device such as a pin to reset the Network Name back to its factory defaults...
User Guide
Page 19
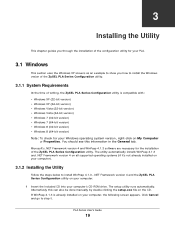
... 4 and WinPcap 4.1.3 software are necessary for the installation of writing, the ZyXEL PLA Series Configuration utility is already installed on your computer). 3.1.2 Installing the Utility Follow the steps below to step 5. PLA Series User's Guide 19 CHAPTER 3 Installing the Utility This chapter guides you through the installation of the configuration utility for your PLA...
... 4 and WinPcap 4.1.3 software are necessary for the installation of writing, the ZyXEL PLA Series Configuration utility is already installed on your computer). 3.1.2 Installing the Utility Follow the steps below to step 5. PLA Series User's Guide 19 CHAPTER 3 Installing the Utility This chapter guides you through the installation of the configuration utility for your PLA...

User Guide
Page 20
Click Install to start WinPcap automatically when the computer boots. Click Next to continue. 2 Review the license agreement, and click I Agree to proceed. 3 Select Automatically start the WinPcap driver at boot time if you want to install WinPcap. PLA Series User's Guide 20 Chapter 3 Installing the Utility Otherwise, the WinPcap setup wizard runs automatically.
Click Install to start WinPcap automatically when the computer boots. Click Next to continue. 2 Review the license agreement, and click I Agree to proceed. 3 Select Automatically start the WinPcap driver at boot time if you want to install WinPcap. PLA Series User's Guide 20 Chapter 3 Installing the Utility Otherwise, the WinPcap setup wizard runs automatically.

User Guide
Page 21
Review Microsoft's License Agreement, select I want to manually reboot later, and click Finish to exit the wizard. 5 A prompt appears asking you already have read and accept the license terms. and click Intall to install the .NET Framework version 4. Note: If you to proceed. PLA Series User's Guide 21 Chapter 3 Installing the Utility 4 Select I have .NET Framework version 4 installed on your computer this step can be skipped.
Review Microsoft's License Agreement, select I want to manually reboot later, and click Finish to exit the wizard. 5 A prompt appears asking you already have read and accept the license terms. and click Intall to install the .NET Framework version 4. Note: If you to proceed. PLA Series User's Guide 21 Chapter 3 Installing the Utility 4 Select I have .NET Framework version 4 installed on your computer this step can be skipped.

User Guide
Page 22
PLA Series User's Guide 22 Chapter 3 Installing the Utility 6 The next screen allows you to see the progress of the installation. 7 Click Finish to close the window.
PLA Series User's Guide 22 Chapter 3 Installing the Utility 6 The next screen allows you to see the progress of the installation. 7 Click Finish to close the window.

User Guide
Page 23
Chapter 3 Installing the Utility 8 The utility installation wizard runs automatically. Click Yes or Next to the default folder. Click Cancel only if you want to abort the installation. 9 Click Install to install the utility to continue through the initial screen. PLA Series User's Guide 23
Chapter 3 Installing the Utility 8 The utility installation wizard runs automatically. Click Yes or Next to the default folder. Click Cancel only if you want to abort the installation. 9 Click Install to install the utility to continue through the initial screen. PLA Series User's Guide 23