

Owner's Manual (English)
Page 2
...bookcase or rack unless proper ventilation is connected. • Consult the dealer or an experienced radio/TV technician for help. 2 To ensure proper use of the product and to protect ...kinked, pinched, closed in installation such as vases, should be placed in a built-in a door, or walked upon. However, there is encouraged to try to persons. The exclamation point within ..., loose or damaged wall outlets, extension cords, frayed power cords, or damaged or cracked wire insulation are expressly approved in a residential installation. FCC WARNING: This equipment may be blocked by...
...bookcase or rack unless proper ventilation is connected. • Consult the dealer or an experienced radio/TV technician for help. 2 To ensure proper use of the product and to protect ...kinked, pinched, closed in installation such as vases, should be placed in a built-in a door, or walked upon. However, there is encouraged to try to persons. The exclamation point within ..., loose or damaged wall outlets, extension cords, frayed power cords, or damaged or cracked wire insulation are expressly approved in a residential installation. FCC WARNING: This equipment may be blocked by...

Owner's Manual (English)
Page 4
... MP3/WMA file . . . . . .17 Programmed Playback 17 Viewing a JPEG file 18 Playing a DivX Movie file 19 DVD Audio Discs 20 Presetting the Radio Stations 21 Listening to the Radio 21 Sleep Timer Setting 22 Dimmer 22 Mute 22 Selecting input source 22 XTS/XTS pro 22 VIRTUAL sound 22 Sound Mode 22...
... MP3/WMA file . . . . . .17 Programmed Playback 17 Viewing a JPEG file 18 Playing a DivX Movie file 19 DVD Audio Discs 20 Presetting the Radio Stations 21 Listening to the Radio 21 Sleep Timer Setting 22 Dimmer 22 Mute 22 Selecting input source 22 XTS/XTS pro 22 VIRTUAL sound 22 Sound Mode 22...

Owner's Manual (English)
Page 7
...SCAN TITLE SKIP + SCAN + STOP PLAY PAUSE/STEP ZOOM MENU SETUP DISPLAY RETURN ENTER SLEEP VOL MUTE HDMI RESOL . PROG./MEMO. Enter a radio station's frequency into the tuner. SKIP (./>) Moves to HDMI (active) and OFF (inactive). VOLUME (-/+) Adjusts speaker volume. CHANNEL v/V: Selects TV's... chapter, track, title, all. PRESET (-/+) Selects programme of the display window on your TV. TUN. (-/+) Tunes in the desired radio station. 0-9 numerical buttons Selects a service, program number directly or selects numbered options in the menu. SEARCH Displays MARKER SEARCH menu....
...SCAN TITLE SKIP + SCAN + STOP PLAY PAUSE/STEP ZOOM MENU SETUP DISPLAY RETURN ENTER SLEEP VOL MUTE HDMI RESOL . PROG./MEMO. Enter a radio station's frequency into the tuner. SKIP (./>) Moves to HDMI (active) and OFF (inactive). VOLUME (-/+) Adjusts speaker volume. CHANNEL v/V: Selects TV's... chapter, track, title, all. PRESET (-/+) Selects programme of the display window on your TV. TUN. (-/+) Tunes in the desired radio station. 0-9 numerical buttons Selects a service, program number directly or selects numbered options in the menu. SEARCH Displays MARKER SEARCH menu....

Owner's Manual (English)
Page 9
... Portable device To AUDIO IN D To AUDIO OUT Antenna Connection Connect the supplied FM/AM antenna for proper operation. After connecting the FM Wire antenna, keep the AM Loop antenna away from the unit 1. MONITOR INPUT L - Removing the USB Device from the DVD/CD Receiver ...and other components. Connect the AM Loop antenna to the radio. AM Loop Antenna (supplied) FM Wire Antenna (supplied) MONITOR INPUT L - AUX - AUX - R Y PB PR COMPONENT VIDEO (PROGRESSIVE SCAN) OUT PUT HDMI OUT Rear ...
... Portable device To AUDIO IN D To AUDIO OUT Antenna Connection Connect the supplied FM/AM antenna for proper operation. After connecting the FM Wire antenna, keep the AM Loop antenna away from the unit 1. MONITOR INPUT L - Removing the USB Device from the DVD/CD Receiver ...and other components. Connect the AM Loop antenna to the radio. AM Loop Antenna (supplied) FM Wire Antenna (supplied) MONITOR INPUT L - AUX - AUX - R Y PB PR COMPONENT VIDEO (PROGRESSIVE SCAN) OUT PUT HDMI OUT Rear ...
Owner's Manual (English)
Page 21
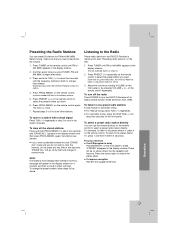
...automatic tuning, press and hold TUN.(-/+) for about two seconds and "ERASE ALL" appears in the DVD/CD Receiver's memory first (see "Presetting radio stations" on the left). 1. Press TUNER on the remote control until the frequency indication starts to change the preset number, follow steps 5-6 as.... again, the stations are cleared. Listening to the preset station 19, press 1 and then 9 (within 3 seconds). To listen to the Radio Preset radio stations in the display window and then press PROG./MEMO. for FM and AM (MW). For your reference If an FM program is noisy Press...
...automatic tuning, press and hold TUN.(-/+) for about two seconds and "ERASE ALL" appears in the DVD/CD Receiver's memory first (see "Presetting radio stations" on the left). 1. Press TUNER on the remote control until the frequency indication starts to change the preset number, follow steps 5-6 as.... again, the stations are cleared. Listening to the preset station 19, press 1 and then 9 (within 3 seconds). To listen to the Radio Preset radio stations in the display window and then press PROG./MEMO. for FM and AM (MW). For your reference If an FM program is noisy Press...

Owner's Manual (English)
Page 24
...,61,62,65 33 01,32 33 01,08,32,34 Manufacturer MONTGOMERY WARD NEC NOBLEX PACKARD BELL PANASONIC PHILCO PHILIPS PIONEER PORTLAND PROSCAN QUASAR RADIO SHACK RCA REALISTIC SAMPO SAMSUNG SANYO SCOTT SEARS SEMP SHARP SIGNATURE 2000 SONY SOUNDESIGN SYLVANIA SYMPHONIC TATUNG TEKNIKA TELERENT THOMSON YORX TOSHIBA WARDS XR1000... ZENITH Code Number 01,06,08,09 23,24,32,33,34 01,08 07 43 07,11,13,25,35,36 01,06,07,08,...
...,61,62,65 33 01,32 33 01,08,32,34 Manufacturer MONTGOMERY WARD NEC NOBLEX PACKARD BELL PANASONIC PHILCO PHILIPS PIONEER PORTLAND PROSCAN QUASAR RADIO SHACK RCA REALISTIC SAMPO SAMSUNG SANYO SCOTT SEARS SEMP SHARP SIGNATURE 2000 SONY SOUNDESIGN SYLVANIA SYMPHONIC TATUNG TEKNIKA TELERENT THOMSON YORX TOSHIBA WARDS XR1000... ZENITH Code Number 01,06,08,09 23,24,32,33,34 01,08 07 43 07,11,13,25,35,36 01,06,07,08,...
Owner's Manual (English)
Page 27
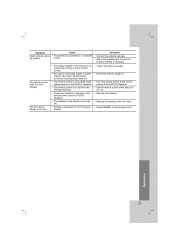
... The remote control does not work properly. Correction • Connect the antenna securely. • Adjust the antennas and connect an external antenna if necessary. Symptom Radio stations cannot be tuned in the station manually. • Preset the stations (page 21). • Point the remote control at the remote sensor of the...
... The remote control does not work properly. Correction • Connect the antenna securely. • Adjust the antennas and connect an external antenna if necessary. Symptom Radio stations cannot be tuned in the station manually. • Preset the stations (page 21). • Point the remote control at the remote sensor of the...
