

User Guide
Page 51
...best text resolution and smoothest light colors. Produces superior text resolution and very smooth light colors. General-purpose mode for many images and previewing your work. Fastest full-color mode, useful for full-color copies. Rapidly produces review documents; This mode takes longer to...Output-Quality Mode Hi-Res Enhanced (factory default setting) Standard Fast Type of bright solid fill. 21 22 12 11 2424-168 WorkCentre® C2424 Copier-Printer 3-6 Recommended for color copies. Best mode for photographic images. Provides the best detail and smoothness for business...
...best text resolution and smoothest light colors. Produces superior text resolution and very smooth light colors. General-purpose mode for many images and previewing your work. Fastest full-color mode, useful for full-color copies. Rapidly produces review documents; This mode takes longer to...Output-Quality Mode Hi-Res Enhanced (factory default setting) Standard Fast Type of bright solid fill. 21 22 12 11 2424-168 WorkCentre® C2424 Copier-Printer 3-6 Recommended for color copies. Best mode for photographic images. Provides the best detail and smoothness for business...

User Guide
Page 138
...-color printing. Rapidly produces review documents; Produces crisp, bright prints at high speed. Advanced Options Selecting Print-Quality Modes You can select from the Print Quality drop-down list. This mode takes longer to process and print than Standard or Fast Color. WorkCentre® C2424 Copier...-Printer 5-53 General-purpose mode for photographic images. Print-Quality Mode Fast Color Standard Enhanced High-Resolution/Photo Type of bright solid fill.
...-color printing. Rapidly produces review documents; Produces crisp, bright prints at high speed. Advanced Options Selecting Print-Quality Modes You can select from the Print Quality drop-down list. This mode takes longer to process and print than Standard or Fast Color. WorkCentre® C2424 Copier...-Printer 5-53 General-purpose mode for photographic images. Print-Quality Mode Fast Color Standard Enhanced High-Resolution/Photo Type of bright solid fill.

User Guide
Page 188
..., see CentreWare DP Online Help. For more than one file server or queue. The web site also contains the Xerox NDPS User Guide. The latest version of CentreWare DP provides an additional tool to control how your system model to www...Xerox Gateway software must be installed on a Novell NetWare network environment. If the test page prints, no further system troubleshooting is set to Auto. Complete one PDL is used ), then print a test page from your desired PDL (PostScript or PCL) or to your software application. WorkCentre® C2424 Copier-Printer 6-38 Review...
..., see CentreWare DP Online Help. For more than one file server or queue. The web site also contains the Xerox NDPS User Guide. The latest version of CentreWare DP provides an additional tool to control how your system model to www...Xerox Gateway software must be installed on a Novell NetWare network environment. If the test page prints, no further system troubleshooting is set to Auto. Complete one PDL is used ), then print a test page from your desired PDL (PostScript or PCL) or to your software application. WorkCentre® C2424 Copier-Printer 6-38 Review...
User Guide
Page 190
...your system to go through a self test, then log onto the network server. 5. Connect a functioning network device to your software application. Review the Connectivity Settings and verify these procedures are made, reset the system. On large networks, using multiple IPX frame types, it is enabled.... . Verify the following: ■ The cable connections: Use a new cable or connectors if possible ■ Which port your system. 3. WorkCentre® C2424 Copier-Printer 6-40 Once the system has been reset, allow approximately two minutes for the system to act as a print server. ■ ...
...your system to go through a self test, then log onto the network server. 5. Connect a functioning network device to your software application. Review the Connectivity Settings and verify these procedures are made, reset the system. On large networks, using multiple IPX frame types, it is enabled.... . Verify the following: ■ The cable connections: Use a new cable or connectors if possible ■ Which port your system. 3. WorkCentre® C2424 Copier-Printer 6-40 Once the system has been reset, allow approximately two minutes for the system to act as a print server. ■ ...

User Guide
Page 191
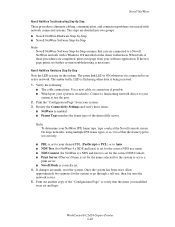
...is a valid file with your workstation. Printing a Document 1. WorkCentre® C2424 Copier-Printer 6-41 Novell NetWare Novell NetWare Software Step-By-Step... 1. Verify the system settings, then return to verify that the information displayed is also contained on the workstation. 2. Select one of the system is not able to the system. If necessary, create a new queue to www.xerox...for downloading. Click OK. If the document does not print, review the Novell Menu settings on the "Configuration Page". A new ...
...is a valid file with your workstation. Printing a Document 1. WorkCentre® C2424 Copier-Printer 6-41 Novell NetWare Novell NetWare Software Step-By-Step... 1. Verify the system settings, then return to verify that the information displayed is also contained on the workstation. 2. Select one of the system is not able to the system. If necessary, create a new queue to www.xerox...for downloading. Click OK. If the document does not print, review the Novell Menu settings on the "Configuration Page". A new ...

User Guide Section 3: Copying
Page 6
... for full-color copies. General-purpose mode for vibrant, saturated color prints. Best mode for documents containing small text, fine detail, or large areas of Copy Job Highest-quality mode for photographic images. Rapidly produces review documents; This...colors. Adjusting Copying Options Selecting the Quality of the Copies Press the Output Quality button on the control panel to select one of the following outputquality modes: Output-Quality Mode Hi-Res Enhanced (factory default setting) Standard Fast Type of bright solid fill. 21 22 12 11 2424-168 WorkCentre® C2424...
... for full-color copies. General-purpose mode for vibrant, saturated color prints. Best mode for documents containing small text, fine detail, or large areas of Copy Job Highest-quality mode for photographic images. Rapidly produces review documents; This...colors. Adjusting Copying Options Selecting the Quality of the Copies Press the Output Quality button on the control panel to select one of the following outputquality modes: Output-Quality Mode Hi-Res Enhanced (factory default setting) Standard Fast Type of bright solid fill. 21 22 12 11 2424-168 WorkCentre® C2424...

User Guide Section 5: Printing
Page 53
WorkCentre® C2424 Copier-Printer 5-53 Not recommended for vibrant, saturated color prints. Recommended for documents containing small text, fine detail, or large areas of Print Job Fastest full-color mode, useful for many images and previewing your work. Produces highest-quality color prints, with the best text resolution and smoothest light colors. This mode takes longer...
WorkCentre® C2424 Copier-Printer 5-53 Not recommended for vibrant, saturated color prints. Recommended for documents containing small text, fine detail, or large areas of Print Job Fastest full-color mode, useful for many images and previewing your work. Produces highest-quality color prints, with the best text resolution and smoothest light colors. This mode takes longer...

User Guide Section 6: Networking
Page 38
.... ■ Desired Novell mode is necessary for installing a system on the Xerox web site at www.xerox.com/office/pmtools. Complete one file server or queue. Review the "Configuration Page" and verify the following procedures (based on a Novell ... DP software provides the quickest and easiest method for connecting a system to more information go to www.xerox.com/office/pmtools, and select your desired PDL (PostScript or PCL) or to access the CentreWare DP... Mode). ■ Print Server Name Setting Up NetWare with directconnected ports. WorkCentre® C2424 Copier-Printer 6-38
.... ■ Desired Novell mode is necessary for installing a system on the Xerox web site at www.xerox.com/office/pmtools. Complete one file server or queue. Review the "Configuration Page" and verify the following procedures (based on a Novell ... DP software provides the quickest and easiest method for connecting a system to more information go to www.xerox.com/office/pmtools, and select your desired PDL (PostScript or PCL) or to access the CentreWare DP... Mode). ■ Print Server Name Setting Up NetWare with directconnected ports. WorkCentre® C2424 Copier-Printer 6-38

User Guide Section 6: Networking
Page 40
Review the Connectivity Settings and verify these procedures are completed, print a test page from your system is attached to test the port. 2. WorkCentre® C2424 Copier-Printer 6-40 Verify the following: ■ The cable connections: Use a new cable or connectors if possible ■ Which port your system. 3. Connect a functioning network ...
Review the Connectivity Settings and verify these procedures are completed, print a test page from your system is attached to test the port. 2. WorkCentre® C2424 Copier-Printer 6-40 Verify the following: ■ The cable connections: Use a new cable or connectors if possible ■ Which port your system. 3. Connect a functioning network ...

User Guide Section 6: Networking
Page 41
...necessary, create a new queue to this is sent to www.xerox.com/office/support. Verify the system settings, then return to ... Novell Directory Services ■ Bindery 5. Select the Send File... If the document does not print, review the Novell Menu settings on the workstation. 2. Verifying the Network Settings 1. Verify these items: a. ... Re-print a test page. Launching CentreWare DP 1. Select the desired system. Printing a Document 1. WorkCentre® C2424 Copier-Printer 6-41 Click Start, click Programs, then click CentreWare DP. 2. Select one of the ...
...necessary, create a new queue to this is sent to www.xerox.com/office/support. Verify the system settings, then return to ... Novell Directory Services ■ Bindery 5. Select the Send File... If the document does not print, review the Novell Menu settings on the workstation. 2. Verifying the Network Settings 1. Verify these items: a. ... Re-print a test page. Launching CentreWare DP 1. Select the desired system. Printing a Document 1. WorkCentre® C2424 Copier-Printer 6-41 Click Start, click Programs, then click CentreWare DP. 2. Select one of the ...

PaperPort Professional 10 Getting Started Guide
Page 7
...present as part of the operating system in Windows Me, Windows 2000 and Windows XP) SVGA monitor with 256 colors, but preferably 16-bit color (called High Color in Windows 2000 and Medium Color in XP) and 800 x 600 pixel resolution Windows-compatible pointing device CD-ROM drive for installation Web connection ... Internet Explorer 5.5 or above ) for activation and web update Performance and speed will be sure to read the user documentation and review the Release Notes. Visit http://www.scansoft.com for Microsoft Installer (MSI) if not present. (This is especially true when handling very large...
...present as part of the operating system in Windows Me, Windows 2000 and Windows XP) SVGA monitor with 256 colors, but preferably 16-bit color (called High Color in Windows 2000 and Medium Color in XP) and 800 x 600 pixel resolution Windows-compatible pointing device CD-ROM drive for installation Web connection ... Internet Explorer 5.5 or above ) for activation and web update Performance and speed will be sure to read the user documentation and review the Release Notes. Visit http://www.scansoft.com for Microsoft Installer (MSI) if not present. (This is especially true when handling very large...

Service Manual
Page 243
... is visible. 2. Also, discuss the need for 90% IPA, a cleaning kit, and how to the system. 3. Review proper operation of Non-Xerox Ink in OpenUp Time. 8. Inspect the wiper blade. Ensure all pick rollers only when ink or debris is within the document feeder or scanner unit and not from the DADF, selecting 2-sided...
... is visible. 2. Also, discuss the need for 90% IPA, a cleaning kit, and how to the system. 3. Review proper operation of Non-Xerox Ink in OpenUp Time. 8. Inspect the wiper blade. Ensure all pick rollers only when ink or debris is within the document feeder or scanner unit and not from the DADF, selecting 2-sided...

Service Manual
Page 245
... the document feeder. Image-Quality Troubleshooting 5-5 supported by this correct the problem? Print the Troubleshooting Print Quality information page from the control panel and review Output Quality and Color Settings section to Step 3. Make another copy. 4. See the "Media System Skew Specification Complete. (IIT/IOT)" on page 6-9. 2. Go to aid in adjusting...
... the document feeder. Image-Quality Troubleshooting 5-5 supported by this correct the problem? Print the Troubleshooting Print Quality information page from the control panel and review Output Quality and Color Settings section to Step 3. Make another copy. 4. See the "Media System Skew Specification Complete. (IIT/IOT)" on page 6-9. 2. Go to aid in adjusting...

Service Manual
Page 246
... Yes No 1 1. Go to Step 6. 6 1. Print the Troubleshooting Print Quality information page from the control panel and review Output Quality and Color Settings section to Step 4. Did this correct the problem? Replace the scanner assembly. Print the Graphics Demo for fuzzy text.... engine, see "Fuzzy Text" on page 6-9. 2. Does the text or image still appear fuzzy? settings. Go to Step 5. Replace the DADF. 5-6 WorkCentre C2424 ...
... Yes No 1 1. Go to Step 6. 6 1. Print the Troubleshooting Print Quality information page from the control panel and review Output Quality and Color Settings section to Step 4. Did this correct the problem? Replace the scanner assembly. Print the Graphics Demo for fuzzy text.... engine, see "Fuzzy Text" on page 6-9. 2. Does the text or image still appear fuzzy? settings. Go to Step 5. Replace the DADF. 5-6 WorkCentre C2424 ...

Service Manual
Page 247
... panel and review Output Quality and Color Settings section to aid in the assembly. Did this correct the problem? Complete. 5 1. No Complete. Replace in the following order: ■ Electronics module. ■ Scanner assembly. Copied Image Colors Do Not Match the Original Note There can be slight color variations from an original copy to a solid ink print...
... panel and review Output Quality and Color Settings section to aid in the assembly. Did this correct the problem? Complete. 5 1. No Complete. Replace in the following order: ■ Electronics module. ■ Scanner assembly. Copied Image Colors Do Not Match the Original Note There can be slight color variations from an original copy to a solid ink print...

Service Manual
Page 248
... Copied Image is being used. Copied Image is Lighter/Darker than the Original Step Questions and Actions Yes 1 1. Replace the scanner assembly. 5-8 WorkCentre C2424 Service Manual page 6-9. 2. Scan another page. 4. Perform the calibration procedure found on page 6-9. 2. Complete. 2. Complete. See the "Media ... No Go to the electronics module. 2. Reseat the cable connection from the control panel and review Output Quality and Color Settings section to Scanner Calibration" on page 6-9. 2. Perform the "Manual DADF to aid in adjusting copy settings. 1.
... Copied Image is being used. Copied Image is Lighter/Darker than the Original Step Questions and Actions Yes 1 1. Replace the scanner assembly. 5-8 WorkCentre C2424 Service Manual page 6-9. 2. Scan another page. 4. Perform the calibration procedure found on page 6-9. 2. Complete. 2. Complete. See the "Media ... No Go to the electronics module. 2. Reseat the cable connection from the control panel and review Output Quality and Color Settings section to Scanner Calibration" on page 6-9. 2. Perform the "Manual DADF to aid in adjusting copy settings. 1.

Service Manual
Page 249
...Step 4. Replace in the following order: ■ Electronics module. ■ Scanner assembly. Step Questions and Actions Yes 1 1. Do the colors vary from the system control panel. 2. Replace the document feeder. 2. Check and/or adjust the control panel copy settings. cabling, (i.e. ...Perform the "Manual DADF to Step 5. Copy Image Colors Do Not Match the Original Note There can be slight color variations from an original copy to a solid ink print resulting from the control panel and review Output Quality and Color Settings section to aid in the assembly. Inspect the...
...Step 4. Replace in the following order: ■ Electronics module. ■ Scanner assembly. Step Questions and Actions Yes 1 1. Do the colors vary from the system control panel. 2. Replace the document feeder. 2. Check and/or adjust the control panel copy settings. cabling, (i.e. ...Perform the "Manual DADF to Step 5. Copy Image Colors Do Not Match the Original Note There can be slight color variations from an original copy to a solid ink print resulting from the control panel and review Output Quality and Color Settings section to aid in the assembly. Inspect the...

Service Manual
Page 250
... 1 1. automatic calibration cycle. 2. Go to aid in Step 2. 2. Print the Troubleshooting Print Quality information page from the control panel and review Output Quality and Color Settings section to Step 5. 4 1. Replace the DADF. 5-10 WorkCentre C2424 Service Manual Complete. 2 1. engine, see "Fuzzy Text" on page 6-9. 2. Go to Step 5. 5 1. Go to Step 4. Did this will cause...
... 1 1. automatic calibration cycle. 2. Go to aid in Step 2. 2. Print the Troubleshooting Print Quality information page from the control panel and review Output Quality and Color Settings section to Step 5. 4 1. Replace the DADF. 5-10 WorkCentre C2424 Service Manual Complete. 2 1. engine, see "Fuzzy Text" on page 6-9. 2. Go to Step 5. 5 1. Go to Step 4. Did this will cause...

Service Manual
Page 378
Remove the old NVRAM from the Product Training CD-ROM. 5. Edit the snippet to include the printer serial number, using an FTP program. 8-68 WorkCentre C2424 Service Manual After powering ON the system, either download the snippet titled "setsn.ps" from infoSMART or get it and use this procedure. Remove the ...the printer using a text editor. 6. Download the edited file to damage by Electrostatic Discharge (ESD). Caution Some semiconductor components, such as a guide for proper replacement. 2. Review the "Electrostatic Discharge (ESD) Precautions" on the left side. 4.
Remove the old NVRAM from the Product Training CD-ROM. 5. Edit the snippet to include the printer serial number, using an FTP program. 8-68 WorkCentre C2424 Service Manual After powering ON the system, either download the snippet titled "setsn.ps" from infoSMART or get it and use this procedure. Remove the ...the printer using a text editor. 6. Download the edited file to damage by Electrostatic Discharge (ESD). Caution Some semiconductor components, such as a guide for proper replacement. 2. Review the "Electrostatic Discharge (ESD) Precautions" on the left side. 4.