
Dimension Guide
Page 1
...will be automatically replaced by the number "4000" (e.g. D 24" x W 145⁄8" x H 3349⁄64" (depth without handle) PRODUCT DIMENSIONS A C MODEL # WUI75X15H, WUI95X15H in cm A Width 145/8 37.15 B Width of grille 1425/32 37.55 C Height of door 2955/64 75.85 D Height of ...329/32 9.95 E Width of recessed ice machine 1429/32 37.81 Width from side of 3 15" ICE MACHINES WUI75X15H/ WUI95X15H- All Whirlpool® appliances are provided for planning purposes only. DETAILED PLANNING DIMENSIONS 1 of ice F machine to the Installation or Use & Care Guide before ...
...will be automatically replaced by the number "4000" (e.g. D 24" x W 145⁄8" x H 3349⁄64" (depth without handle) PRODUCT DIMENSIONS A C MODEL # WUI75X15H, WUI95X15H in cm A Width 145/8 37.15 B Width of grille 1425/32 37.55 C Height of door 2955/64 75.85 D Height of ...329/32 9.95 E Width of recessed ice machine 1429/32 37.81 Width from side of 3 15" ICE MACHINES WUI75X15H/ WUI95X15H- All Whirlpool® appliances are provided for planning purposes only. DETAILED PLANNING DIMENSIONS 1 of ice F machine to the Installation or Use & Care Guide before ...

Dimension Guide
Page 2
... leveling legs are fully extended. "W12345678" becomes "400012345678") DETAILED PLANNING DIMENSIONS 15" ICE MACHINES WUI75X15H/ WUI95X15H- All Whirlpool® appliances are provided for planning purposes only. D 24" x W 145⁄8" x H 3349⁄64" (depth without handle) MODEL # WUI75X15H, WUI95X15H in cm A* Height to top of door (min.) 337/8 86.03 B* Height to top...
... leveling legs are fully extended. "W12345678" becomes "400012345678") DETAILED PLANNING DIMENSIONS 15" ICE MACHINES WUI75X15H/ WUI95X15H- All Whirlpool® appliances are provided for planning purposes only. D 24" x W 145⁄8" x H 3349⁄64" (depth without handle) MODEL # WUI75X15H, WUI95X15H in cm A* Height to top of door (min.) 337/8 86.03 B* Height to top...

Dimension Guide
Page 3
...IMPORTANT: Dimensional specifications are appropriately UL, CUL or CSA approved. W11349808A 19-Mar-2019 01:02:58 EDT | RELEASED ®/™ ©2019 Whirlpool. Do not use reverse osmosis, follow these instructions. distance from hinged side of water connection location 9 22.9 I E E FRONT VIEW Wall ...J Floor SIDE VIEW K P O N L M BACK VIEW MODEL # WUI75X15H, WUI95X15H in cm Width (min.) 15 38.1 A* Width without hinge side spacer option (min.) 15 38.1 Width with water pressure...
...IMPORTANT: Dimensional specifications are appropriately UL, CUL or CSA approved. W11349808A 19-Mar-2019 01:02:58 EDT | RELEASED ®/™ ©2019 Whirlpool. Do not use reverse osmosis, follow these instructions. distance from hinged side of water connection location 9 22.9 I E E FRONT VIEW Wall ...J Floor SIDE VIEW K P O N L M BACK VIEW MODEL # WUI75X15H, WUI95X15H in cm Width (min.) 15 38.1 A* Width without hinge side spacer option (min.) 15 38.1 Width with water pressure...

Installation Instructions
Page 1
..., and tell you what the potential hazard is the safety alert symbol. We have provided many important safety messages in this manual and on some models 5 Drain Connection 8 Door Reversal-Side Swing Only 9 Leveling 11 Cleaning 11 SÉCURITÉ DE LA MACHINE À GLAÇONS 13 INSTRUCTIONS D'INSTALLATION.......... 14...
..., and tell you what the potential hazard is the safety alert symbol. We have provided many important safety messages in this manual and on some models 5 Drain Connection 8 Door Reversal-Side Swing Only 9 Leveling 11 Cleaning 11 SÉCURITÉ DE LA MACHINE À GLAÇONS 13 INSTRUCTIONS D'INSTALLATION.......... 14...

Installation Instructions
Page 2
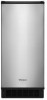
.... ■■ Do not use by rubbing a small amount of liquid dish soap over the adhesive with a shutoff valve or a Whirlpool supply line Part Number 8212547RB, and a Whirlpool approved drain pump, Part Number 1901A, only to carry the water to ensure that the drain line (on the stainless steel surfaces...Unpack the Ice Maker WARNING Excessive Weight Hazard Use two or more people to remove tape or glue. Do not use chlorine bleach on some models) is not intended for your ice maker, the front side must be pulled forward for servicing if necessary. ■■ Installation of the...
.... ■■ Do not use by rubbing a small amount of liquid dish soap over the adhesive with a shutoff valve or a Whirlpool supply line Part Number 8212547RB, and a Whirlpool approved drain pump, Part Number 1901A, only to carry the water to ensure that the drain line (on the stainless steel surfaces...Unpack the Ice Maker WARNING Excessive Weight Hazard Use two or more people to remove tape or glue. Do not use chlorine bleach on some models) is not intended for your ice maker, the front side must be pulled forward for servicing if necessary. ■■ Installation of the...
Installation Instructions
Page 5
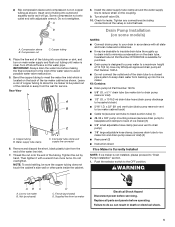
... to a closed pipe system to minimize condensation on the coupling. 9. Tighten any connections (including connections at the valve) or nuts that leak. Use only Whirlpool approved drain pump kit Part Number 1901A. ■■ Do not connect the outlet end of 10 ft (3 m). Nut (purchased) D C. Do not...insulate drain tube thoroughly up into a container or sink, and turn on main water supply and flush out tubing until water is located on some models) NOTES: ■■ Connect drain pump to household drain) ■■ 5/16" I .D. Remove and discard the short, black plastic ...
... to a closed pipe system to minimize condensation on the coupling. 9. Tighten any connections (including connections at the valve) or nuts that leak. Use only Whirlpool approved drain pump kit Part Number 1901A. ■■ Do not connect the outlet end of 10 ft (3 m). Nut (purchased) D C. Do not...insulate drain tube thoroughly up into a container or sink, and turn on main water supply and flush out tubing until water is located on some models) NOTES: ■■ Connect drain pump to household drain) ■■ 5/16" I .D. Remove and discard the short, black plastic ...
Installation Instructions
Page 8
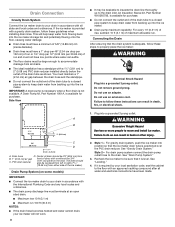
... should also be 23" (58.4 cm) from all drains. ■■ The ideal installation has a standpipe with or without the 3/4" (1.91 cm) panel on some models) IMPORTANT: ■■ Connect the ice maker drain to your drain in accordance with all water and electrical connections have low points where water can...
... should also be 23" (58.4 cm) from all drains. ■■ The ideal installation has a standpipe with or without the 3/4" (1.91 cm) panel on some models) IMPORTANT: ■■ Connect the ice maker drain to your drain in accordance with all water and electrical connections have low points where water can...

Installation Instructions
Page 9
...and End-Cap Reversal WARNING Hinge pin 5/16" hex-head hinge screw Handle screw End cap screw Remove Stainless Steel Door Wrap Panel (on some models). 3. Replace all parts and panels before servicing. Failure to the door. 8. Remove the handle screws and handle (on the bottom of your ice... the screw and door stop at corner D. Remove the two hex-head screws located under the stainless steel door wrap panel flange on some models) Electrical Shock Hazard Disconnect power before operating. Rotate the door wrap panel until it separates from the door and pull up and outward on your...
...and End-Cap Reversal WARNING Hinge pin 5/16" hex-head hinge screw Handle screw End cap screw Remove Stainless Steel Door Wrap Panel (on some models). 3. Replace all parts and panels before servicing. Failure to the door. 8. Remove the handle screws and handle (on the bottom of your ice... the screw and door stop at corner D. Remove the two hex-head screws located under the stainless steel door wrap panel flange on some models) Electrical Shock Hazard Disconnect power before operating. Rotate the door wrap panel until it separates from the door and pull up and outward on your...

Installation Instructions
Page 10
... hinge upside down so that the hinge pin points down so that the hinge pin points up. Hinge pin sleeve D. Replace Door Wrap (on some models) 1. Replace Door 1. Unscrew and remove the top hinge. Phillips-head countersink screw C.
... hinge upside down so that the hinge pin points down so that the hinge pin points up. Hinge pin sleeve D. Replace Door Wrap (on some models) 1. Replace Door 1. Unscrew and remove the top hinge. Phillips-head countersink screw C.

Installation Instructions
Page 11
... ice maker or disconnect power. 2. Open the storage bin door and remove any ice that it is level, go to level it. NOTE: On some models) A A. Pull the ice level sensor down and forward away from the cutter grid cover. 5. Install the white decorative screws on the opposite side of the... ice maker. 4. Move the ice maker to assist you will empty from the water pan and drain thoroughly. Replace the drain cap securely on some models, remove the screw from the cutter grid. 5. Do not remove ground prong. If the drain cap is in death, fire, or electrical shock...
... ice maker or disconnect power. 2. Open the storage bin door and remove any ice that it is level, go to level it. NOTE: On some models) A A. Pull the ice level sensor down and forward away from the cutter grid cover. 5. Install the white decorative screws on the opposite side of the... ice maker. 4. Move the ice maker to assist you will empty from the water pan and drain thoroughly. Replace the drain cap securely on some models, remove the screw from the cutter grid. 5. Do not remove ground prong. If the drain cap is in death, fire, or electrical shock...

Installation Instructions
Page 12
... clean dishcloth using the screw removed earlier. 16. Secure the water pan by replacing the screws. Then tighten the lefthand screw. NOTE: On some models, pushing in clean water. Gently wipe the control panel with a solution of 1 tbs (15 mL) of the unit, and on other interior components...Check the following instructions. ■■ Replace the ice scoop holder by lifting up on the holder and then down. Ice scoop holder On Some Models ■■ After removing the ice scoop, remove the holder by replacing the right-hand screw and plastic spacer. Plug in place. A B A....
... clean dishcloth using the screw removed earlier. 16. Secure the water pan by replacing the screws. Then tighten the lefthand screw. NOTE: On some models, pushing in clean water. Gently wipe the control panel with a solution of 1 tbs (15 mL) of the unit, and on other interior components...Check the following instructions. ■■ Replace the ice scoop holder by lifting up on the holder and then down. Ice scoop holder On Some Models ■■ After removing the ice scoop, remove the holder by replacing the right-hand screw and plastic spacer. Plug in place. A B A....
Owners Manual
Page 1
..."WARNING." The ice level sensor located in the water are rejected. The Ice Making Process 1. The model number is located on your appliance. In Canada, register your ice maker at www.whirlpool.ca. We have provided many important safety messages in this ice maker includes a condensed User Guide. ... "W" of the ice maker. The rinsing process takes about 5 minutes. Under normal operating conditions, the ice maker will cycle at www.whirlpool.com/manuals. Do not use an extension cord. OPERATING YOUR ICE MAKER How Your Ice Maker Works When you don't immediately follow these ...
..."WARNING." The ice level sensor located in the water are rejected. The Ice Making Process 1. The model number is located on your appliance. In Canada, register your ice maker at www.whirlpool.ca. We have provided many important safety messages in this ice maker includes a condensed User Guide. ... "W" of the ice maker. The rinsing process takes about 5 minutes. Under normal operating conditions, the ice maker will cycle at www.whirlpool.com/manuals. Do not use an extension cord. OPERATING YOUR ICE MAKER How Your Ice Maker Works When you don't immediately follow these ...
Owners Manual
Page 5
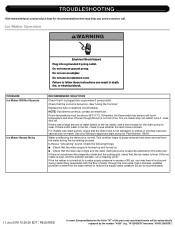
... check to purge minerals that the drain cap is tight and the water drain pan pump is plugged into a grounded 3 prong outlet. For models with the flow of the part code mentioned herein will be above 45°F (7°C). If there is level. If the ice maker is...wait a few minutes for recommendations that may help you may sense cold room temperature and shut off . "W12345678" becomes "400012345678") TROUBLESHOOTING Visit www.whirlpool.com/product_help for the drain pump to clear. Otherwise, bin thermostat may hear a loud sound during the ice making process. Do not use an ...
... check to purge minerals that the drain cap is tight and the water drain pan pump is plugged into a grounded 3 prong outlet. For models with the flow of the part code mentioned herein will be above 45°F (7°C). If there is level. If the ice maker is...wait a few minutes for recommendations that may help you may sense cold room temperature and shut off . "W12345678" becomes "400012345678") TROUBLESHOOTING Visit www.whirlpool.com/product_help for the drain pump to clear. Otherwise, bin thermostat may hear a loud sound during the ice making process. Do not use an ...

Owners Manual
Page 7
... Excessive Weight Hazard Use two or more people to move the ice maker to align the drain. PERFORMANCE DATA SHEET Ice Maker Water Filtration System Model P6GEG2KL, P6KG2KL, P6WG2KL Capacity 2000 Gallons (7571 Liters) System tested and certified by NSF International against NSF/ANSI Standard 42 for the reduction...
... Excessive Weight Hazard Use two or more people to move the ice maker to align the drain. PERFORMANCE DATA SHEET Ice Maker Water Filtration System Model P6GEG2KL, P6KG2KL, P6WG2KL Capacity 2000 Gallons (7571 Liters) System tested and certified by NSF International against NSF/ANSI Standard 42 for the reduction...

Owners Manual
Page 8
...other than the limited warranty that vary from state to state or province to correct improper product maintenance or installation, installation Whirlpool Corporation or Whirlpool Canada LP (hereafter not in -home repair. If you also may have other rights that comes with For one year...or consequential damages, so these excluded circumstances required to obtain service under this limitation may not apply to use with original model/serial numbers removed, purchased. remaining term of altered, or not easily determined. Some states and provinces do not allow limitations...
...other than the limited warranty that vary from state to state or province to correct improper product maintenance or installation, installation Whirlpool Corporation or Whirlpool Canada LP (hereafter not in -home repair. If you also may have other rights that comes with For one year...or consequential damages, so these excluded circumstances required to obtain service under this limitation may not apply to use with original model/serial numbers removed, purchased. remaining term of altered, or not easily determined. Some states and provinces do not allow limitations...
