User Instructions
Page 1
... 8212545RP 5 ft (1.5 m) Red and Blue EPDM. (2-pack) 1903WH Laundry supply storage cart This washer does not include inlet water hoses. Dealer name Serial number Address Phone number Model number In Canada, visit www.whirlpool.ca. For more high-quality items or to know your sales slip together for future reference. ® WASHER USER INSTRUCTIONS INSTRUCTIONS D'UTILISATION...
... 8212545RP 5 ft (1.5 m) Red and Blue EPDM. (2-pack) 1903WH Laundry supply storage cart This washer does not include inlet water hoses. Dealer name Serial number Address Phone number Model number In Canada, visit www.whirlpool.ca. For more high-quality items or to know your sales slip together for future reference. ® WASHER USER INSTRUCTIONS INSTRUCTIONS D'UTILISATION...
User Instructions
Page 2
...and either the word "DANGER" or "WARNING." This symbol alerts you to reduce the chance of others . All safety messages will follow instructions. Always read and obey all safety messages. These words mean: DANGER You can be killed or seriously injured if you and others are ...not followed. 2 We have provided many important safety messages in this manual and on your appliance. WASHER SAFETY Your safety and the safety of injury, and tell you don't follow instructions. WARNING You can be killed or seriously injured if you what the potential hazard is the safety ...
...and either the word "DANGER" or "WARNING." This symbol alerts you to reduce the chance of others . All safety messages will follow instructions. Always read and obey all safety messages. These words mean: DANGER You can be killed or seriously injured if you and others are ...not followed. 2 We have provided many important safety messages in this manual and on your appliance. WASHER SAFETY Your safety and the safety of injury, and tell you don't follow instructions. WARNING You can be killed or seriously injured if you what the potential hazard is the safety ...
User Instructions
Page 3
...fabric softener into the liquid chlorine bleach dispenser. Measure detergent and pour it (including cooking oils). NOTE: If your washer. ■ Load evenly to follow these instructions can be removed in every load, or use this dispenser. Doing so can stain fabrics. Do not use an adapter.... Bleach is immediately fed into washer and is added automatically during the wash part of the cycle. No washer can cause poor cleaning. ...
...fabric softener into the liquid chlorine bleach dispenser. Measure detergent and pour it (including cooking oils). NOTE: If your washer. ■ Load evenly to follow these instructions can be removed in every load, or use this dispenser. Doing so can stain fabrics. Do not use an adapter.... Bleach is immediately fed into washer and is added automatically during the wash part of the cycle. No washer can cause poor cleaning. ...
User Instructions
Page 4
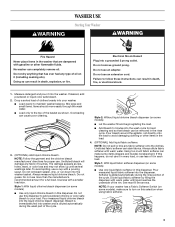
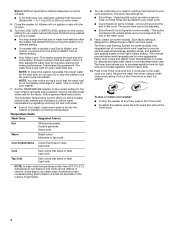
... just right for heavy soils. 10. Each fabric setting is an integrated set of the cycle. It eliminates the guesswork. Follow garment label instructions. The controls provide higher wash temperatures for different types of small lint-like balls on some models) - Push in water. The sound level... soils Warm Bright colors Moderate to 250 mL) warm water. 5. Reduce the wash time when using a small water level setting. To stop the washer once the wash cycle has started filling by turning the selector to a different setting. ■ On models with a variable Load Size or Water...
... just right for heavy soils. 10. Each fabric setting is an integrated set of the cycle. It eliminates the guesswork. Follow garment label instructions. The controls provide higher wash temperatures for different types of small lint-like balls on some models) - Push in water. The sound level... soils Warm Bright colors Moderate to 250 mL) warm water. 5. Reduce the wash time when using a small water level setting. To stop the washer once the wash cycle has started filling by turning the selector to a different setting. ■ On models with a variable Load Size or Water...
User Instructions
Page 5
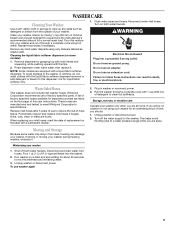
... inlet hoses. Do not remove ground prong. Failure to follow these instructions can damage your washer and run it is for separate purchase are away. Whirlpool Corporation recommends use washer again 5 If storing or moving your washer for an extended period of your washer 1. Run washer on a drain and spin setting for a normal wash load. To use...
... inlet hoses. Do not remove ground prong. Failure to follow these instructions can damage your washer and run it is for separate purchase are away. Whirlpool Corporation recommends use washer again 5 If storing or moving your washer for an extended period of your washer 1. Run washer on a drain and spin setting for a normal wash load. To use...
User Instructions
Page 6
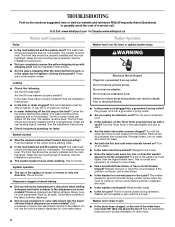
... bleach leaking ■ Did you using an extension cord? www.whirlpool.com In Canada www.whirlpool.ca Washer and Components Washer Operation Noisy ■ Is the load balanced and the washer level? Leaking ■ Check the following: Are the fill hoses tight? See the Installation Instructions for proper installation of the agitator is normal and necessary...
... bleach leaking ■ Did you using an extension cord? www.whirlpool.com In Canada www.whirlpool.ca Washer and Components Washer Operation Noisy ■ Is the load balanced and the washer level? Leaking ■ Check the following: Are the fill hoses tight? See the Installation Instructions for proper installation of the agitator is normal and necessary...
User Instructions
Page 7
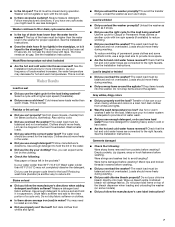
...a higher spin speed (if available). ■ Did you unload the washer promptly? Washer continues to avoid tangling? The top of loads washed increases, the water temperature may decrease for proper operation. See the Installation Instructions. ■ Does the drain hose fit too tightly in the pockets?...or twisted ■ Did you follow the manufacturer's care label instructions? 7 The wash load must be higher than the water level in the water. ■ Did you overload the washer? Drop items loosely into the washer. Do not wrap items around the agitator? Transfer of the...
...a higher spin speed (if available). ■ Did you unload the washer promptly? Washer continues to avoid tangling? The top of loads washed increases, the water temperature may decrease for proper operation. See the Installation Instructions. ■ Does the drain hose fit too tightly in the pockets?...or twisted ■ Did you follow the manufacturer's care label instructions? 7 The wash load must be higher than the water level in the water. ■ Did you overload the washer? Drop items loosely into the washer. Do not wrap items around the agitator? Transfer of the...

User Instructions
Page 8
... or workmanship and is covered by this major appliance is operated and maintained according to instructions attached to or furnished with the product, Whirlpool Corporation or Whirlpool Canada LP (hereafter "Whirlpool") will fit right and work right because they are excluded from your major appliance, to... days from the date of your major appliance, unless such damage results from unauthorized modifications made with published installation instructions. 11. WHIRLPOOL SHALL NOT BE LIABLE FOR INCIDENTAL OR CONSEQUENTIAL DAMAGES. SOME STATES AND PROVINCES DO NOT ALLOW THE EXCLUSION OR...
... or workmanship and is covered by this major appliance is operated and maintained according to instructions attached to or furnished with the product, Whirlpool Corporation or Whirlpool Canada LP (hereafter "Whirlpool") will fit right and work right because they are excluded from your major appliance, to... days from the date of your major appliance, unless such damage results from unauthorized modifications made with published installation instructions. 11. WHIRLPOOL SHALL NOT BE LIABLE FOR INCIDENTAL OR CONSEQUENTIAL DAMAGES. SOME STATES AND PROVINCES DO NOT ALLOW THE EXCLUSION OR...
Installation Instructions
Page 1
W10200331B WARNING You can be killed or seriously injured if you don't follow instructions. WASHER INSTALLATION INSTRUCTIONS INSTRUCTIONS POUR L'INSTALLATION DE LA LAVEUSE Table of Contents/Table des matières WASHER SAFETY 1 SÉCURITÉ DE LA LAVEUSE 9 INSTALLATION REQUIREMENTS 2 Tools and Parts 2 Location ...Materials 4 Connect Drain Hose 6 Connect the Inlet Hoses 6 Secure the Drain Hose 7 Level the Washer 7 Complete Installation 8 INSTRUCTIONS D'INSTALLATION 11 Avant de commencer 11 Retrait du matériel d'expédition 11 Raccordement ...
W10200331B WARNING You can be killed or seriously injured if you don't follow instructions. WASHER INSTALLATION INSTRUCTIONS INSTRUCTIONS POUR L'INSTALLATION DE LA LAVEUSE Table of Contents/Table des matières WASHER SAFETY 1 SÉCURITÉ DE LA LAVEUSE 9 INSTALLATION REQUIREMENTS 2 Tools and Parts 2 Location ...Materials 4 Connect Drain Hose 6 Connect the Inlet Hoses 6 Secure the Drain Hose 7 Level the Washer 7 Complete Installation 8 INSTRUCTIONS D'INSTALLATION 11 Avant de commencer 11 Retrait du matériel d'expédition 11 Raccordement ...
Installation Instructions
Page 2
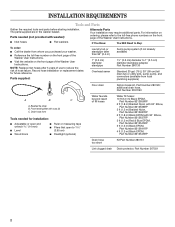
...ft (1.2 m) Black EPDM, Part Number 8212546RP Drain hose too short Kit Part Number 280131 Lint clogged drain Drain protector, Part Number 367031 2 The parts supplied are in the washer basket. Front leveling feet with washer): Alternate Parts Your installation may require additional parts. I Visit the website on the front page of the Washer User Instructions... pump system (if not already available) 11⁄4" (3.2 cm) diameter to reduce the risk of the Washer User Instructions. NOTE: Replace inlet hoses after 5 years of use to 1" (2.5 cm) diameter standpipe adapter, Part ...
...ft (1.2 m) Black EPDM, Part Number 8212546RP Drain hose too short Kit Part Number 280131 Lint clogged drain Drain protector, Part Number 367031 2 The parts supplied are in the washer basket. Front leveling feet with washer): Alternate Parts Your installation may require additional parts. I Visit the website on the front page of the Washer User Instructions... pump system (if not already available) 11⁄4" (3.2 cm) diameter to reduce the risk of the Washer User Instructions. NOTE: Replace inlet hoses after 5 years of use to 1" (2.5 cm) diameter standpipe adapter, Part ...

Installation Instructions
Page 3
... 3" (7.6 cm) C I Hot and cold water faucets located within 4 ft (1.2 m) of where the power cord is installed, the minimum air openings in the top and bottom are required (C). I If a closet door is attached to the washer. Drain System The washer can cause damage in the Washer User Instructions for winterizing information. See "Tools and Parts." Standpipe...
... 3" (7.6 cm) C I Hot and cold water faucets located within 4 ft (1.2 m) of where the power cord is installed, the minimum air openings in the top and bottom are required (C). I If a closet door is attached to the washer. Drain System The washer can cause damage in the Washer User Instructions for winterizing information. See "Tools and Parts." Standpipe...
Installation Instructions
Page 4
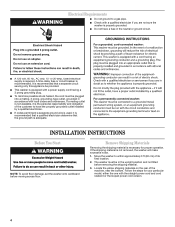
...not ground to a gas pipe. or 20-amp, fused electrical supply is the personal responsibility and obligation of the customer to within approximately 3 ft (90 cm) of the machine, near the bottom. I Do not have the properly grounded outlet installed by a quali ed electrician. I ...Check with the straight power cord and cord restraint or the looped power cord version. 4 INSTALLATION INSTRUCTIONS Before You Start NOTE: To avoid oor damage, set the washer onto cardboard before removing the shipping material. 3. Locate the yellow shipping materials on the rear of its nal...
...not ground to a gas pipe. or 20-amp, fused electrical supply is the personal responsibility and obligation of the customer to within approximately 3 ft (90 cm) of the machine, near the bottom. I Do not have the properly grounded outlet installed by a quali ed electrician. I ...Check with the straight power cord and cord restraint or the looped power cord version. 4 INSTALLATION INSTRUCTIONS Before You Start NOTE: To avoid oor damage, set the washer onto cardboard before removing the shipping material. 3. Locate the yellow shipping materials on the rear of its nal...
Installation Instructions
Page 6
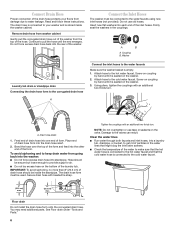
... Tighten the couplings with an additional two-thirds turn . Read and follow these instructions. The drain hose is connected to keep drain water from going back into standpipe. Connect the Inlet Hoses The washer must be secure but loose enough to make sure that the hot water hose ... I Check the temperature of the water to provide a gap for air. Connect Drain Hose Proper connection of the drain hose protects your washer and is stored inside the standpipe. Floor drain Do not install the drain hose form onto the corrugated drain hose. Screw on coupling by...
... Tighten the couplings with an additional two-thirds turn . Read and follow these instructions. The drain hose is connected to keep drain water from going back into standpipe. Connect the Inlet Hoses The washer must be secure but loose enough to make sure that the hot water hose ... I Check the temperature of the water to provide a gap for air. Connect Drain Hose Proper connection of the drain hose protects your washer and is stored inside the standpipe. Floor drain Do not install the drain hose form onto the corrugated drain hose. Screw on coupling by...
Installation Instructions
Page 8
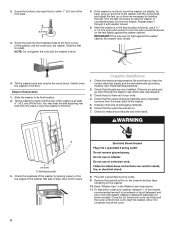
... part, go back through 4 until the rear of the washer is not level, move the washer out slightly, tip back, prop up the front of powdered or liquid detergent and pour it to the oor. Steps in the Washer User Instructions. 11. Be sure that all parts are not tight against... the washer cabinet. Read "Washer Use" in nal location 1. Tilt the washer back and remove the wood block. Complete Installation 1. Dispose of/recycle all of ...
... part, go back through 4 until the rear of the washer is not level, move the washer out slightly, tip back, prop up the front of powdered or liquid detergent and pour it to the oor. Steps in the Washer User Instructions. 11. Be sure that all parts are not tight against... the washer cabinet. Read "Washer Use" in nal location 1. Tilt the washer back and remove the wood block. Complete Installation 1. Dispose of/recycle all of ...


