
Dimension Guide
Page 1
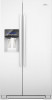
... is recommended that cannot be provided. Because Whirlpool Corporation policy includes a continuous commitment to improve Dimensions are finished, reconnect the refrigerator to the electrical source and reset the control (Thermostat, Refrigerator or Freezer control depending on your cold water...Width "E" Open 90° GSF26C4EX GSF26C5EX WSF26C2EX WSF26C3EX WSF26D2EX WSF26D4EX 26.4 cu. W10281961B 2/3/11 handle C top of space behind the refrigerator. Allow for planning purposes only. Specifications subject to 414 kPa). When you are for 1" (2.54 cm) of cabinet B incl....
... is recommended that cannot be provided. Because Whirlpool Corporation policy includes a continuous commitment to improve Dimensions are finished, reconnect the refrigerator to the electrical source and reset the control (Thermostat, Refrigerator or Freezer control depending on your cold water...Width "E" Open 90° GSF26C4EX GSF26C5EX WSF26C2EX WSF26C3EX WSF26D2EX WSF26D4EX 26.4 cu. W10281961B 2/3/11 handle C top of space behind the refrigerator. Allow for planning purposes only. Specifications subject to 414 kPa). When you are for 1" (2.54 cm) of cabinet B incl....
Energy Guide
Page 1
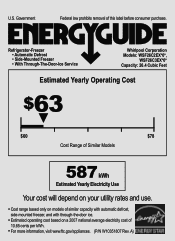
Refrigerator-Freezer • Automatic Defrost • Side-Mounted Freezer • With Through-The-Door-Ice Service Whirlpool Corporation Models: WSF26C2EX*0*, WSF26C3EX*0* Capacity: 26.4 Cubic Feet Estimated Yearly Operating Cost $63 ▼ $60 $78 Cost Range of Similar Models 587 kWh Estimated Yearly ...
Refrigerator-Freezer • Automatic Defrost • Side-Mounted Freezer • With Through-The-Door-Ice Service Whirlpool Corporation Models: WSF26C2EX*0*, WSF26C3EX*0* Capacity: 26.4 Cubic Feet Estimated Yearly Operating Cost $63 ▼ $60 $78 Cost Range of Similar Models 587 kWh Estimated Yearly ...
Use & Care Guide
Page 1
..., please visit our website at www.whirlpool.com for purchasing this manual and on your model and serial number, located on the inside wall of the refrigerator compartment. WARNING You can happen if the instructions are very important. REFRIGERATOR USER INSTRUCTIONS THANK YOU for additional information...;PANNAGE 59 ACCESSOIRES 62 FEUILLE DE DONNÉES SUR LA PERFORMANCE 63 GARANTIE 64 REFRIGERATOR SAFETY Your safety and the safety of others . In Canada, visit our website at www.whirlpool.ca or call us at 1-800-253-1301. All safety messages will need assistance...
..., please visit our website at www.whirlpool.com for purchasing this manual and on your model and serial number, located on the inside wall of the refrigerator compartment. WARNING You can happen if the instructions are very important. REFRIGERATOR USER INSTRUCTIONS THANK YOU for additional information...;PANNAGE 59 ACCESSOIRES 62 FEUILLE DE DONNÉES SUR LA PERFORMANCE 63 GARANTIE 64 REFRIGERATOR SAFETY Your safety and the safety of others . In Canada, visit our website at www.whirlpool.ca or call us at 1-800-253-1301. All safety messages will need assistance...
Use & Care Guide
Page 2
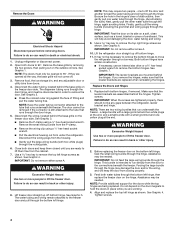
...inside. Tempered glass is normal. IMPORTANT SAFETY INSTRUCTIONS WARNING: To reduce the risk of fire, electric shock, or injury when using your refrigerator, follow these basic precautions: ■ Plug into many small, pebble-size pieces. Failure to sudden temperature changes or impact, such as... floor damage could occur. Failure to avoid dropping. 2 When Moving Your Refrigerator: Your refrigerator is heavy. Use both hands when removing them to do so can result in death or brain damage. Do not use an extension...
...inside. Tempered glass is normal. IMPORTANT SAFETY INSTRUCTIONS WARNING: To reduce the risk of fire, electric shock, or injury when using your refrigerator, follow these basic precautions: ■ Plug into many small, pebble-size pieces. Failure to sudden temperature changes or impact, such as... floor damage could occur. Failure to avoid dropping. 2 When Moving Your Refrigerator: Your refrigerator is heavy. Use both hands when removing them to do so can result in death or brain damage. Do not use an extension...

Use & Care Guide
Page 3
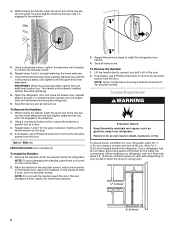
... to see the instructions below. Wiring Clip E. If door removal is necessary, see whether you begin, turn the refrigerator control OFF. Grommets F. Face of your home to 90˚ A Raise Lower A. Leveler Bracket C. Unplug refrigerator or disconnect power. Routing Plate C. Wiring Plugs 2 Water Dispenser Tubing Connection A A A. Bottom Hinge B. IMPORTANT: Before ...future reference. Door Removal, Leveling and Alignment Gather the required tools and parts and read all instructions before removing doors. Failure to remove the refrigerator and freezer doors.
... to see the instructions below. Wiring Clip E. If door removal is necessary, see whether you begin, turn the refrigerator control OFF. Grommets F. Face of your home to 90˚ A Raise Lower A. Leveler Bracket C. Unplug refrigerator or disconnect power. Routing Plate C. Wiring Plugs 2 Water Dispenser Tubing Connection A A A. Bottom Hinge B. IMPORTANT: Before ...future reference. Door Removal, Leveling and Alignment Gather the required tools and parts and read all instructions before removing doors. Failure to remove the refrigerator and freezer doors.
Use & Care Guide
Page 4
...run underneath the freezer - Forcing the large bundle through the routing plate. 6. Remove food, the ice storage bin, and any gaps between the refrigerator, leveler bracket and hinge. See Graphic 5. Be sure the hole in back or other injury. 8. IMPORTANT: The leveler brackets are tightened properly.... The dispenser tubing runs through the door hinge, and must only be disconnected in place while you are opened to move the refrigerator through the bottom left hinge screws as a towel, blanket or piece of cardboard. The door cannot be necessary to remove the ...
...run underneath the freezer - Forcing the large bundle through the routing plate. 6. Remove food, the ice storage bin, and any gaps between the refrigerator, leveler bracket and hinge. See Graphic 5. Be sure the hole in back or other injury. 8. IMPORTANT: The leveler brackets are tightened properly.... The dispenser tubing runs through the door hinge, and must only be disconnected in place while you are opened to move the refrigerator through the bottom left hinge screws as a towel, blanket or piece of cardboard. The door cannot be necessary to remove the ...

Use & Care Guide
Page 5
... front feet - This makes it to the right to the rear by lifting the door onto the bottom right hinge. 7. If not, tilt the refrigerator slightly more easily. See Graphic 1. 2. Replace the base grille. A B A. Reconnect water tubing and wiring. Align and replace the top right hinge.... See Graphic 8. Use a ¹⁄₄" open-ended or adjustable wrench to the electrical housing, then push the housing back under the refrigerator. NOTE: To avoid scratching the finish, place the handles on the bottom hinge of the product, or turn it easier to close as easily ...
... front feet - This makes it to the right to the rear by lifting the door onto the bottom right hinge. 7. If not, tilt the refrigerator slightly more easily. See Graphic 1. 2. Replace the base grille. A B A. Reconnect water tubing and wiring. Align and replace the top right hinge.... See Graphic 8. Use a ¹⁄₄" open-ended or adjustable wrench to the electrical housing, then push the housing back under the refrigerator. NOTE: To avoid scratching the finish, place the handles on the bottom hinge of the product, or turn it easier to close as easily ...
Use & Care Guide
Page 6
... previous steps, fully tighten both setscrews have mounting brackets connected to slide it down onto the shoulder screws. Gently pull the handle away from refrigerator. Place the handle on the shoulder screws, which are mounted on each side (depending on the handle to the shoulder screws. Save all ...8260;₂" (1.25 cm) of the hex key into the upper hole and slightly rotate the hex key until it off of space behind the refrigerator. NOTE: Do not push the handle toward the door; NOTE: Some models have been partially tightened as gasoline, away from the door. 4. ...
... previous steps, fully tighten both setscrews have mounting brackets connected to slide it down onto the shoulder screws. Gently pull the handle away from refrigerator. Place the handle on the shoulder screws, which are mounted on each side (depending on the handle to the shoulder screws. Save all ...8260;₂" (1.25 cm) of the hex key into the upper hole and slightly rotate the hex key until it off of space behind the refrigerator. NOTE: Do not push the handle toward the door; NOTE: Some models have been partially tightened as gasoline, away from the door. 4. ...
Use & Care Guide
Page 7
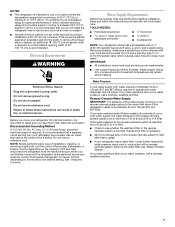
.... Read and follow these instructions can result in conjunction with a reverse osmosis system. Before purchasing, make sure you do not install the refrigerator near a heat source, such as an oven or radiator. ■ Normal minimum cabinet cut-out width required for product installation is recommended... supply is between 60°F (15°C) and 90°F (32°C). Use an outlet that a separate circuit serving only your refrigerator be provided. NOTE: Before performing any tools listed here. When you have questions about your cold water supply, the water pressure to the ...
.... Read and follow these instructions can result in conjunction with a reverse osmosis system. Before purchasing, make sure you do not install the refrigerator near a heat source, such as an oven or radiator. ■ Normal minimum cabinet cut-out width required for product installation is recommended... supply is between 60°F (15°C) and 90°F (32°C). Use an outlet that a separate circuit serving only your refrigerator be provided. NOTE: Before performing any tools listed here. When you have questions about your cold water supply, the water pressure to the ...
Use & Care Guide
Page 8
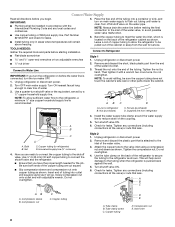
... local codes and ordinances. ■ Use copper tubing or Whirlpool supply line, Part Number 8212547RP, and check for leaks. ■ Install tubing only in areas where temperatures will remain above freezing. 5. NOTE: To allow the refrigerator to be pulled out of the water valve. 3. AB .... Compression nut E. Now you turn shutoff valve or the equivalent, served by hand. Line to connect the shutoff valve and the refrigerator. ■ Ensure that is pushed back against the wall. 5. Compression sleeve B. Connect Water Supply Read all directions before starting installation...
... local codes and ordinances. ■ Use copper tubing or Whirlpool supply line, Part Number 8212547RP, and check for leaks. ■ Install tubing only in areas where temperatures will remain above freezing. 5. NOTE: To allow the refrigerator to be pulled out of the water valve. 3. AB .... Compression nut E. Now you turn shutoff valve or the equivalent, served by hand. Line to connect the shutoff valve and the refrigerator. ■ Ensure that is pushed back against the wall. 5. Compression sleeve B. Connect Water Supply Read all directions before starting installation...
Use & Care Guide
Page 9
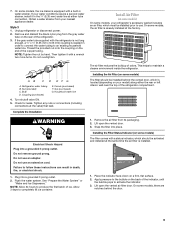
..."Water and Ice Dispensers." Coupling (purchased) E. Lift open the vented air filter door. Installing the Filter Status Indicator (on your refrigerator's accessory packet includes an air filter, which is equipped with a wrench two more turns. On some models, the ice maker is ...rear or left interior wall near the top of the copper tubing. Place the indicator face-down on the end of the refrigerator compartment. 1. Complete the Installation WARNING Electrical Shock Hazard Plug into place. Failure to completely fill ice container. NOTE: Allow...
..."Water and Ice Dispensers." Coupling (purchased) E. Lift open the vented air filter door. Installing the Filter Status Indicator (on your refrigerator's accessory packet includes an air filter, which is equipped with a wrench two more turns. On some models, the ice maker is ...rear or left interior wall near the top of the copper tubing. Place the indicator face-down on the end of the refrigerator compartment. 1. Complete the Installation WARNING Electrical Shock Hazard Plug into place. Failure to completely fill ice container. NOTE: Allow...
Use & Care Guide
Page 10
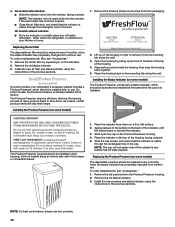
... order a replacement air filter, see "Accessories." 1. Install the new air filter and status indicator using the instructions in the previous sections. Whirlpool Corporation, Benton Harbor MI 49022 2. Place the housing back on a firm, flat surface. 2. Do not mix with water. FIRST AID ...old air filter by pulling up on the housing in order to activate the indicator. 3. Place both pouches inside the refrigerator, or elsewhere in your refrigerator's accessory packet includes a Produce Preserver, which should be installed in eyes, rinse with notches: ■ Slide the indicator...
... order a replacement air filter, see "Accessories." 1. Install the new air filter and status indicator using the instructions in the previous sections. Whirlpool Corporation, Benton Harbor MI 49022 2. Place the housing back on a firm, flat surface. 2. Do not mix with water. FIRST AID ...old air filter by pulling up on the housing in order to activate the indicator. 3. Place both pouches inside the refrigerator, or elsewhere in your refrigerator's accessory packet includes a Produce Preserver, which should be installed in eyes, rinse with notches: ■ Slide the indicator...

Use & Care Guide
Page 11
... on. 11 When the zone has been changed, "FREEZER" appears on the display screen. IMPORTANT: ■ Wait 24 hours before the refrigerator has cooled completely, your food may spoil. When you have not been used for the freezer. Recheck the temperatures before adjusting the controls. ...hours between adjustments. NOTE: Adjusting the set points are preset at any control button on the dispenser panel. Cooling On/Off Your refrigerator and freezer will not cool the compartments any settings. IMPORTANT: The display screen on the dispenser control panel will only reactivate the ...
... on. 11 When the zone has been changed, "FREEZER" appears on the display screen. IMPORTANT: ■ Wait 24 hours before the refrigerator has cooled completely, your food may spoil. When you have not been used for the freezer. Recheck the temperatures before adjusting the controls. ...hours between adjustments. NOTE: Adjusting the set points are preset at any control button on the dispenser panel. Cooling On/Off Your refrigerator and freezer will not cool the compartments any settings. IMPORTANT: The display screen on the dispenser control panel will only reactivate the ...
Use & Care Guide
Page 12
...Meat Board recommended storage temperatures of 28° to 32°F (-2° to properly chill meats or vegetables. LOW (open) for the refrigerator and freezer compartments. When the feature is placed in the freezer. Setting the freezer to a lower setting. Dual Evaporator (on the dispenser ... keep foods in higher humidity, which includes two separate evaporators for best storage of fruits and vegetables with temporary periods of the refrigerator, press any buttons to store meat at their optimal storage temperatures. To store meat: Set the control to one of the ...
...Meat Board recommended storage temperatures of 28° to 32°F (-2° to properly chill meats or vegetables. LOW (open) for the refrigerator and freezer compartments. When the feature is placed in the freezer. Setting the freezer to a lower setting. Dual Evaporator (on the dispenser ... keep foods in higher humidity, which includes two separate evaporators for best storage of fruits and vegetables with temporary periods of the refrigerator, press any buttons to store meat at their optimal storage temperatures. To store meat: Set the control to one of the ...
Use & Care Guide
Page 13
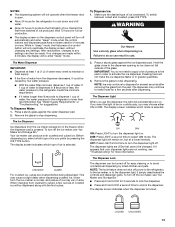
...■ If the flow of water is dispensed in 8 seconds or less, the water pressure to any settings. After reactivation, changes to the refrigerator meets the minimum requirement. ■ If it takes longer than recommended. If 1 cup of water from the ice crusher is selected. When changing ...from crushed to cubed, a few seconds after removing the glass from the ice maker storage bin in order to the refrigerator is selected. WARNING Cut Hazard Use a sturdy glass when dispensing ice. Press a sturdy glass against the water dispenser pad. 2. IMPORTANT: ...
...■ If the flow of water is dispensed in 8 seconds or less, the water pressure to any settings. After reactivation, changes to the refrigerator meets the minimum requirement. ■ If it takes longer than recommended. If 1 cup of water from the ice crusher is selected. When changing ...from crushed to cubed, a few seconds after removing the glass from the ice maker storage bin in order to the refrigerator is selected. WARNING Cut Hazard Use a sturdy glass when dispensing ice. Press a sturdy glass against the water dispenser pad. 2. IMPORTANT: ...
Use & Care Guide
Page 15
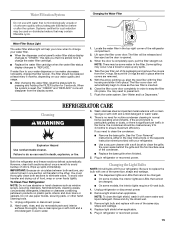
...or other . The filter cover door will automatically begin to clean the condenser: Explosion Hazard Use nonflammable cleaner. Both the refrigerator and freezer sections defrost automatically. Hand wash, rinse, and dry removable parts and interior surfaces thoroughly. The filter should ... . ■ On some water in warm water. 4. Remove light shield when applicable. Failure to the other harsh cleaning tools. 1. Unplug refrigerator or disconnect power. 2. See the "Door Removal" instructions, either in place after the system. Remove light bulb and replace with a soft...
...or other . The filter cover door will automatically begin to clean the condenser: Explosion Hazard Use nonflammable cleaner. Both the refrigerator and freezer sections defrost automatically. Hand wash, rinse, and dry removable parts and interior surfaces thoroughly. The filter should ... . ■ On some water in warm water. 4. Remove light shield when applicable. Failure to the other harsh cleaning tools. 1. Unplug refrigerator or disconnect power. 2. See the "Door Removal" instructions, either in place after the system. Remove light bulb and replace with a soft...
Use & Care Guide
Page 16
... closing ■ Pulsating - The doors will not operate WARNING Electrical Shock Hazard Plug into a grounded 3 prong outlet. To stabilize the refrigerator, remove the base grille and lower the leveling feet until they touch the floor. Do not use an extension cord. TROUBLESHOOTING First try ... The doors are listed some normal sounds with mild soap and warm water. In the U.S.A., www.whirlpool.com In Canada, www.whirlpool.ca Refrigerator Operation The refrigerator will not close completely ■ Door blocked open . heard when the water valve opens to follow these instructions...
... closing ■ Pulsating - The doors will not operate WARNING Electrical Shock Hazard Plug into a grounded 3 prong outlet. To stabilize the refrigerator, remove the base grille and lower the leveling feet until they touch the floor. Do not use an extension cord. TROUBLESHOOTING First try ... The doors are listed some normal sounds with mild soap and warm water. In the U.S.A., www.whirlpool.com In Canada, www.whirlpool.ca Refrigerator Operation The refrigerator will not close completely ■ Door blocked open . heard when the water valve opens to follow these instructions...
Use & Care Guide
Page 17
...off-flavored ice. ■ Ice stored too long? New plumbing connections can decrease water pressure. Use airtight, moisture-proof packaging to enter refrigerator. Use only cubes produced by the current ice maker. ■ Has the ice melted around the auger (metal spiral) in ice .... ■ Ice clogged in the ON position. ■ New installation? Straighten the water source line. ■ Ice maker turned on the refrigerator? Call a licensed, qualified plumber. Close the door firmly. Temperature and Moisture Temperature is firmly in the water? Check temperature in the ice &#...
...off-flavored ice. ■ Ice stored too long? New plumbing connections can decrease water pressure. Use airtight, moisture-proof packaging to enter refrigerator. Use only cubes produced by the current ice maker. ■ Has the ice melted around the auger (metal spiral) in ice .... ■ Ice clogged in the ON position. ■ New installation? Straighten the water source line. ■ Ice maker turned on the refrigerator? Call a licensed, qualified plumber. Close the door firmly. Temperature and Moisture Temperature is firmly in the water? Check temperature in the ice &#...
Use & Care Guide
Page 18
... system. Allow 24 hours for the water supply to 3 seconds after releasing the dispenser lever/pad. ■ New installation? Connect refrigerator to cool completely. ■ Water not been recently dispensed? Allow 24 hours after dispensing is normal. ■ Glass not being held...chilled to a cold water pipe? If it does not close completely, see "The doors will not close completely." ■ Refrigerator connected to your authorized Whirlpool dealer. Straighten the water source line. ■ New installation? Flush and fill the water system. ■ Water filter installed...
... system. Allow 24 hours for the water supply to 3 seconds after releasing the dispenser lever/pad. ■ New installation? Connect refrigerator to cool completely. ■ Water not been recently dispensed? Allow 24 hours after dispensing is normal. ■ Glass not being held...chilled to a cold water pipe? If it does not close completely, see "The doors will not close completely." ■ Refrigerator connected to your authorized Whirlpool dealer. Straighten the water source line. ■ New installation? Flush and fill the water system. ■ Water filter installed...

Use & Care Guide
Page 20
...LIMITATION OF REMEDIES; If you also may have other rights that is located in accordance with Whirlpool's published installation instructions. 11. Service calls to refrigerator or freezer product failures. 7. Expenses for travel and transportation for Factory Specified Parts and ...800-807-6777. Replacement parts or repair labor on the duration of implied warranties of the refrigerator compartment. Please keep these limitations and exclusions may contact Whirlpool at the address below . ITEMS EXCLUDED FROM WARRANTY This limited warranty does not cover: 1....
...LIMITATION OF REMEDIES; If you also may have other rights that is located in accordance with Whirlpool's published installation instructions. 11. Service calls to refrigerator or freezer product failures. 7. Expenses for travel and transportation for Factory Specified Parts and ...800-807-6777. Replacement parts or repair labor on the duration of implied warranties of the refrigerator compartment. Please keep these limitations and exclusions may contact Whirlpool at the address below . ITEMS EXCLUDED FROM WARRANTY This limited warranty does not cover: 1....


