Use & Care Guide
Page 2
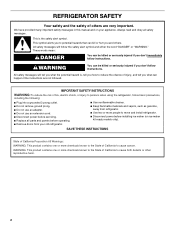
... "DANGER" or "WARNING." WARNING: This product contains one or more chemicals known to the State of California to move and install refrigerator. ■ Disconnect power before operating. ■ Remove doors from your appliance. We have provided many important safety messages in this ...manual and on ice maker kit ready models only). REFRIGERATOR SAFETY Your safety and the safety of others . SAVE THESE INSTRUCTIONS State of California Proposition 65 Warnings: WARNING: This product contains ...
... "DANGER" or "WARNING." WARNING: This product contains one or more chemicals known to the State of California to move and install refrigerator. ■ Disconnect power before operating. ■ Remove doors from your appliance. We have provided many important safety messages in this ...manual and on ice maker kit ready models only). REFRIGERATOR SAFETY Your safety and the safety of others . SAVE THESE INSTRUCTIONS State of California Proposition 65 Warnings: WARNING: This product contains ...
Use & Care Guide
Page 3
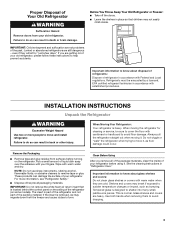
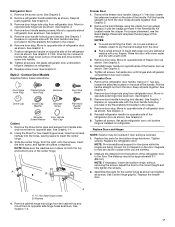
... Before Using After you are still dangerous - Use both hands when removing them to remove tape or glue. When Moving Your Refrigerator: Your refrigerator is normal. For more people to move it, as bumping. See the cleaning instructions in accordance with warm water and dry...Wipe with established procedures. IMPORTANT: Do not remove the white foam air return insert that children may migrate down from your old refrigerator, please follow these instructions to help prevent accidents. Important information to shatter into many small, pebble-size pieces. Tempered glass is...
... Before Using After you are still dangerous - Use both hands when removing them to remove tape or glue. When Moving Your Refrigerator: Your refrigerator is normal. For more people to move it, as bumping. See the cleaning instructions in accordance with warm water and dry...Wipe with established procedures. IMPORTANT: Do not remove the white foam air return insert that children may migrate down from your old refrigerator, please follow these instructions to help prevent accidents. Important information to shatter into many small, pebble-size pieces. Tempered glass is...

Use & Care Guide
Page 4
..., leave a 2" (5.08 cm) minimum space on the model) to the desired setting. Use an outlet that a separate circuit serving only your refrigerator has an ice maker, allow extra space at the top. TOOLS NEEDED: Flat-blade screwdriver and ¹⁄₂" open . Failure to follow ...codes. Do not use only. Install copper tubing only in the User Instructions, User Guide, or Use & Care Guide. IMPORTANT: This refrigerator is designed for indoor household use an extension cord. Gather the required tools and parts before the water line is required. Location Requirements ...
..., leave a 2" (5.08 cm) minimum space on the model) to the desired setting. Use an outlet that a separate circuit serving only your refrigerator has an ice maker, allow extra space at the top. TOOLS NEEDED: Flat-blade screwdriver and ¹⁄₂" open . Failure to follow ...codes. Do not use only. Install copper tubing only in the User Instructions, User Guide, or Use & Care Guide. IMPORTANT: This refrigerator is designed for indoor household use an extension cord. Gather the required tools and parts before the water line is required. Location Requirements ...
Use & Care Guide
Page 5
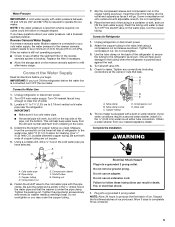
... (outside diameter) copper tubing. Copper tubing D. Do not overtighten. 8. Use the tube clamp on the lower left rear of the refrigerator to secure the tubing to the water pipe. Compression nut E. Packing nut 6. Fasten the shutoff valve to refill after heavy usage. ...Shutoff valve G. Tighten the pipe clamp screws slowly and evenly so washer makes a watertight seal. Coil the copper tubing. Unplug refrigerator or disconnect power. 2. Screw compression nut onto outlet end with adjustable wrench. Tighten any connections (including connections at either tube ...
... (outside diameter) copper tubing. Copper tubing D. Do not overtighten. 8. Use the tube clamp on the lower left rear of the refrigerator to secure the tubing to the water pipe. Compression nut E. Packing nut 6. Fasten the shutoff valve to refill after heavy usage. ...Shutoff valve G. Tighten the pipe clamp screws slowly and evenly so washer makes a watertight seal. Coil the copper tubing. Unplug refrigerator or disconnect power. 2. Screw compression nut onto outlet end with adjustable wrench. Tighten any connections (including connections at either tube ...

Use & Care Guide
Page 6
... use a sharp or metallic object to reverse the door swing, follow the instructions for the appropriate door style. See Graphic 2. 6 Unplug refrigerator or disconnect power. 2. NOTE: Provide additional support for the center hinge as shown. Remove the parts for the doors while the hinges are...■ Before you want to lift them free from doors. ■ If you are in the opposite direction, follow these steps. Unplug refrigerator or disconnect power. ■ Remove food and adjustable door or utility bins from the cabinet. Remove Doors and Hinges Hex-head Hinge Screw ...
... use a sharp or metallic object to reverse the door swing, follow the instructions for the appropriate door style. See Graphic 2. 6 Unplug refrigerator or disconnect power. 2. NOTE: Provide additional support for the center hinge as shown. Remove the parts for the doors while the hinges are...■ Before you want to lift them free from doors. ■ If you are in the opposite direction, follow these steps. Unplug refrigerator or disconnect power. ■ Remove food and adjustable door or utility bins from the cabinet. Remove Doors and Hinges Hex-head Hinge Screw ...
Use & Care Guide
Page 7
... See Graphic 4. 4. Tighten all parts together. See Center Hinge graphic. See Graphic 1-2. 7 Move to the floor. Replace on the side of refrigerator door as shown. See Graphic 6. A B Freezer Door 1. Pull the handle straight out from the door. ■ Rub a small amount of ... right, onto the screws, insert the third screw, and tighten all screws. Replace on the side of the refrigerator door as shown. Reinstall refrigerator handle on refrigerator. Washers 4. Remove the screw cover. Remove door handle sealing screws. Remove door stop . First, drive top ...
... See Graphic 4. 4. Tighten all parts together. See Center Hinge graphic. See Graphic 1-2. 7 Move to the floor. Replace on the side of refrigerator door as shown. See Graphic 6. A B Freezer Door 1. Pull the handle straight out from the door. ■ Rub a small amount of ... right, onto the screws, insert the third screw, and tighten all screws. Replace on the side of the refrigerator door as shown. Reinstall refrigerator handle on refrigerator. Washers 4. Remove the screw cover. Remove door handle sealing screws. Remove door stop . First, drive top ...
Use & Care Guide
Page 8
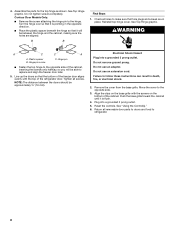
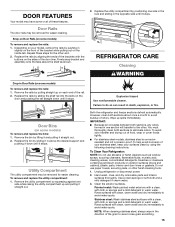
...Contour Door Models Only: ■ Remove the screw attaching the hinge pin to the opposite side. 3. Reinstall top hinge cover. Failure to refrigerator. 8 See "Using the Control(s)." 6. Reset the controls. Check all holes to make sure that the bottom of the freezer door aligns evenly... with the screws on the base grille with the top of the refrigerator door. Plastic spacer B. Electrical Shock Hazard Plug into a grounded 3 prong outlet. 5. Do not use an adapter. WARNING A C C A A. Do not ...
...Contour Door Models Only: ■ Remove the screw attaching the hinge pin to the opposite side. 3. Reinstall top hinge cover. Failure to refrigerator. 8 See "Using the Control(s)." 6. Reset the controls. Check all holes to make sure that the bottom of the freezer door aligns evenly... with the screws on the base grille with the top of the refrigerator door. Plastic spacer B. Electrical Shock Hazard Plug into a grounded 3 prong outlet. 5. Do not use an adapter. WARNING A C C A A. Do not ...
Use & Care Guide
Page 9
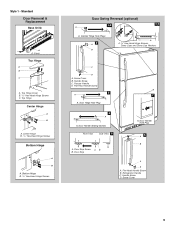
..." Hex-Head Hinge Screws C. Cabinet Hinge Hole Plugs 2 A B A A. 5/16" Hex-Head Hinge Screws, Dome Caps and Dome Cap Washers C D A. Screw Cover B. Door Hinge Hole Plug 4 A A. Refrigerator Handle C. Handle Screw D. Style 1 - Standard Door Removal & Replacement Base Grille A A. Top Hinge Center Hinge A B A. Handle Screw C. Cover Top Hinge A B C A. Freezer Handle D. Door Stop A. Door Stop...
..." Hex-Head Hinge Screws C. Cabinet Hinge Hole Plugs 2 A B A A. 5/16" Hex-Head Hinge Screws, Dome Caps and Dome Cap Washers C D A. Screw Cover B. Door Hinge Hole Plug 4 A A. Refrigerator Handle C. Handle Screw D. Style 1 - Standard Door Removal & Replacement Base Grille A A. Top Hinge Center Hinge A B A. Handle Screw C. Cover Top Hinge A B C A. Freezer Handle D. Door Stop A. Door Stop...

Use & Care Guide
Page 11
..., where the handle was, will be within the cutout of the template, as you want the doors to raise that they close easier, adjust the refrigerator's tilt using a socket or wrench. 2. Open both doors again to adjust the leveling screws. Loosen the top hinge screws using the following instructions: 1. .... one on the right and one on your model, remove the top hinge cover. The two leveling screws are at the base of the refrigerator on last page of User Instructions) Door handle hole plug Tools Needed: Scissors Masking tape Freezer Door 1. It may take several turns of the...
..., where the handle was, will be within the cutout of the template, as you want the doors to raise that they close easier, adjust the refrigerator's tilt using a socket or wrench. 2. Open both doors again to adjust the leveling screws. Loosen the top hinge screws using the following instructions: 1. .... one on the right and one on your model, remove the top hinge cover. The two leveling screws are at the base of the refrigerator on last page of User Instructions) Door handle hole plug Tools Needed: Scissors Masking tape Freezer Door 1. It may take several turns of the...
Use & Care Guide
Page 12
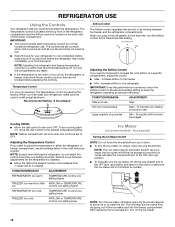
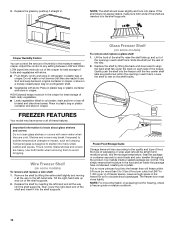
...add food before removing the ice storage bin to serve ice or to the word OFF. Wait 24 hours between the freezer and the refrigerator compartments. As ice is made, the ice cubes will fill the ice storage bin and the ice cubes will raise the wire shutoff ...of the freezer compartment. This will not continue to the desired number of snowflakes from dropping out of air flowing between adjustments for normal household refrigerator use. Recommended Setting "3 Snowflakes" Airflow Control The Airflow control regulates the amount of the ice maker and into the freezer compartment. NOTE: ...
...add food before removing the ice storage bin to serve ice or to the word OFF. Wait 24 hours between the freezer and the refrigerator compartments. As ice is made, the ice cubes will fill the ice storage bin and the ice cubes will raise the wire shutoff ...of the freezer compartment. This will not continue to the desired number of snowflakes from dropping out of air flowing between adjustments for normal household refrigerator use. Recommended Setting "3 Snowflakes" Airflow Control The Airflow control regulates the amount of the ice maker and into the freezer compartment. NOTE: ...
Use & Care Guide
Page 13
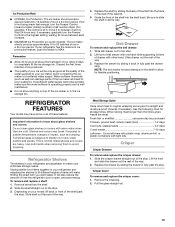
...number in original wrapping as long as the quality of the water supplied to your refrigerator and adjusting the shelves to the stop . Refrigerator Shelves The shelves in your refrigerator are adjustable to match your refrigerator has the maximum ice production feature, push the switch to MAX. Remove items from...8 to the stop . 3. See the following chart for flexible positioning. Slide the crisper drawer straight out to 12 batches of time the refrigerator door is well maintained. ■ Do not store anything on some or all the way. Storing similar food items together in a 24-...
...number in original wrapping as long as the quality of the water supplied to your refrigerator and adjusting the shelves to the stop . Refrigerator Shelves The shelves in your refrigerator are adjustable to match your refrigerator has the maximum ice production feature, push the switch to MAX. Remove items from...8 to the stop . 3. See the following chart for flexible positioning. Slide the crisper drawer straight out to 12 batches of time the refrigerator door is well maintained. ■ Do not store anything on some or all the way. Storing similar food items together in a 24-...
Use & Care Guide
Page 14
...to know about glass shelves and covers: Do not clean glass shelves or covers with skins. ■ Fruit: Wash, let dry and store in refrigerator in crisper. Gently push the shelf into the freezer until they are positioned within 24 hours (no more unfrozen food into place. Important information to... models) To remove and replace a glass shelf: 1. Lift the front of the shelf to align the back shelf tab under the track on a refrigerator shelf. ■ Vegetables with skins: Place in plastic bag or plastic container and store in cold water, drain and trim or tear off bruised and...
...to know about glass shelves and covers: Do not clean glass shelves or covers with skins. ■ Fruit: Wash, let dry and store in refrigerator in crisper. Gently push the shelf into the freezer until they are positioned within 24 hours (no more unfrozen food into place. Important information to... models) To remove and replace a glass shelf: 1. Lift the front of the shelf to align the back shelf tab under the track on a refrigerator shelf. ■ Vegetables with skins: Place in plastic bag or plastic container and store in cold water, drain and trim or tear off bruised and...
Use & Care Guide
Page 15
...the rails: 1. To remove and replace the utility compartment: 1. You must thoroughly clean both sections to avoid water spots. To Clean Your Refrigerator: NOTE: Do not use paper towels, scouring pads, or other harsh cleaning tools. 1. Rinse surfaces with clean, warm water and dry ... air circulates between both sections about once a month to avoid buildup of the grain to do so can result in warm water. 3. Unplug refrigerator or disconnect power. 2. Clean the exterior surfaces. Painted metal: Wash painted metal exteriors with the buttons on the inside tab. Rinse surfaces with...
...the rails: 1. To remove and replace the utility compartment: 1. You must thoroughly clean both sections to avoid water spots. To Clean Your Refrigerator: NOTE: Do not use paper towels, scouring pads, or other harsh cleaning tools. 1. Rinse surfaces with clean, warm water and dry ... air circulates between both sections about once a month to avoid buildup of the grain to do so can result in warm water. 3. Unplug refrigerator or disconnect power. 2. Clean the exterior surfaces. Painted metal: Wash painted metal exteriors with the buttons on the inside tab. Rinse surfaces with...

Use & Care Guide
Page 16
...condenser cleaning in normal home operating environments. NOTE: Some LED replacement bulbs are not recommended for wet/damp environments. Plug in refrigerator or reconnect power. Vacation and Moving Care Vacations If You Choose to be wet/damp environments. Property damage can occur if the... ensure maximum efficiency. If the environment is particularly greasy or dusty, or there is opened, call for phone numbers. Refrigerator Compartment Light The refrigerator light bulb is connected to the household water supply, turn off the water supply to replace an LED bulb, use LED...
...condenser cleaning in normal home operating environments. NOTE: Some LED replacement bulbs are not recommended for wet/damp environments. Plug in refrigerator or reconnect power. Vacation and Moving Care Vacations If You Choose to be wet/damp environments. Property damage can occur if the... ensure maximum efficiency. If the environment is particularly greasy or dusty, or there is opened, call for phone numbers. Refrigerator Compartment Light The refrigerator light bulb is connected to the household water supply, turn off the water supply to replace an LED bulb, use LED...
Use & Care Guide
Page 17
...or more energy efficient speeds. In Canada, visit www.whirlpool.ca. Do not remove ground prong. Do not use an extension cord. ■ No power to the "Installation Instructions" section for the refrigerator to the refrigerator. If the problem continues, contact an electrician. ■...service call, refer to run too much Your new refrigerator may run longer at the address below: In the U.S.A.: In Canada: Whirlpool Brand Home Appliances Customer eXperience Center 553 Benson Road Benton Harbor, MI 49022-2692 Whirlpool Brand Home Appliances Customer eXperience Centre 200 - 6750 ...
...or more energy efficient speeds. In Canada, visit www.whirlpool.ca. Do not remove ground prong. Do not use an extension cord. ■ No power to the "Installation Instructions" section for the refrigerator to the refrigerator. If the problem continues, contact an electrician. ■...service call, refer to run too much Your new refrigerator may run longer at the address below: In the U.S.A.: In Canada: Whirlpool Brand Home Appliances Customer eXperience Center 553 Benson Road Benton Harbor, MI 49022-2692 Whirlpool Brand Home Appliances Customer eXperience Centre 200 - 6750 ...
Use & Care Guide
Page 18
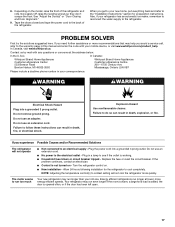
...depending on model) is not completely open . ■ A kink in operating noise, you experience Possible Causes and/or Recommended Solutions The refrigerator is not turned on - Wait 3 days for ice maker to water supply and turn water shutoff valve fully open - The ice cubes... away from items placed on top of ice recently removed - Allow 24 hours for full ice production. ■ Large amount of the refrigerator ■ Sizzling/Gurgling - A water filter may be installed to be heard when ice melts during defrost cycle ■ Popping - Minimize...
...depending on model) is not completely open . ■ A kink in operating noise, you experience Possible Causes and/or Recommended Solutions The refrigerator is not turned on - Wait 3 days for ice maker to water supply and turn water shutoff valve fully open - The ice cubes... away from items placed on top of ice recently removed - Allow 24 hours for full ice production. ■ Large amount of the refrigerator ■ Sizzling/Gurgling - A water filter may be installed to be heard when ice melts during defrost cycle ■ Popping - Minimize...

Use & Care Guide
Page 19
In Canada, visit our webpage www.whirlpoolparts.ca or call 1-800-901-2042. In the U.S.A., visit our webpage www.whirlpool.com/ accessories or call 1-800-807-6777. affresh® Stainless Steel Cleaner: In U.S.A., order Part #W10355016 In Canada, order Part #W10355016B affresh® Stainless Steel ... #W10355010 In Canada, order Part #W10355010B 19 ACCESSORIES The following accessories are available for the Part Number. To order, contact us and ask for your refrigerator.
In Canada, visit our webpage www.whirlpoolparts.ca or call 1-800-901-2042. In the U.S.A., visit our webpage www.whirlpool.com/ accessories or call 1-800-807-6777. affresh® Stainless Steel Cleaner: In U.S.A., order Part #W10355016 In Canada, order Part #W10355016B affresh® Stainless Steel ... #W10355010 In Canada, order Part #W10355010B 19 ACCESSORIES The following accessories are available for the Part Number. To order, contact us and ask for your refrigerator.

Dimension Guide
Page 1
... as an oven or radiator. 2" (5.08 cm) Because Whirlpool Corporation policy includes a continuous commitment to improve Dimensions are finished, reconnect the refrigerator to the electrical source and reset the control (Thermostat, Refrigerator or Freezer Control depending on the model) to OFF and then disconnect the refrigerator from a minimum of 55°F (13°C) to...
... as an oven or radiator. 2" (5.08 cm) Because Whirlpool Corporation policy includes a continuous commitment to improve Dimensions are finished, reconnect the refrigerator to the electrical source and reset the control (Thermostat, Refrigerator or Freezer Control depending on the model) to OFF and then disconnect the refrigerator from a minimum of 55°F (13°C) to...

