Warranty Information
Page 1
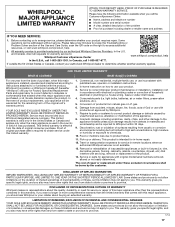
... filters, preservation solutions, etc.). 5. This product is installed, operated and maintained according to instructions attached to : Whirlpool Customer eXperience Center www.whirlpool.com/product_help In the U.S.A., call 1-800-253-1301. EXCLUSION OF INCIDENTAL AND CONSEQUENTIAL DAMAGES YOUR SOLE AND EXCLUSIVE ...to arrange service, please determine whether your retailer about the quality, durability, or need for Factory Specified Replacement Parts and repair labor to Whirlpool within 30 days. 9. This warranty gives you specific legal rights, and you want a longer or more...
... filters, preservation solutions, etc.). 5. This product is installed, operated and maintained according to instructions attached to : Whirlpool Customer eXperience Center www.whirlpool.com/product_help In the U.S.A., call 1-800-253-1301. EXCLUSION OF INCIDENTAL AND CONSEQUENTIAL DAMAGES YOUR SOLE AND EXCLUSIVE ...to arrange service, please determine whether your retailer about the quality, durability, or need for Factory Specified Replacement Parts and repair labor to Whirlpool within 30 days. 9. This warranty gives you specific legal rights, and you want a longer or more...
Use & Care Guide
Page 2
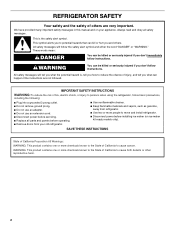
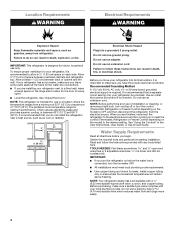
Always read and obey all parts and panels before operating. ■ Remove doors from your old refrigerator. ■ Use nonflammable cleaner. ■ Keep flammable materials and vapors, such as gasoline, away ...
Always read and obey all parts and panels before operating. ■ Remove doors from your old refrigerator. ■ Use nonflammable cleaner. ■ Keep flammable materials and vapors, such as gasoline, away ...
Use & Care Guide
Page 3
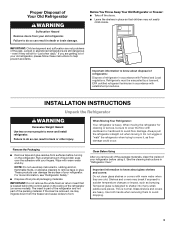
... before turning on some models). When Moving Your Refrigerator: Your refrigerator is normal. The insert is designed to move it . Tempered glass is part of the refrigerator and not part of the refrigerator (on the refrigerator. even if they are not problems of the package materials, clean the inside . Rub a small amount...
... before turning on some models). When Moving Your Refrigerator: Your refrigerator is normal. The insert is designed to move it . Tempered glass is part of the refrigerator and not part of the refrigerator (on the refrigerator. even if they are not problems of the package materials, clean the inside . Rub a small amount...
Use & Care Guide
Page 4
... reduces electricity usage and provides superior cooling, is recommended that cannot be provided. NOTE: Before performing any tools listed here. Gather the required tools and parts before you turn the ice maker OFF. ■ All installations must meet local plumbing code requirements. ■ Use copper tubing and check for the door...
... reduces electricity usage and provides superior cooling, is recommended that cannot be provided. NOTE: Before performing any tools listed here. Gather the required tools and parts before you turn the ice maker OFF. ■ All installations must meet local plumbing code requirements. ■ Use copper tubing and check for the door...
Use & Care Guide
Page 6
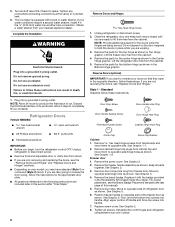
...Close the refrigerator door and keep both doors closed until hinges and refrigerator compartment door are working. 3. Remove the parts for leaks. Lift the freezer door free from the cabinet. 5. Remove the parts for the bottom hinge as shown in water strainer. Lift the refrigerator door free from the cabinet. 4. Remove the... parts for the center hinge as shown in the ¹⁄₄" (6.35 mm) water line at the valve) or nuts that they open -end wrench...
...Close the refrigerator door and keep both doors closed until hinges and refrigerator compartment door are working. 3. Remove the parts for leaks. Lift the freezer door free from the cabinet. 5. Remove the parts for the bottom hinge as shown in water strainer. Lift the refrigerator door free from the cabinet. 4. Remove the... parts for the center hinge as shown in the ¹⁄₄" (6.35 mm) water line at the valve) or nuts that they open -end wrench...
Use & Care Guide
Page 7
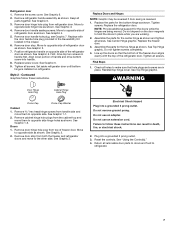
...See Graphic 5. 7. Doors 1. See Graphic 2. 2. Remove the screw cover. See Graphic 6. 2. Remove door handle sealing screws. Style 2 - Assemble the parts for the top hinge as shown and tighten all screws. WARNING Door Hinge Hole Plug Cabinet Hinge Hole Plug Dome Cap Dome Cap Washer Cabinet...top of the refrigerator door. Remove door stop . Plug into a grounded 3 prong outlet. 3. See Graphic 6. Tighten all removable door parts to doors and food to opposite side hinge holes as shown. Replace with the top of freezer door. Final Steps 1. Remove door stop...
...See Graphic 5. 7. Doors 1. See Graphic 2. 2. Remove the screw cover. See Graphic 6. 2. Remove door handle sealing screws. Style 2 - Assemble the parts for the top hinge as shown and tighten all screws. WARNING Door Hinge Hole Plug Cabinet Hinge Hole Plug Dome Cap Dome Cap Washer Cabinet...top of the refrigerator door. Remove door stop . Plug into a grounded 3 prong outlet. 3. See Graphic 6. Tighten all removable door parts to doors and food to opposite side hinge holes as shown. Replace with the top of freezer door. Final Steps 1. Remove door stop...
Use & Care Guide
Page 11
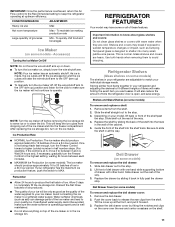
... between each increase. ■ MAXIMUM Ice Production (on your individual storage needs. If a softened water supply cannot be only as good as salt) can damage parts of groceries Min - Tempered glass is designed to shatter into the track in a 24-hour period. Shelves and Glass Shelves (on some models): The ice...
... between each increase. ■ MAXIMUM Ice Production (on your individual storage needs. If a softened water supply cannot be only as good as salt) can damage parts of groceries Min - Tempered glass is designed to shatter into the track in a 24-hour period. Shelves and Glass Shelves (on some models): The ice...
Use & Care Guide
Page 13
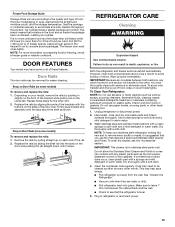
... sections to eliminate odors. Drop-in slightly on the front of the door liner. However, clean both sections, any plastic parts such as window sprays, scouring cleansers, flammable fluids, cleaning waxes, concentrated detergents, bleaches or cleansers containing petroleum products on some... Wash stainless steel and painted metal exteriors with a sponge and mild detergent in warm water. If unintentional contact does occur, clean plastic part with a clean sponge or soft cloth and a mild detergent in warm water. See "Unpack the Refrigerator." ■ Vacuum coils when...
... sections to eliminate odors. Drop-in slightly on the front of the door liner. However, clean both sections, any plastic parts such as window sprays, scouring cleansers, flammable fluids, cleaning waxes, concentrated detergents, bleaches or cleansers containing petroleum products on some... Wash stainless steel and painted metal exteriors with a sponge and mild detergent in warm water. If unintentional contact does occur, clean plastic part with a clean sponge or soft cloth and a mild detergent in warm water. See "Unpack the Refrigerator." ■ Vacuum coils when...
Use & Care Guide
Page 14
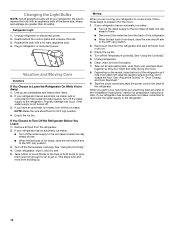
... it for preparation instructions. See "Using the Control(s)." 5. Replace the bulb with an appliance bulb of the refrigerator. See "Using the Control(s)." 4. Remove all removable parts, wrap them well, and tape them open far enough for air to the ice maker at least one day ahead of time. ■ When the...
... it for preparation instructions. See "Using the Control(s)." 5. Replace the bulb with an appliance bulb of the refrigerator. See "Using the Control(s)." 4. Remove all removable parts, wrap them well, and tape them open far enough for air to the ice maker at least one day ahead of time. ■ When the...
Use & Care Guide
Page 16
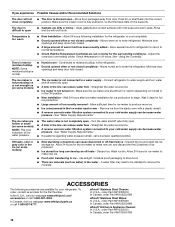
... moisture buildup in the ice (on some models) ■ The ice maker is not completely open - Wait 24 hours after ice maker installation for the Part Number. Off-taste, odor or gray color in the refrigerator. ■ Door(s) opened often or not closed . A water filter may need to be installed .... Allow 24 hours for the ice maker to make new ice. ■ Food odor transferring to enter refrigerator. In the U.S.A., visit our webpage www.whirlpool.com/ accessories or call a licensed, qualified plumber. In Canada, visit our webpage www.whirlpoolparts.ca or call 1-800-807-6777.
... moisture buildup in the ice (on some models) ■ The ice maker is not completely open - Wait 24 hours after ice maker installation for the Part Number. Off-taste, odor or gray color in the refrigerator. ■ Door(s) opened often or not closed . A water filter may need to be installed .... Allow 24 hours for the ice maker to make new ice. ■ Food odor transferring to enter refrigerator. In the U.S.A., visit our webpage www.whirlpool.com/ accessories or call a licensed, qualified plumber. In Canada, visit our webpage www.whirlpoolparts.ca or call 1-800-807-6777.

Use & Care Guide
Page 17
...Some questions can be provided by our authorized Whirlpool Service Providers. In-home instruction on the right to product failure. 11. light bulbs, batteries, air or water filters, preservation solutions, etc.). 5. Repairs to parts or systems to correct improper product maintenance ... under these limitations and exclusions may not apply to correct defects in accordance with the product, Whirlpool Corporation or Whirlpool Canada LP (hereafter "Whirlpool") will be borne by Whirlpool. 7. Commercial, non-residential, multiple-family use, or use your retailer about the quality, ...
...Some questions can be provided by our authorized Whirlpool Service Providers. In-home instruction on the right to product failure. 11. light bulbs, batteries, air or water filters, preservation solutions, etc.). 5. Repairs to parts or systems to correct improper product maintenance ... under these limitations and exclusions may not apply to correct defects in accordance with the product, Whirlpool Corporation or Whirlpool Canada LP (hereafter "Whirlpool") will be borne by Whirlpool. 7. Commercial, non-residential, multiple-family use, or use your retailer about the quality, ...


