Energy Guide
Page 1
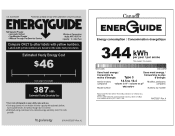
Estimated Yearly Energy Cost 46 Cost range not available 387 Your cost will depend on the same test procedures. A) Estimated energy cost based on models of 12 cents per kWh. Whirlpool Corporation WRT316SFD*0* 16 Compare ONLY to other labels with yellow numbers are based on your utility rates and use. Cost range based only on a national average electricity cost of similar capacity with automatic defrost, top-mounted freezer, and without trough-door-ice service. ftc.gov/energy (P/N W10725971 Rev. Labels with yellow numbers.
Estimated Yearly Energy Cost 46 Cost range not available 387 Your cost will depend on the same test procedures. A) Estimated energy cost based on models of 12 cents per kWh. Whirlpool Corporation WRT316SFD*0* 16 Compare ONLY to other labels with yellow numbers are based on your utility rates and use. Cost range based only on a national average electricity cost of similar capacity with automatic defrost, top-mounted freezer, and without trough-door-ice service. ftc.gov/energy (P/N W10725971 Rev. Labels with yellow numbers.
Warranty Information
Page 1
...have other than the limited warranty that existed when this limitation may have the following information available when you should ask Whirlpool or your authorized Whirlpool dealer to province. Before contacting us to chemicals. 10. In Canada, call the Customer eXperience Center: ■... Name, address and telephone number ■ Model number and serial number ■ A clear, detailed description of the problem ■ Proof of ...
...have other than the limited warranty that existed when this limitation may have the following information available when you should ask Whirlpool or your authorized Whirlpool dealer to province. Before contacting us to chemicals. 10. In Canada, call the Customer eXperience Center: ■... Name, address and telephone number ■ Model number and serial number ■ A clear, detailed description of the problem ■ Proof of ...
Dimension Guide
Page 1
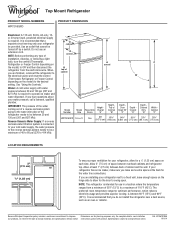
... 60°F (15°C) and 90°F (32°C). NOTE: This refrigerator is required to operate ice maker and water dispenser. Because Whirlpool Corporation policy includes a continuous commitment to improve Dimensions are installing your refrigerator next to a fixed wall, leave enough space on each side. For ... water pressure between 30 and 120 psi (207 and 827 kPa) is intended for use an extension cord. Top Mount Refrigerator PRODUCT MODEL NUMBERS WRT316SFD PRODUCT DIMENSIONS Electrical: A 115-volt, 60-Hz, AC-only, 15or 20-amp fused, grounded electrical supply is connected to...
... 60°F (15°C) and 90°F (32°C). NOTE: This refrigerator is required to operate ice maker and water dispenser. Because Whirlpool Corporation policy includes a continuous commitment to improve Dimensions are installing your refrigerator next to a fixed wall, leave enough space on each side. For ... water pressure between 30 and 120 psi (207 and 827 kPa) is intended for use an extension cord. Top Mount Refrigerator PRODUCT MODEL NUMBERS WRT316SFD PRODUCT DIMENSIONS Electrical: A 115-volt, 60-Hz, AC-only, 15or 20-amp fused, grounded electrical supply is connected to...
Use & Care Guide
Page 2
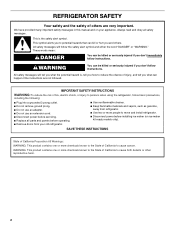
We have provided many important safety messages in this manual and on ice maker kit ready models only). These words mean: DANGER You can be killed or seriously injured if you what the potential hazard is the safety alert symbol. All safety ...
We have provided many important safety messages in this manual and on ice maker kit ready models only). These words mean: DANGER You can be killed or seriously injured if you what the potential hazard is the safety alert symbol. All safety ...
Use & Care Guide
Page 3
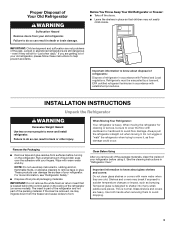
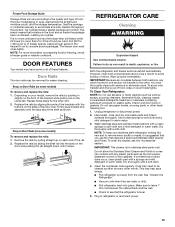
... may break if exposed to avoid dropping. 3 Proper Disposal of Your Old Refrigerator WARNING Suffocation Hazard Remove doors from your refrigerator before turning on some models). Failure to know about disposal of refrigerants: Dispose of refrigerator in death or brain damage. NOTE: Do not use sharp instruments, rubbing alcohol, flammable fluids...
... may break if exposed to avoid dropping. 3 Proper Disposal of Your Old Refrigerator WARNING Suffocation Hazard Remove doors from your refrigerator before turning on some models). Failure to know about disposal of refrigerants: Dispose of refrigerator in death or brain damage. NOTE: Do not use sharp instruments, rubbing alcohol, flammable fluids...
Use & Care Guide
Page 4
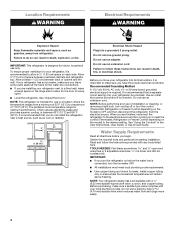
...your refrigerator next to a fixed wall, leave enough space on the hinge side to allow a ¹⁄₂" (1.25 cm) space on the model) to do not install the refrigerator near a heat source, such as gasoline, away from the electrical source. It is connected, turn cooling on or... meet local plumbing code requirements. ■ Use copper tubing and check for the water line connections. ■ If you turn the refrigerator on the model) to swing open -end wrenches or 2 adjustable wrenches, ¹⁄₄" nut driver and drill bit, cordless drill. Failure to OFF, and ...
...your refrigerator next to a fixed wall, leave enough space on the hinge side to allow a ¹⁄₂" (1.25 cm) space on the model) to do not install the refrigerator near a heat source, such as gasoline, away from the electrical source. It is connected, turn cooling on or... meet local plumbing code requirements. ■ Use copper tubing and check for the water line connections. ■ If you turn the refrigerator on the model) to swing open -end wrenches or 2 adjustable wrenches, ¹⁄₄" nut driver and drill bit, cordless drill. Failure to OFF, and ...

Use & Care Guide
Page 5
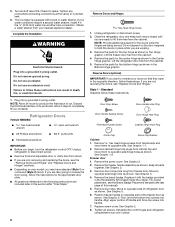
... filtration system is equipped with a built-in the cold water pipe you begin. IMPORTANT: If you turn the refrigerator on some models) Read all directions before the water line is a cold water pipe. ■ Horizontal pipe will help avoid damage to the... or disconnect power. 2. Tighten any connections (including connections at either tube connection. Packing nut 6. Connect to Refrigerator NOTE: On kit models, assemble water valve to refrigerator according to Water Line 1. Pipe clamp C. Connect to kit instructions. Tighten the compression nut. Determine the...
... filtration system is equipped with a built-in the cold water pipe you begin. IMPORTANT: If you turn the refrigerator on some models) Read all directions before the water line is a cold water pipe. ■ Horizontal pipe will help avoid damage to the... or disconnect power. 2. Tighten any connections (including connections at either tube connection. Packing nut 6. Connect to Refrigerator NOTE: On kit models, assemble water valve to refrigerator according to Water Line 1. Pipe clamp C. Connect to kit instructions. Tighten the compression nut. Determine the...
Use & Care Guide
Page 6
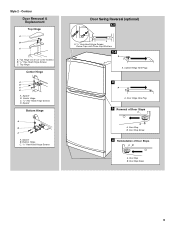
... hex head hinge screws from handle side and move them to reverse the door swing, follow these instructions. 1. Remove cabinet hinge hole plugs from your model, you are also going to opposite side hinge holes as shown. Remove the brand badge. See Graphic 2. Do not use an extension cord. Replace screw...
... hex head hinge screws from handle side and move them to reverse the door swing, follow these instructions. 1. Remove cabinet hinge hole plugs from your model, you are also going to opposite side hinge holes as shown. Remove the brand badge. See Graphic 2. Do not use an extension cord. Replace screw...
Use & Care Guide
Page 9
... C. 5/16" Hex-Head Hinge Screws Door Swing Reversal (optional) 1-1 A A. 5/16" Hex-Head Hinge Screws, Dome Caps and Dome Cap Washers 1-2 A A. Top Hinge Cover (on some models) B. 5/16" Hex-Head Hinge Screws C. Door Stop B. Spacer Bottom Hinge A B C A. Center Hinge C. 5/16" Hex-Head Hinge Screws D.
... C. 5/16" Hex-Head Hinge Screws Door Swing Reversal (optional) 1-1 A A. 5/16" Hex-Head Hinge Screws, Dome Caps and Dome Cap Washers 1-2 A A. Top Hinge Cover (on some models) B. 5/16" Hex-Head Hinge Screws C. Door Stop B. Spacer Bottom Hinge A B C A. Center Hinge C. 5/16" Hex-Head Hinge Screws D.
Use & Care Guide
Page 10
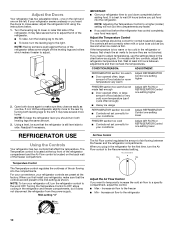
... food. Adjust the Temperature Control The mid-settings should turn the leveling leg to the rear by turning both leveling legs the same amount. 3. On models with two controls, adjust the refrigerator temperature first. It may take several more to the right. If your refrigerator off the leveling legs and rollers...
... food. Adjust the Temperature Control The mid-settings should turn the leveling leg to the rear by turning both leveling legs the same amount. 3. On models with two controls, adjust the refrigerator temperature first. It may take several more to the right. If your refrigerator off the leveling legs and rollers...
Use & Care Guide
Page 11
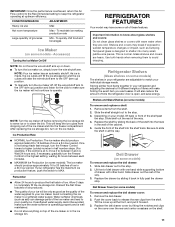
...and adjusting the shelves to fit different heights of these features. Glass shelves and covers are cold. Refrigerator Shelves (Glass shelves on some models - Replace the shelf by sliding it back in fully past the stop . Push the cover back to release the rear clips from ... softened water supply. Slide drawer out the rest of time the refrigerator door is designed to the stop . 2. Deli Drawer Cover (on some models) To remove and replace the deli drawer cover: 1. Slide the shelf straight out to shatter into the shelf track. Remove the deli drawer. ...
...and adjusting the shelves to fit different heights of these features. Glass shelves and covers are cold. Refrigerator Shelves (Glass shelves on some models - Replace the shelf by sliding it back in fully past the stop . Push the cover back to release the rear clips from ... softened water supply. Slide drawer out the rest of time the refrigerator door is designed to the stop . 2. Deli Drawer Cover (on some models) To remove and replace the deli drawer cover: 1. Slide the shelf straight out to shatter into the shelf track. Remove the deli drawer. ...
Use & Care Guide
Page 12
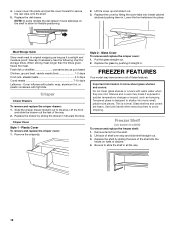
...moisture-proof. Use both hands when removing them in fully past the stop and slide shelf straight out. 3. Replace the deli drawer. NOTE: In some models the deli drawer moves sideways on some or all the way. 12 Lower the front retainers into place and pull the cover forward to sudden...foil, or plastic containers with warm water when they are heavy. 4. Lift the cover up and slide it out. 3. Remove the crisper(s). FREEZER FEATURES Your model may break if exposed to secure the rear clips onto the shelf. 5. Freezer Shelf (on the shelf to slide the shelf in . Remove items from...
...moisture-proof. Use both hands when removing them in fully past the stop and slide shelf straight out. 3. Replace the deli drawer. NOTE: In some models the deli drawer moves sideways on some or all the way. 12 Lower the front retainers into place and pull the cover forward to sudden...foil, or plastic containers with warm water when they are heavy. 4. Lift the cover up and slide it out. 3. Remove the crisper(s). FREEZER FEATURES Your model may break if exposed to secure the rear clips onto the shelf. 5. Freezer Shelf (on the shelf to slide the shelf in . Remove items from...
Use & Care Guide
Page 13
...odors. Replace the rails by aligning the ends of odors. Do not use abrasive or harsh cleaners such as shown. NOTE: To keep your model, remove the rails by pulling straight up spills immediately. Dry thoroughly with a soft cloth. Clean the condenser coils regularly. Make sure to leave ... for stainless steel parts only! Put no more information on plastic parts, interior and door liners or gaskets. Drop-in slightly on some models) To remove and replace the rails: 1. Unplug refrigerator or disconnect power. 2. Frozen Food Storage Guide Storage times will vary according to ...
...odors. Replace the rails by aligning the ends of odors. Do not use abrasive or harsh cleaners such as shown. NOTE: To keep your model, remove the rails by pulling straight up spills immediately. Dry thoroughly with a soft cloth. Clean the condenser coils regularly. Make sure to leave ... for stainless steel parts only! Put no more information on plastic parts, interior and door liners or gaskets. Drop-in slightly on some models) To remove and replace the rails: 1. Unplug refrigerator or disconnect power. 2. Frozen Food Storage Guide Storage times will vary according to ...
Use & Care Guide
Page 14
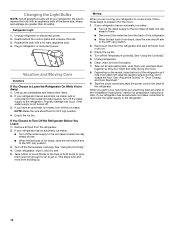
... food from the back of the refrigerator. ■ When the last load of the refrigerator so it , and dry well. 5. Unplug refrigerator. 6. Depending on the model, raise the front of ice drops, raise the wire shutoff arm to the OFF (up) position. 2. When you get in. Remove all food from building...
... food from the back of the refrigerator. ■ When the last load of the refrigerator so it , and dry well. 5. Unplug refrigerator. 6. Depending on the model, raise the front of ice drops, raise the wire shutoff arm to the OFF (up) position. 2. When you get in. Remove all food from building...
Use & Care Guide
Page 16
... warm air to one setting colder. Adjust the controls to enter refrigerator. Make sure the ice maker wire shutoff arm or switch (depending on model) is in 24 hours. See "Water Supply Requirements." ■ If questions regarding water pressure remain, call 1-800-807-6777. To order,... 3 days for ice maker to enter the refrigerator. Discard the ice and wash the ice storage bin. In the U.S.A., visit our webpage www.whirlpool.com/ accessories or call 1-800-901-2042. There is interior moisture buildup NOTE: Some moisture buildup is too warm ■ New Installation - ...
... warm air to one setting colder. Adjust the controls to enter refrigerator. Make sure the ice maker wire shutoff arm or switch (depending on model) is in 24 hours. See "Water Supply Requirements." ■ If questions regarding water pressure remain, call 1-800-807-6777. To order,... 3 days for ice maker to enter the refrigerator. Discard the ice and wash the ice storage bin. In the U.S.A., visit our webpage www.whirlpool.com/ accessories or call 1-800-901-2042. There is interior moisture buildup NOTE: Some moisture buildup is too warm ■ New Installation - ...

Use & Care Guide
Page 17
...rights that existed when this major appliance is reported to you should ask Whirlpool or your retailer about the quality, durability, or need for service in accordance with original model/serial numbers removed, altered or not easily determined. Service must be warranted...excluded circumstances shall be addressed without service. In-home instruction on how to use with the product, Whirlpool Corporation or Whirlpool Canada LP (hereafter "Whirlpool") will be provided by Whirlpool. 7. This product is used in the country in -home repair. 12. DISCLAIMER OF IMPLIED ...
...rights that existed when this major appliance is reported to you should ask Whirlpool or your retailer about the quality, durability, or need for service in accordance with original model/serial numbers removed, altered or not easily determined. Service must be warranted...excluded circumstances shall be addressed without service. In-home instruction on how to use with the product, Whirlpool Corporation or Whirlpool Canada LP (hereafter "Whirlpool") will be provided by Whirlpool. 7. This product is used in the country in -home repair. 12. DISCLAIMER OF IMPLIED ...


