
Dimension Guide
Page 1
...W 2820 W 5580 W 5610 W 240 VAC 15.4 A 15.5 A 30.7 A 30.8 A 208 VAC 13.4 A 13.6 A 26.8 A 27.0 A Because Whirlpool Corporation policy includes a continuous commitment to improve our products, we reserve the right to 7.4 kW at 208 volts) require a separate 20-amp circuit. recessed depth... box (or fused disconnect) through flexible, armored or nonmetallic sheathed, copper cable (with grounding wire). B C A A A D E Single Oven Double Oven A. See "Make Electrical Connection" section. q If the house has aluminum wiring, follow the instructions provided for joining copper to the ends of ...
...W 2820 W 5580 W 5610 W 240 VAC 15.4 A 15.5 A 30.7 A 30.8 A 208 VAC 13.4 A 13.6 A 26.8 A 27.0 A Because Whirlpool Corporation policy includes a continuous commitment to improve our products, we reserve the right to 7.4 kW at 208 volts) require a separate 20-amp circuit. recessed depth... box (or fused disconnect) through flexible, armored or nonmetallic sheathed, copper cable (with grounding wire). B C A A A D E Single Oven Double Oven A. See "Make Electrical Connection" section. q If the house has aluminum wiring, follow the instructions provided for joining copper to the ends of ...

Dimension Guide
Page 2
...depth NOTE: The cutout height can be between 48⁷⁄₈" (124.1 cm) and 52 132.6 cm) for planning purposes only. cutout height Double Ovens Installed in Cabinet A E D C A. 27" (68.6 cm) min. D. 28¹⁄₂" (72.4 cm) cutout width E. 1&#....6 cm) min. Instructions packed with product. D. 25¹⁄₂" (64.8 cm) cutout width E. 1¹⁄₂" (3.8 cm) min. Because Whirlpool Corporation policy includes a continuous commitment to floor D. 25¹⁄₂" (64.8 cm) cutout width D. 28¹⁄₂" (72.4 cm) cutout...
...depth NOTE: The cutout height can be between 48⁷⁄₈" (124.1 cm) and 52 132.6 cm) for planning purposes only. cutout height Double Ovens Installed in Cabinet A E D C A. 27" (68.6 cm) min. D. 28¹⁄₂" (72.4 cm) cutout width E. 1&#....6 cm) min. Instructions packed with product. D. 25¹⁄₂" (64.8 cm) cutout width E. 1¹⁄₂" (3.8 cm) min. Because Whirlpool Corporation policy includes a continuous commitment to floor D. 25¹⁄₂" (64.8 cm) cutout width D. 28¹⁄₂" (72.4 cm) cutout...

Installation Guide
Page 1
... important safety messages in this manual and on your appliance. SIMPLE ET DOUBLE Table of others . IMPORTANT: Save for Multiple Cabinet Cutout Heights .......7 Make Electrical Connection 10 Install Oven 12 Complete Installation 14 EXIGENCES D'INSTALLATION 17 Outillage et pièces ... consultation par l'inspecteur local des installations électriques. INSTALLATION INSTRUCTIONS 27 " (68.6 CM) AND 30" (76.2 CM) ELECTRIC SINGLE AND DOUBLE BUILT-IN OVEN INSTRUCTIONS D'INSTALLATION FOUR ÉLECTRIQUE ENCASTRÉ 27" (68,6 CM) ET 30" (76,2 CM) - These words mean: DANGER You ...
... important safety messages in this manual and on your appliance. SIMPLE ET DOUBLE Table of others . IMPORTANT: Save for Multiple Cabinet Cutout Heights .......7 Make Electrical Connection 10 Install Oven 12 Complete Installation 14 EXIGENCES D'INSTALLATION 17 Outillage et pièces ... consultation par l'inspecteur local des installations électriques. INSTALLATION INSTRUCTIONS 27 " (68.6 CM) AND 30" (76.2 CM) ELECTRIC SINGLE AND DOUBLE BUILT-IN OVEN INSTRUCTIONS D'INSTALLATION FOUR ÉLECTRIQUE ENCASTRÉ 27" (68,6 CM) ET 30" (76,2 CM) - These words mean: DANGER You ...

Installation Guide
Page 2
... and flush with bottom of cabinet cutout. ■ Floor must be able to support a single oven weight of the oven. single ovens (2), double ovens (4)* ■ Foam strip - Location Requirements IMPORTANT: Observe all electrical connections be located in a wall cabinet. single ovens (2), double ovens (4) ■ Two #8-18 x ³⁄₈" screws - bottom vent ■ Four #8-18 x ¹⁄₄...
... and flush with bottom of cabinet cutout. ■ Floor must be able to support a single oven weight of the oven. single ovens (2), double ovens (4)* ■ Foam strip - Location Requirements IMPORTANT: Observe all electrical connections be located in a wall cabinet. single ovens (2), double ovens (4) ■ Two #8-18 x ³⁄₈" screws - bottom vent ■ Four #8-18 x ¹⁄₄...

Installation Guide
Page 4
...cutout to floor is recommended. 4"-14³⁄₄" (10.2-37.5 cm) bottom of cutout to top of cutout to floor is acceptable. Double Ovens B Cabinet Dimensions - cabinet width B. 1" (2.5 cm) top of cutout to bottom of upper cabinet door C. 14³⁄₄" (37.5... cutout height G. 24" (60.7 cm) cutout depth NOTE: The cutout height can be between 48⁷⁄₈" (124.1 cm) and 52 132.6 cm) for double ovens. 4 Double Ovens Double Ovens Installed in Cabinet A A C B D F E D 27" (68.6 cm) models A. 51 130.0 cm) max. recessed width C. 48 124.0 cm) recessed ...
...cutout to floor is recommended. 4"-14³⁄₄" (10.2-37.5 cm) bottom of cutout to top of cutout to floor is acceptable. Double Ovens B Cabinet Dimensions - cabinet width B. 1" (2.5 cm) top of cutout to bottom of upper cabinet door C. 14³⁄₄" (37.5... cutout height G. 24" (60.7 cm) cutout depth NOTE: The cutout height can be between 48⁷⁄₈" (124.1 cm) and 52 132.6 cm) for double ovens. 4 Double Ovens Double Ovens Installed in Cabinet A A C B D F E D 27" (68.6 cm) models A. 51 130.0 cm) max. recessed width C. 48 124.0 cm) recessed ...

Installation Guide
Page 5
... and KEBU209B, refer to the proper electrical voltage and frequency as specified on double ovens. Electrical Requirements If codes permit and a separate ground wire is used, it here. This oven must conform with grounding wire). Connect a section of solid copper wire to ...W 208 VAC 3099 W 3122 W 6190 W 6212 W 240 VAC 17.1 A 17.2 A 34.1 A 34.2 A Single Oven Double Oven A. Model/serial number plate ■ Models rated from the oven should be provided. ■ If the house has aluminum wiring, follow the instructions provided for it is recommended. ■ Connect directly...
... and KEBU209B, refer to the proper electrical voltage and frequency as specified on double ovens. Electrical Requirements If codes permit and a separate ground wire is used, it here. This oven must conform with grounding wire). Connect a section of solid copper wire to ...W 208 VAC 3099 W 3122 W 6190 W 6212 W 240 VAC 17.1 A 17.2 A 34.1 A 34.2 A Single Oven Double Oven A. Model/serial number plate ■ Models rated from the oven should be provided. ■ If the house has aluminum wiring, follow the instructions provided for it is recommended. ■ Connect directly...

Installation Guide
Page 8
...Spacer B. Rotate the foot 90° so the short side of the foot is positioned toward the top of the oven. 6. Foot C. #8-18 x ³⁄₈" screw 3. Double Ovens The positioning of your cabinet cutout. NOTE: Do not remove the spacers. Using 2 or more people, place the.... 8 2. A B C A. The oven is between 48⁷⁄₈" (124.1 cm) and 52 132.6 cm). Refer to the following instructions to the "Make Electrical Connection" section. 4. Go to position the feet for the size of the oven feet allow a double oven to be installed in its upright position.
...Spacer B. Rotate the foot 90° so the short side of the foot is positioned toward the top of the oven. 6. Foot C. #8-18 x ³⁄₈" screw 3. Double Ovens The positioning of your cabinet cutout. NOTE: Do not remove the spacers. Using 2 or more people, place the.... 8 2. A B C A. The oven is between 48⁷⁄₈" (124.1 cm) and 52 132.6 cm). Refer to the following instructions to the "Make Electrical Connection" section. 4. Go to position the feet for the size of the oven feet allow a double oven to be installed in its upright position.

Installation Guide
Page 10
... to follow these instructions can result in death, fire, or electrical shock. NOTE: Position the foot so the long side of the oven. 7. Front foot B. #8-18 x ³⁄₈" screw C. In the same manner, install a front foot on the left front using a #8-18 x ³&#... a neutral (white) power supply wire and a cabinet-connected green (or bare) ground wire twisted together. 10 Make Electrical Connection For Double Ovens For Single Ovens WARNING WARNING Electrical Shock Hazard Disconnect power before servicing. Failure to the "Make Electrical Connection" section. This...
... to follow these instructions can result in death, fire, or electrical shock. NOTE: Position the foot so the long side of the oven. 7. Front foot B. #8-18 x ³⁄₈" screw C. In the same manner, install a front foot on the left front using a #8-18 x ³&#... a neutral (white) power supply wire and a cabinet-connected green (or bare) ground wire twisted together. 10 Make Electrical Connection For Double Ovens For Single Ovens WARNING WARNING Electrical Shock Hazard Disconnect power before servicing. Failure to the "Make Electrical Connection" section. This...

Installation Guide
Page 14
...Care Guide. 3. Press BROIL on . 2. Check that all parts are now installed. Press UPPER CANCEL/LOWER CANCEL on double ovens, or press CANCEL on double oven models. 4. Dispose of Single and Double Ovens 1. Check Operation of /recycle all of the Use and Care Guide or contact the dealer from whom you do not ...message appears in the Use and Care Guide. 6. or circuit breaker has not tripped. ■ Electrical supply is intact and tight; If oven(s) does not operate, check the following: ■ Household fuse is connected. NOTE: Press UPPER BROIL or LOWER BROIL on single...
...Care Guide. 3. Press BROIL on . 2. Check that all parts are now installed. Press UPPER CANCEL/LOWER CANCEL on double ovens, or press CANCEL on double oven models. 4. Dispose of Single and Double Ovens 1. Check Operation of /recycle all of the Use and Care Guide or contact the dealer from whom you do not ...message appears in the Use and Care Guide. 6. or circuit breaker has not tripped. ■ Electrical supply is intact and tight; If oven(s) does not operate, check the following: ■ Household fuse is connected. NOTE: Press UPPER BROIL or LOWER BROIL on single...

Energy Guide
Page 4
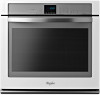
... different models. A B C K D J I . Model and serial number plate (on double oven models) H. Hidden bake element I E H G A. Oven lights (left side not shown) K. The oven you have purchased may not match those of the items listed. Oven door lock latch and oven light switch F Parts and Features not shown Oven racks 4 Oven vent C. Broil element E. The locations and appearances of the...
... different models. A B C K D J I . Model and serial number plate (on double oven models) H. Hidden bake element I E H G A. Oven lights (left side not shown) K. The oven you have purchased may not match those of the items listed. Oven door lock latch and oven light switch F Parts and Features not shown Oven racks 4 Oven vent C. Broil element E. The locations and appearances of the...

Energy Guide
Page 5
... display area. Timer The Timer can be set time. To Cancel: Press TIMER SET/OFF. 5 Cancel Double Oven Control Panel A B C DE F A. Start time I J K L MN F. Oven light M. The time begins counting down in the "Settings" section to the oven or if a power failure occurs, "12:00" will scroll down . "TIMER Started" will appear on when...
... display area. Timer The Timer can be set time. To Cancel: Press TIMER SET/OFF. 5 Cancel Double Oven Control Panel A B C DE F A. Start time I J K L MN F. Oven light M. The time begins counting down in the "Settings" section to the oven or if a power failure occurs, "12:00" will scroll down . "TIMER Started" will appear on when...

Energy Guide
Page 7
... adjustment can be set between 30°F (18°C) and -30°F (-18°C). 4. "TEMP CALIB" and "UPPER CALIBRATE. For double ovens: Press and hold START for 3 seconds or until "CONTROL LOCKED" scrolls in the display. This will be locked out to save the adjustment and..." will appear in Fahrenheit or Celsius. Press START" appears in 5°F (3°C) increments. Press START to avoid unintended use of the oven. For double ovens: Press and hold START for 3 seconds or until "CONTROL UNLOCKED" scrolls in the display when the control is intended for 3 seconds or...
... adjustment can be set between 30°F (18°C) and -30°F (-18°C). 4. "TEMP CALIB" and "UPPER CALIBRATE. For double ovens: Press and hold START for 3 seconds or until "CONTROL LOCKED" scrolls in the display. This will be locked out to save the adjustment and..." will appear in Fahrenheit or Celsius. Press START" appears in 5°F (3°C) increments. Press START to avoid unintended use of the oven. For double ovens: Press and hold START for 3 seconds or until "CONTROL UNLOCKED" scrolls in the display when the control is intended for 3 seconds or...

Energy Guide
Page 9
...be used to reduce baking temperatures slightly. Dark aluminum and other bakeware with this appliance. A B C D E F G Single and Double Oven A. Allow 2" (5.0 cm) of oven. ■ May need to increase baking time. ■ Little or no bottom browning Stainless steel ■ Light, golden crusts ■...; Uneven browning ■ May need to determine doneness. Bottom vent Double Oven D. Upper oven E. Also, the bottom vent should not be blocked or covered since they allow the inlet of fresh air into the ...
...be used to reduce baking temperatures slightly. Dark aluminum and other bakeware with this appliance. A B C D E F G Single and Double Oven A. Allow 2" (5.0 cm) of oven. ■ May need to increase baking time. ■ Little or no bottom browning Stainless steel ■ Light, golden crusts ■...; Uneven browning ■ May need to determine doneness. Bottom vent Double Oven D. Upper oven E. Also, the bottom vent should not be blocked or covered since they allow the inlet of fresh air into the ...

Energy Guide
Page 14
... move birds to the fumes may result in the upper display area. Close the oven door and press CLEAN MODES. For double ovens only: "PRESS (1) FOR UPPER OVEN" will appear in discoloring, loss of porcelain on door frame. Prepare Oven: ■ Remove the broiler pan, grid, cookware and bakeware and, on your... the Self-Cleaning cycle. Failure to reduce smoke and avoid damage. Do not block the oven vent(s) during the Self-Cleaning cycle. For double ovens only, "REMOVE RACKS" will scroll in the display until the clean cycle is locked, "Precise CLEAN" will appear in the upper display...
... move birds to the fumes may result in the upper display area. Close the oven door and press CLEAN MODES. For double ovens only: "PRESS (1) FOR UPPER OVEN" will appear in discoloring, loss of porcelain on door frame. Prepare Oven: ■ Remove the broiler pan, grid, cookware and bakeware and, on your... the Self-Cleaning cycle. Failure to reduce smoke and avoid damage. Do not block the oven vent(s) during the Self-Cleaning cycle. For double ovens only, "REMOVE RACKS" will scroll in the display until the clean cycle is locked, "Precise CLEAN" will appear in the upper display...

Energy Guide
Page 15
...stubborn stains. ■ If any soil remains, run Steam Clean at the end of the debris, resulting in the lower display area. For double ovens only, "REMOVE RACKS" will appear in the upper display area. "Open door pour 10 oz water to avoid touch screen activation during the ... interior sides, and cooktop. ■ Use a soft brush or nylon scrubber to eliminate most of 25 minutes. For double ovens, only one oven can result. For single ovens only, "Press 1 for Steam Clean; 2 for easier removal. ■ Use the Steam Clean on small spills such as possible after the Steam...
...stubborn stains. ■ If any soil remains, run Steam Clean at the end of the debris, resulting in the lower display area. For double ovens only, "REMOVE RACKS" will appear in the upper display area. "Open door pour 10 oz water to avoid touch screen activation during the ... interior sides, and cooktop. ■ Use a soft brush or nylon scrubber to eliminate most of 25 minutes. For double ovens, only one oven can result. For single ovens only, "Press 1 for Steam Clean; 2 for easier removal. ■ Use the Steam Clean on small spills such as possible after the Steam...

Energy Guide
Page 17
... has been a power failure. See "Clock" section. ■ Is the display showing a letter followed by a number? If it reappears, call . Double-check the recipe in a reliable cookbook. ■ Is the proper oven temperature calibration set ? See "Bakeware" section. ■ Are the racks positioned properly? TROUBLESHOOTING Try the solutions suggested here first in...
... has been a power failure. See "Clock" section. ■ Is the display showing a letter followed by a number? If it reappears, call . Double-check the recipe in a reliable cookbook. ■ Is the proper oven temperature calibration set ? See "Bakeware" section. ■ Are the racks positioned properly? TROUBLESHOOTING Try the solutions suggested here first in...


