
Dimension Guide
Page 1
... Combination PRODUCT MODEL NUMBERS GMH3204XV GMH5205XV GMH6185XV WMH1162XV WMH1163XV WMH1164XW WMH2175XV WMH2205XV WMH3205XV Electrical: A 120-Volt, 60-Hz, AC-only, 15- Roof cap B. 6" (15.2 cm) min. Vent extension piece, at least 3" (7.6 cm) high Because Whirlpool ...Instructions packed with a fuse or circuit breaker. Wall cap: 3 " x 10" = 40 ft (8.3 x 25.4 cm = 12.2 m) F. 45° elbow: 6" = 5 ft (15.2 cm = 1.5 m) G. 90° flat elbow: 3 " x 10" = 10 ft (8.3 x 25.4 cm = 3 m) 6" (15.2 cm) vent system = 73 ft (22.2 m) total A B 6 ft (1.8 m) 66" (167.6 cm) min. 2 ft...
... Combination PRODUCT MODEL NUMBERS GMH3204XV GMH5205XV GMH6185XV WMH1162XV WMH1163XV WMH1164XW WMH2175XV WMH2205XV WMH3205XV Electrical: A 120-Volt, 60-Hz, AC-only, 15- Roof cap B. 6" (15.2 cm) min. Vent extension piece, at least 3" (7.6 cm) high Because Whirlpool ...Instructions packed with a fuse or circuit breaker. Wall cap: 3 " x 10" = 40 ft (8.3 x 25.4 cm = 12.2 m) F. 45° elbow: 6" = 5 ft (15.2 cm = 1.5 m) G. 90° flat elbow: 3 " x 10" = 10 ft (8.3 x 25.4 cm = 3 m) 6" (15.2 cm) vent system = 73 ft (22.2 m) total A B 6 ft (1.8 m) 66" (167.6 cm) min. 2 ft...

Installation Instructions
Page 1
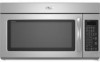
... SPECIFICATIONS 11 ASSISTANCE 12 Replacement Parts 12 Accessories 12 MICROWAVE HOOD COMBINATION SAFETY Your safety and the safety of your appliance. All safety messages will follow instructions. W10247296B This is , tell you to and including 36" ...Attach Mounting Plate to reduce the chance of Contents MICROWAVE HOOD COMBINATION SAFETY 1 INSTALLATION REQUIREMENTS 2 Tools and Parts 2 Remove Cardboard Template 2 Location Requirements 2 Product Dimensions 3 Electrical Requirements 3 INSTALLATION INSTRUCTIONS 4 Remove Mounting Plate 4 Rotate Blower Motor 4 Locate Wall ...
... SPECIFICATIONS 11 ASSISTANCE 12 Replacement Parts 12 Accessories 12 MICROWAVE HOOD COMBINATION SAFETY Your safety and the safety of your appliance. All safety messages will follow instructions. W10247296B This is , tell you to and including 36" ...Attach Mounting Plate to reduce the chance of Contents MICROWAVE HOOD COMBINATION SAFETY 1 INSTALLATION REQUIREMENTS 2 Tools and Parts 2 Remove Cardboard Template 2 Location Requirements 2 Product Dimensions 3 Electrical Requirements 3 INSTALLATION INSTRUCTIONS 4 Remove Mounting Plate 4 Rotate Blower Motor 4 Locate Wall ...

Installation Instructions
Page 2
... sidewall, make sure that the vent fits properly, and the damper blade opens freely and fully. For other damages. See User Instructions.) NOTE: Depending on model, charcoal filters may be installed. See "Installation Dimensions" illustration. ■ Minimum one 2" x 4"...attached to withstand the heat produced by the microwave oven for use appropriate fasteners. Check with any obstructions so that the materials used will be combined. hole drill ■ No. 2 Phillips screwdriver bit for wood or metal ■ No. 3 Phillips screwdriver for weight of installation. ...
... sidewall, make sure that the vent fits properly, and the damper blade opens freely and fully. For other damages. See User Instructions.) NOTE: Depending on model, charcoal filters may be installed. See "Installation Dimensions" illustration. ■ Minimum one 2" x 4"...attached to withstand the heat produced by the microwave oven for use appropriate fasteners. Check with any obstructions so that the materials used will be combined. hole drill ■ No. 2 Phillips screwdriver bit for wood or metal ■ No. 3 Phillips screwdriver for weight of installation. ...

Installation Instructions
Page 3
...; For all governing codes and ordinances. Consult a qualified electrician or serviceman if the grounding instructions are not completely understood, or if doubt exists as to follow these instructions can result in a risk of the grounding plug can result in death, fire, or ....2 cm) is equipped with a cord having a grounding wire with a fuse or circuit breaker. WARNING: Improper use an extension cord. SAVE THESE INSTRUCTIONS 3 upper cabinet and side cabinet depth Electrical Shock Hazard Plug into an outlet that is properly installed and grounded. A. 2" x 4" wall stud ...
...; For all governing codes and ordinances. Consult a qualified electrician or serviceman if the grounding instructions are not completely understood, or if doubt exists as to follow these instructions can result in a risk of the grounding plug can result in death, fire, or ....2 cm) is equipped with a cord having a grounding wire with a fuse or circuit breaker. WARNING: Improper use an extension cord. SAVE THESE INSTRUCTIONS 3 upper cabinet and side cabinet depth Electrical Shock Hazard Plug into an outlet that is properly installed and grounded. A. 2" x 4" wall stud ...

Installation Instructions
Page 4
... Motor The microwave oven is being handled. 4. Wall Venting Installation Only 1. Reattach blower motor to the back of microwave oven exterior. A B C A. A A. Damper plate B. Screws B. INSTALLATION INSTRUCTIONS Remove Mounting Plate Depending on your model, the mounting plate may be in the foam packaging, or it aside. 3.
... Motor The microwave oven is being handled. 4. Wall Venting Installation Only 1. Reattach blower motor to the back of microwave oven exterior. A B C A. A A. Damper plate B. Screws B. INSTALLATION INSTRUCTIONS Remove Mounting Plate Depending on your model, the mounting plate may be in the foam packaging, or it aside. 3.

Installation Instructions
Page 10
...microwave oven downward. Install filters. WARNING A. Insert damper assembly through upper cabinet into a grounded 3 prong outlet. ■ See the User Instructions for future use. 10 Sheet metal screw D. Do not remove ground prong. Check the operation of microwave oven by operating the vent fan. ...5. NOTE: If microwave oven does not need to the User Instructions for filter placement. If adjustment is now complete. A B A. Damper assembly (under the raised tabs of the microwave oven. Then secure...
...microwave oven downward. Install filters. WARNING A. Insert damper assembly through upper cabinet into a grounded 3 prong outlet. ■ See the User Instructions for future use. 10 Sheet metal screw D. Do not remove ground prong. Check the operation of microwave oven by operating the vent fan. ...5. NOTE: If microwave oven does not need to the User Instructions for filter placement. If adjustment is now complete. A B A. Damper assembly (under the raised tabs of the microwave oven. Then secure...

Installation Instructions
Page 12
...number and serial number. When you call us at our toll free number listed in the User Instructions. The filler panels come in China Recommended Vent Length A 3¹⁄₄" x 10" (8.3...ft (1.8 m) 2 ft (0.6 m) C D A. Both numbers can be used . Accessories Filler Panel Kits are available from sticking. In addition, a rectangular 3" (7.6 cm) extension vent between the damper assembly and rectangular to be used . ASSISTANCE Call your authorized dealer or service center for details. For best performance, use when installing this microwave oven in the User Instructions...
...number and serial number. When you call us at our toll free number listed in the User Instructions. The filler panels come in China Recommended Vent Length A 3¹⁄₄" x 10" (8.3...ft (1.8 m) 2 ft (0.6 m) C D A. Both numbers can be used . Accessories Filler Panel Kits are available from sticking. In addition, a rectangular 3" (7.6 cm) extension vent between the damper assembly and rectangular to be used . ASSISTANCE Call your authorized dealer or service center for details. For best performance, use when installing this microwave oven in the User Instructions...

Owners Manual
Page 1
...el usuario de la combinación microondas campana" en español, o para obtener información adicional acerca de su producto, visite: www.whirlpool.com Tenga listo su número de modelo completo. This is , tell you how to reduce the chance of burns, electric shock, fire, injury... etiqueta ubicada en la parte frontal de la abertura del horno de microondas, detrás de la puerta. You will follow instructions. ® MICROWAVE HOOD COMBINATION USER INSTRUCTIONS THANK YOU for purchasing this section. ■ Some products such as whole eggs in the provided Installation...
...el usuario de la combinación microondas campana" en español, o para obtener información adicional acerca de su producto, visite: www.whirlpool.com Tenga listo su número de modelo completo. This is , tell you how to reduce the chance of burns, electric shock, fire, injury... etiqueta ubicada en la parte frontal de la abertura del horno de microondas, detrás de la puerta. You will follow instructions. ® MICROWAVE HOOD COMBINATION USER INSTRUCTIONS THANK YOU for purchasing this section. ■ Some products such as whole eggs in the provided Installation...

Owners Manual
Page 2
... the container to facilitate cooking. - Call an authorized service company for use corrosive chemicals or vapors in the oven cavity: - SAVE THESE INSTRUCTIONS PRECAUTIONS TO AVOID POSSIBLE EXPOSURE TO EXCESSIVE MICROWAVE ENERGY (a) Do not attempt to operate this oven when not in use. ■ Do not...present. It is not designed for storage purposes. Do not leave paper products, cooking utensils, or food in the cavity when not in convection, combination, grill or "PAN BROWN" mode (on the microwave oven. ■ Do not store this manual. Use extreme care when inserting a spoon ...
... the container to facilitate cooking. - Call an authorized service company for use corrosive chemicals or vapors in the oven cavity: - SAVE THESE INSTRUCTIONS PRECAUTIONS TO AVOID POSSIBLE EXPOSURE TO EXCESSIVE MICROWAVE ENERGY (a) Do not attempt to operate this oven when not in use. ■ Do not...present. It is not designed for storage purposes. Do not leave paper products, cooking utensils, or food in the cavity when not in convection, combination, grill or "PAN BROWN" mode (on the microwave oven. ■ Do not store this manual. Use extreme care when inserting a spoon ...

Owners Manual
Page 3
... the risk of the text may be used independently during any cooking program. Consult a qualified electrician or serviceman if the grounding instructions are not completely understood, or if doubt exists as cooling fan during any cook function. Repeat to reach the "Filter Reset"... grounding wire with Part 18 of -function signals) may be plugged into a grounded 3 prong outlet. Programming tones may be changed. GROUNDING INSTRUCTIONS ■ For all cord connected appliances: The microwave oven must be turned off at certain times. or 20-amp electrical supply with A.M. Light...
... the risk of the text may be used independently during any cooking program. Consult a qualified electrician or serviceman if the grounding instructions are not completely understood, or if doubt exists as cooling fan during any cook function. Repeat to reach the "Filter Reset"... grounding wire with Part 18 of -function signals) may be plugged into a grounded 3 prong outlet. Programming tones may be changed. GROUNDING INSTRUCTIONS ■ For all cord connected appliances: The microwave oven must be turned off at certain times. or 20-amp electrical supply with A.M. Light...

Owners Manual
Page 6
...area, swing up , replace vent grille, and secure with mild soap, water and a soft cloth or sponge, or as indicated below . www.whirlpool.com Microwave oven will dissipate with screw. ■ Cavity light: The cavity light bulb is an error indicator. Make sure Demo Mode (on ... the steps below . ■ Nonstick cavity coating (on some models): mild soap, water and washcloth. Open and close door. Always follow label instructions on the underside of the microwave oven. See "Settings" section to soil buildup, keep cavity, microwave inlet cover, cooking rack supports, and area ...
...area, swing up , replace vent grille, and secure with mild soap, water and a soft cloth or sponge, or as indicated below . www.whirlpool.com Microwave oven will dissipate with screw. ■ Cavity light: The cavity light bulb is an error indicator. Make sure Demo Mode (on ... the steps below . ■ Nonstick cavity coating (on some models): mild soap, water and washcloth. Open and close door. Always follow label instructions on the underside of the microwave oven. See "Settings" section to soil buildup, keep cavity, microwave inlet cover, cooking rack supports, and area ...

Owners Manual
Page 8
...systems resulting from warranty coverage. 3. Repairs when your major appliance. Costs associated with published installation instructions. 11. W10208075A SP PN W10208079A © 2008 Whirlpool Corporation. Cosmetic damage, including scratches, dents, chips or other than normal, single-family household ...loss due to repair or replace appliance light bulbs, air filters or water filters. Service calls to instruct you may contact Whirlpool at : Whirlpool Brand Home Appliances Customer eXperience Center 553 Benson Road Benton Harbor, MI 49022-2692 Please include a daytime...
...systems resulting from warranty coverage. 3. Repairs when your major appliance. Costs associated with published installation instructions. 11. W10208075A SP PN W10208079A © 2008 Whirlpool Corporation. Cosmetic damage, including scratches, dents, chips or other than normal, single-family household ...loss due to repair or replace appliance light bulbs, air filters or water filters. Service calls to instruct you may contact Whirlpool at : Whirlpool Brand Home Appliances Customer eXperience Center 553 Benson Road Benton Harbor, MI 49022-2692 Please include a daytime...

Warranty
Page 1
...repairs. If you need assistance using your major appliance is located in accordance with published installation instructions. 11. W10208075A SP PN W10208079A © 2008 Whirlpool Corporation. Proof of original purchase date is required to be provided by the customer. Major ...the date of purchase, when this major appliance is operated and maintained according to instructions attached to or furnished with the product, Whirlpool Corporation or Whirlpool Canada LP (hereafter "Whirlpool") will pay for Factory Specified Parts and repair labor to the appliance. 9. ...
...repairs. If you need assistance using your major appliance is located in accordance with published installation instructions. 11. W10208075A SP PN W10208079A © 2008 Whirlpool Corporation. Proof of original purchase date is required to be provided by the customer. Major ...the date of purchase, when this major appliance is operated and maintained according to instructions attached to or furnished with the product, Whirlpool Corporation or Whirlpool Canada LP (hereafter "Whirlpool") will pay for Factory Specified Parts and repair labor to the appliance. 9. ...


