
Dimension Guide
Page 1
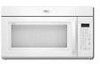
..., at least 3" (7.6 cm) high Because Whirlpool Corporation policy includes a continuous commitment to improve Dimensions are for 66" (167.6 cm) installation height. For complete details, see Installation our products, we reserve the right to round transition piece so that a separate circuit serving only this microwave oven be provided. ® Microwave Hood Combination PRODUCT MODEL NUMBERS GMH3204XV...
..., at least 3" (7.6 cm) high Because Whirlpool Corporation policy includes a continuous commitment to improve Dimensions are for 66" (167.6 cm) installation height. For complete details, see Installation our products, we reserve the right to round transition piece so that a separate circuit serving only this microwave oven be provided. ® Microwave Hood Combination PRODUCT MODEL NUMBERS GMH3204XV...

Installation Instructions
Page 1
...can be killed or seriously injured if you don't follow instructions. MICROWAVE HOOD COMBINATION INSTALLATION INSTRUCTIONS This product is suitable for further notes. Table of Contents MICROWAVE HOOD COMBINATION SAFETY 1 INSTALLATION REQUIREMENTS 2 Tools and Parts 2 Remove Cardboard Template 2 Location Requirements... how to Wall 8 Prepare Upper Cabinet 8 Install Damper Assembly 9 Install the Microwave Oven 9 Complete Installation 10 VENTING DESIGN SPECIFICATIONS 11 ASSISTANCE 12 Replacement Parts 12 Accessories 12 MICROWAVE HOOD COMBINATION SAFETY Your safety and the safety of...
...can be killed or seriously injured if you don't follow instructions. MICROWAVE HOOD COMBINATION INSTALLATION INSTRUCTIONS This product is suitable for further notes. Table of Contents MICROWAVE HOOD COMBINATION SAFETY 1 INSTALLATION REQUIREMENTS 2 Tools and Parts 2 Remove Cardboard Template 2 Location Requirements... how to Wall 8 Prepare Upper Cabinet 8 Install Damper Assembly 9 Install the Microwave Oven 9 Complete Installation 10 VENTING DESIGN SPECIFICATIONS 11 ASSISTANCE 12 Replacement Parts 12 Accessories 12 MICROWAVE HOOD COMBINATION SAFETY Your safety and the safety of...

Installation Instructions
Page 2
... is perforated. See User Instructions.) NOTE: Depending on model, charcoal filters may be sure to back of microwave oven) Cardboard template (part of the cardboard packaging. 2. See "Installation Dimensions" illustration. ■ Minimum one 2" x 4" (50.8 x 101.6 mm) wood wall stud ... drywall or plaster/lath within cabinet opening where the microwave oven will not discolor, delaminate or sustain other types of installation. Washers (2) D. See "Venting Design Specifications" section. NOTES: ■ If installing the microwave oven near a left sidewall, make sure that the...
... is perforated. See User Instructions.) NOTE: Depending on model, charcoal filters may be sure to back of microwave oven) Cardboard template (part of the cardboard packaging. 2. See "Installation Dimensions" illustration. ■ Minimum one 2" x 4" (50.8 x 101.6 mm) wood wall stud ... drywall or plaster/lath within cabinet opening where the microwave oven will not discolor, delaminate or sustain other types of installation. Washers (2) D. See "Venting Design Specifications" section. NOTES: ■ If installing the microwave oven near a left sidewall, make sure that the...

Installation Instructions
Page 3
..." (35.6 cm) max. Grounded 3 prong outlet *30" (76.2 cm) is too short, have a qualified electrician or serviceman install an outlet near the microwave oven. If the power supply cord is typical for the electric current. Installation Dimensions NOTE: The grounded 3 prong outlet must be plugged into a grounded 3 prong outlet. See "Electrical Requirements" section...
..." (35.6 cm) max. Grounded 3 prong outlet *30" (76.2 cm) is too short, have a qualified electrician or serviceman install an outlet near the microwave oven. If the power supply cord is typical for the electric current. Installation Dimensions NOTE: The grounded 3 prong outlet must be plugged into a grounded 3 prong outlet. See "Electrical Requirements" section...

Installation Instructions
Page 4
... plate 2. Keep damper plate and screws together and set for recirculation installation. Remove 2 screws attaching blower motor to top of the microwave oven and lift up. Damper plate B. Screws C. Rotate Blower Motor The microwave oven is set aside. 3. Wall Venting Installation Only 1. Screws (in recessed holes) D A. NOTE: To avoid possible damage to the venting...
... plate 2. Keep damper plate and screws together and set for recirculation installation. Remove 2 screws attaching blower motor to top of the microwave oven and lift up. Damper plate B. Screws C. Rotate Blower Motor The microwave oven is set aside. 3. Wall Venting Installation Only 1. Screws (in recessed holes) D A. NOTE: To avoid possible damage to the venting...

Installation Instructions
Page 5
... motor is not positioned with flat sides facing the back of the microwave oven (as shown), performance will be reattached to back of microwave oven with 2 screws removed in Step 3 cannot be poor. Roof Venting Installation Only 1. Repeat Step 1 from "Wall Venting Installation Only." 3. Exhaust port IMPORTANT: If blower motor is not correctly oriented...
... motor is not positioned with flat sides facing the back of the microwave oven (as shown), performance will be reattached to back of microwave oven with 2 screws removed in Step 3 cannot be poor. Roof Venting Installation Only 1. Repeat Step 1 from "Wall Venting Installation Only." 3. Exhaust port IMPORTANT: If blower motor is not correctly oriented...

Installation Instructions
Page 6
... plumb line down each stud center. Support tabs F. See illustrations in "Possible Wall Stud Configurations." Wall stud centerlines D. Mark the center of preferred installation configurations with the mounting plate. Wall Stud at One End Hole Figure 3 Wall Studs at End Holes Figure 2 B C C C D B D... E E E F F NOTE: If wall stud is within 6" (15.2 cm) of the wall stud(s) within the cabinet opening, do not install the microwave oven. 1. Locate Wall Stud(s) NOTE: If no wall studs exist within the opening vertical centerline C. No Wall Studs at End Holes Figure 1 No...
... plumb line down each stud center. Support tabs F. See illustrations in "Possible Wall Stud Configurations." Wall stud centerlines D. Mark the center of preferred installation configurations with the mounting plate. Wall Stud at One End Hole Figure 3 Wall Studs at End Holes Figure 2 B C C C D B D... E E E F F NOTE: If wall stud is within 6" (15.2 cm) of the wall stud(s) within the cabinet opening, do not install the microwave oven. 1. Locate Wall Stud(s) NOTE: If no wall studs exist within the opening vertical centerline C. No Wall Studs at End Holes Figure 1 No...

Installation Instructions
Page 7
...B A. The blackened holes in place, mark both sides of the cabinet. ■ If the cardboard template is aligned to the wall stud centerline(s). Wall Venting Installation Only Upper cabinet bottom ³⁄₈" (1 cm) 4" (10.2 cm) Centerline 6" (15.2 cm) 6" (15.2 cm) 8. If the end ...holes are ideal hole locations. 7. Following are over wall studs, use 2 lag screws. Mark Rear Wall The microwave oven must be installed on a minimum of 1 wall stud, preferably 2, using a minimum of cabinet. Set the mounting plate aside. if 1 end hole is ...
...B A. The blackened holes in place, mark both sides of the cabinet. ■ If the cardboard template is aligned to the wall stud centerline(s). Wall Venting Installation Only Upper cabinet bottom ³⁄₈" (1 cm) 4" (10.2 cm) Centerline 6" (15.2 cm) 6" (15.2 cm) 8. If the end ...holes are ideal hole locations. 7. Following are over wall studs, use 2 lag screws. Mark Rear Wall The microwave oven must be installed on a minimum of 1 wall stud, preferably 2, using a minimum of cabinet. Set the mounting plate aside. if 1 end hole is ...

Installation Instructions
Page 8
..." section. 7. Attach Mounting Plate to Wall NOTE: Secure the mounting plate to the thickest part of the rear wall (for example, the thickness of "Installation for Wall Stud at the other end hole. With the support tabs of the mounting plate facing forward, insert 1/4-20 x 3" round-head bolts through the... Wall Stud at One End Hole (Figure 3) 1. Installation for Wall Studs at One End Hole" in the "Drill Holes in Step 3 of "Mark Rear Wall." 2. No Wall Studs at both end holes of the mounting plate. Check alignment of the microwave oven. With the support tabs of the mounting plate facing ...
..." section. 7. Attach Mounting Plate to Wall NOTE: Secure the mounting plate to the thickest part of the rear wall (for example, the thickness of "Installation for Wall Stud at the other end hole. With the support tabs of the mounting plate facing forward, insert 1/4-20 x 3" round-head bolts through the... Wall Stud at One End Hole (Figure 3) 1. Installation for Wall Studs at One End Hole" in the "Drill Holes in Step 3 of "Mark Rear Wall." 2. No Wall Studs at both end holes of the mounting plate. Check alignment of the microwave oven. With the support tabs of the mounting plate facing ...

Installation Instructions
Page 9
...and washers used to secure the microwave oven to move and install microwave oven. For Roof Venting Installation Only 7. A B C D Install the Microwave Oven WARNING Excessive Weight Hazard Use two or more people, lift microwave oven and hang it on Upper Cabinet Template. 8. Back of the microwave oven is the heavy side....the upper cabinet. 5. Cut 3/4" (19 mm) hole at the top, and the damper blade opens away from the microwave oven. Failure to be installed around the supply cord hole, as shown. Sheet metal screws 3. Power supply cord bushing 6. Using a keyhole saw, cut...
...and washers used to secure the microwave oven to move and install microwave oven. For Roof Venting Installation Only 7. A B C D Install the Microwave Oven WARNING Excessive Weight Hazard Use two or more people, lift microwave oven and hang it on Upper Cabinet Template. 8. Back of the microwave oven is the heavy side....the upper cabinet. 5. Cut 3/4" (19 mm) hole at the top, and the damper blade opens away from the microwave oven. Failure to be installed around the supply cord hole, as shown. Sheet metal screws 3. Power supply cord bushing 6. Using a keyhole saw, cut...

Installation Instructions
Page 10
... troubleshooting information. NOTES: ■ Some upper cabinets may be adjusted, skip steps 7-9. 7. WARNING A. A B C D E F A. Sheet metal screw D. Plug microwave oven into a grounded 3 prong outlet. Install filters. Save Installation Instructions for filter placement. Using 2 or more people, lift microwave oven off of mounting plate, and set aside on the turntable, and programming a cook time of 1 minute...
... troubleshooting information. NOTES: ■ Some upper cabinets may be adjusted, skip steps 7-9. 7. WARNING A. A B C D E F A. Sheet metal screw D. Plug microwave oven into a grounded 3 prong outlet. Install filters. Save Installation Instructions for filter placement. Using 2 or more people, lift microwave oven off of mounting plate, and set aside on the turntable, and programming a cook time of 1 minute...

Installation Instructions
Page 11
...at least 3" (7.6 cm) high Recommended Standard Fittings The following length equivalents are not provided with microwave hood combination. ■ We do not recommend using recirculation installation. Wall cap E. 3¹⁄₄" x 10" to 6" (8.3 x 25.4 cm to ... tape to seal all joints in "Recommended Vent Length." Roof cap: 3¹⁄₄" x 10" = 24 ft (8.3 x 25.4 cm = 7.3 m) C. 90° elbow: 3¹ ₄" x 10" = 25 ft (8.3 x 25.4 cm = 7.6 m) D. 90° elbow: 6" = 10 ft (15.2 cm = 3 m) E. NOTES: ■ Vent materials needed for the damper to 15.2 cm = ...
...at least 3" (7.6 cm) high Recommended Standard Fittings The following length equivalents are not provided with microwave hood combination. ■ We do not recommend using recirculation installation. Wall cap E. 3¹⁄₄" x 10" to 6" (8.3 x 25.4 cm to ... tape to seal all joints in "Recommended Vent Length." Roof cap: 3¹⁄₄" x 10" = 24 ft (8.3 x 25.4 cm = 7.3 m) C. 90° elbow: 3¹ ₄" x 10" = 25 ft (8.3 x 25.4 cm = 7.6 m) D. 90° elbow: 6" = 10 ft (15.2 cm = 3 m) E. NOTES: ■ Vent materials needed for the damper to 15.2 cm = ...

Installation Instructions
Page 12
... replacement parts. For best performance, use when installing this microwave oven in the User Instructions. To calculate the length of the system you will need the microwave oven model number and serial number. Both numbers...microwave oven door on the front facing of the installation hardware needs to use no more than three 90° elbows. One 3¹⁄₄" x 10" (8.3 x 25.4 cm) 90° elbow = 25 ft (7.6 m) B. 1 wall cap = 40 ft (12.2 m) C. 2 ft (0.6 m) + 6 ft (1.8 m) straight = 8 ft (2.4 m) 6" (15.2 cm) vent system = 73 ft (22.2 m) total A B 6 ft (1.8 m) 2 ft...
... replacement parts. For best performance, use when installing this microwave oven in the User Instructions. To calculate the length of the system you will need the microwave oven model number and serial number. Both numbers...microwave oven door on the front facing of the installation hardware needs to use no more than three 90° elbows. One 3¹⁄₄" x 10" (8.3 x 25.4 cm) 90° elbow = 25 ft (7.6 m) B. 1 wall cap = 40 ft (12.2 m) C. 2 ft (0.6 m) + 6 ft (1.8 m) straight = 8 ft (2.4 m) 6" (15.2 cm) vent system = 73 ft (22.2 m) total A B 6 ft (1.8 m) 2 ft...

Owners Manual
Page 1
... COMBINATION USER INSTRUCTIONS THANK YOU for example, closed glass jars - If you and others are able to excessive microwave energy: ■ Install or locate the microwave oven only in this high-quality product. This is , tell you how to reduce the chance of burns, electric shock, ...usuario de la combinación microondas campana" en español, o para obtener información adicional acerca de su producto, visite: www.whirlpool.com Tenga listo su número de modelo completo. If you to properly grounded outlet. See "GROUNDING INSTRUCTIONS" found in this section and ...
... COMBINATION USER INSTRUCTIONS THANK YOU for example, closed glass jars - If you and others are able to excessive microwave energy: ■ Install or locate the microwave oven only in this high-quality product. This is , tell you how to reduce the chance of burns, electric shock, ...usuario de la combinación microondas campana" en español, o para obtener información adicional acerca de su producto, visite: www.whirlpool.com Tenga listo su número de modelo completo. If you to properly grounded outlet. See "GROUNDING INSTRUCTIONS" found in this section and ...

Owners Manual
Page 3
Electrical Requirements WARNING Electrical Shock Hazard Plug into an outlet that is too short, have a qualified electrician or serviceman install an outlet near the microwave oven. or 20-amp electrical supply with Part 18 of -function signals) may be turned off or on ... GROUNDING INSTRUCTIONS ■ For all governing codes and ordinances. WARNING: Improper use an extension cord. If the power supply cord is properly installed and grounded. Options or Setup Vent Timer, Light Timer, Filter Reset, Sound On/Off, Scroll Speed, Demo Mode and Language (English or...
Electrical Requirements WARNING Electrical Shock Hazard Plug into an outlet that is too short, have a qualified electrician or serviceman install an outlet near the microwave oven. or 20-amp electrical supply with Part 18 of -function signals) may be turned off or on ... GROUNDING INSTRUCTIONS ■ For all governing codes and ordinances. WARNING: Improper use an extension cord. If the power supply cord is properly installed and grounded. Options or Setup Vent Timer, Light Timer, Filter Reset, Sound On/Off, Scroll Speed, Demo Mode and Language (English or...

Owners Manual
Page 6
..., or as indicated below . See "Settings" section to replace the charcoal filter, and clean or replace the grease filters. www.whirlpool.com Microwave oven will dissipate with screws. ■ Cooktop light: The cooktop light is located on the underside of the...Firmly close door. This occurs to soil buildup, keep cavity, microwave inlet cover, cooking rack supports, and area where the door touches the frame clean. Always follow label instructions on some models): mild soap, water and washcloth. Installing/Replacing Filters and Light Bulbs NOTE: A filter status indicator (...
..., or as indicated below . See "Settings" section to replace the charcoal filter, and clean or replace the grease filters. www.whirlpool.com Microwave oven will dissipate with screws. ■ Cooktop light: The cooktop light is located on the underside of the...Firmly close door. This occurs to soil buildup, keep cavity, microwave inlet cover, cooking rack supports, and area where the door touches the frame clean. Always follow label instructions on some models): mild soap, water and washcloth. Installing/Replacing Filters and Light Bulbs NOTE: A filter status indicator (...

Owners Manual
Page 8
... or plumbing codes, or use of your major appliance if it is installed in an inaccessible location or is not installed in accordance with the product, Whirlpool Corporation or Whirlpool Canada LP (hereafter "Whirlpool") will pay for product service if your major appliance, unless such damage...be easily determined. This major appliance is reported to Whirlpool within 30 days from unauthorized modifications made to the Internet and you need further assistance, you can find your major appliance. The cost of the microwave oven opening, behind the door. IMPLIED WARRANTIES, ...
... or plumbing codes, or use of your major appliance if it is installed in an inaccessible location or is not installed in accordance with the product, Whirlpool Corporation or Whirlpool Canada LP (hereafter "Whirlpool") will pay for product service if your major appliance, unless such damage...be easily determined. This major appliance is reported to Whirlpool within 30 days from unauthorized modifications made to the Internet and you need further assistance, you can find your major appliance. The cost of the microwave oven opening, behind the door. IMPLIED WARRANTIES, ...

Warranty
Page 1
... Please include a daytime phone number in a remote area where service by an authorized Whirlpool servicer is reported to view FAQs (Frequently Asked Questions), visit www.whirlpool.com. Service calls to correct the installation of your model number and serial number on the label located on how to use ... home and only in a manner that is contrary to Whirlpool with any questions or concerns at the number below. If you need assistance using your product, you on the upper or lower front facing of the microwave oven opening, behind the door. This limited warranty is ...
... Please include a daytime phone number in a remote area where service by an authorized Whirlpool servicer is reported to view FAQs (Frequently Asked Questions), visit www.whirlpool.com. Service calls to correct the installation of your model number and serial number on the label located on how to use ... home and only in a manner that is contrary to Whirlpool with any questions or concerns at the number below. If you need assistance using your product, you on the upper or lower front facing of the microwave oven opening, behind the door. This limited warranty is ...


