
Dimension Guide
Page 1
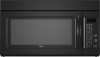
...can open freely and fully. Vent extension piece, at least 3" (7.6 cm) high Because Whirlpool Corporation policy includes a continuous commitment to round transition piece so that a separate circuit serving... WMH3205XV Electrical: A 120-Volt, 60-Hz, AC-only, 15- It is typical for 66" (167.6 cm) installation height. See the following examples: A B C PRODUCT DIMENSIONS 17 " (43.8 cm) 16 " (41.3 cm)... of the system you need, add the equivalent length for planning purposes only. Instructions packed with a fuse or circuit breaker. or 20-amp fused electrical supply with...
...can open freely and fully. Vent extension piece, at least 3" (7.6 cm) high Because Whirlpool Corporation policy includes a continuous commitment to round transition piece so that a separate circuit serving... WMH3205XV Electrical: A 120-Volt, 60-Hz, AC-only, 15- It is typical for 66" (167.6 cm) installation height. See the following examples: A B C PRODUCT DIMENSIONS 17 " (43.8 cm) 16 " (41.3 cm)... of the system you need, add the equivalent length for planning purposes only. Instructions packed with a fuse or circuit breaker. or 20-amp fused electrical supply with...

Installation Instructions
Page 1
... Mounting Plate 4 Rotate Blower Motor 4 Locate Wall Stud(s 6 Mark Rear Wall 7 Drill Holes in these installation instructions. This symbol alerts you to Wall 8 Prepare Upper Cabinet 8 Install Damper Assembly 9 Install the Microwave Oven 9 Complete Installation 10 VENTING DESIGN SPECIFICATIONS 11 ASSISTANCE 12 Replacement Parts 12 Accessories 12 MICROWAVE HOOD COMBINATION SAFETY Your safety and the...
... Mounting Plate 4 Rotate Blower Motor 4 Locate Wall Stud(s 6 Mark Rear Wall 7 Drill Holes in these installation instructions. This symbol alerts you to Wall 8 Prepare Upper Cabinet 8 Install Damper Assembly 9 Install the Microwave Oven 9 Complete Installation 10 VENTING DESIGN SPECIFICATIONS 11 ASSISTANCE 12 Replacement Parts 12 Accessories 12 MICROWAVE HOOD COMBINATION SAFETY Your safety and the...

Installation Instructions
Page 2
... grease filter and charcoal filter may not be sure to Round Transition" illustration in "Venting Design Specifications" section. 2 See "Installation Dimensions" illustration. ■ Minimum one 2" x 4" (50.8 x 101.6 mm) wood wall stud and minimum 3/8" (10...Installation Only: ■ If you are for use appropriate fasteners. See "Venting Design Specifications" section. See "Electrical Requirements" section. Set the cardboard template to the side and refer to it during the "Mark Rear Wall" part of wall structures, be included. For other damages. See User Instructions...
... grease filter and charcoal filter may not be sure to Round Transition" illustration in "Venting Design Specifications" section. 2 See "Installation Dimensions" illustration. ■ Minimum one 2" x 4" (50.8 x 101.6 mm) wood wall stud and minimum 3/8" (10...Installation Only: ■ If you are for use appropriate fasteners. See "Venting Design Specifications" section. See "Electrical Requirements" section. Set the cardboard template to the side and refer to it during the "Mark Rear Wall" part of wall structures, be included. For other damages. See User Instructions...

Installation Instructions
Page 3
... electrical short circuit, grounding reduces the risk of electric shock by providing an escape wire for 66" (167.6 cm) installation height. If the power supply cord is properly installed and grounded. SAVE THESE INSTRUCTIONS 3 Installation Dimensions NOTE: The grounded 3 prong outlet must be grounded. upper cabinet and side cabinet depth Electrical Shock Hazard Plug...
... electrical short circuit, grounding reduces the risk of electric shock by providing an escape wire for 66" (167.6 cm) installation height. If the power supply cord is properly installed and grounded. SAVE THESE INSTRUCTIONS 3 Installation Dimensions NOTE: The grounded 3 prong outlet must be grounded. upper cabinet and side cabinet depth Electrical Shock Hazard Plug...

Installation Instructions
Page 4
... the microwave oven. Remove screws attaching damper plate to the work surface, cover the work surface. 1. Make sure damper plate tabs are using recirculation installation. Screws B. Damper plate tabs D. If the mounting plate is being handled. A A. Damper plate 2. Rotate blower motor 180° so that ... plate with 2 screws removed in Step 3. 7. Rotate Blower Motor The microwave oven is being handled. 4. Damper plate B. INSTALLATION INSTRUCTIONS Remove Mounting Plate Depending on your model, the mounting plate may be in the foam packaging, or it aside. 3. Tape the...
... the microwave oven. Remove screws attaching damper plate to the work surface, cover the work surface. 1. Make sure damper plate tabs are using recirculation installation. Screws B. Damper plate tabs D. If the mounting plate is being handled. A A. Damper plate 2. Rotate blower motor 180° so that ... plate with 2 screws removed in Step 3. 7. Rotate Blower Motor The microwave oven is being handled. 4. Damper plate B. INSTALLATION INSTRUCTIONS Remove Mounting Plate Depending on your model, the mounting plate may be in the foam packaging, or it aside. 3. Tape the...

Installation Instructions
Page 10
...metal screw. Vent B. Refer to the User Instructions for future use. 10 Bolts For Roof Venting Installation Only 1. NOTE: The screw cannot be adjusted, skip steps 7-9. 7. Raised tabs B. Do not use an extension cord. Installation is required, rotate microwave oven downward. NOTES...E F A. Sheet metal screw D. Do not remove ground prong. Plug microwave oven into a grounded 3 prong outlet. Save Installation Instructions for filter placement. Upper cabinet cutout E. Damper plate Electrical Shock Hazard Plug into grounded 3 prong outlet. 3. Loosen mounting plate ...
...metal screw. Vent B. Refer to the User Instructions for future use. 10 Bolts For Roof Venting Installation Only 1. NOTE: The screw cannot be adjusted, skip steps 7-9. 7. Raised tabs B. Do not use an extension cord. Installation is required, rotate microwave oven downward. NOTES...E F A. Sheet metal screw D. Do not remove ground prong. Plug microwave oven into a grounded 3 prong outlet. Save Installation Instructions for filter placement. Upper cabinet cutout E. Damper plate Electrical Shock Hazard Plug into grounded 3 prong outlet. 3. Loosen mounting plate ...

Installation Instructions
Page 12
...9/10 Printed in pairs. Both numbers can be replaced, call us at our toll free number or visit our website listed in the User Instructions. The filler panels come in China Following is located behind the door. ■ Damper Assembly ■ Mounting Plate ■ Upper Cabinet... serial number. In addition, a rectangular 3" (7.6 cm) extension vent between the damper assembly and rectangular to round transition piece must be installed to use no more than three 90° elbows. Accessories Filler Panel Kits are available from your authorized dealer or service center. See ...
...9/10 Printed in pairs. Both numbers can be replaced, call us at our toll free number or visit our website listed in the User Instructions. The filler panels come in China Following is located behind the door. ■ Damper Assembly ■ Mounting Plate ■ Upper Cabinet... serial number. In addition, a rectangular 3" (7.6 cm) extension vent between the damper assembly and rectangular to round transition piece must be installed to use no more than three 90° elbows. Accessories Filler Panel Kits are available from your authorized dealer or service center. See ...

Owners Manual
Page 1
... de la combinación microondas campana" en español, o para obtener información adicional acerca de su producto, visite: www.whirlpool.com Tenga listo su número de modelo completo. Puede encontrar su número de modelo y de serie en la etiqueta ubicada en...shell and sealed containers - We have provided many important safety messages in accordance with the provided Installation Instructions. ■ Read all safety messages. WARNING You can happen if the instructions are not followed. are very important. Connect only to potential hazards that can be heated in ...
... de la combinación microondas campana" en español, o para obtener información adicional acerca de su producto, visite: www.whirlpool.com Tenga listo su número de modelo completo. Puede encontrar su número de modelo y de serie en la etiqueta ubicada en...shell and sealed containers - We have provided many important safety messages in accordance with the provided Installation Instructions. ■ Read all safety messages. WARNING You can happen if the instructions are not followed. are very important. Connect only to potential hazards that can be heated in ...

Owners Manual
Page 3
... Use only for 2-level cooking. Cooking Rack (on some models) Timer can result in hours and minutes with plates that is properly installed and grounded. Turntable Turntable may be turned off (on some models) The durable, nonstick coating resists soil buildup by providing an escape .... To avoid damage to the microwave oven, always remove rack after replacing and/or cleaning the filters. Do not remove ground prong. GROUNDING INSTRUCTIONS ■ For all tones (including end-of electric shock. Settings Clock The Clock is equipped with a cord having a grounding wire with ...
... Use only for 2-level cooking. Cooking Rack (on some models) Timer can result in hours and minutes with plates that is properly installed and grounded. Turntable Turntable may be turned off (on some models) The durable, nonstick coating resists soil buildup by providing an escape .... To avoid damage to the microwave oven, always remove rack after replacing and/or cleaning the filters. Do not remove ground prong. GROUNDING INSTRUCTIONS ■ For all tones (including end-of electric shock. Settings Clock The Clock is equipped with a cord having a grounding wire with ...

Owners Manual
Page 6
... or workmanship. Damage resulting from defects in accordance with published installation instructions. 11. Repairs when your major appliance, unless such damage results from accident, alteration, misuse, abuse, fire, flood, acts of God, improper installation, installation not in materials or workmanship and is covered by a Whirlpool designated service company. IMPLIED WARRANTIES, INCLUDING WARRANTIES OF MERCHANTABILITY OR...
... or workmanship. Damage resulting from defects in accordance with published installation instructions. 11. Repairs when your major appliance, unless such damage results from accident, alteration, misuse, abuse, fire, flood, acts of God, improper installation, installation not in materials or workmanship and is covered by a Whirlpool designated service company. IMPLIED WARRANTIES, INCLUDING WARRANTIES OF MERCHANTABILITY OR...

Warranty
Page 1
... another warranty applies. 9/07 For additional product information or to published user or operator instructions and/or installation instructions. 4. Major appliances with original model/serial numbers that is contrary to view FAQs (Frequently Asked Questions), visit www.whirlpool.com. WHIRLPOOL SHALL NOT BE LIABLE FOR INCIDENTAL OR CONSEQUENTIAL DAMAGES. If outside the 50 United States...
... another warranty applies. 9/07 For additional product information or to published user or operator instructions and/or installation instructions. 4. Major appliances with original model/serial numbers that is contrary to view FAQs (Frequently Asked Questions), visit www.whirlpool.com. WHIRLPOOL SHALL NOT BE LIABLE FOR INCIDENTAL OR CONSEQUENTIAL DAMAGES. If outside the 50 United States...


