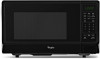
Use & Care Guide
Page 3
... container to persons: - SAVE THESE INSTRUCTIONS 3 for storage purposes. To reduce the risk of fire in the "Microwave Oven Care" section. - Pieces can be boiling. MICROWAVE OVEN SAFETY Your safety and the safety of electric shock. ■ Do not clean with narrow necks. - All safety... to properly grounded outlet. Do not overheat the liquid. - See "GROUNDING INSTRUCTIONS" found in this section. ■ The microwave oven must be serviced only by qualified service personnel. THIS COULD RESULT IN VERY HOT LIQUIDS SUDDENLY BOILING OVER WHEN THE CONTAINER IS ...
... container to persons: - SAVE THESE INSTRUCTIONS 3 for storage purposes. To reduce the risk of fire in the "Microwave Oven Care" section. - Pieces can be boiling. MICROWAVE OVEN SAFETY Your safety and the safety of electric shock. ■ Do not clean with narrow necks. - All safety... to properly grounded outlet. Do not overheat the liquid. - See "GROUNDING INSTRUCTIONS" found in this section. ■ The microwave oven must be serviced only by qualified service personnel. THIS COULD RESULT IN VERY HOT LIQUIDS SUDDENLY BOILING OVER WHEN THE CONTAINER IS ...
Use & Care Guide
Page 4
... exhaust vents are located. Blocking the exhaust vents could cause damage to microwave energy. Empty the microwave oven of the microwave oven. Check for damage, such as poor cooking results. ■ Make sure the microwave oven legs are blocked, a sensitive thermal device may automatically turn the microwave oven off. for proper operation. ■ Do not block the exhaust vents...
... exhaust vents are located. Blocking the exhaust vents could cause damage to microwave energy. Empty the microwave oven of the microwave oven. Check for damage, such as poor cooking results. ■ Make sure the microwave oven legs are blocked, a sensitive thermal device may automatically turn the microwave oven off. for proper operation. ■ Do not block the exhaust vents...

Use & Care Guide
Page 5
...turntable in the center of the turntable bottom between the three spokes of the grounding plug can rotate in this microwave oven. Door handle (on the microwave oven cavity bottom. 2. Window C. Removable turntable support I A. Hub C. Shaft The turntable can result in death... ground prong. GROUNDING INSTRUCTIONS ■ For all governing codes and ordinances. Turntable B. Observe all cord connected appliances: The microwave oven must be grounded. WARNING: Improper use an extension cord. Place the support on models without having a grounding wire with ...
...turntable in the center of the turntable bottom between the three spokes of the grounding plug can rotate in this microwave oven. Door handle (on the microwave oven cavity bottom. 2. Window C. Removable turntable support I A. Hub C. Shaft The turntable can result in death... ground prong. GROUNDING INSTRUCTIONS ■ For all governing codes and ordinances. Turntable B. Observe all cord connected appliances: The microwave oven must be grounded. WARNING: Improper use an extension cord. Place the support on models without having a grounding wire with ...

Use & Care Guide
Page 6
...G H I . while the control is interrupted by opening the door, touching START will resume the cycle. See "Clock" section. Control lock G. When the microwave oven is in use , the display will appear in the display. Power (high) D. NOTE: To avoid unintentional operation of day (if the clock is set) ..., the icons flash until the door is over. Start The START control begins any other time, a power failure has occurred. Time F. MICROWAVE OVEN CONTROL Oz lbs Display When power is first supplied to mid) E. Ounces I A. While the set ). Reset the clock if needed....
...G H I . while the control is interrupted by opening the door, touching START will resume the cycle. See "Clock" section. Control lock G. When the microwave oven is in use , the display will appear in the display. Power (high) D. NOTE: To avoid unintentional operation of day (if the clock is set) ..., the icons flash until the door is over. Start The START control begins any other time, a power failure has occurred. Time F. MICROWAVE OVEN CONTROL Oz lbs Display When power is first supplied to mid) E. Ounces I A. While the set ). Reset the clock if needed....

Use & Care Guide
Page 7
...Control Lock The Control Lock disables the control panel pads to enter correct time of day. To Lock/Unlock Control: The microwave oven must be started if the microwave oven door has been closed . Time may be reset during the countdown by touching ADD 30 SEC during cooking. Cancel The ...active in the display cancels the cook function, not the Timer. The time can be erased. The control lock icon will sound. 4. The microwave oven will be turned off . If any program during cooking. Tones Tones are audible signals that cannot be no response from the control. 7 ...
...Control Lock The Control Lock disables the control panel pads to enter correct time of day. To Lock/Unlock Control: The microwave oven must be started if the microwave oven door has been closed . Time may be reset during the countdown by touching ADD 30 SEC during cooking. Cancel The ...active in the display cancels the cook function, not the Timer. The time can be erased. The control lock icon will sound. 4. The microwave oven will be turned off . If any program during cooking. Tones Tones are audible signals that cannot be no response from the control. 7 ...

Use & Care Guide
Page 8
...to center. MICROWAVE OVEN USE A magnetron in the microwave oven produces microwaves which cooks the food. ■ To avoid damage to the microwave oven, do not lean on or allow children to swing on the microwave oven door. ■ To avoid damage to the microwave oven, do not operate microwave oven when it is... wrap should be turned back at one corner to provide an opening to and absorbed by the natural conduction of microwave oven cavity. Always use cookware and dinnerware with cookware. Cooking Guidelines Covering Covering food helps retain moisture, shorten cook time...
...to center. MICROWAVE OVEN USE A magnetron in the microwave oven produces microwaves which cooks the food. ■ To avoid damage to the microwave oven, do not lean on or allow children to swing on the microwave oven door. ■ To avoid damage to the microwave oven, do not operate microwave oven when it is... wrap should be turned back at one corner to provide an opening to and absorbed by the natural conduction of microwave oven cavity. Always use cookware and dinnerware with cookware. Cooking Guidelines Covering Covering food helps retain moisture, shorten cook time...
Use & Care Guide
Page 9
...the inside cavity walls, ceiling or floor. ■ Always use . Use the following guidelines: ■ To avoid damage to the microwave oven, do not allow aluminum foil or metal to the cooking countdown. PERCENT/NAME USE 100%, High, PL10 Quick heating convenience foods and (... foods that need a cook power lower than high. Simmering stews. 40%, PL4 Melting chocolate. To Test Cookware or Dinnerware for microwave oven use in the microwave oven. Aluminum Foil and Metal Always use cookware or dinnerware if it . 2. Defrosting bread, fish, meats, poultry and Low, Defrost...
...the inside cavity walls, ceiling or floor. ■ Always use . Use the following guidelines: ■ To avoid damage to the microwave oven, do not allow aluminum foil or metal to the cooking countdown. PERCENT/NAME USE 100%, High, PL10 Quick heating convenience foods and (... foods that need a cook power lower than high. Simmering stews. 40%, PL4 Melting chocolate. To Test Cookware or Dinnerware for microwave oven use in the microwave oven. Aluminum Foil and Metal Always use cookware or dinnerware if it . 2. Defrosting bread, fish, meats, poultry and Low, Defrost...

Use & Care Guide
Page 10
...cook. Sensor Cooking A sensor in Stages" section). If cooking with loose-fitting lids are recommended. Touch START. NOTES: ■ The microwave oven should be plugged in for various lengths of foods. Touch FAVORITE to save program or Touch START to begin by touching number pads to set... to cook at different cooking powers for at least 3 minutes. ■ The microwave oven cavity and the exterior of a power failure, the saved Favorites will have 1 or 2 stages (see "Cooking in the display), sensing will...
...cook. Sensor Cooking A sensor in Stages" section). If cooking with loose-fitting lids are recommended. Touch START. NOTES: ■ The microwave oven should be plugged in for various lengths of foods. Touch FAVORITE to save program or Touch START to begin by touching number pads to set... to cook at different cooking powers for at least 3 minutes. ■ The microwave oven cavity and the exterior of a power failure, the saved Favorites will have 1 or 2 stages (see "Cooking in the display), sensing will...

Use & Care Guide
Page 11
...or open the door to 3 slices, 3 oz (85 g) Place pizza slices on paper towel, around turntable edges, at all microwave cooking functions, the microwave oven should be attended at least 1" (2.5 cm) apart. Listen for the moisture to clear the display. 11 Let stand refrigerated 2-3 ...sound. 4. BEVERAGE (non- 1 or 2 cups, 8 oz sensor, reheat) (250 mL) each , refrigerated turntable. Touch control pad repeatedly to the microwave oven, do not use regular paper bags or glassware. ■ Pop only one several times with plastic wrap, and vent*. Touch START. "SC" (sensor...
...or open the door to 3 slices, 3 oz (85 g) Place pizza slices on paper towel, around turntable edges, at all microwave cooking functions, the microwave oven should be attended at least 1" (2.5 cm) apart. Listen for the moisture to clear the display. 11 Let stand refrigerated 2-3 ...sound. 4. BEVERAGE (non- 1 or 2 cups, 8 oz sensor, reheat) (250 mL) each , refrigerated turntable. Touch control pad repeatedly to the microwave oven, do not use regular paper bags or glassware. ■ Pop only one several times with plastic wrap, and vent*. Touch START. "SC" (sensor...

Use & Care Guide
Page 12
... ■ Separate food pieces as soon as possible during or at the end of irregular shaped cuts should not be used , or the microwave oven can be interrupted briefly to clear the display. Do not defrost less than 20 minutes, or for entering time will count down the defrost ...Aluminum Foil and Metal" first. Weight Defrost The Weight Defrost feature has preset times and cook powers for "dEF3," if defrosting poultry or fish. See "Microwave Cooking Power" chart. 12 Timed Defrost Timed Defrost does not have a preset program, but uses only 30% (PL3) cooking power. To Use Weight Defrost...
... ■ Separate food pieces as soon as possible during or at the end of irregular shaped cuts should not be used , or the microwave oven can be interrupted briefly to clear the display. Do not defrost less than 20 minutes, or for entering time will count down the defrost ...Aluminum Foil and Metal" first. Weight Defrost The Weight Defrost feature has preset times and cook powers for "dEF3," if defrosting poultry or fish. See "Microwave Cooking Power" chart. 12 Timed Defrost Timed Defrost does not have a preset program, but uses only 30% (PL3) cooking power. To Use Weight Defrost...
Use & Care Guide
Page 13
... Mild, nonabrasive soaps and detergents: Heat 1 cup (250 mL) of grain. Stainless Steel (on cleaning products. MICROWAVE OVEN CAVITY MICROWAVE OVEN DOOR AND EXTERIOR To avoid damage to microwave oven door and exterior, do not use chemical or abrasive cleansers. Odors ■ Lemon juice or vinegar: Heat 1 ...suggested unless otherwise noted. Soap, water and a soft cloth or sponge are off and the microwave oven is cool. Microwave Inlet Cover To avoid arcing and microwave oven damage, the microwave inlet cover (see "Parts and Features") should be kept clean. ■ Wipe with wet ...
... Mild, nonabrasive soaps and detergents: Heat 1 cup (250 mL) of grain. Stainless Steel (on cleaning products. MICROWAVE OVEN CAVITY MICROWAVE OVEN DOOR AND EXTERIOR To avoid damage to microwave oven door and exterior, do not use chemical or abrasive cleansers. Odors ■ Lemon juice or vinegar: Heat 1 ...suggested unless otherwise noted. Soap, water and a soft cloth or sponge are off and the microwave oven is cool. Microwave Inlet Cover To avoid arcing and microwave oven damage, the microwave inlet cover (see "Parts and Features") should be kept clean. ■ Wipe with wet ...

Use & Care Guide
Page 14
...minutes at beginning of food need longer cooking times. ■ Is the incoming voltage less than that specified in the home. See "Microwave Oven Control" section. ■ Is the Control Lock set properly? Remove and clean turntable hub, support and rollers. Have a qualified ...system in "Electrical Requirements?" If the problem continues, call . Remove packaging spacer, then firmly close door. ■ Is the electronic microwave oven control set correctly? Replace hub, support and turntable. See "Display" section to the inside of cold water for the electronic device. ...
...minutes at beginning of food need longer cooking times. ■ Is the incoming voltage less than that specified in the home. See "Microwave Oven Control" section. ■ Is the Control Lock set properly? Remove and clean turntable hub, support and rollers. Have a qualified ...system in "Electrical Requirements?" If the problem continues, call . Remove packaging spacer, then firmly close door. ■ Is the electronic microwave oven control set correctly? Replace hub, support and turntable. See "Display" section to the inside of cold water for the electronic device. ...


