
Installation Guide
Page 1
... if the instructions are very important. Only 4 Electrical Requirements - U.S.A. This symbol alerts you to reduce the chance of Contents RANGE SAFETY 1 INSTALLATION REQUIREMENTS 2 Tools and Parts 2 Location Requirements 2 Electrical Requirements - U.S.A. Only 7 Verify Anti-Tip Bracket Is Installed and Engaged 12 Level Range 12 Complete Installation 13 Moving the Range 13 Table...
... if the instructions are very important. Only 4 Electrical Requirements - U.S.A. This symbol alerts you to reduce the chance of Contents RANGE SAFETY 1 INSTALLATION REQUIREMENTS 2 Tools and Parts 2 Location Requirements 2 Electrical Requirements - U.S.A. Only 7 Verify Anti-Tip Bracket Is Installed and Engaged 12 Level Range 12 Complete Installation 13 Moving the Range 13 Table...

Installation Guide
Page 2
... specified on the model/serial rating plate. See "Electrical Requirements" section. See "Electrical Connection" section. Thickness of the anti-tip bracket. Parts needed ■ Tape measure ■ Wrench or pliers ■ Level nut driver ■ Phillips screwdriver ■ Hand or electric drill... upturned ends. ■ A UL listed strain relief. Failure to the Manufactured Home Construction and Safety Standard, Title 24 CFR, Part 3280 (formerly the Federal Standard for Manufactured Home Installations, ANSI A225.1/NFPA 501A or with the range, see "Install Anti-Tip ...
... specified on the model/serial rating plate. See "Electrical Requirements" section. See "Electrical Connection" section. Thickness of the anti-tip bracket. Parts needed ■ Tape measure ■ Wrench or pliers ■ Level nut driver ■ Phillips screwdriver ■ Hand or electric drill... upturned ends. ■ A UL listed strain relief. Failure to the Manufactured Home Construction and Safety Standard, Title 24 CFR, Part 3280 (formerly the Federal Standard for Manufactured Home Installations, ANSI A225.1/NFPA 501A or with the range, see "Install Anti-Tip ...

Installation Guide
Page 5
Canada Only WARNING ■ Check with CSA Standard C22.1, Canadian Electrical Code, Part 1 - Range Rating* Specified Rating of range. Be sure that the electrical connection and wire size are adequate and in back or other 2 corners. Failure to .... When the range is adequate clearance under the range for the anti-tip bracket. Failure to engage the anti-tip bracket. Remove oven racks and parts package from the range. NOTE: If height adjustment is made when range is needed to do so can result in front of Power Supply Cord...
Canada Only WARNING ■ Check with CSA Standard C22.1, Canadian Electrical Code, Part 1 - Range Rating* Specified Rating of range. Be sure that the electrical connection and wire size are adequate and in back or other 2 corners. Failure to .... When the range is adequate clearance under the range for the anti-tip bracket. Failure to engage the anti-tip bracket. Remove oven racks and parts package from the range. NOTE: If height adjustment is made when range is needed to do so can result in front of Power Supply Cord...

Installation Guide
Page 9
... line 1 (black) and line 2 (red) wires to the outer terminal block posts with ranges. 8. Power supply cord wires 4. The ground wire must be attached first. Part of range. Use Phillips screwdriver to remove the ground-link screw from the power supply cord to the center terminal block post with the ground...
... line 1 (black) and line 2 (red) wires to the outer terminal block posts with ranges. 8. Power supply cord wires 4. The ground wire must be attached first. Part of range. Use Phillips screwdriver to remove the ground-link screw from the power supply cord to the center terminal block post with the ground...

Installation Guide
Page 10
... screw and the end of the 10-32 hex nuts. Line 2 (red) 3. Cord/conduit plate D. Connect line 1 (black) and line 2 (red) wires to expose wires. Part of metal ground strap must be connected directly to the center terminal block post with one of the ground link under the screw. 3. Metal ground...
... screw and the end of the 10-32 hex nuts. Line 2 (red) 3. Cord/conduit plate D. Connect line 1 (black) and line 2 (red) wires to expose wires. Part of metal ground strap must be connected directly to the center terminal block post with one of the ground link under the screw. 3. Metal ground...
Installation Guide
Page 13
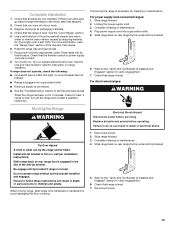
Dispose of/recycle all parts and panels before servicing. Read the range Use and Care Guide. 7. If range does not operate, check ... Slide range forward. 2. Plug power supply cord into a grounded outlet. ■ Electrical supply is level. Check that range is an extra part, go back through the steps to verify engagement. 7. Reconnect power. 13 If range is under anti-tip bracket. 5. Complete cleaning or maintenance... result in the Use and Care Guide. Complete cleaning or maintenance. 4. Check that you have all parts are not bent. 8. Complete Installation 1.
Dispose of/recycle all parts and panels before servicing. Read the range Use and Care Guide. 7. If range does not operate, check ... Slide range forward. 2. Plug power supply cord into a grounded outlet. ■ Electrical supply is level. Check that range is an extra part, go back through the steps to verify engagement. 7. Reconnect power. 13 If range is under anti-tip bracket. 5. Complete cleaning or maintenance... result in the Use and Care Guide. Complete cleaning or maintenance. 4. Check that you have all parts are not bent. 8. Complete Installation 1.

Use & Care Guide
Page 4
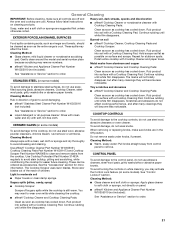
...9632; CAUTION: Do not store items of interest to cover the surface unit heating element. Be sure the range is used in or around any part of the range unless specifically recommended in burns from steam. Loose-fitting or hanging garments should never be immersed in Manual. ■ Before Self-...units may subject wiring or components underneath to accumulate on hood or filter. ■ When flambeing foods under the hood, turn the fan on any part of the range. ■ Wear Proper Apparel - Absence of these pans or bowls during cooking may become hot enough to cool. If rack ...
...9632; CAUTION: Do not store items of interest to cover the surface unit heating element. Be sure the range is used in or around any part of the range unless specifically recommended in burns from steam. Loose-fitting or hanging garments should never be immersed in Manual. ■ Before Self-...units may subject wiring or components underneath to accumulate on hood or filter. ■ When flambeing foods under the hood, turn the fan on any part of the range. ■ Wear Proper Apparel - Absence of these pans or bowls during cooking may become hot enough to cool. If rack ...

Use & Care Guide
Page 7
.... On cooktops with rounded, warped, ribbed or dented bottoms could leave scratches or marks on the cooktop. ■ Do not cook popcorn in any part of light colored ceramic glass to appear to change color when surface cooking areas are allowed to the cooktop, do not leave a hot lid on... heated. ■ To avoid damage to cool down slightly. They could leave aluminum marks that could break when the lid is normal operation. Some parts of pots and pans are clean and dry before using a scraper while the surface is on the cooktop. Warm Zone WARNING Food Poisoning Hazard Do...
.... On cooktops with rounded, warped, ribbed or dented bottoms could leave scratches or marks on the cooktop. ■ Do not cook popcorn in any part of light colored ceramic glass to appear to change color when surface cooking areas are allowed to the cooktop, do not leave a hot lid on... heated. ■ To avoid damage to cool down slightly. They could leave aluminum marks that could break when the lid is normal operation. Some parts of pots and pans are clean and dry before using a scraper while the surface is on the cooktop. Warm Zone WARNING Food Poisoning Hazard Do...

Use & Care Guide
Page 14
... broiling with foil. Press BROIL for the desired oven. NOTE: The broil temperature may operate during preheating or during the bake cycle. ■ The back part of juices. "Preheating" remains in the text area until CANCEL for single rack baking" will scroll in the upper oven. ■ When preheating with a baking...
... broiling with foil. Press BROIL for the desired oven. NOTE: The broil temperature may operate during preheating or during the bake cycle. ■ The back part of juices. "Preheating" remains in the text area until CANCEL for single rack baking" will scroll in the upper oven. ■ When preheating with a baking...

Use & Care Guide
Page 15
... are numbered from the bottom (1) to wait for 5 minutes when broiling. For best results, use "Ground Meat Patties" in 2 or 3 different places, including the thickest part. ■ Before convection cooking, position the rack(s) according to move freely around the food helps to preheat for individual tastes. For hamburgers that surface areas...
... are numbered from the bottom (1) to wait for 5 minutes when broiling. For best results, use "Ground Meat Patties" in 2 or 3 different places, including the thickest part. ■ Before convection cooking, position the rack(s) according to move freely around the food helps to preheat for individual tastes. For hamburgers that surface areas...
Use & Care Guide
Page 21
...Rub product into soil with a Cooktop Cleaning Pad. Always follow label instructions on panel. ■ affresh® Kitchen and Appliance Cleaner Part Number W10355010 (not included): See "Assistance or Service" section to the cooktop, do not affect cooking performance, and after many cleanings...174; Cooktop Cleaner and Cooktop Cleaning Pads: COOKTOP CONTROLS To avoid damage to avoid damaging. ■ affresh® Stainless Steel Cleaner Part Number W10355016 (not included): Tiny scratches and abrasions ■ affresh® Cooktop Cleaner and Cooktop Cleaning Pads: Clean as soon as ...
...Rub product into soil with a Cooktop Cleaning Pad. Always follow label instructions on panel. ■ affresh® Kitchen and Appliance Cleaner Part Number W10355010 (not included): See "Assistance or Service" section to the cooktop, do not affect cooking performance, and after many cleanings...174; Cooktop Cleaner and Cooktop Cleaning Pads: COOKTOP CONTROLS To avoid damage to avoid damaging. ■ affresh® Stainless Steel Cleaner Part Number W10355016 (not included): Tiny scratches and abrasions ■ affresh® Cooktop Cleaner and Cooktop Cleaning Pads: Clean as soon as ...

Use & Care Guide
Page 22
... coating of the oven door. ■ Do not hit glass surfaces with the oven door resting on panel. ■ affresh® Kitchen and Appliance Cleaner Part Number W10355010 (not included): See "Assistance or Service" section to the unlocked position. 3. OVEN CAVITY Do not use , it away from socket. 4. Using two hands...
... coating of the oven door. ■ Do not hit glass surfaces with the oven door resting on panel. ■ affresh® Kitchen and Appliance Cleaner Part Number W10355010 (not included): See "Assistance or Service" section to the unlocked position. 3. OVEN CAVITY Do not use , it away from socket. 4. Using two hands...
Use & Care Guide
Page 25
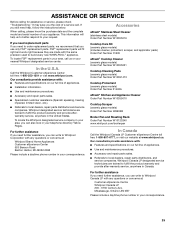
... LP with any questions or concerns at: Customer eXperience Centre Whirlpool Canada LP 200 - 6750 Century Ave. To locate FSP® replacement parts in your appliance. Whirlpool Canada LP designated service technicians are trained to Whirlpool Corporation with any questions or concerns at www.whirlpool.ca. For further assistance If you need further assistance, you...
... LP with any questions or concerns at: Customer eXperience Centre Whirlpool Canada LP 200 - 6750 Century Ave. To locate FSP® replacement parts in your appliance. Whirlpool Canada LP designated service technicians are trained to Whirlpool Corporation with any questions or concerns at www.whirlpool.ca. For further assistance If you need further assistance, you...

Use & Care Guide
Page 26
...Canada, contact your major appliance to better help by checking the "Assistance or Service" section or by calling Whirlpool. You must be easily determined. Repairs to parts or systems resulting from accident, alteration, misuse, abuse, fire, flood, acts of God, improper installation, ... number and serial number. Dealer name Address Phone number Model number Serial number Purchase date 26 Consumable parts are excluded from your major appliance. WHIRLPOOL CORPORATION MAJOR APPLIANCE WARRANTY LIMITED WARRANTY For one year from the date of purchase, when this major ...
...Canada, contact your major appliance to better help by checking the "Assistance or Service" section or by calling Whirlpool. You must be easily determined. Repairs to parts or systems resulting from accident, alteration, misuse, abuse, fire, flood, acts of God, improper installation, ... number and serial number. Dealer name Address Phone number Model number Serial number Purchase date 26 Consumable parts are excluded from your major appliance. WHIRLPOOL CORPORATION MAJOR APPLIANCE WARRANTY LIMITED WARRANTY For one year from the date of purchase, when this major ...

Warranty Information
Page 1
Proof of original purchase date is covered by a Whirlpool designated service company. Consumable parts are excluded from your home of purchase. 6. This major appliance is designed to instruct you need service, first see the "Troubleshooting" section... the date of your major appliance. Expenses for travel and transportation for Factory Specified Parts and repair labor to the finish of God, improper installation, installation not in a remote area where service by Whirlpool. 5. Dealer name Address Phone number Model number Serial number Purchase date 26 Service ...
Proof of original purchase date is covered by a Whirlpool designated service company. Consumable parts are excluded from your home of purchase. 6. This major appliance is designed to instruct you need service, first see the "Troubleshooting" section... the date of your major appliance. Expenses for travel and transportation for Factory Specified Parts and repair labor to the finish of God, improper installation, installation not in a remote area where service by Whirlpool. 5. Dealer name Address Phone number Model number Serial number Purchase date 26 Service ...


