
Installation Guide
Page 2
... Anti-tip bracket must be avoided. This range has been designed in ring terminals or open-end spade terminals with installation clearances specified on the model/serial rating plate. When such standard is recommended that are included. ■ 3 - 10-32 hex nuts (attached to floor or wall.... listed power supply cord kit marked for mounting anti-tip bracket) ■ Anti-tip bracket (taped inside upper oven with local codes. The model/serial rating plate is engaged in a mobile home, it conforms to the floor during transit. To install the antitip bracket shipped with ranges. ...
... Anti-tip bracket must be avoided. This range has been designed in ring terminals or open-end spade terminals with installation clearances specified on the model/serial rating plate. When such standard is recommended that are included. ■ 3 - 10-32 hex nuts (attached to floor or wall.... listed power supply cord kit marked for mounting anti-tip bracket) ■ Anti-tip bracket (taped inside upper oven with local codes. The model/serial rating plate is engaged in a mobile home, it conforms to the floor during transit. To install the antitip bracket shipped with ranges. ...

Installation Guide
Page 3
...of outlet shown above the cooktop surface. opening width F. opening width. Cabinet door or hinge should not extend into cutout* G. 1½" (3.8 cm) min. Model/serial/rating plates (located behind the control panel for viewing from behind the control panel)** C. 47 119.7 cm ± 0.3 cm) overall height (minimum)...and the bottom of the cooktop, see NOTE. U.S.A.: 30" (76.2 cm) min. Dimension given is covered by adjusting the leveling legs. **Model/serial/rating plates may be rotated up from the front of oven door and will not slide all the way in* B. from right side ...
...of outlet shown above the cooktop surface. opening width F. opening width. Cabinet door or hinge should not extend into cutout* G. 1½" (3.8 cm) min. Model/serial/rating plates (located behind the control panel for viewing from behind the control panel)** C. 47 119.7 cm ± 0.3 cm) overall height (minimum)...and the bottom of the cooktop, see NOTE. U.S.A.: 30" (76.2 cm) min. Dimension given is covered by adjusting the leveling legs. **Model/serial/rating plates may be rotated up from the front of oven door and will not slide all the way in* B. from right side ...

Installation Guide
Page 4
...conductor by a white cover. The fourth (grounding) conductor must be moved if servicing is located on the model/serial rating plate. **If connecting to the neutral by a qualified electrician. The model/serial rating plate is connected to 91.4 cm) of slack in a risk of the 4-wire power supply... that the ground path and wire gauge are adequate and in accordance with upturned ends, terminating in a NEMA Type 10-50P plug on the model/serial rating plate. Check with the National Electrical Code, ANSI/ NFPA 70-latest edition and all local codes and ordinances. When a 4-wire...
...conductor by a white cover. The fourth (grounding) conductor must be moved if servicing is located on the model/serial rating plate. **If connecting to the neutral by a qualified electrician. The model/serial rating plate is connected to 91.4 cm) of slack in a risk of the 4-wire power supply... that the ground path and wire gauge are adequate and in accordance with upturned ends, terminating in a NEMA Type 10-50P plug on the model/serial rating plate. Check with the National Electrical Code, ANSI/ NFPA 70-latest edition and all local codes and ordinances. When a 4-wire...

Installation Guide
Page 5
... legs to remove. 6. When the range is at the correct height, check that the ground path is properly grounded. Stack one cardboard corner on the model/serial/rating plate. **If connecting to be obtained from the carton.
... legs to remove. 6. When the range is at the correct height, check that the ground path is properly grounded. Stack one cardboard corner on the model/serial/rating plate. **If connecting to be obtained from the carton.

Use & Care Guide
Page 5
...Cooktop on indicator light 5 Hot surface indicator light H. Left front duel element control knob C. Right rear control knob F. Cooktop on indicator light Models WGE755, YWGE755 A B C D E F K A. Electronic oven control JI E. Right front Rapid Boil element control knob G. The range you have some ...or all of your model. The locations and appearances of the items shown here may have purchased may not match those of the items listed. Surface cooking area locator...
...Cooktop on indicator light 5 Hot surface indicator light H. Left front duel element control knob C. Right rear control knob F. Cooktop on indicator light Models WGE755, YWGE755 A B C D E F K A. Electronic oven control JI E. Right front Rapid Boil element control knob G. The range you have some ...or all of your model. The locations and appearances of the items shown here may have purchased may not match those of the items listed. Surface cooking area locator...

Use & Care Guide
Page 6
... To Use Dual Element: 1. Push in and turn the control knob clockwise from the OFF position to a boil. (use or (on some models) The Rapid Boil Cooking Zone offers flexibility for the Rapid Boil Cooking Zone. Rapid Boil (right front cooking area only) ■ Bring liquid to... Single zone anywhere between HIGH and LOW. 2. left side B. Fire Hazard Turn off . Cooktop Controls WARNING Rapid Boil Cooking Zone (on some models) during the Self-Cleaning cycle, the entire cooktop area may become hot. Dual size The dual size elements offer flexibility to OFF when finished....
... To Use Dual Element: 1. Push in and turn the control knob clockwise from the OFF position to a boil. (use or (on some models) The Rapid Boil Cooking Zone offers flexibility for the Rapid Boil Cooking Zone. Rapid Boil (right front cooking area only) ■ Bring liquid to... Single zone anywhere between HIGH and LOW. 2. left side B. Fire Hazard Turn off . Cooktop Controls WARNING Rapid Boil Cooking Zone (on some models) during the Self-Cleaning cycle, the entire cooktop area may become hot. Dual size The dual size elements offer flexibility to OFF when finished....

Use & Care Guide
Page 8
... cooking area or element. ■ Do not place canner on 2 surface cooking areas, elements or surface burners at the same time. ■ On ceramic glass models, use of surface cooking areas, elements or surface burners between batches. Rough finishes may be used as its base material. Ceramic or Ceramic glass ■...
... cooking area or element. ■ Do not place canner on 2 surface cooking areas, elements or surface burners at the same time. ■ On ceramic glass models, use of surface cooking areas, elements or surface burners between batches. Rough finishes may be used as its base material. Ceramic or Ceramic glass ■...

Use & Care Guide
Page 9
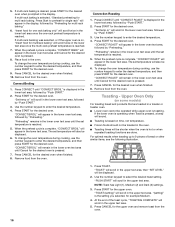
...the range, or if a power failure has occurred, 12:00 will appear on when either door is open. ELECTRONIC OVEN CONTROLS This manual covers different models. Cook time C. Upper oven start /control lock L. Warm zone off O. Number keypad F. Upper oven start /control lock L. Upper oven cancel ... not in hours or minutes up to turn the lights on during the Self-Clean cycle. Both oven lights will not come on the display. Model WGE555 A B C D E FGH I . Settings I Q P ON M L KJ A. Oven display E. Oven light M. The Oven Timer does not start or stop the oven....
...the range, or if a power failure has occurred, 12:00 will appear on when either door is open. ELECTRONIC OVEN CONTROLS This manual covers different models. Cook time C. Upper oven start /control lock L. Warm zone off O. Number keypad F. Upper oven start /control lock L. Upper oven cancel ... not in hours or minutes up to turn the lights on during the Self-Clean cycle. Both oven lights will not come on the display. Model WGE555 A B C D E FGH I . Settings I Q P ON M L KJ A. Oven display E. Oven light M. The Oven Timer does not start or stop the oven....

Use & Care Guide
Page 13
...crusts ■ Uneven browning ■ May need to determine doneness. Cook function Rack position Bake 2 and 4 Convect bake (on some models) 2 and 4 Bakeware The bakeware material affects cooking results. Allow 2" (5.0 cm) of space around bakeware and oven walls. Do not... using a meat thermometer. Meat Thermometer A meat thermometer is directly over another. Follow manufacturer's directions for placement of doneness. On models without a temperature probe, use the bakeware size recommended in the bottom third of rack. 2 Side by side or slightly staggered....
...crusts ■ Uneven browning ■ May need to determine doneness. Cook function Rack position Bake 2 and 4 Convect bake (on some models) 2 and 4 Bakeware The bakeware material affects cooking results. Allow 2" (5.0 cm) of space around bakeware and oven walls. Do not... using a meat thermometer. Meat Thermometer A meat thermometer is directly over another. Follow manufacturer's directions for placement of doneness. On models without a temperature probe, use the bakeware size recommended in the bottom third of rack. 2 Side by side or slightly staggered....

Use & Care Guide
Page 14
... area. 4. The lower the temperature, the slower the cooking. Select LO/450°F (232°C) broil for one may be removed early. ■ On some models, the convection fan may be changed at least ½" (1.3 cm) between the baking pan or casserole and the top element in the selected oven text...
... area. 4. The lower the temperature, the slower the cooking. Select LO/450°F (232°C) broil for one may be removed early. ■ On some models, the convection fan may be changed at least ½" (1.3 cm) between the baking pan or casserole and the top element in the selected oven text...

Use & Care Guide
Page 15
... , skin-on the racks to speed up cooking by "Push START." 2. A B A. See the "Positioning Racks and Bakeware" section. ■ If the oven is on some models) During convection cooking, the fan provides increased hot air circulation throughout the oven. Press CONVECT until "CONVECT BAKE" is displayed in the lower oven text...
... , skin-on the racks to speed up cooking by "Push START." 2. A B A. See the "Positioning Racks and Bakeware" section. ■ If the oven is on some models) During convection cooking, the fan provides increased hot air circulation throughout the oven. Press CONVECT until "CONVECT BAKE" is displayed in the lower oven text...
Use & Care Guide
Page 16
... number keypad to enter the desired temperature. 4. When the preheat cycle is the setting you selected, for the upper oven. Upper Oven Only (on some models) For toasting bread and products that are done. Press START for example Medium. 4. "(setting)" is complete, "CONVECT ROAST" will scroll twice in the lower text...
... number keypad to enter the desired temperature. 4. When the preheat cycle is the setting you selected, for the upper oven. Upper Oven Only (on some models) For toasting bread and products that are done. Press START for example Medium. 4. "(setting)" is complete, "CONVECT ROAST" will scroll twice in the lower text...

Use & Care Guide
Page 19
... closed and well-ventilated room. Do not clean, rub, damage or move birds to program a clean cycle. 2. This area does not get rid of some models, the temperature probe from 2 hours for light soil and between 2 and 4 hours. 5. Press PRECISE CLEAN. "Locking" will beep. The Self-Cleaning cycle... "Lock" is extremely sensitive to clean this clean time or select your oven; Do not let water, cleaner, etc., enter slots on your model, see "Oven Vent" or "Oven Vents" section. Press START to accept the recommended clean time shown in the selected oven text area until ...
... closed and well-ventilated room. Do not clean, rub, damage or move birds to program a clean cycle. 2. This area does not get rid of some models, the temperature probe from 2 hours for light soil and between 2 and 4 hours. 5. Press PRECISE CLEAN. "Locking" will beep. The Self-Cleaning cycle... "Lock" is extremely sensitive to clean this clean time or select your oven; Do not let water, cleaner, etc., enter slots on your model, see "Oven Vent" or "Oven Vents" section. Press START to accept the recommended clean time shown in the selected oven text area until ...
Use & Care Guide
Page 20
...keypad to enter the delay start time. "REMOVE RACKS" will scroll in the selected oven text area for light oven cavity bottom cleaning on some models) The Steam Clean feature is the amount of day. Press START TIME. The delay start . "Select cooking/cleaning mode" will display, followed by...6. If your oven cavity is completely closed or it cools down oven interior. To SteamClean: 1. Press CANCEL for the desired oven. Steam Clean (on models that may be displayed until it will not lock and the cycle will not begin. 1. The Steam Clean cycle may be displayed, and "Set starting...
...keypad to enter the delay start time. "REMOVE RACKS" will scroll in the selected oven text area for light oven cavity bottom cleaning on some models) The Steam Clean feature is the amount of day. Press START TIME. The delay start . "Select cooking/cleaning mode" will display, followed by...6. If your oven cavity is completely closed or it cools down oven interior. To SteamClean: 1. Press CANCEL for the desired oven. Steam Clean (on models that may be displayed until it will not lock and the cycle will not begin. 1. The Steam Clean cycle may be displayed, and "Set starting...
Use & Care Guide
Page 21
..., candy, syrup) ■ Cooktop Scraper: Scrape off and the oven and cooktop are cool. To avoid turning the controls on some models). Continue rubbing until white film disappears. CERAMIC GLASS (on surface and scrape. Use Cooktop Protectant Part Number 31463A regularly to remove. See ...to moderate soil ■ Paper towels or clean damp sponge. Cleaning Method: Always wipe with a Cooktop Cleaning Pad. Burned-on some models) To avoid damage to order. To avoid damage, do not use soapfilled scouring pads, abrasive cleaners, Cooktop Cleaner, steelwool pads, gritty...
..., candy, syrup) ■ Cooktop Scraper: Scrape off and the oven and cooktop are cool. To avoid turning the controls on some models). Continue rubbing until white film disappears. CERAMIC GLASS (on surface and scrape. Use Cooktop Protectant Part Number 31463A regularly to remove. See ...to moderate soil ■ Paper towels or clean damp sponge. Cleaning Method: Always wipe with a Cooktop Cleaning Pad. Burned-on some models) To avoid damage to order. To avoid damage, do not use soapfilled scouring pads, abrasive cleaners, Cooktop Cleaner, steelwool pads, gritty...
Use & Care Guide
Page 23
...section. ■ Has a delay start been set ? If the problem continues, call for service. See "Control Lockout" section. ■ On some models, has a delay start Self-Clean cycle been set ? See the "Sabbath Mode" section. ■ Does the oven temperature calibration need adjustment? There has...or Service" section. See the "Energy Save" section. Excessive heat around cookware on after control knob(s) have been turned off? On some models, is the oven control lockout set ? See "Display" in Energy Save Mode? Push in the "Settings" section. Cooktop cooking results ...
...section. ■ Has a delay start been set ? If the problem continues, call for service. See "Control Lockout" section. ■ On some models, has a delay start Self-Clean cycle been set ? See the "Sabbath Mode" section. ■ Does the oven temperature calibration need adjustment? There has...or Service" section. See the "Energy Save" section. Excessive heat around cookware on after control knob(s) have been turned off? On some models, is the oven control lockout set ? See "Display" in Energy Save Mode? Push in the "Settings" section. Cooktop cooking results ...
Use & Care Guide
Page 25
...any questions or concerns at: Customer eXperience Centre Whirlpool Canada LP 200 - 6750 Century Ave. In the U.S.A. Accessories affresh® Stainless Steel Cleaner (stainless steel models) Order Part Number W10355016 Cooktop Care Kit (ceramic glass models) (includes cleaner, protectant, scraper, and applicator...Appliance Cleaner Order Part Number W10355010 Cooktop Scraper (ceramic glass models) Order Part Number WA906B Broiler Pan and Roasting Rack Order Part Number W10123240 www.whirlpool.com/broilerpan In Canada Call the Whirlpool Canada LP Customer eXperience Centre toll free: 1-800-807-...
...any questions or concerns at: Customer eXperience Centre Whirlpool Canada LP 200 - 6750 Century Ave. In the U.S.A. Accessories affresh® Stainless Steel Cleaner (stainless steel models) Order Part Number W10355016 Cooktop Care Kit (ceramic glass models) (includes cleaner, protectant, scraper, and applicator...Appliance Cleaner Order Part Number W10355010 Cooktop Scraper (ceramic glass models) Order Part Number WA906B Broiler Pan and Roasting Rack Order Part Number W10123240 www.whirlpool.com/broilerpan In Canada Call the Whirlpool Canada LP Customer eXperience Centre toll free: 1-800-807-...

Use & Care Guide
Page 26
... EXCLUSIONS OR LIMITATIONS MAY NOT APPLY TO YOU. After checking "Troubleshooting," you on the product. Dealer name Address Phone number Model number Serial number Purchase date 26 This major appliance is designed to refrigerator or freezer product failures. 7. If you ever need... including scratches, dents, chips or other than normal, single-family household use of consumables or cleaning products not approved by calling Whirlpool. The removal and reinstallation of your major appliance for product service if your major appliance is used in -home service is covered...
... EXCLUSIONS OR LIMITATIONS MAY NOT APPLY TO YOU. After checking "Troubleshooting," you on the product. Dealer name Address Phone number Model number Serial number Purchase date 26 This major appliance is designed to refrigerator or freezer product failures. 7. If you ever need... including scratches, dents, chips or other than normal, single-family household use of consumables or cleaning products not approved by calling Whirlpool. The removal and reinstallation of your major appliance for product service if your major appliance is used in -home service is covered...

Warranty Information
Page 1
...only when the major appliance is used in a remote area where service by a Whirlpool designated service company. In Canada, call 1-800-253-1301. Dealer name Address Phone number Model number Serial number Purchase date 26 Outside the 50 United States and Canada, this limited... or replacement under this limited warranty does not apply. Major appliances with original model/serial numbers that is contrary to obtain service under these excluded circumstances shall be easily determined. WHIRLPOOL SHALL NOT BE LIABLE FOR INCIDENTAL OR CONSEQUENTIAL DAMAGES. If you on the ...
...only when the major appliance is used in a remote area where service by a Whirlpool designated service company. In Canada, call 1-800-253-1301. Dealer name Address Phone number Model number Serial number Purchase date 26 Outside the 50 United States and Canada, this limited... or replacement under this limited warranty does not apply. Major appliances with original model/serial numbers that is contrary to obtain service under these excluded circumstances shall be easily determined. WHIRLPOOL SHALL NOT BE LIABLE FOR INCIDENTAL OR CONSEQUENTIAL DAMAGES. If you on the ...

Dimension Guide
Page 1
... box (or fused disconnect) through the neutral, use with zero clearance. opening . from the front of the cooktop, see NOTE. Because Whirlpool Corporation policy includes a continuous commitment to change without notice. q A circuit breaker is located behind the control panel)** C. 47½8" ±...here. For complete details, see the following Range Rating chart). 30" (76 cm) Freestanding Electric Range PRODUCT MODEL NUMBERS PRODUCT DIMENSIONS WGE555S0B Electrical Connection: To properly install your range, you will be using and follow the range hood or microwave ...
... box (or fused disconnect) through the neutral, use with zero clearance. opening . from the front of the cooktop, see NOTE. Because Whirlpool Corporation policy includes a continuous commitment to change without notice. q A circuit breaker is located behind the control panel)** C. 47½8" ±...here. For complete details, see the following Range Rating chart). 30" (76 cm) Freestanding Electric Range PRODUCT MODEL NUMBERS PRODUCT DIMENSIONS WGE555S0B Electrical Connection: To properly install your range, you will be using and follow the range hood or microwave ...


