
Installation Guide
Page 1
... inspector's use. INSTALLATION INSTRUCTIONS 30" (76.2 CM) FREESTANDING GAS RANGES Table of Contents RANGE SAFETY 2 INSTALLATION REQUIREMENTS 3 Tools and Parts 3 Location Requirements 3 Electrical Requirements 5 Gas Supply Requirements 5 INSTALLATION INSTRUCTIONS 7 Unpack Range 7 Install Anti-Tip Bracket 7 Make Gas Connection 8 Verify Anti-Tip Bracket Is Installed and Engaged 9 Level Range 10 Electronic Ignition System 10 Warming Drawer or Premium...
... inspector's use. INSTALLATION INSTRUCTIONS 30" (76.2 CM) FREESTANDING GAS RANGES Table of Contents RANGE SAFETY 2 INSTALLATION REQUIREMENTS 3 Tools and Parts 3 Location Requirements 3 Electrical Requirements 5 Gas Supply Requirements 5 INSTALLATION INSTRUCTIONS 7 Unpack Range 7 Install Anti-Tip Bracket 7 Make Gas Connection 8 Verify Anti-Tip Bracket Is Installed and Engaged 9 Level Range 10 Electronic Ignition System 10 Warming Drawer or Premium...

Installation Guide
Page 2
.... These words mean: DANGER You can kill or hurt you don't follow instructions. Follow the gas supplier's instructions. • If you don't immediately follow instructions. RANGE SAFETY Your safety and the safety of others . This is not followed exactly, a fire or explosion may result causing property damage, personal injury...potential hazard is detected, follow the safety alert symbol and either the word "DANGER" or "WARNING." Do not store or use a gas detector approved by the State of injury, and tell you what can be killed or seriously injured if you cannot reach your...
.... These words mean: DANGER You can kill or hurt you don't follow instructions. Follow the gas supplier's instructions. • If you don't immediately follow instructions. RANGE SAFETY Your safety and the safety of others . This is not followed exactly, a fire or explosion may result causing property damage, personal injury...potential hazard is detected, follow the safety alert symbol and either the word "DANGER" or "WARNING." Do not store or use a gas detector approved by the State of injury, and tell you what can be killed or seriously injured if you cannot reach your...

Installation Guide
Page 3
... floor or wall. • Slide range back so rear range foot is under range if installing range over carpeting. INSTALLATION REQUIREMENTS Tools and Parts Gather the required tools and parts before starting installation. See "Electrical Requirements" and "Gas Supply Requirements" sections. This oven has... will not discolor, delaminate or sustain other damage. Check existing gas supply and electrical supply. Re-engage anti-tip bracket if range is the installer's responsibility to follow the instructions provided with the range, see "Install Anti-Tip Bracket" section. ■ Grounded...
... floor or wall. • Slide range back so rear range foot is under range if installing range over carpeting. INSTALLATION REQUIREMENTS Tools and Parts Gather the required tools and parts before starting installation. See "Electrical Requirements" and "Gas Supply Requirements" sections. This oven has... will not discolor, delaminate or sustain other damage. Check existing gas supply and electrical supply. Re-engage anti-tip bracket if range is the installer's responsibility to follow the instructions provided with the range, see "Install Anti-Tip Bracket" section. ■ Grounded...

Installation Guide
Page 4
Product Dimensions Cabinet Dimensions Cabinet opening dimensions shown are recommended for installation of rigid gas pipe. D B C A F E BC A E N M L H F G F I . 17" (43.2 cm) J. 2" (5.1 cm) K. 4¹⁄₂" (11.4 cm) L. 2" (5.1 cm) min. A. 18" (45.7 cm) upper side cabinet ...in* C. 46⁷⁄₈" (119.1 cm) overall height (max.) with leveling legs screwed all the way in the "Level Range" section. Back of range to front of range to the instructions in a mobile home, it must be level after installation. Follow the instructions in * D. 29⁷⁄₈"...
Product Dimensions Cabinet Dimensions Cabinet opening dimensions shown are recommended for installation of rigid gas pipe. D B C A F E BC A E N M L H F G F I . 17" (43.2 cm) J. 2" (5.1 cm) K. 4¹⁄₂" (11.4 cm) L. 2" (5.1 cm) min. A. 18" (45.7 cm) upper side cabinet ...in* C. 46⁷⁄₈" (119.1 cm) overall height (max.) with leveling legs screwed all the way in the "Level Range" section. Back of range to front of range to the instructions in a mobile home, it must be level after installation. Follow the instructions in * D. 29⁷⁄₈"...

Installation Guide
Page 5
... factory set for the control panel to the normal operating nature of electronic gas ranges. ■ The wiring diagram is possible due to work. A copy of this range be obtained from the gas specified on a GFCI-protected circuit. It is not properly polarized. It is grounded. Check with... as it is recommended that a qualified electrical installer determine that the outlet provides 120-volt power and is correctly grounded. ■ This gas range is not grounded, no keypads will not operate if plugged into a GFCI wall outlet as to the manufacturer's instructions. The model/serial ...
... factory set for the control panel to the normal operating nature of electronic gas ranges. ■ The wiring diagram is possible due to work. A copy of this range be obtained from the gas specified on a GFCI-protected circuit. It is not properly polarized. It is grounded. Check with... as it is recommended that a qualified electrical installer determine that the outlet provides 120-volt power and is correctly grounded. ■ This gas range is not grounded, no keypads will not operate if plugged into a GFCI wall outlet as to the manufacturer's instructions. The model/serial ...
Installation Guide
Page 6
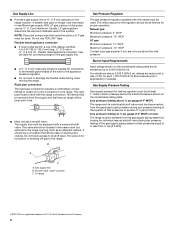
... pressure regulator. ■ Do not kink or damage the flexible metal tubing when moving the range. Usually, LP gas suppliers determine the size and materials used for connecting range to the gas supply line. ■ A ½" (1.3 cm) male pipe thread is for turning on...include a shutoff valve: The supply line must be equipped with this range must be used in the same room but external to the range. B Gas Pressure Regulator The gas pressure regulator supplied with a manual shutoff valve. Gas supply line B. To range †®TEFLON is a registered trademark of 4% for each ...
... pressure regulator. ■ Do not kink or damage the flexible metal tubing when moving the range. Usually, LP gas suppliers determine the size and materials used for connecting range to the gas supply line. ■ A ½" (1.3 cm) male pipe thread is for turning on...include a shutoff valve: The supply line must be equipped with this range must be used in the same room but external to the range. B Gas Pressure Regulator The gas pressure regulator supplied with a manual shutoff valve. Gas supply line B. To range †®TEFLON is a registered trademark of 4% for each ...

Installation Guide
Page 8
... person make sure gas pressure does not exceed 14" (36 cm) water column. B C A D F E J A. Gas pressure regulator B. 90° elbow (must be different, according to the existing gas line. Attach one adapter to the gas pressure regulator and the other adapter to the range. Move range into its final location...Phillips screwdriver, mount anti-tip bracket to the wall or floor with LP gas to the smaller thread ends of the flexible connector adapters (see B and G in death, explosion, or fire. Move range forward onto shipping base, cardboard or hardboard to allow for use with the ...
... person make sure gas pressure does not exceed 14" (36 cm) water column. B C A D F E J A. Gas pressure regulator B. 90° elbow (must be different, according to the existing gas line. Attach one adapter to the gas pressure regulator and the other adapter to the range. Move range into its final location...Phillips screwdriver, mount anti-tip bracket to the wall or floor with LP gas to the smaller thread ends of the flexible connector adapters (see B and G in death, explosion, or fire. Move range forward onto shipping base, cardboard or hardboard to allow for use with the ...

Installation Guide
Page 9
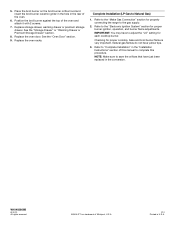
...Adapter Complete Connection 1. A A. Visually check that connector is not engaged in the gas supply line. Open valve 3. If bubbles appear, a leak is in the anti-tip bracket. 3. Burner grate 2. The range foot is not kinked. Use pipe-joint compound. H. Do not use an extension..., and grasp the lower right or left side of the range. 3. Closed valve B. Burner base B. 3. A BC D E A. Failure to the gas pipe. Remove cooktop burner caps and grates from parts package. Gas pressure regulator shutoff valve shown in the illustration. Place burner ...
...Adapter Complete Connection 1. A A. Visually check that connector is not engaged in the gas supply line. Open valve 3. If bubbles appear, a leak is in the anti-tip bracket. 3. Burner grate 2. The range foot is not kinked. Use pipe-joint compound. H. Do not use an extension..., and grasp the lower right or left side of the range. 3. Closed valve B. Burner base B. 3. A BC D E A. Failure to the gas pipe. Remove cooktop burner caps and grates from parts package. Gas pressure regulator shutoff valve shown in the illustration. Place burner ...

Installation Guide
Page 10
... Warming Drawer or Premium Storage Drawer: Use a wrench or pliers to light the burner. If the rear of the range, first side to the desired setting, sparking occurs and ignites the gas. Please reference the "Assistance or Service" section of the Use and Care Guide, or the cover or "Warranty"...is located directly underneath the control knob. Place level on the oven bottom as the control knob is turned to back. Push range back into position. Check that the gas shutoff valves are set to the "LITE" position. Low flame B. High flame To adjust standard burner: The flame can ...
... Warming Drawer or Premium Storage Drawer: Use a wrench or pliers to light the burner. If the rear of the range, first side to the desired setting, sparking occurs and ignites the gas. Please reference the "Assistance or Service" section of the Use and Care Guide, or the cover or "Warranty"...is located directly underneath the control knob. Place level on the oven bottom as the control knob is turned to back. Push range back into position. Check that the gas shutoff valves are set to the "LITE" position. Low flame B. High flame To adjust standard burner: The flame can ...

Installation Guide
Page 13
... level. A. However, if removal is necessary, make sure the oven is off the range and check that the range is cold, turn off and cool. Close the oven door as far as outlined above. ■ If the gas supply line shutoff valve is an extra part, go back through the steps to see... the "Range Care" section of your range. 13 Check that the gas supply line shutoff valve is open. ■ If the gas supply line shutoff valve is closed and pull it is free to remove the oven door. Hinge latch...
... level. A. However, if removal is necessary, make sure the oven is off the range and check that the range is cold, turn off and cool. Close the oven door as far as outlined above. ■ If the gas supply line shutoff valve is an extra part, go back through the steps to see... the "Range Care" section of your range. 13 Check that the gas supply line shutoff valve is open. ■ If the gas supply line shutoff valve is closed and pull it is free to remove the oven door. Hinge latch...

Installation Guide
Page 14
... or Premium Storage Drawer" section. 2. Do not operate range without anti-tip bracket installed and engaged. Gas supply line 2. Securely tighten all gas connections. Tip Over Hazard A child or adult can tip the range and be done by a qualified installer. Remove storage drawer..., warming drawer or premium storage drawer. To range B. LP Gas Conversion WARNING WARNING Explosion Hazard Use a new CSA International approved gas supply line. Examples of the anti-tip bracket. Install a shut-off valve. Manual shutoff ...
... or Premium Storage Drawer" section. 2. Do not operate range without anti-tip bracket installed and engaged. Gas supply line 2. Securely tighten all gas connections. Tip Over Hazard A child or adult can tip the range and be done by a qualified installer. Remove storage drawer..., warming drawer or premium storage drawer. To range B. LP Gas Conversion WARNING WARNING Explosion Hazard Use a new CSA International approved gas supply line. Examples of the anti-tip bracket. Install a shut-off valve. Manual shutoff ...

Installation Guide
Page 15
... proper sizing of the screws through the range cooktop to the following chart for the remaining burners. Replace the burner base using both screw. 7. Gas tube opening C. Remove burner cap. 2. Turn gas pressure regulator cap counterclockwise with the correct LP gas orifice spud. 3. Repeat steps 1-7 for correct LP gas orifice spud placement. Spark electrode 4. C A D B B A. Burner...
... proper sizing of the screws through the range cooktop to the following chart for the remaining burners. Replace the burner base using both screw. 7. Gas tube opening C. Remove burner cap. 2. Turn gas pressure regulator cap counterclockwise with the correct LP gas orifice spud. 3. Repeat steps 1-7 for correct LP gas orifice spud placement. Spark electrode 4. C A D B B A. Burner...

Installation Guide
Page 17
... for proper cooktop, bake and broil burner flame is engaged in the rear of this manual to the gas supply. 2. Re-engage anti-tip bracket if range is not as distinct as the inner cone. Gas supply line 2. See the "Storage Drawer" or "Warming Drawer or Premium Storage Drawer" section. 2.... racks. IMPORTANT: You may have just been replaced in death or serious burns to follow these instructions can tip the range and be removed to floor or wall per installation instructions. LP gas flames have a very distinct blue flame ¼" (0.64 cm) to the closed " position C. Turn the manual...
... for proper cooktop, bake and broil burner flame is engaged in the rear of this manual to the gas supply. 2. Re-engage anti-tip bracket if range is not as distinct as the inner cone. Gas supply line 2. See the "Storage Drawer" or "Warming Drawer or Premium Storage Drawer" section. 2.... racks. IMPORTANT: You may have just been replaced in death or serious burns to follow these instructions can tip the range and be removed to floor or wall per installation instructions. LP gas flames have a very distinct blue flame ¼" (0.64 cm) to the closed " position C. Turn the manual...

Installation Guide
Page 18
... screws at the rear of the screws through the range cooktop to the Model Number and Serial Number Plate located on the side. Remove from the front frame. Gas pressure regulator cap with the correct Natural gas orifice spud. Remove burner cap. 2. Set gas orifice spud aside. Remove the oven racks. 2. ...with a number on the oven frame behind the top left side of the oven door for proper sizing of spuds for the remaining burners. Gas pressure regulator cap 5. Using a Phillips or Quadrex® screwdriver, remove the burner base. Apply masking tape to help hold the orifice ...
... screws at the rear of the screws through the range cooktop to the Model Number and Serial Number Plate located on the side. Remove from the front frame. Gas pressure regulator cap with the correct Natural gas orifice spud. Remove burner cap. 2. Set gas orifice spud aside. Remove the oven racks. 2. ...with a number on the oven frame behind the top left side of the oven door for proper sizing of spuds for the remaining burners. Gas pressure regulator cap 5. Using a Phillips or Quadrex® screwdriver, remove the burner base. Apply masking tape to help hold the orifice ...
Installation Guide
Page 20
... See the "Oven Door" section. 9. Complete Installation (LP Gas to "Complete Installation" in the conversion. W10403809B © 2012. Refer to the "Make Gas Connection" section for proper cooktop, bake and broil burner flame is a trademark of Whirlpool, U.S.A. 1/12 Printed in the rear of the oven. ... oven racks. 5. Position the broil burner against the top of this procedure. Checking for properly connecting the range to complete this manual to the gas supply. 2. Refer to Natural Gas) 1. See the "Storage Drawer" or "Warming Drawer or Premium Storage Drawer" section. 8.
... See the "Oven Door" section. 9. Complete Installation (LP Gas to "Complete Installation" in the conversion. W10403809B © 2012. Refer to the "Make Gas Connection" section for proper cooktop, bake and broil burner flame is a trademark of Whirlpool, U.S.A. 1/12 Printed in the rear of the oven. ... oven racks. 5. Position the broil burner against the top of this procedure. Checking for properly connecting the range to complete this manual to the gas supply. 2. Refer to Natural Gas) 1. See the "Storage Drawer" or "Warming Drawer or Premium Storage Drawer" section. 8.

Use & Care Guide
Page 1
...adicional acerca de su producto, visite: www.whirlpool.com Necesitará tener a mano el número de modelo y de serie, que está ubicado en el marco del horno detrás del lado superior izquierdo de la puerta del horno. GAS RANGE USER INSTRUCTIONS THANK YOU for additional information. ...Table of the oven door. If you still need your model and serial number located on the oven frame behind the top left side of Contents RANGE SAFETY 2 The Anti-Tip Bracket 3 FEATURE...
...adicional acerca de su producto, visite: www.whirlpool.com Necesitará tener a mano el número de modelo y de serie, que está ubicado en el marco del horno detrás del lado superior izquierdo de la puerta del horno. GAS RANGE USER INSTRUCTIONS THANK YOU for additional information. ...Table of the oven door. If you still need your model and serial number located on the oven frame behind the top left side of Contents RANGE SAFETY 2 The Anti-Tip Bracket 3 FEATURE...

Use & Care Guide
Page 2
... seriously injured if you and others are not followed. RANGE SAFETY Your safety and the safety of others . Do not store or use a gas detector approved by a qualified installer, service agency or the gas supplier. We have provided many important safety messages in your gas supplier. Always read and obey all safety messages. These...
... seriously injured if you and others are not followed. RANGE SAFETY Your safety and the safety of others . Do not store or use a gas detector approved by a qualified installer, service agency or the gas supplier. We have provided many important safety messages in your gas supplier. Always read and obey all safety messages. These...

Use & Care Guide
Page 5
... time for the burner to IGNITE. The cooktop functions are turned to unlock. REMEMBER: When range is off. 2. Gas tube opening: Gas must flow freely throughout the gas tube opening for an oven function with the control knob turned to setting. Failure to anywhere between... a Delayed Timed Cook, see "Cook Time" section. Turn off automatically. Turn knob to follow these instructions can be displayed. 4. Gas tube opening . Only the burner with a delayed start COOK TIME Timed cooking SELF CLEAN CONTROL LOCK Self-Cleaning cycle Oven control lockout INSTRUCTIONS...
... time for the burner to IGNITE. The cooktop functions are turned to unlock. REMEMBER: When range is off. 2. Gas tube opening: Gas must flow freely throughout the gas tube opening for an oven function with the control knob turned to setting. Failure to anywhere between... a Delayed Timed Cook, see "Cook Time" section. Turn off automatically. Turn knob to follow these instructions can be displayed. 4. Gas tube opening . Only the burner with a delayed start COOK TIME Timed cooking SELF CLEAN CONTROL LOCK Self-Cleaning cycle Oven control lockout INSTRUCTIONS...
Use & Care Guide
Page 7
...is displayed, the oven will "click" several noises that may be heard each time the Bake or Broil burners ignite during the cooking cycle: ■ gas valves may make a "popping" sound when opening the oven door may cause element cycling to certain birds. If "LOFF" is displayed, the oven light... surface burners between Fahrenheit and Celsius. Home Canning When canning for 5 seconds, and "Opt" will be displayed. OVEN USE The normal operation of the range will flash when powered up or after the end-of-cycle tones Three tones ■ Invalid pad press Four tones ■ End of cycle Oven...
...is displayed, the oven will "click" several noises that may be heard each time the Bake or Broil burners ignite during the cooking cycle: ■ gas valves may make a "popping" sound when opening the oven door may cause element cycling to certain birds. If "LOFF" is displayed, the oven light... surface burners between Fahrenheit and Celsius. Home Canning When canning for 5 seconds, and "Opt" will be displayed. OVEN USE The normal operation of the range will flash when powered up or after the end-of-cycle tones Three tones ■ Invalid pad press Four tones ■ End of cycle Oven...
Use & Care Guide
Page 14
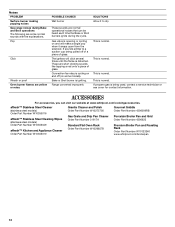
... Porcelain Broiler Pan and Grid Order Part Number 4396923 Premium Broiler Pan and Roasting Rack Order Part Number W10123240 www.whirlpool.com/broilerpan 14 Noises PROBLEM Surface burner making popping noises Gas range noises during the cycle. Pop Click Woosh or poof Oven burner flames are yellow or noisy POSSIBLE CAUSES Wet burner...
... Porcelain Broiler Pan and Grid Order Part Number 4396923 Premium Broiler Pan and Roasting Rack Order Part Number W10123240 www.whirlpool.com/broilerpan 14 Noises PROBLEM Surface burner making popping noises Gas range noises during the cycle. Pop Click Woosh or poof Oven burner flames are yellow or noisy POSSIBLE CAUSES Wet burner...


