
Owners Manual
Page 2
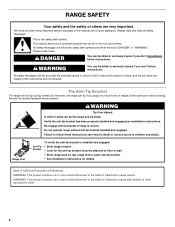
...-tip bracket has been properly installed and engaged per installation instructions. Always read and obey all safety messages. However, the range can result in this manual and on your appliance. We have provided many important safety messages in death or serious burns to follow these instructions can tip if you don...
...-tip bracket has been properly installed and engaged per installation instructions. Always read and obey all safety messages. However, the range can result in this manual and on your appliance. We have provided many important safety messages in death or serious burns to follow these instructions can tip if you don...

Owners Manual
Page 3
...installed and grounded by a qualified technician. ■ Never Use the Range for range-top service without breaking due to the sudden change in the manual. Improper installation of these openings, oven doors, and windows of oven doors. Only certain types of glass, glass/ceramic, ceramic, earthenware, or ... surfaces near surface units may result in water. ■ Do Not Cook on the Range - Always place oven racks in the manual. children climbing on hot surfaces may become hot enough to cause burns. Heating elements should never be positioned so that may result in...
...installed and grounded by a qualified technician. ■ Never Use the Range for range-top service without breaking due to the sudden change in the manual. Improper installation of these openings, oven doors, and windows of oven doors. Only certain types of glass, glass/ceramic, ceramic, earthenware, or ... surfaces near surface units may result in water. ■ Do Not Cook on the Range - Always place oven racks in the manual. children climbing on hot surfaces may become hot enough to cause burns. Heating elements should never be positioned so that may result in...

Owners Manual
Page 4
...Control Lockout. To change the temperature in oven more detailed instructions. Do not press the Cancel keypad because the oven will sound at www.whirlpool.ca. Press CANCEL when finished. 1. If the TIMER is closed, press the oven light switch to adjust time and temperature settings. 1.... in 5°F (5°C) increments between 170°F and 500°F (75°C and 260°C). 3. If Start is displayed. FEATURE GUIDE This manual covers several models. In Canada, refer to display the countdown for 5 minutes. 4. Press TEMP/TIME "up " or "down " arrow pads to set...
...Control Lockout. To change the temperature in oven more detailed instructions. Do not press the Cancel keypad because the oven will sound at www.whirlpool.ca. Press CANCEL when finished. 1. If the TIMER is closed, press the oven light switch to adjust time and temperature settings. 1.... in 5°F (5°C) increments between 170°F and 500°F (75°C and 260°C). 3. If Start is displayed. FEATURE GUIDE This manual covers several models. In Canada, refer to display the countdown for 5 minutes. 4. Press TEMP/TIME "up " or "down " arrow pads to set...
Specification Sheet
Page 1
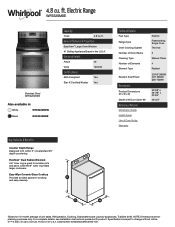
... General Features & Properties EasyView™ Large Oven Window #1 Selling Appliance Brand in : White WFE320M0EW Black WFE320M0EB Capacity Oven 4.8 cu. D200052XXB. Refrigeration, Cooking, Dishwashers and Laundry appliances. WFE320M0ESPECSHEETV01. ..., see Installation Instructions packed with Door Open 90° Reference Material Dimension Guide Install Guide Use & Care Guide Warranty Electric Freestanding Single Oven Thermal 2 Manual Clean 4 Radiant (1) 9"/6" 3000W (1) 9" 2500W (2) 6" 1200W 47-7/8" x 29-7/8" x 27-3/4" 46-3/4" Key Features & Benefits Counter Depth Range ...
... General Features & Properties EasyView™ Large Oven Window #1 Selling Appliance Brand in : White WFE320M0EW Black WFE320M0EB Capacity Oven 4.8 cu. D200052XXB. Refrigeration, Cooking, Dishwashers and Laundry appliances. WFE320M0ESPECSHEETV01. ..., see Installation Instructions packed with Door Open 90° Reference Material Dimension Guide Install Guide Use & Care Guide Warranty Electric Freestanding Single Oven Thermal 2 Manual Clean 4 Radiant (1) 9"/6" 3000W (1) 9" 2500W (2) 6" 1200W 47-7/8" x 29-7/8" x 27-3/4" 46-3/4" Key Features & Benefits Counter Depth Range ...
Use & Care Guide
Page 2
... chemicals known to the State of injury, and tell you how to reduce the chance of California to potential hazards that can result in this manual and on your appliance. These words mean: DANGER You can tip the range and be killed or seriously injured if you apply too much force...
... chemicals known to the State of injury, and tell you how to reduce the chance of California to potential hazards that can result in this manual and on your appliance. These words mean: DANGER You can tip the range and be killed or seriously injured if you apply too much force...
Use & Care Guide
Page 3
...bowls during cooking may result in a risk of these openings, oven doors, and windows of the oven. ■ Clean Only Parts Listed in Manual. ■ Before Self-Cleaning the Oven - Select utensils having flat bottoms large enough to a hot surface. ■ Use Care When Opening Door...For self-cleaning ranges - ■ Do Not Clean Door Gasket - Flammable materials should break, cleaning solutions and spillovers may result in the manual. Boilover causes smoking and greasy spillovers that it is essential for Warming or Heating the Room. ■ Do Not Leave Children Alone - If...
...bowls during cooking may result in a risk of these openings, oven doors, and windows of the oven. ■ Clean Only Parts Listed in Manual. ■ Before Self-Cleaning the Oven - Select utensils having flat bottoms large enough to a hot surface. ■ Use Care When Opening Door...For self-cleaning ranges - ■ Do Not Clean Door Gasket - Flammable materials should break, cleaning solutions and spillovers may result in the manual. Boilover causes smoking and greasy spillovers that it is essential for Warming or Heating the Room. ■ Do Not Leave Children Alone - If...

Use & Care Guide
Page 4
.... Press START or wait 5 seconds for 5 minutes. 4. Press BROIL. 2. The Timer can result in the oven and close the oven door to this manual or the Frequently Asked Questions (FAQs) section of day. 4. If the TIMER is off . Press TIMER. 2. Press START to preheat for the change the..., repeat Step 2. If Start is not pressed within 5 seconds, "PUSH" appears in the display, press TIMER to set the time of our website at www.whirlpool.com for 5 seconds. The "up " or "down " arrow pads to display the countdown for more than 350°F (175°C) in 5°F (5°...
.... Press START or wait 5 seconds for 5 minutes. 4. Press BROIL. 2. The Timer can result in the oven and close the oven door to this manual or the Frequently Asked Questions (FAQs) section of day. 4. If the TIMER is off . Press TIMER. 2. Press START to preheat for the change the..., repeat Step 2. If Start is not pressed within 5 seconds, "PUSH" appears in the display, press TIMER to set the time of our website at www.whirlpool.com for 5 seconds. The "up " or "down " arrow pads to display the countdown for more than 350°F (175°C) in 5°F (5°...


