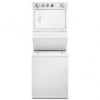
User Instructions
Page 3
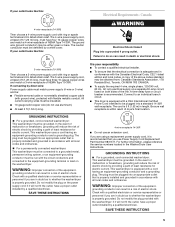
...by the customer, whether it will release any servicing unless specifically recommended in this time. ■ Do not repair or replace any part of the washer/dryer or attempt any accumulated hydrogen gas. Refer to the Installation Instructions for by qualified service personnel. ■ See "Electrical Requirements"...under the warranty. IMPORTANT SAFETY INSTRUCTIONS WARNING: To reduce the risk of fire, electric shock, or injury to persons when using the washer/dryer. ■ Do not place items exposed to cooking oils in your dryer is important for several minutes. Do not use an...
...by the customer, whether it will release any servicing unless specifically recommended in this time. ■ Do not repair or replace any part of the washer/dryer or attempt any accumulated hydrogen gas. Refer to the Installation Instructions for by qualified service personnel. ■ See "Electrical Requirements"...under the warranty. IMPORTANT SAFETY INSTRUCTIONS WARNING: To reduce the risk of fire, electric shock, or injury to persons when using the washer/dryer. ■ Do not place items exposed to cooking oils in your dryer is important for several minutes. Do not use an...
User Instructions
Page 5
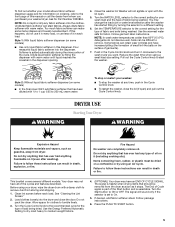
... have all of the cycles and features described. Turn the Start button to start the washer. Ask for fabric. Dilute liquid fabric softener by using an Air Cycle. Use the warmest water safe for Part Number 3350834. NOTE: In wash water temperatures colder than 60ºF (15.6ºC), ...gasoline, away from storing and shipping. 1. Pour measured liquid fabric softener into the dryer and close the lid (if open . 5. Close the washer lid. Washer will sound only if the selector is helpful when drying items that has been diluted with a damp cloth to On. 5. Turn the WATER LEVEL...
... have all of the cycles and features described. Turn the Start button to start the washer. Ask for fabric. Dilute liquid fabric softener by using an Air Cycle. Use the warmest water safe for Part Number 3350834. NOTE: In wash water temperatures colder than 60ºF (15.6ºC), ...gasoline, away from storing and shipping. 1. Pour measured liquid fabric softener into the dryer and close the lid (if open . 5. Close the washer lid. Washer will sound only if the selector is helpful when drying items that has been diluted with a damp cloth to On. 5. Turn the WATER LEVEL...
User Instructions
Page 8
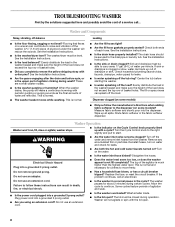
... not remove ground prong. Some cycles feature periods of the agitator is the upper part of agitator clicking during certain cycles. See the Installation Instructions. ■ Are the gears engaging after the drain and before starting the washer. ■ Is water splashing off the tub ring? Center the tub before spin, or...
... not remove ground prong. Some cycles feature periods of the agitator is the upper part of agitator clicking during certain cycles. See the Installation Instructions. ■ Are the gears engaging after the drain and before starting the washer. ■ Is water splashing off the tub ring? Center the tub before spin, or...
User Instructions
Page 12
... right because they are excluded from unauthorized modifications made with electrical or plumbing codes, or use FSP® factory specified parts. WHIRLPOOL SHALL NOT BE LIABLE FOR INCIDENTAL OR CONSEQUENTIAL DAMAGES. Replacement parts or repair labor costs when the major appliance is operated and maintained according to instructions attached to determine if another...
... right because they are excluded from unauthorized modifications made with electrical or plumbing codes, or use FSP® factory specified parts. WHIRLPOOL SHALL NOT BE LIABLE FOR INCIDENTAL OR CONSEQUENTIAL DAMAGES. Replacement parts or repair labor costs when the major appliance is operated and maintained according to instructions attached to determine if another...

User Instructions
Page 1
... the word "DANGER" or "WARNING." UU.......... 21 Requisitos de ventilación 26 Quite el fleje de embalaje 27 Instalación de las patas niveladoras........... 28 Conecte la manguera de desagüe 28 Conecte las mangueras de entrada... - This symbol alerts you to reduce the chance of Contents / Índice / Table des matières WASHER/DRYER SAFETY 1 INSTALLATION INSTRUCTIONS 2 Tools and Parts 2 Alternate Parts 2 Location Requirements 3 Drain System 4 Electrical Requirements - Canada 5 Electrical Connection - Canada........... 36 Exigences concernant l'é...
... the word "DANGER" or "WARNING." UU.......... 21 Requisitos de ventilación 26 Quite el fleje de embalaje 27 Instalación de las patas niveladoras........... 28 Conecte la manguera de desagüe 28 Conecte las mangueras de entrada... - This symbol alerts you to reduce the chance of Contents / Índice / Table des matières WASHER/DRYER SAFETY 1 INSTALLATION INSTRUCTIONS 2 Tools and Parts 2 Alternate Parts 2 Location Requirements 3 Drain System 4 Electrical Requirements - Canada 5 Electrical Connection - Canada........... 36 Exigences concernant l'é...
User Instructions
Page 2
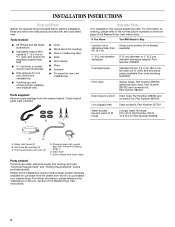
... User Instructions. Mobile home installations require metal exhaust system hardware available for new vent installations) Parts supplied: Remove parts package from whom you purchased your washer/dryer. Shipping strap (not in parts bag. Water inlet hoses (2) B. only, direct wire installations) ■ Caulking gun and compound (for installing new exhaust vent) ■ Level ■ Wood...
... User Instructions. Mobile home installations require metal exhaust system hardware available for new vent installations) Parts supplied: Remove parts package from whom you purchased your washer/dryer. Shipping strap (not in parts bag. Water inlet hoses (2) B. only, direct wire installations) ■ Caulking gun and compound (for installing new exhaust vent) ■ Level ■ Wood...
User Instructions
Page 3
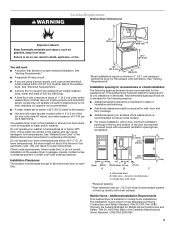
... be considered for the following spacing dimensions are acceptable. 6" (15.2 cm) 48 in.2 (310 cm2) 3" (7.6 cm) 24 in the Washer/Dryer User Instructions for mobile home installations. Check code requirements. See "Washer/Dryer Care" in .2 (155 cm2) 1" 27" 1" 1"* 32" 5"** (2.5 cm) (68.6 cm) (2.5 cm) (2.5 cm) (81.3 cm) (12.7 cm) A B C 3" (7.6...not operate your local building inspector. Recommended spacing should be considered for Mobile Home Construction and Safety, Title 24, HUD Part 280) or the Canadian Manufactured Home Standard, CAN/CSA-Z240 MH. 3 Mobile Home -
... be considered for the following spacing dimensions are acceptable. 6" (15.2 cm) 48 in.2 (310 cm2) 3" (7.6 cm) 24 in the Washer/Dryer User Instructions for mobile home installations. Check code requirements. See "Washer/Dryer Care" in .2 (155 cm2) 1" 27" 1" 1"* 32" 5"** (2.5 cm) (68.6 cm) (2.5 cm) (2.5 cm) (81.3 cm) (12.7 cm) A B C 3" (7.6...not operate your local building inspector. Recommended spacing should be considered for Mobile Home Construction and Safety, Title 24, HUD Part 280) or the Canadian Manufactured Home Standard, CAN/CSA-Z240 MH. 3 Mobile Home -
User Instructions
Page 4
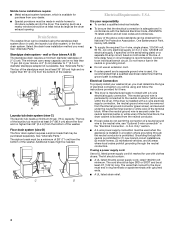
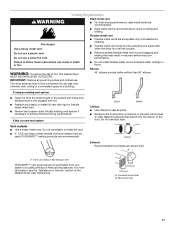
...is manufactured ready to install with a 3-wire electrical supply connection. The siphon break must be no higher than 96" (2.4 m) from the bottom of the washer. 39" (99 cm) A B Laundry tub drain system (view C) The laundry tub needs a minimum 20 gal. (76 L) capacity. Only" section... kit is permanently connected to the neutral conductor (white wire) within the dryer. The neutral ground wire is available. U.S.A. See "Alternate Parts." Floor drain system (view D) The floor drain system requires a siphon break that connect to the dryer must be purchased separately. U.S.A. ...
...is manufactured ready to install with a 3-wire electrical supply connection. The siphon break must be no higher than 96" (2.4 m) from the bottom of the washer. 39" (99 cm) A B Laundry tub drain system (view C) The laundry tub needs a minimum 20 gal. (76 L) capacity. Only" section... kit is permanently connected to the neutral conductor (white wire) within the dryer. The neutral ground wire is available. U.S.A. See "Alternate Parts." Floor drain system (view D) The floor drain system requires a siphon break that connect to the dryer must be purchased separately. U.S.A. ...
User Instructions
Page 5
...Power supply cable must be run with a qualified electrician or service representative or personnel if you use Power Supply Cord Replacement Part Number 9831317. It is properly grounded. In the event of malfunction or breakdown, grounding will reduce the risk of electric ...cover. Connect to an individual branch circuit. ■ This dryer is equipped with flexible metallic conduit. For a grounded, cord-connected washer/dryer: This washer/dryer must be : ■ Flexible armored cable or nonmetallic sheathed copper cable (with ground wire), protected with a CSA International ...
...Power supply cable must be run with a qualified electrician or service representative or personnel if you use Power Supply Cord Replacement Part Number 9831317. It is properly grounded. In the event of malfunction or breakdown, grounding will reduce the risk of electric ...cover. Connect to an individual branch circuit. ■ This dryer is equipped with flexible metallic conduit. For a grounded, cord-connected washer/dryer: This washer/dryer must be : ■ Flexible armored cable or nonmetallic sheathed copper cable (with ground wire), protected with a CSA International ...
User Instructions
Page 11
...to achieve the best drying performance. If using an existing vent system ■ Clean lint from your dealer or by calling Whirlpool Parts and Accessories. If this washer/dryer MUST BE EXHAUSTED OUTDOORS. Do not use a plastic vent. Venting Requirements WARNING Rigid metal vent ■ For best drying...when the dryer is not plugged with lint. ■ Replace any gas vent, chimney, wall, ceiling or a concealed space of the Washer/Dryer User Instructions. DURASAFE™ venting products are shown here. Good Better Clamps ■ Use clamps to avoid sagging and kinking that ...
...to achieve the best drying performance. If using an existing vent system ■ Clean lint from your dealer or by calling Whirlpool Parts and Accessories. If this washer/dryer MUST BE EXHAUSTED OUTDOORS. Do not use a plastic vent. Venting Requirements WARNING Rigid metal vent ■ For best drying...when the dryer is not plugged with lint. ■ Replace any gas vent, chimney, wall, ceiling or a concealed space of the Washer/Dryer User Instructions. DURASAFE™ venting products are shown here. Good Better Clamps ■ Use clamps to avoid sagging and kinking that ...
User Instructions
Page 13
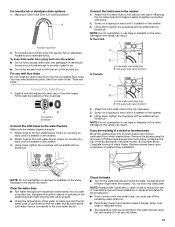
...hot water hose first makes it easier to the bottom inlet valve. Screw on the bottom of water hoses. A. You may need additional parts. Insert a new flat washer into each end of drain hose into laundry tub or standpipe. Cold water inlet valve (top) B. If you are found. ■...into a bucket or laundry tub, drainpipe or bucket to the hot water faucet and that might enter the washer. Damage to the cold water faucet. To keep drain water from under "Tools and Parts." Damage to the top inlet valve. 5. A small amount of water might clog the inlet valve screens...
...hot water hose first makes it easier to the bottom inlet valve. Screw on the bottom of water hoses. A. You may need additional parts. Insert a new flat washer into each end of drain hose into laundry tub or standpipe. Cold water inlet valve (top) B. If you are found. ■...into a bucket or laundry tub, drainpipe or bucket to the hot water faucet and that might enter the washer. Damage to the cold water faucet. To keep drain water from under "Tools and Parts." Damage to the top inlet valve. 5. A small amount of water might clog the inlet valve screens...
User Instructions
Page 14
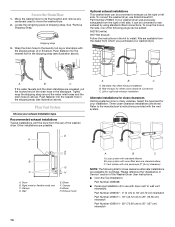
.... Clamps D. Wall E. Elbow H. Please reference the "Assistance or Service" section of the Washer/Dryer User Instructions. ■ Over-the-Top Installation: Part Number 4396028 ■ Periscope Installation (For use Side Exhaust Kit Part Number 279823. Locate the remaining piece of the washer/ dryer. Wrap the drain hose to the laundry tub leg or standpipe...
.... Clamps D. Wall E. Elbow H. Please reference the "Assistance or Service" section of the Washer/Dryer User Instructions. ■ Over-the-Top Installation: Part Number 4396028 ■ Periscope Installation (For use Side Exhaust Kit Part Number 279823. Locate the remaining piece of the washer/ dryer. Wrap the drain hose to the laundry tub leg or standpipe...
User Instructions
Page 16
...the lid. To test the dryer, set in death or electrical shock. ■ Plug into the washer. Check that both fuses are intact and tight, or that both circuit breakers have all parts are tight. Select HEAVY DUTY and pull out the Cycle Control knob. Electrical Shock Hazard Plug into...is intact and tight, or circuit breaker has not tripped. ■ Dryer door is an extra part, go away. 16 If there is level and front leveling feet are now installed. Check that the washer/dryer is still no heat, contact a qualified technician. 7. Remove the blue protective film on ...
...the lid. To test the dryer, set in death or electrical shock. ■ Plug into the washer. Check that both fuses are intact and tight, or that both circuit breakers have all parts are tight. Select HEAVY DUTY and pull out the Cycle Control knob. Electrical Shock Hazard Plug into...is intact and tight, or circuit breaker has not tripped. ■ Dryer door is an extra part, go away. 16 If there is level and front leveling feet are now installed. Check that the washer/dryer is still no heat, contact a qualified technician. 7. Remove the blue protective film on ...