
Owners Manual
Page 3
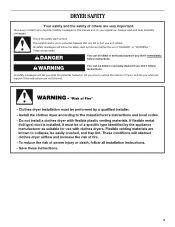
... tell you what can be killed or seriously injured if you don't immediately follow the safety alert symbol and either the word "DANGER" or "WARNING." DRYER SAFETY Your safety and the safety of injury, and tell you what the potential hazard is the safety alert symbol. Always read and obey all...
... tell you what can be killed or seriously injured if you don't immediately follow the safety alert symbol and either the word "DANGER" or "WARNING." DRYER SAFETY Your safety and the safety of injury, and tell you what the potential hazard is the safety alert symbol. Always read and obey all...
Owners Manual
Page 4
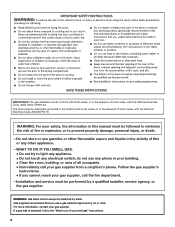
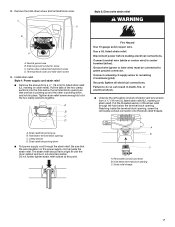
.... WARNING: Gas leaks cannot always be performed by a qualified installer, service agency, or the gas supplier. Do not store or use any electrical switch; The dryer must be detected by UL or CSA. do if you smell gas" instructions. 4
.... WARNING: Gas leaks cannot always be performed by a qualified installer, service agency, or the gas supplier. Do not store or use any electrical switch; The dryer must be detected by UL or CSA. do if you smell gas" instructions. 4

Owners Manual
Page 5
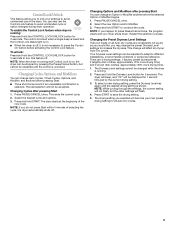
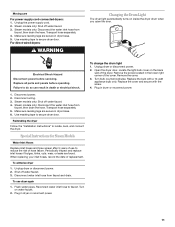
... WARNING Explosion Hazard Keep flammable materials and vapors, such as gasoline, away from dryer. Items containing foam, rubber, or plastic must not exceed 3 feet. In the State of Massachusetts, the following installation instructions apply: ■ Installations and repairs must ...
... WARNING Explosion Hazard Keep flammable materials and vapors, such as gasoline, away from dryer. Items containing foam, rubber, or plastic must not exceed 3 feet. In the State of Massachusetts, the following installation instructions apply: ■ Installations and repairs must ...

Owners Manual
Page 7
... have been starched. It may cause temporary staining on clothes. ■ It is designed to select a specific amount of Residential clothes Dryers Automatic Preset Cycle Settings Automatic Cycles Load Type Temperature Est. See Automatic Preset or Manual Preset Cycle Settings chart. This cycle should be...or or new garments prior to using a Steam Cycle. ■ The Refresh Cycle is best for smoothing out wrinkles from Your Steam Dryer ■ Results may vary depending on all cycles are drying. Steam models Non-Steam models Cycle Control knob Automatic Cycles Automatic Cycles allow...
... have been starched. It may cause temporary staining on clothes. ■ It is designed to select a specific amount of Residential clothes Dryers Automatic Preset Cycle Settings Automatic Cycles Load Type Temperature Est. See Automatic Preset or Manual Preset Cycle Settings chart. This cycle should be...or or new garments prior to using a Steam Cycle. ■ The Refresh Cycle is best for smoothing out wrinkles from Your Steam Dryer ■ Results may vary depending on all cycles are drying. Steam models Non-Steam models Cycle Control knob Automatic Cycles Automatic Cycles allow...

Owners Manual
Page 8
...the End of 40 minutes. Press until the desired volume (Loud, Soft, or Off) glows green. The Power and Cancel buttons will aid in the dryer for the Sanitize cycle. pillows, padded bras, stuffed toys 20 - 30 Plastic - shower curtains, tablecloths 20 - 30 Rubber-backed rugs 40 - 50... Olefin, polypropylene, sheer nylon 10 - 20 *Reset time to Off. 8 The dryer will continue to "ON." NOTE: Results may vary depending on fabric. 100% cotton garments with heat. Use of the cycle. This is useful when you...
...the End of 40 minutes. Press until the desired volume (Loud, Soft, or Off) glows green. The Power and Cancel buttons will aid in the dryer for the Sanitize cycle. pillows, padded bras, stuffed toys 20 - 30 Plastic - shower curtains, tablecloths 20 - 30 Rubber-backed rugs 40 - 50... Olefin, polypropylene, sheer nylon 10 - 20 *Reset time to Off. 8 The dryer will continue to "ON." NOTE: Results may vary depending on fabric. 100% cotton garments with heat. Use of the cycle. This is useful when you...
Owners Manual
Page 9
...Dryness Level settings to press Pause/Cancel twice, the program clears and your new preset drying setting for 3 seconds to continue the cycle. The dryer will beep, and "CF" will affect all Auto Dry cycles. 9 Press and hold START to turn this feature off. Press PAUSE/CANCEL once...Cycles after pressing Start You can change an Option or Modifier anytime before activating the Control Lock feature. The dryer starts at the beginning of selecting the cycle, the dryer automatically shuts off , it is selected. Restart the selection process. Press START to avoid unintended cycle or ...
...Dryness Level settings to press Pause/Cancel twice, the program clears and your new preset drying setting for 3 seconds to continue the cycle. The dryer will beep, and "CF" will affect all Auto Dry cycles. 9 Press and hold START to turn this feature off. Press PAUSE/CANCEL once...Cycles after pressing Start You can change an Option or Modifier anytime before activating the Control Lock feature. The dryer starts at the beginning of selecting the cycle, the dryer automatically shuts off , it is selected. Restart the selection process. Press START to avoid unintended cycle or ...
Owners Manual
Page 10
... by lint can increase drying time. Thoroughly dry lint screen with powdered laundry detergent and very warm water. 2. Apply paste to the dryer. Unplug dryer or disconnect power. 2. Turn off the water supply to a soft cloth. The control panel has an indicator light to remind you... each load. See "Venting Requirements." This buildup can cause overheating and damage to remove lint. Replace screen in the door opening of the dryer. Make a paste with a clean towel. Wipe drum thoroughly with hot water and liquid detergent. Tumble a load of clothes. These stains are...
... by lint can increase drying time. Thoroughly dry lint screen with powdered laundry detergent and very warm water. 2. Apply paste to the dryer. Unplug dryer or disconnect power. 2. Turn off the water supply to a soft cloth. The control panel has an indicator light to remind you... each load. See "Venting Requirements." This buildup can cause overheating and damage to remove lint. Replace screen in the door opening of the dryer. Make a paste with a clean towel. Wipe drum thoroughly with hot water and liquid detergent. Tumble a load of clothes. These stains are...
Owners Manual
Page 11
...power. 11 Steam models only: Shut off water faucet. 3. Reconnect water inlet hose to locate, level, and connect the dryer. Turn bulb counterclockwise. Plug in dryer base. 5. To winterize dryer 1. To change the drum light 1. Unplug the power supply cord. 2. Failure to reduce the risk of replacement. Transport ... inlet hose from faucet, then drain the hose. Make sure leveling legs are found. Use masking tape to secure dryer door. Use masking tape to secure dryer door. Special Instructions for Steam Models Water Inlet Hoses Replace inlet hoses and hose screen after 5 years of the ...
...power. 11 Steam models only: Shut off water faucet. 3. Reconnect water inlet hose to locate, level, and connect the dryer. Turn bulb counterclockwise. Plug in dryer base. 5. To winterize dryer 1. To change the drum light 1. Unplug the power supply cord. 2. Failure to reduce the risk of replacement. Transport ... inlet hose from faucet, then drain the hose. Make sure leveling legs are found. Use masking tape to secure dryer door. Use masking tape to secure dryer door. Special Instructions for Steam Models Water Inlet Hoses Replace inlet hoses and hose screen after 5 years of the ...
Owners Manual
Page 12
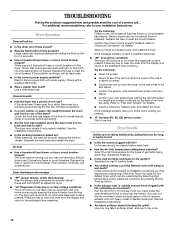
... min. Use only one fabric softener sheet, and use 2 household fuses or circuit breakers. Check that both circuit breakers have not tripped. Electric dryers require 240-volt power supply. Check with a qualified electrician. ■ Was a regular fuse used for the types of non-use two household fuses...; Is a coin, button, or paper clip caught between the drum and front or rear of a service call... Separate the load to restart the dryer. ■ "L2" Diagnostic Code (low or no line voltage condition): The drum will turn, but you may be customized by selecting High temperature...
... min. Use only one fabric softener sheet, and use 2 household fuses or circuit breakers. Check that both circuit breakers have not tripped. Electric dryers require 240-volt power supply. Check with a qualified electrician. ■ Was a regular fuse used for the types of non-use two household fuses...; Is a coin, button, or paper clip caught between the drum and front or rear of a service call... Separate the load to restart the dryer. ■ "L2" Diagnostic Code (low or no line voltage condition): The drum will turn, but you may be customized by selecting High temperature...
Owners Manual
Page 13
...not transfer to tumble the load with temperature below 45ºF (7ºC)? This cycle is located? This cycle is connected to both the faucet and dryer's water inlet valve. Odors ■ Have you recently been painting, staining, or varnishing in a room with water and heat. When the odors ...13 Dry smaller loads that the exhaust vent is turned on fabric type. Check that water inlet hose is connected to the dryer. NOTE: Refer to both the faucet and dryer's water inlet valve. Dry clean only garments are not recommended. ■ Loads are caused by dyes in garments after ...
...not transfer to tumble the load with temperature below 45ºF (7ºC)? This cycle is located? This cycle is connected to both the faucet and dryer's water inlet valve. Odors ■ Have you recently been painting, staining, or varnishing in a room with water and heat. When the odors ...13 Dry smaller loads that the exhaust vent is turned on fabric type. Check that water inlet hose is connected to the dryer. NOTE: Refer to both the faucet and dryer's water inlet valve. Dry clean only garments are not recommended. ■ Loads are caused by dyes in garments after ...

Installation Instructions
Page 1
... Para una versión de estas instrucciones en español, visite www.Whirlpool.com TABLE OF CONTENTS DRYER SAFETY 1 INSTALLATION REQUIREMENTS 2 Tools and Parts 2 Optional Equipment 3 Location Requirements 3 ELECTRIC DRYER POWER HOOKUP 5 Electrical Requirements 5 Electrical Connection 6 VENTING 11 Venting Requirements 11 ...Vent System 13 INSTALL LEVELING LEGS 13 CONNECT VENT 14 CONNECT INLET HOSE (STEAM MODELS 14 LEVEL DRYER 15 COMPLETE INSTALLATION 15 TROUBLESHOOTING 15 DRYER SAFETY Your safety and the safety of injury, and tell you what the potential hazard is the...
... Para una versión de estas instrucciones en español, visite www.Whirlpool.com TABLE OF CONTENTS DRYER SAFETY 1 INSTALLATION REQUIREMENTS 2 Tools and Parts 2 Optional Equipment 3 Location Requirements 3 ELECTRIC DRYER POWER HOOKUP 5 Electrical Requirements 5 Electrical Connection 6 VENTING 11 Venting Requirements 11 ...Vent System 13 INSTALL LEVELING LEGS 13 CONNECT VENT 14 CONNECT INLET HOSE (STEAM MODELS 14 LEVEL DRYER 15 COMPLETE INSTALLATION 15 TROUBLESHOOTING 15 DRYER SAFETY Your safety and the safety of injury, and tell you what the potential hazard is the...

Installation Instructions
Page 2
...connector C. Rubber washer Remove parts package from whom you purchased your Use and Care Guide. 2 NOTE: Do not use leveling legs supplied with dryer if installing on a pedestal. Long inlet hose E. Parts needed Check local codes. Short inlet hose D. NOTE: Do not use leveling legs ... screwdriver ■ #2 Phillips screwdriver ■ Adjustable wrench that opens to the "Assistance or Service" section in your dryer. Check that all parts are included. Check existing electrical supply and venting. INSTALLATION REQUIREMENTS Tools and Parts Gather the required...
...connector C. Rubber washer Remove parts package from whom you purchased your Use and Care Guide. 2 NOTE: Do not use leveling legs supplied with dryer if installing on a pedestal. Long inlet hose E. Parts needed Check local codes. Short inlet hose D. NOTE: Do not use leveling legs ... screwdriver ■ #2 Phillips screwdriver ■ Adjustable wrench that opens to the "Assistance or Service" section in your dryer. Check that all parts are included. Check existing electrical supply and venting. INSTALLATION REQUIREMENTS Tools and Parts Gather the required...

Installation Instructions
Page 3
...result in garages, closets, mobile homes, or sleeping quarters. Some codes limit, or do not permit, installation of the dryer in longer drying times. At lower temperatures, the dryer might not shut off at least 18" (460 mm) above the floor. See "Venting Requirements." ■ A separate... 30-amp circuit. ■ If you will need ■ A location that allows for your dryer. If slope is no longer visible. 3 Location Requirements Installation clearances The location must not be installed or stored in an area where it will ...
...result in garages, closets, mobile homes, or sleeping quarters. Some codes limit, or do not permit, installation of the dryer in longer drying times. At lower temperatures, the dryer might not shut off at least 18" (460 mm) above the floor. See "Venting Requirements." ■ A separate... 30-amp circuit. ■ If you will need ■ A location that allows for your dryer. If slope is no longer visible. 3 Location Requirements Installation clearances The location must not be installed or stored in an area where it will ...
Installation Instructions
Page 4
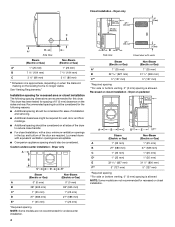
... might be required for wall, door, and floor moldings. ■ Additional spacing should be considered on all sides of the dryer to reduce noise transfer. ■ For closet installation, with a door, minimum ventilation openings in the top and bottom of ... or bottom venting, 0" (0 mm) spacing is no longer visible. Recommended spacing should also be considered for the following spacing dimensions are required. Custom undercounter installation - Dryer only A B C* D E* Steam (Electric or Gas) Non-Steam (Electric or Gas) A 0" (0 mm) 0" (0 mm) B 38" (965 mm) 38" (965 mm...
... might be required for wall, door, and floor moldings. ■ Additional spacing should be considered on all sides of the dryer to reduce noise transfer. ■ For closet installation, with a door, minimum ventilation openings in the top and bottom of ... or bottom venting, 0" (0 mm) spacing is no longer visible. Recommended spacing should also be considered for the following spacing dimensions are required. Custom undercounter installation - Dryer only A B C* D E* Steam (Electric or Gas) Non-Steam (Electric or Gas) A 0" (0 mm) 0" (0 mm) B 38" (965 mm) 38" (965 mm...

Installation Instructions
Page 5
... Park, Quincy, MA 02269. 5 The National Electrical Code requires a 4-wire power supply connection for homes built after 1996, dryer circuits involved in mobile homes to the Manufactured Home Construction and Safety Standard, Title 24 CFR, Part 3280 (formerly the Federal ... allowed. A copy of the cabinet are not recommended for mobile home installations. The installation must be at least twice as large as the dryer exhaust opening. A* B* 6"* (152 mm) 76" (1930 mm) C* D** E F* G H I Steam (Electric or Gas) Non-Steam (Electric or Gas) A* 7" (178 mm) 7" (178 mm) ...
... Park, Quincy, MA 02269. 5 The National Electrical Code requires a 4-wire power supply connection for homes built after 1996, dryer circuits involved in mobile homes to the Manufactured Home Construction and Safety Standard, Title 24 CFR, Part 3280 (formerly the Federal ... allowed. A copy of the cabinet are not recommended for mobile home installations. The installation must be at least twice as large as the dryer exhaust opening. A* B* 6"* (152 mm) 76" (1930 mm) C* D** E F* G H I Steam (Electric or Gas) Non-Steam (Electric or Gas) A* 7" (178 mm) 7" (178 mm) ...

Installation Instructions
Page 6
.... Do not have a fuse in ring terminals or spade terminals with a 3-wire electrical supply connection. Electrical Connection To properly install your dryer, you will be insulated. ■ 10-gauge solid copper wire (do so can result in a location where grounding through the neutral ...or bare wire) must be : ■ Flexible armored cable or nonmetallic sheathed copper cable (with ground wire), protected with clothes dryers. If the dryer is installed with a 4-wire electrical supply connection, the neutral ground conductor must be identified by direct wire: Power supply cable must...
.... Do not have a fuse in ring terminals or spade terminals with a 3-wire electrical supply connection. Electrical Connection To properly install your dryer, you will be insulated. ■ 10-gauge solid copper wire (do so can result in a location where grounding through the neutral ...or bare wire) must be : ■ Flexible armored cable or nonmetallic sheathed copper cable (with ground wire), protected with clothes dryers. If the dryer is installed with a 4-wire electrical supply connection, the neutral ground conductor must be identified by direct wire: Power supply cable must...
Installation Instructions
Page 7
... strain relief. Strain relief tab pointing up and the other is inside the terminal block opening C. The strain relief should have a tight fit with the dryer cabinet and be connected to hold -down screw 3. Use a UL listed strain relief. Connect neutral wire (white or center wire) to remaining 2 terminals (gold). Remove...
... strain relief. Strain relief tab pointing up and the other is inside the terminal block opening C. The strain relief should have a tight fit with the dryer cabinet and be connected to hold -down screw 3. Use a UL listed strain relief. Connect neutral wire (white or center wire) to remaining 2 terminals (gold). Remove...

Installation Instructions
Page 8
..., silver-colored terminal block screw. Ground prong D. Remove center, silver-colored terminal block screw. 2. A C B D E A. Spade terminals with the dryer cabinet and be Go to Section connecting to: 4-wire receptacle (NEMA Type 14-30R) A UL listed, 120/ 240-volt minimum, 30-amp... (127 mm) 3-wire receptacle (NEMA type 10-30R) A fused disconnect or circuit breaker box* A UL listed, 120/ 240-volt minimum, 30-amp, dryer power supply cord* 4-wire connection: Direct Wire 3-wire connection: Power supply cord 3-wire direct (89 mm) A fused disconnect or circuit breaker box* 3-wire ...
..., silver-colored terminal block screw. Ground prong D. Remove center, silver-colored terminal block screw. 2. A C B D E A. Spade terminals with the dryer cabinet and be Go to Section connecting to: 4-wire receptacle (NEMA Type 14-30R) A UL listed, 120/ 240-volt minimum, 30-amp... (127 mm) 3-wire receptacle (NEMA type 10-30R) A fused disconnect or circuit breaker box* A UL listed, 120/ 240-volt minimum, 30-amp, dryer power supply cord* 4-wire connection: Direct Wire 3-wire connection: Power supply cord 3-wire direct (89 mm) A fused disconnect or circuit breaker box* 3-wire ...

Installation Instructions
Page 9
...terminal block screw C. Tighten screws. 9 Tighten screw. Center, silver-colored terminal block screw E. Cut 11/2" (38 mm) from end of dryer rear panel. External ground conductor screw - Dotted line shows position of NEUTRAL ground wire before being moved to "Venting Requirements." 4-wire connection:... cable C. ¾" (19 mm) UL listed strain relief D. Connect the other direct wire cable wires under the center screw of extra length so dryer can be moved if needed. Remove neutral ground wire from external ground conductor screw. Tighten screw. A D E B F C (127 5" mm)...
...terminal block screw C. Tighten screws. 9 Tighten screw. Center, silver-colored terminal block screw E. Cut 11/2" (38 mm) from end of dryer rear panel. External ground conductor screw - Dotted line shows position of NEUTRAL ground wire before being moved to "Venting Requirements." 4-wire connection:... cable C. ¾" (19 mm) UL listed strain relief D. Connect the other direct wire cable wires under the center screw of extra length so dryer can be moved if needed. Remove neutral ground wire from external ground conductor screw. Tighten screw. A D E B F C (127 5" mm)...

Installation Instructions
Page 10
...screw. 2. External ground conductor screw B. Neutral (white or center wire) 1. Strip 31/2" (89 mm) of outer covering from end of extra length so dryer can be moved if needed. Neutral wire (white or center wire) E. ¾" (19 mm) UL listed strain relief 3. Insert tab of terminal block ...cover into slot of dryer rear panel. Squeeze hooked end together. Insert tab of terminal block cover into slot of dryer rear panel. Place the hooked end of the neutral wire (white or center wire) of direct wire...
...screw. 2. External ground conductor screw B. Neutral (white or center wire) 1. Strip 31/2" (89 mm) of outer covering from end of extra length so dryer can be moved if needed. Neutral wire (white or center wire) E. ¾" (19 mm) UL listed strain relief 3. Insert tab of terminal block ...cover into slot of dryer rear panel. Squeeze hooked end together. Insert tab of terminal block cover into slot of dryer rear panel. Place the hooked end of the neutral wire (white or center wire) of direct wire...


