
Owners Manual
Page 2
... eXperience Center toll free: 1-800-253-1301 or visit us at www.whirlpool.ca. Whirlpool designated service technicians are trained to Whirlpool Corporation with any questions or concerns at 1-800-442-9991 and follow the instructions below. ASSISTANCE OR SERVICE Before calling for assistance or service, please check "Troubleshooting." It may save you the...
... eXperience Center toll free: 1-800-253-1301 or visit us at www.whirlpool.ca. Whirlpool designated service technicians are trained to Whirlpool Corporation with any questions or concerns at 1-800-442-9991 and follow the instructions below. ASSISTANCE OR SERVICE Before calling for assistance or service, please check "Troubleshooting." It may save you the...
Owners Manual
Page 3
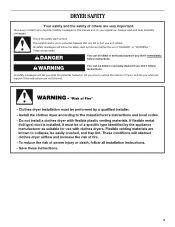
... many important safety messages in this manual and on your appliance. All safety messages will tell you don't follow instructions. DRYER SAFETY Your safety and the safety of injury, and tell you don't immediately follow instructions. This symbol alerts you to reduce the chance of others . WARNING You can happen if the...
... many important safety messages in this manual and on your appliance. All safety messages will tell you don't follow instructions. DRYER SAFETY Your safety and the safety of injury, and tell you don't immediately follow instructions. This symbol alerts you to reduce the chance of others . WARNING You can happen if the...
Owners Manual
Page 4
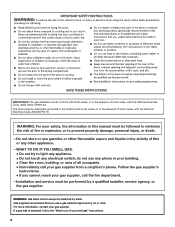
... try to do not use any phone in your safety, the information in this or any electrical switch; do if you smell gas" instructions. 4 Follow the gas supplier's instructions. • If you use gasoline or other appliance. - For more information, contact your gas supplier from a neighbor's phone. If a gas leak is detected...
... try to do not use any phone in your safety, the information in this or any electrical switch; do if you smell gas" instructions. 4 Follow the gas supplier's instructions. • If you use gasoline or other appliance. - For more information, contact your gas supplier from a neighbor's phone. If a gas leak is detected...

Owners Manual
Page 5
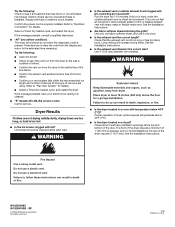
...washer can result in death, explosion, or fire. Do not dry anything flammable on it (including cooking oils). Failure to follow these instructions can completely remove oil. Items containing foam, rubber, or plastic must not exceed 3 feet. WARNING DRYER USE WARNING Explosion Hazard Keep ... ever had anything that has ever had any type of oil on a clothesline or by the State of Massachusetts, the following installation instructions apply: ■ Installations and repairs must be performed by a qualified or licensed contractor, plumber, or gasfitter qualified or licensed by ...
...washer can result in death, explosion, or fire. Do not dry anything flammable on it (including cooking oils). Failure to follow these instructions can completely remove oil. Items containing foam, rubber, or plastic must not exceed 3 feet. WARNING DRYER USE WARNING Explosion Hazard Keep ... ever had anything that has ever had any type of oil on a clothesline or by the State of Massachusetts, the following installation instructions apply: ■ Installations and repairs must be performed by a qualified or licensed contractor, plumber, or gasfitter qualified or licensed by ...
Owners Manual
Page 11
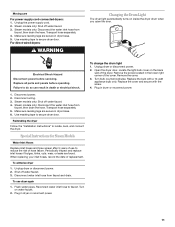
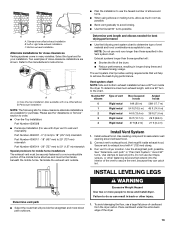
...Disconnect the water inlet hose from faucet and drain. Use masking tape to secure dryer door. Reinstalling the dryer Follow the "Installation Instructions" to do so can result in dryer base. 5. Disconnect water inlet hose from faucet, then drain the hose. Turn on the.... Turn bulb counterclockwise. Transport hose separately. 4. Disconnect power. 2. Make sure leveling legs are secure in death or electrical shock. 1. Special Instructions for Steam Models Water Inlet Hoses Replace inlet hoses and hose screen after 5 years of the cover. Plug in dryer base. 6. Make sure...
...Disconnect the water inlet hose from faucet and drain. Use masking tape to secure dryer door. Reinstalling the dryer Follow the "Installation Instructions" to do so can result in dryer base. 5. Disconnect water inlet hose from faucet, then drain the hose. Turn on the.... Turn bulb counterclockwise. Transport hose separately. 4. Disconnect power. 2. Make sure leveling legs are secure in death or electrical shock. 1. Special Instructions for Steam Models Water Inlet Hoses Replace inlet hoses and hose screen after 5 years of the cover. Plug in dryer base. 6. Make sure...
Owners Manual
Page 12
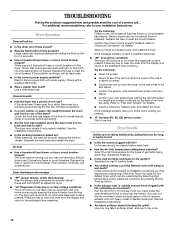
... rear edges of the drum for 2-5 seconds. ■ Has a household fuse blown, or has a circuit breaker tripped? See the Installation Instructions. ■ Is the clothing knotted or balled up , the load will not run when this diagnostic code is present. Press and hold START...estimated time remaining. Lint screen should be customized by selecting High temperature and/or additional cycle time by a power failure? Hold your Installation Instructions. If the problem continues, call ... Clean out pockets before each load. ■ Has the Air Only temperature setting been selected? ...
... rear edges of the drum for 2-5 seconds. ■ Has a household fuse blown, or has a circuit breaker tripped? See the Installation Instructions. ■ Is the clothing knotted or balled up , the load will not run when this diagnostic code is present. Press and hold START...estimated time remaining. Lint screen should be customized by selecting High temperature and/or additional cycle time by a power failure? Hold your Installation Instructions. If the problem continues, call ... Clean out pockets before each load. ■ Has the Air Only temperature setting been selected? ...
Owners Manual
Page 13
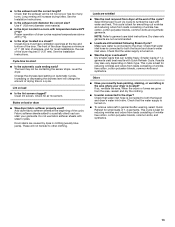
...increase drying times. Clean lint screen. Loads are still wrinkled following Steam Cycle? This cycle is turned on fabric type. See the Installation Instructions. NOTE: Refer to other clothing. Check that water inlet hose is not too long or has too many turns. If so, ventilate...? Check that water inlet hose is connected to the dryer? Long venting will change the amount of the cycle? See the Installation Instructions. ■ Is the exhaust vent diameter the correct size? Fabric softener sheets added to both the faucet and dryer's water inlet valve...
...increase drying times. Clean lint screen. Loads are still wrinkled following Steam Cycle? This cycle is turned on fabric type. See the Installation Instructions. NOTE: Refer to other clothing. Check that water inlet hose is not too long or has too many turns. If so, ventilate...? Check that water inlet hose is connected to the dryer? Long venting will change the amount of the cycle? See the Installation Instructions. ■ Is the exhaust vent diameter the correct size? Fabric softener sheets added to both the faucet and dryer's water inlet valve...

Owners Manual
Page 14
...the appliance. 8. The removal and reinstallation of your major appliance, unless such damage results from defects in accordance with Whirlpool's published installation instructions. 10. If outside the 50 United States and Canada, contact your home. 7. Write down the following information about ...from the date of purchase, when this major appliance is operated and maintained according to instructions attached to or furnished with the product, Whirlpool Corporation or Whirlpool Canada LP (hereafter "Whirlpool") will need repair service, first see the "Troubleshooting" section of the Use & Care...
...the appliance. 8. The removal and reinstallation of your major appliance, unless such damage results from defects in accordance with Whirlpool's published installation instructions. 10. If outside the 50 United States and Canada, contact your home. 7. Write down the following information about ...from the date of purchase, when this major appliance is operated and maintained according to instructions attached to or furnished with the product, Whirlpool Corporation or Whirlpool Canada LP (hereafter "Whirlpool") will need repair service, first see the "Troubleshooting" section of the Use & Care...

Installation Instructions
Page 1
... you how to potential hazards that can be killed or seriously injured if you don't immediately follow instructions. W10255468C W10259190B - All safety messages will tell you what the potential hazard is the safety alert symbol. All safety messages... will follow instructions. ELECTRIC DRYER INSTALLATION INSTRUCTIONS U.S.A. ONLY Para una versión de estas instrucciones en español, visite www.Whirlpool.com TABLE OF CONTENTS DRYER SAFETY 1 INSTALLATION REQUIREMENTS 2 Tools and Parts 2...
... you how to potential hazards that can be killed or seriously injured if you don't immediately follow instructions. W10255468C W10259190B - All safety messages will tell you what the potential hazard is the safety alert symbol. All safety messages... will follow instructions. ELECTRIC DRYER INSTALLATION INSTRUCTIONS U.S.A. ONLY Para una versión de estas instrucciones en español, visite www.Whirlpool.com TABLE OF CONTENTS DRYER SAFETY 1 INSTALLATION REQUIREMENTS 2 Tools and Parts 2...

Installation Instructions
Page 2
... Non-Steam Models Steam Models A B C D E A. Leveling legs (4) B. Short inlet hose D. Parts needed Check local codes. Check existing electrical supply and venting. Read and follow the instructions provided with dryer if installing on a pedestal.
... Non-Steam Models Steam Models A B C D E A. Leveling legs (4) B. Short inlet hose D. Parts needed Check local codes. Check existing electrical supply and venting. Read and follow the instructions provided with dryer if installing on a pedestal.

Installation Instructions
Page 6
... outlet looks like this : Then choose a 3-wire power supply cord with ring or spade terminals and UL listed strain relief. If using and follow the instructions provided for it is recommended. The 4-wire power supply cord, at least 5 ft (1.52 m) long. Securely tighten all electrical connections.
... outlet looks like this : Then choose a 3-wire power supply cord with ring or spade terminals and UL listed strain relief. If using and follow the instructions provided for it is recommended. The 4-wire power supply cord, at least 5 ft (1.52 m) long. Securely tighten all electrical connections.

Installation Instructions
Page 8
... wire, go to center, silvercolored terminal block screw. Neutral wire (white or center wire) E. ¾" (19 mm) UL listed strain relief 8 Now complete installation following instructions for mobile homes and where local codes do not permit the connection of NEUTRAL ground wire before being moved to "Optional 3-wire connection" section. Remove...
... wire, go to center, silvercolored terminal block screw. Neutral wire (white or center wire) E. ¾" (19 mm) UL listed strain relief 8 Now complete installation following instructions for mobile homes and where local codes do not permit the connection of NEUTRAL ground wire before being moved to "Optional 3-wire connection" section. Remove...

Installation Instructions
Page 11
Remove center, silver-colored terminal block screw. 2. B A C D E F A. Failure to follow these instructions can be used for direct wire or power supply cord where local codes do not permit connecting cabinet-ground conductor to outer terminal block screws. ... "Assistance or Service" section. Remove neutral ground wire from the external ground conductor screw to achieve the best drying performance. Grounding path determined by calling Whirlpool Service. Tighten strain relief screws. 5.
Remove center, silver-colored terminal block screw. 2. B A C D E F A. Failure to follow these instructions can be used for direct wire or power supply cord where local codes do not permit connecting cabinet-ground conductor to outer terminal block screws. ... "Assistance or Service" section. Remove neutral ground wire from the external ground conductor screw to achieve the best drying performance. Grounding path determined by calling Whirlpool Service. Tighten strain relief screws. 5.
Installation Instructions
Page 13
... 4396028 ■ Periscope Installation (For use the fewest number of the dryer. ■ Reduce performance, resulting in "Plan Vent System." A B A. Connect vent to the manufacturer's instructions. INSTALL LEVELING LEGS Determine vent path ■ Select the route that will help to use with 4" (102 mm) clamp. 3. Standard rear offset exhaust installation B. Refer...
... 4396028 ■ Periscope Installation (For use the fewest number of the dryer. ■ Reduce performance, resulting in "Plan Vent System." A B A. Connect vent to the manufacturer's instructions. INSTALL LEVELING LEGS Determine vent path ■ Select the route that will help to use with 4" (102 mm) clamp. 3. Standard rear offset exhaust installation B. Refer...
Installation Instructions
Page 16
... vent. Run the dryer for details. ■ Select a Timed Dry heated cycle, and restart the dryer. W10255468C W10259190B - SP © 2009 Whirlpool Corporation. Try the following : ■ Clean lint screen. ■ Check to see if a household fuse has blown or circuit breaker has tripped....temperatures above 45ºF (7ºC). ■ Is the dryer located in a room with heavy metal or flexible metal vent. See the Installation Instructions. ■ Are fabric softener sheets blocking the grille? The front of the dryer requires a minimum of 1" (25 mm) of airspace, ...
... vent. Run the dryer for details. ■ Select a Timed Dry heated cycle, and restart the dryer. W10255468C W10259190B - SP © 2009 Whirlpool Corporation. Try the following : ■ Clean lint screen. ■ Check to see if a household fuse has blown or circuit breaker has tripped....temperatures above 45ºF (7ºC). ■ Is the dryer located in a room with heavy metal or flexible metal vent. See the Installation Instructions. ■ Are fabric softener sheets blocking the grille? The front of the dryer requires a minimum of 1" (25 mm) of airspace, ...
Warranty
Page 1
... limited warranty is valid only in the United States or Canada and applies only when the major appliance is used for in accordance with Whirlpool's published installation instructions. 10. You will pay for future reference. Consumable parts are unable to resolve the problem after checking "Troubleshooting," additional help you obtain assistance or...
... limited warranty is valid only in the United States or Canada and applies only when the major appliance is used for in accordance with Whirlpool's published installation instructions. 10. You will pay for future reference. Consumable parts are unable to resolve the problem after checking "Troubleshooting," additional help you obtain assistance or...

Ventilation Specification
Page 1
...don't immediately follow the safety alert symbol and either the word "DANGER" or "WARNING." W10100920C All safety messages will follow instructions. We have provided many important safety messages in a prominent location. WARNING You can be killed or seriously injured if you... and tell you what the potential hazard is, tell you how to potential hazards that the owner post, in a prominent location, instructions for the customer's use gasoline or other appliance. ® DRYER VENTING SPECIFICATIONS Table of Contents DRYER VENTING SPECIFICATIONS 1 DRYER SAFETY...1 ...
...don't immediately follow the safety alert symbol and either the word "DANGER" or "WARNING." W10100920C All safety messages will follow instructions. We have provided many important safety messages in a prominent location. WARNING You can be killed or seriously injured if you... and tell you what the potential hazard is, tell you how to potential hazards that the owner post, in a prominent location, instructions for the customer's use gasoline or other appliance. ® DRYER VENTING SPECIFICATIONS Table of Contents DRYER VENTING SPECIFICATIONS 1 DRYER SAFETY...1 ...

Ventilation Specification
Page 2
Do not store or use any electrical switch; Follow the gas supplier's instructions. • If you cannot reach your gas supplier, call your building. • Clear the room, building, or area of all occupants. • Immediately...valve, it shall be a T-handle type. ■ A flexible gas connector, when used, must not exceed 3 feet. 2 In the State of Massachusetts, the following installation instructions apply: ■ Installations and repairs must be performed by a qualified or licensed contractor, plumber, or gasfitter qualified or licensed by a qualified installer, service agency, or...
Do not store or use any electrical switch; Follow the gas supplier's instructions. • If you cannot reach your gas supplier, call your building. • Clear the room, building, or area of all occupants. • Immediately...valve, it shall be a T-handle type. ■ A flexible gas connector, when used, must not exceed 3 feet. 2 In the State of Massachusetts, the following installation instructions apply: ■ Installations and repairs must be performed by a qualified or licensed contractor, plumber, or gasfitter qualified or licensed by a qualified installer, service agency, or...

Ventilation Specification
Page 3
... absence of fire, electric shock, or injury to persons when using the dryer, follow basic precautions, including the following: ■ Read all instructions before or after each load. ■ Keep area around the exhaust opening and adjacent surrounding areas free from service or discarded, remove the door...replace any part of the dryer or attempt any servicing unless specifically recommended in this Use and Care Guide or in published user-repair instructions that have the skills to carry out. ■ Do not use heat to dry articles containing foam rubber or similarly textured rubber-...
... absence of fire, electric shock, or injury to persons when using the dryer, follow basic precautions, including the following: ■ Read all instructions before or after each load. ■ Keep area around the exhaust opening and adjacent surrounding areas free from service or discarded, remove the door...replace any part of the dryer or attempt any servicing unless specifically recommended in this Use and Care Guide or in published user-repair instructions that have the skills to carry out. ■ Do not use heat to dry articles containing foam rubber or similarly textured rubber-...

Ventilation Specification
Page 4
... of these codes may also apply to multi-dryer vent systems. There are other codes requiring dryers to follow these instructions can get through the heating source, reducing the dryer's efficiency. To meet codes requirements. 2. Codes Requirements The following...Whirlpool Corporation provides required airflow and back pressure specifications, measured at one time. ■ Consider moisture, lint and air temperature in the design of lint accumulated in operation. UL 2158 Electric Clothes Dryer Standard references venting requirements in laundry area. 4. See the Installation Instructions...
... of these codes may also apply to multi-dryer vent systems. There are other codes requiring dryers to follow these instructions can get through the heating source, reducing the dryer's efficiency. To meet codes requirements. 2. Codes Requirements The following...Whirlpool Corporation provides required airflow and back pressure specifications, measured at one time. ■ Consider moisture, lint and air temperature in the design of lint accumulated in operation. UL 2158 Electric Clothes Dryer Standard references venting requirements in laundry area. 4. See the Installation Instructions...


